Jump to content

All Activity

This stream auto-updates

  1. Past hour
  2. 7! 7 days to Endex!! Let's get those aircraft into the Painters and Finishers.
  3. You have come this far, persevere. I'm with you, I'm hitting snags with the S-55! It's frustrating. Colin
  4. Keep going, you're nearly there! Great work on the build, despite the over engineering! The tracks look very good .... nice job! Keith ☺️
  5. Graham - pleased about your workspace - there's Never enough room. As to clutter - I try, I try and yet every build I'm found wanting It's pathognomic of modelling As to the build - Fab just flippin' Fab. Great looking Sea Rob
  6. As @Troy Smith said - cloudy daylight is useful, but my iPhone even then darkens and distorts the colours. I improve the pictures via Photoshop but you can also use the picture enhancement function of the smartphone. The best genuine result comes from sun-lighted models although it doesn't always fit the subject. There is a section here at BM that deals with model photography: https://www.britmodeller.com/forums/index.php?/forum/158-photography/
  7. Weathering of the tracks looks good. Approaching the home straight by the looks of it. πŸ‘πŸ‘Œ
  8. I'll give this build a follow Chris! Taking notes as I have have one in the stash too (unsurprisingly ... πŸ˜‰ ) All the chassis work you're putting in is intimately familiar to me ... I can smell the singed flesh from welding sparks as I type.
  9. Just had chance to watch the video and the homemade BMF does look really good (I have some of the rubbish brand name BMF which is completely useless!) - just have a question - does the adhesive on the home made stuff last a while or do you have to make a fresh sheet whenever you need to do any foiling? Looking forward to seeing the Bug finished. Keith
  10. Hope these will help a little - sorry about the watermark (to many photos end up on ebay these days) - if you want full size photos (they are quite large having been scanned from negs and slides at stupid DPI) send me a PM. All images in my collection (may have one or two Phantom photos/Negs/Slides etc) and this one I love, just very different - at least stores wise Buz
  11. Thanks @Stef N. I think I was heading in the direction of flipping. I'd always know they were wrong if I had left them fitted them the wrong way round. The job is going to be a pain tho'.
  12. Attended with IPMS Wakefield, very enjoyable day and thank you and well done to the team at Wurr Models for organising it.
  13. some well known but useful pic here https://asisbiz.com/il2/Hurricane/Sea-Hurricane.html note this fascinating colour shot Sea Hurricane by Etienne du Plessis, on Flickr This got debated at some point for the unusual paint scheme, note also the partly dropped flaps, probably held open by wooden wedges, I've seen a Sea Hurricane with these in places, when airborne you fully open the flaps, the wedges drop oou and you then close them, they did the same on Seafires. also https://www.destinationsjourney.com/historical-military-photographs/hawker-sea-hurricane-mk-ia-hurricat/ same old pics, but easier to view than Asisbiz note most of these have the Hurricane CM/1 Rotol prop. HTH
  14. I don't think I do unfortunately - given the nature of the job I did take likely hundreds but I only archived about 50% of those sort of jobs I did back in the day, and I don't think the Escort was one of them. I will have a look however. The one big bonus of building the Safari versions of the Hasegawa kits it's about the only event where the Hasegawa kit ride height matches reality. One other thing I'm considering with this build (opinions welcome) - I am looking at the perfectly white pristine and unpainted body shell and thinking "do I really need to paint this gloss white plastic gloss white?" What if I just decal right on top of the bare plastic? It's not like I need to save time on painting or save paint however the super smooth plastic seems the perfect surface for decals to adhere too, and I always do all my panel line stuff at the end anyway. Thoughts? / Experience? Will it look too plasticky once clear coated?
  15. I'd personally flip it unless it is going to be a massive pain in the backside.
  16. Superb work - in the first pic we could be looking at the real thing! Pat
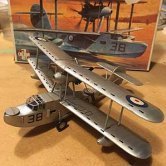
  17. Ok, about time I got started properly here. Firstly there is some surgery required. And then a dry fit. There will be a tiny bit of blending required which will be down to me not being able to cut in a straight line even when it's made simple for me. I built up as many of the bits as I was comfortable with. Flung some primer around. Then some Interior Grey Green and when dry a little brush work. That will do for just now. There may be a little more when I surface tomorrow. A shout out to @bigbadbadge and @Paul Lucas for heading me in the right direction regarding the underside colour. Duck Egg Blue has been ordered up and will be here in time when I get to that stage. I'll also need to cut some masks for the codes. Thanks for looking, Cheers, Alistair
  18. A very pleasing build! Perfect modelling and finish.
  19. I have only three 109:s left in my stash, and very little interest in adding more of them. Hopefully I have none left when this GB ends. Although, only one of my finished Messerschmitts is an F model
  20. Great work! The Phantom, figures, dio and the overall composition match perfectly - a real eyecatcher!
  21. Welcome to the list, Graham, from one corner of the Commonwealth to another! Plenty to choose from between Canadian built and Canadian operated machines. Looking forward to seeing what you bring.
  22. That's my son's Christmas sorted πŸŽ„ John
  23. Nice work on the Phantom & the diorama Chris
  1. Load more activity
×
×
  • Create New...