Jump to content

View New Content

Showing topics posted in for the last 14 days.

This stream auto-updates

  1. Past hour
  2. Thank you very much! As said I am building them right now. Saluti Giampiero
  3. I use bostic self adhesive plumbers tape and a sharp scalpel. It comes in a 50mm or 75mm wide roll, isn’t too dear and is malleable enough that you can burnish it on to any surface https://www.ebay.ie/itm/354659535271?mkcid=16&mkevt=1&mkrid=5282-175127-2357-0&ssspo=akoZzqQmTlO&sssrc=2349624&ssuid=VGICMH_DRRi&var=&widget_ver=artemis&media=COPY
  4. I use the RB tools Rivet-r and it’s quite good.
  5. Out in the suburbs of Tokyo, a good 45 mins train ride from the centre *and* a 30 minute walk from the train station is Mitaka Subaru Dealership. But this dealership has something extra. Rallying royalty in a special showroom upstairs. Original vehicles, not replicas. Not many but it makes up in quality what it lacks in quantity. The also have a 22B, number Zero. And inside it smells like a new car. There's also the SuperGT winner BRZ. Incredibly, they'll let you sit in the cars. And then volunteer to take your photo. Which I'm glad about as Mrs GalaxyG had passed on this experience so I made this trip alone. Here I am in Colin McRae's Impreza. If you're looking at these pics then I'm sure you can imagine how special this was. What's more they'll open the bonnet and you are free to open any doors and crawl all over the car with a camera, so I have a lot of reference photos now for when I build my Tamiya Impreza 99 or the Rally Australia Legacy. This is part of the massive selection of trophies they have on display. Downstairs is a fairly ordinary if large Subaru dealership. With some fairly ordinary Subarus.
  6. Hej Touvdal, This brought back some memories for me. It's the first kit my Dad bought me for 2/6d from Woolies (Woolworth's Store) and made with me in the late 1960s, when I was about 10 years old. It's what got me lifetime hooked on model making and aviation. You've made a much better job of it than we did, but it didn't last long in my 10 year old hands so probably for the best back then. Nice job! farvel
  7. Very sad to hear - always enjoyed his show on Battersea dogs home. His husband taught my son ballet - also a thoroughly decent sort and an amazing dancer.
  8. Hello all. My apologies for no updates with this DUCK, but things have been progressing very well indeed. I am using someone else's computer at the moment as dear old BT have been unable to reconnect half our village back to landline and internet since two Saturdays ago. I have now got to the stage where weathering of the DUKW is in progress. I have been photographing what I have done, so will update when we are re-connected. All the best everyone, Ray
  9. @Windy37 Thank you so much, everything helps! I'm trying to improve my technique so every hint or advice is welcome! I'll try
  10. Easiest airfields to turn into active military ones are Finningly (now Doncaster doesn't want an airport anymore) and Boscombe Down, which would only need RAF painted on the sign at the gate.
  11. In between other things i'm still working on the tracks. 41 down 33 to go...... And then there is another one
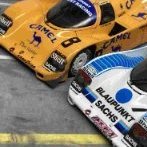
  12. Hi guys, I'd like to show this model I finished quite some time ago. The kit is the Tamiya 956 "Kenwood" kit, I used the Tamiya PE parts set and Shunko decals on this. Paint is Zero Paints basecoat + 2K automotive clear. The engine detail is very poor on this kit, so in addition to using the PE parts I added some scratch-built details and aluminium tubes. I also added rear suspension details and brake ducts.
  13. Thanks Mark, For the while, I save them in meatboxes, so they can be moved easily and safely.... Then, I'll build my cabinets.. in my future man attic... Sincerely. CC
  14. Hallo Now you may see my camo colors. The cockpit was done with Quintas decals. The decals I had were for KH kit, therefore I had to make them fit for my HB kit. The extra side walls were omitted and some adjustment done. After installation in the fuselage I had to close all holes from the sidewall and to seal the cockpit tube. To prevent future spraying fogging. The fuselage was glued together. Tomorrow I will work on my intakes. The assembly. After installation some parts the wheel bay will be sprayed and finished. Ejection seats have to be finished with Quintas. Easy nice job. The glassing has to be widened. One millimeter by some styrene on the fuselage. The fit is excellent. I have some more things to add. Somehow anything which imitate the curtains. Well, so far. Happy modelling
  15. Sprayed some XF 62 Olive Drab. Time to chill before those stripes.... Stay safe. Simon.
  16. First planking of the lower hull ticked off
  17. Thanks Mark !! I like to look at pics of the time being... The real things were worst, see... But doing this in scale will not be easy nor realistic... And then.... That was the time.... Un tout grand Merci Jean !! I really enjoyed the movie, saw it 10 or 12 times... Sincerely. CC
  18. For your information. It is most likely that following the availability of the 1/48 Kinetic Canadair CT-114 Tutor an aftermarket producer will offer us a 3D printed vinyl decals of the current analog dials cockpit of the Tutor + seat cushion + seabelts. But the same aftermarket producer will also have to offer later a 3D printed vinyl decals of the brand new glass cockpit to come. 20 x active Tutor jets will be upgraded by L3Harris and IMP Aerospace, including glass cockpit instrumentation and associated avionics equipment. The first conversion aircraft serving as prototype has been completed, with testing commencing in March 2023 in Trenton, Ontario followed by operational test in Moose Jaw, home of the 431 Air Demonstration Sqn the Snowbirds. SharkOwl Take a look here at the brand new Tutor glasss cockpit : https://www.facebook.com/groups/602341376444965/posts/6521876821158028/
  19. Fresh from a weekend away celebrating the Memsahib's birthday (21... again!!), I thought that it was time for a progress update. I left things with the fuselage having been glued together and this had the joins cleaned up. I have also fitted the intake parts to the starboard side and the wings have been glued up ready for fitting. The nosecone was filled with Liquid Gravity and glue, then everything was sealed in with a layer of blu-tack, taking extra care to keep that away from the glueing surface. by John L, on Flickr by John L, on Flickr by John L, on Flickr by John L, on Flickr I hope to fit the port intake parts later then, after checking the nose weight to avoid tail sitting, I can complete the wing/fuselage assembly. John
  20. Great job so far Bill. I feel for you having done a couple of fibreglass/resin/ short run subjects. Fibreglass is especially a pain trying to clean up or correct, or even add any openings. And I won't go into the constant itching from the fibreglass dust. I do hope you are wearing at least a paper mask when doing any cutting. I hadn't stopped to realize that the Bounder is almost as BIG as the Valkyrie. Brings new meaning to the phrase "Go Big or Go Home".
  21. Nice solution for the antenna wire, I'll have to keep your method in mind for whenever I have a similar situation.
  22. Yes, standard USN Sea Blue finish of the time... which Sea Blue ? Well, there are a couple of threads on the evolution of this colour in the WW2 section of the forum so I'd study these before choosing the paint. The aircraft given to the Air Force featured the same scheme, see for example these pictures from the same website http://www.aviastore.it/?p=5103 Very visible in the pictures is the designation S2C-5, that as mentioned above was used because Italy in theory could not have bombers...
  23. Youyou printed with 20 micron layers with Photon Ultra. Putting in place the canvas of the 13 mts boat, as I only have the plan of the 10 mts boat, I have very slightly lowered the vertical scale of the hull.
  24. Lovely work! All that stuff on the tail looks particularly nice (and scary!)
  1. Load more activity
×
×
  • Create New...