

galaxyg
-
Posts
1,170 -
Joined
-
Last visited


.thumb.jpg.d3635a7ef6507d35f372dd09671fe96f.jpg)

galaxyg's Achievements
")
Very Obsessed Member (5/9)
4.6k
Reputation
-
 Nice! Great shine on that paintwork too. Where's the background and floor from, they look very realistic too.
 -
Aoshima Liberty Walk Lamborghini Aventador
galaxyg replied to galaxyg's topic in Ready For Inspection - Vehicles
Thanks - all of these RFI photos were taken outdoors so I could get a decent sky reflection, whereas the WIP ones were taken indoors, that might account for it. -
Aoshima Liberty Walk Lamborghini Aventador
galaxyg posted a topic in Ready For Inspection - Vehicles
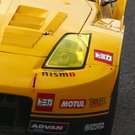
Background: A car so wild I had to add this to my collection. Knowing this one comes with adjustable suspension so it can easily be de-cambered made the decision even easier. And it was the perfect excuse to try a more unusual colour. Pros: This is a kit which very much seems designed to be assembled. That seems strange to say, all kits must be - but this one more so than most. A lot of parts have small locator pins and matching holes in the part they join, and it just makes assembly so much easier. About 1/3 of the parts can be made as push-fit without glue and a lot of those are in places I'd really not want to be taking glue anyway. The kit has a perfect shape and proportions, nice sharp clean mouldings, great fitment of nearly everything, has parts divided in a logical way to make for very little masking (I only masked the dashboard), sharp high quality decals and a detailed interior. In addition there are not only decals but in some cases, stickers and this also makes for an easier assembly than usual. Cons: The side scoop bodywork behind the doors fits perfectly but not when coupled with the fake-mesh part that goes with it. Then some thought and reinforcement is needed. The suspension entirely lacks detail but given the selling point of adjustable height and camber, this is fair. Verdict: Brilliant. The results speak for the kit's quality and the fact that I was able to go from opening the box to completed kit in only 2 weeks is as much a testament to how much the kit has been designed to be built without fuss as it is to the amount of time I threw at it. Build notes: Built over the course of two weeks in April 2024, painted in Halfords rattle-can Ford Tibetan Bronze, clearcoated with Mr Hobby Gloss Premium. I've added a Japanese number plate, some hoses to the engine, some carbon and alu-fibre wrap in a few areas and the Lamborghini badge on the front is a 3rd party item. Otherwise, it's as it came in the box. I did further experimentation with this model to find out what are the perfect conditions for photography - always easier on shiny road cars, and that has made for some great results which although still not quite indistinguishable from a 1:1 car, are another step closer than I've got before. I'm very pleased with both the pics and the result, the build has a much smaller number of minor imperfections than usual and no major ones; it is now my favourite build of 2024.. so far.- 17 replies
-
- 19
-

-
Thanks. I wish my stash would run less for sure... it's currently at 74 and with another holiday to Japan looking likely at the other end of this year, it'll probably end up larger than 74 by Christmas regardless of what I build between now and then. Still, this Aventador's only taken two weeks but that was quite intense. On with the remains of the build... The side windows need to be held in place whilst the PVA dries. I've used an unsightly blob of blu-tack. Most of the black parts on the car are not meant to be carbon fibre, but the rear wing is, and I've also given it an alu-fibre leading edge to help pull the whole bronze-black-silver colour scheme together more. Very close to the end now. Hard to see on this image but I've painted every rivet head with greenstuffworld chrome. This is where the WIP comes to an end. RFI pics soon.
-
Once again the Halford Peugeot Antelope Beige proves useful. As does the Hasegawa self-adhesive alu-fibre pattern, which adds some more to the interior and helps reinforce silver as another colour in this build - the colour of the wheels. Completed interior. Almost unseen - the carpets are silicon carbide paper, which being charcoal grey, doesn't even need painting. Hurrah. Inset - the windscreen comes with it's own die cut black sticker, which is just another one of the niceties that comes with this kit. The bonnet had solid moulded mesh but in this case, I've replaced with the real thing. Like the Audi A4 I recently built, the windscreen installs from the outside. Also like the Audi, there's little in the way of glueable contact area are however there's *just* enough friction to keep it in place without glue, so I'll take that. Engine installed. Green cast on the car is a reflection of my t-shirt Finally chassis and body united. It's looking mean. There's more to be done yet - side windows, door mirrors and a load of other black parts around the back, plus exhaust. And of course the big wing.
- 17 replies
-
- 10
-
-
Just curious. Mine was a H reg (1991) Nissan Sunny hatchback in red. Derby (Chaddesden) test centre in 1994.
-
Hasegawa Nissan Sunny / Pulsar GTiR 1991 1000 Lakes Rally
galaxyg replied to Windy37's topic in Work In Progress - Vehicles
I've got the road-going version of this kit, as yet unstarted, and I had a look at the instructions. The cutout is where the CAT goes in the road car. I was debating in my head whether to get the road or rally kit of this car, and in the end road won. I'll be watching this build with interest. -
The front and rear adjustable axles/suspension remind me a bit of Lego. They're tight enough to allow movement afterwards but stay in position once left. Note all the little holes in the hubs - the brake discs and calipers are push-fit. The most extreme of the camber - and I also used this to test out if this'll be the car to convert me to black wheels (no). Despite black wheels being a Liberty Walk "standard". And if fluorescent callipers look good - which are moulded in red and took a lot of covering up. But also no, I will repaint them. Opposite extreme- Safari rally mode. Adverse camber - I wonder when this'll be a trend. It's little worse than the opposite to me. inset: Without tyres, you can go full on Delorean hover mode. Not shown is the sensible option, straight wheels, quite low. The rear window comprises 11 pieces of plastic and 6 stickers. With the exception of the final part, it's all push fit which is great when dealing with transparent parts. Completed hatch. The engine is unhelpfully moulded in one piece, including the X member. But it's very tidily moulded, I'll give it that. However some careful painting mitigates this. The large void just to the left of the middle of the photo in the golden triangle is filled with hoses and wiring in the real car, and this area is clearly visible from the outside once the engine cover is on, so I'm going to have to busy that up later. Assembled brakes. The silver and logo parts are a one-piece self adhesive sticker - there are decals provided too but this solution is so much easier for the builder. The calipers I've repainted in the same brass colour as in the engine bay.
-
Sacrilege as it is*, they could relaunch as an EV-only brand, as at least it's a badge with some heritage rather than all these no-name EV brands that are popping up all over the place. *all brands are going to be forced to do this anyway, heritage or not.
-
Thanks. Ring decals - Easier than it looks - there's carrier film inside the rings, so it's one large piece that is nice and strong.
-
The side scoops and their fake mesh don't fit as well as I'd like, clamping and reinforcing (inset) is necessary. Back lights are very easy to build up - everything is moulded in the colours it needs to be a goes together almost without glue. An array of parts waiting to be fitted. The bonnet needs to be gloss black yet but the rest are ready. Locator pins/holes for many items make this easier to build than without. Great idea. Wipers and scuttle panel are moulded together. In this instance, this is a great idea. Since I had the "studio" set up for the completed Audi, I took this with many of the panels attached. The ones over the rear end are like a perfectly fitting plastic jigsaw. I'm very happy with the paintwork, it's amazing what a Halfords rattle-can can do. Front lights, another easy assembly with only a little painting, the aluminium Y shapes. Car starts to get it's face.
-
Background: The TOCA games by Codemasters introduced me to the BTCC right in the middle of the fantastic Super Touring era, and the A4 is one of that era's stars. As soon as the kit was announced (years ago) I knew I had to have one. After a long long wait for release, eventually it was available. Pros: Almost everything but in particular: perfect shape, nice sharp clean mouldings, great fitment of nearly everything, perfect seamless tyres, sharp high quality decals, nicely detailed interior. Cons: Fitting the glass is a pain, as there's so little glue contact area. The back windscreen is a perfect fit *when held in place* but it's natural curve is slightly less than the hole it drops into, meaning you have to use something more powerful to glue it in place than you'd want to on clear parts with little contact area. The front and sides are also not easy to glue in. The instruction manual shows the several parts fitting either in a direction or point in the build that is physically impossible and there's a small bit of the rollcage the instructions forget to tell you about entirely. Verdict: A very very good kit. Recommended. Build notes: Built over the course of one month in March-April 2024. Painted in Tamiya Mica Silver. Additions to the kit are the seatbelts and PE buckles, some wiring and detail on the interior, and the PE bonnet and boot catches.
- 16 replies
-
- 20
-
-

-
Mitsubishi Lancer EVO I Group A - 1994 Monte Carlo
galaxyg replied to Potsie's topic in Ready For Inspection - Vehicles
Nice restoration. I've had a few kits in the freezer in the past. Looks good especially considering it's a Hasegawa kit of *that* era of tooling/quality. -
Thanks. The kit tyres were not *really* bad, just a bit too big for what I thought looked right. I have a big box of spare parts, and the replacement tyres came from that. The spares box is populated by things left over from 100+ builds so I can't remember exactly where they came from except they were wrapped around a set of RS Watanabe wheels.
-
The back window fits perfectly *when you hold it*. But without that holding in place, it's curve is slightly shallower than the curve of the hole. I've had to resort to poly cement to hold it in, not a glue I'd normally take near clear parts. Resting on some pegs to use it's weight to hold the front splitter in place whilst that dries. Here below with side windows, door mirrors and tow hooks. All that remains are 4 decals on the glass, 4 PE bonnet catches, an aerial and rear wing. Expect some RFI images over the weekend if it's bright enough to support good photos.