

Jabba
-
Posts
7,921 -
Joined
-
Last visited
About Jabba

- Birthday 29/05/1962
Recent Profile Visitors
9,351 profile views


Jabba's Achievements
")
Completely Obsessed Member (6/9)
10.5k
Reputation
-
Certainly.
-
I forgot about the @Enzo the Magnificent way of doing things.
-
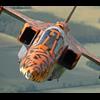
Odds and Ordnance do a set of all camera pods and the flash wing tanks:- https://www.scalemates.com/kits/odds-and-ordnance-oao72033-raf-f-4m-phantom-strike-camera-recce-pod-and-strobe-flasher-unit--1123602 The 3 Grey scheme was only used when the RAF Phantoms were in the Air Defence role.
-
Been trying to point this out for years, but no-one believes me. Ex RAF rigger.
-
Weapons now fitted. I have also added the sensors at the nose and tail with a blob of Kristal Klear and then painting black. One strange thing that Italeri have done is that they have provided clear parts for the nose of the Maverick missiles, but not for the Penny Pave pod. Also trying to figure out where tha anti col lights are. Working on the ejection seat, so hopefully this one will be finished soon.
-
Green, Green, Green.
-
You know you want to.
-
Certainly, and welcome aboard.
-
Getting ther slowly. All weaponary painted and decaled, ready to fit.
-
A splash of colour is always good. I did some subtle weathering and applied a matt varnish. U/C added and now sitting on all 3 wheels. Will start decalling the weapons soon.
-
Hopefully that will do the trick. I shall be painting the Black parts with paint rather than pen this time. I would have throught that 24 Hrs was long enough for the paint from the pen to dry. Anyhow, the colour part of the badges and stencils have now been applied. The refuelling panel on the nose came from the kit decal sheet.
-
These are the photos I took a few years ago of the model. I do have it still available if you require any more. I should also mention that this is a Chinook HC2 (CH-47D), so some thing may slightly be different. Also in the void where the Fwd XMSN would sit there are some Hyd piping around the walls, but I did not feel that these were required. I hope that this is of some help.
-
I managed to start decalling last night. The majority og the bigger decals are on, I just have to add the colour badges to the white patches then start on the stencils. There do not appear to be many stencils, but the instruction sheet is not that good for these so I will apply what I can. One strange thing is that seems to be only 2 jacking points, one at the rear and one on wone of the wings. On all aircraft that I have worked on there is usually a minmum of 3 of these. There are spares on the decal sheet and I will look at other decal sheets that I have for hopefully a better solution. Something tsrange happened here. I used one of those new fangled paint pens to paint the black areas on the ECM pod. I left it at least 24Hrs and applied some Klear and this happened. I will repaint the Grey and see what happens.
-
Maybe.
-
In Germany the verbal warning had to be spoken in German, which was not too difficult, but you had to get the correct word for shot or you may have been doing something else.


