Review Content
Showing topics in Aircraft Reviews, Kits, Aftermarket (updates/conversions), Decals & Masks, Reference material, Armoured Fighting Vehicle Reviews, Kits, Aftermarket, Diorama, Accessories & Themed Figures, Reference Material, Kits, Aftermarket & Themed Figures, Reference Material, Vehicle Reviews, Sci-fi & Real Space Reviews, Figure Reviews, Locos, Trains & Layout Reviews and Tools & Paint Reviews posted in for the last 365 days.
- Today
-
Why are the transfers decals in the top right hand corner of the sheet smiling at me?
-
 Fw.190A-6 Cockpit (6481101 for Eduard) 1:48 Eduard Brassin We’ve just reviewed the new Fw.190A-6 kit in 1:48 from Eduard here, and it’s a great kit that will satisfy many builders straight from the box. If you’re hungry for more detail however, this new cockpit set will upgrade the kit cockpit to a higher level that justifies spending extra time painting and weathering the area, which is a typical focal point of most aviation models, with the exception of drones and UAVs. As is usual with Eduard's larger resin sets, they arrive in a Brassin-themed black-and-yellow cardboard box, with the resin parts safely cocooned in bags between two layers of grey foam, and the instructions folded around acting as additional padding. Inside are a mixture of traditional cast and 3D printed resin, PE, decals and a small sheet of clear acetate film, the largest part of which is the cockpit tub with the aft decking and side consoles already moulded in. The separate seat has a button-quilted cushion moulded-in and has a pair of pre-painted PE lap-belts added, fitting into the tub along with the control column after the removal of the tendril-like supports from the printing process, applying stencil and dial decals on the side consoles after detail-painting. The instrument panel lower section is made first, using either a lamination of two layers of PE and a blank resin panel backing, mounting a choice of resin centre sections that are used with the alternative resin panel with dials moulded-in and decals instead of using PE. In this latest set, there are levers and handles supplied as delicate 3D printed parts to be glued into recesses in the panel sides instead of shallow PE parts. The rudder pedals are also 3D printed, which gives them a more realistic look for less effort, beyond the capabilities of PE parts alone, which would have to be folded to shape. They are glued into the floor of the cockpit on their mounting posts along with the lower instrument panel that fits in place on the ends of the side consoles. A resin lever is fixed to the port side console, and the shoulder belts are laid over the top of the seat now in place, followed by building the resin gunsight with acetate glazing parts sliding into grooves in the mechanism. The completed gunsight is slotted into the upper panel, which you can build from PE and resin, or resin and decals in the same manner as the lower panel. The coaming fits over the top, and it has a cut-out on top to accommodate the gunsight that protrudes through. The starboard fuselage half has two lugs marked in red that are removed to be replaced by a resin winder handle, and once everything has been painted and decaled, the fuselage can be closed around the new cockpit, the kit forward bulkhead, and the resin coaming. The final resin part combines the pilot’s head armour and the support structure behind it in one highly detailed part, which should be detail painted according to the usual Gunze Sangyo call-outs, and has a red warning decal to be applied to the front of the head armour below the cushion, as shown in a separate diagram. That is then glued in place inside the clear styrene canopy appropriate to your decal choice from the kit. To fit the new cockpit inside the fuselage a pair of plastic wedges are removed from the inside, to be replaced with a detailed PE and resin trim wheel. The assemblies should then fit neatly within, alongside the kit bulkhead, assuming you aren't taking advantage of any of the other sets I'll be mentioning in this review. The set includes the opening mechanism and the pilot's head armour, which has a warning decal added to it after painting. The interior roll-over frame is resin, and has delicate PE bracing wires linking to the rear, all of which fits inside the canopy after painting. The canopy then installs as normal. Conclusion As the cockpit is one of the main focal-points of any single-seat fighter, the extra effort is well-worth expending, as the detail is finer and accurate, thanks to the capability of 3D printed parts, traditional resin, PE and decals, each with their own specialities. Highly recommended. Review sample courtesy of
 - Yesterday
-
Fw-190A-6 ProfiPACK (82137) 1:48 Eduard Introduced in 1941 to combat the ever-improving Spitfire, the Fw.190 was intended to supplant the Bf.109 if it reached a development plateau, or to run alongside it as a stablemate if it could continue to be improved. Its powerful twin-bank radial engine was installed with a close-fitting cowling on a small fuselage, and was initially equipped with an oversized, ducted prop-spinner to keep the engine cool, which was discarded early in development in favour of a fan that ran on the prop's drive-shaft to push air over and between the cylinder heads, also facilitating oil cooling. It was also given a wide-track landing gear, which reduced the likelihood of a nose-over, a problem afflicting both the Bf.109 and its opponent the Spitfire, due to their narrow tracked gear and poor forward visibility over a long cowling. When it first encountered Spitfires, the Fw.190 gave the RAF pilots a shock, as they were expecting Bf.109s, not these agile new aircraft. It caused a frenzy of development at Supermarine, which was just part of the leapfrog game played by both sides throughout the conflict. The initial A-1 production version was equipped with a BMW 801 engine, and by the time the A-4 was signed off, it had two 7.92mm guns in the cowling, and a pair of 20mm MG151 cannons in the wing root, all of which were synchronised with the prop's motion, in turn mated to a more powerful version of the BMW engine. There were several equipment fits used in the many variants that gave the Würger (Shrike) additional weapons and capabilities, including a pressurised cockpit, rocket tubes and reconnaissance cameras. The A-6 was a natural progression of development that started reaching service in mid-1943, with an increased armament that included MG17s in the engine cowling, two 20mm MG 151 cannons in the wing root as before, and another identical pair just outboard of the landing gear bays. The wings were also lightened whilst improving their strength, leaving space for extra ammunition for the two wing-mounted cannons, in an effort to increase their success in downing the bomber streams that were attacking German industry on a daily basis by that point in the war. The Kit Since the initial tooling of the Fw.190A series airframe in 2007, there have been numerous reboxings, additional parts and re-releases of other variants, plus tooling upgrades as time went by. Eduard's Fw.190 today is a great kit, and has stood the test of time well over the last decade, the moulds amended and improved to keep it current. The ProfiPACK boxing of this variant includes extras to improve on the already excellent detail, and arrives in a gold-themed box, which is adorned with a dramatic and emotional painting of the iconic Butcher Bird in night fighter guise, engaged with an ill-fated Halifax bomber, which has its two inner engines on fire, although the mid-upper gunner is still bravely fighting on. Inside are five grey/blue sprues, one of clear parts, a fret of Photo-Etch (PE) brass, a small sheet of kabuki tape masking material (not pictured), two decal sheets and the instruction/painting guide, printed in colour on glossy white paper. Due to the modular nature of the sprue design and layout there will be a fair quantity of spare parts left after construction, which are marked on the diagrams with pale blue overprinting. Construction starts in the cockpit, which is augmented with pre-painted PE side consoles and instrument panels, but also retained are the decals that can be applied to flat panels, as well as the engraved styrene panels for those that prefer to paint their details manually. The tub includes the sharply tapering rear deck, to which you add the rear bulkhead cheeks, control column, seat, plastic or PE rudder pedals, pre-painted seatbelts and sundry other parts in styrene and PE. The cockpit sides have details moulded-in that are improved by adding PE parts to the areas that will be seen within the finished compartment, detail painting them according to the instructions accompanying each part. To close the fuselage, the cockpit assembly with upper instrument panel that has the same choices as the lower is inserted along with a bulkhead that closes the front of the tub, two exhaust inserts with L and R engraved into the cowling, and the two-part engine assembly, which is only an approximation of the front row of cylinders, as little will be seen once the cowling, prop and cooling fan is in place. The lower wings are full span, and has a spar fitted that runs to the ends of the gear bays, with detail on the face visible through the apertures. This is augmented by the wheel bays, various ribs and the cannon barrels that protrude through, with the upper wing surfaces added after painting of the bay roof detail that is engraved into their underside. The completed wing assembly is then offered up to the fuselage, and the missing sections of the cowling with exhaust stubs, gun barrels and troughs are added to the top and bottom of the nose, adding the instrument coaming to the front of the cockpit cut-out, either adding a small PE part into a recess, or making the same part from scrap styrene and a decal if you prefer. The two-part intake ring finishes the front cowling, and the flying surfaces are glued into place, including separate rudder and ailerons that can be posed deflected, and fixed elevators that slot into the sides of the tail. The tyres provided for the main gear have separate hubs front and back, and fit onto the peg on the ends of the struts, with separate oleo-scissors and captive bay door parts, the latter with a choice of two styles. The retraction gear is installed along with the leg in the bay on the inner side of the leg, and the centre doors fit to the central bar that splits the bays either closed, or opened with a strut holding them in place. The tail wheel slots into a two-part yoke and slides into a socket under the tail, a crew step, aerial and D/F loop for most decal options, gun barrels and pitot probes are installed, then the three-bladed paddle prop is completed with spinner and fan behind it, with a peg at the rear fitting into a corresponding hole in the engine front. Two styles of open and closed canopies are provided, and are outfitted with head armour, PE grab handle and armour support before being added to the airframe along with the windscreen part. The last touch is to add the gear-down indicator pegs to the tops of the wings, which are made from tiny PE parts, and for the night fighter options (F&G), a series of antennae are made from PE strips with circular bases that are applied to the wings and fuselage as indicated, fixing styrene flare hiders to the side-mounted exhausts. A belly-mounted fuel tank is made from two halves, and is mounted on a long, four-part pylon that fixes under the fuselage on two pegs, where another set of antennae for the night fighters are shown in blue. If you are rigging the aerial wire to the tail, remember that if you pose the canopy open, the wire can appear relaxed, although many photos also show it taut, so check your references. Markings There are seven decal options on the sheet provided, with the common stencils on a separate sheet as is common with Eduard kits. Which decal option you choose informs your choice of options whilst building the kit, so make your choice early to avoid confusion and potential mistakes. From the box you can build one of the following: Fw 190A-6, WNr. 550375, Lt. Heinz-Günther Lück, 1./JG 1, Deelen, Netherlands, August 1943 Fw 190A-6, WNr. 550461, Oblt. Helmut Radtke, 5./JG 54, Immola, Finland, Summer 1944 Fw 190A-6, WNr. 550453, Hptm. Friedrich-Karl Müller, Stab /JG 300, Bonn-Hangelar, Germany, October 1943 Fw 190A-6, Fw. Günther Josten, 1./JG 51, Bobruysk, the USSR, January 1944 Fw 190A-6, WNr. 550473, Fw. Walter Nietzsche, II. /JG 300, Rheine, Germany, Summer 1943 Fw 190A-6/R11, WNr. 550143, Oblt. Fritz Krause, 1./NJGr 10, Werneuchen, Germany, January 1944 Fw 190A-6/R11, II. /JG 300, Lobnitz, Germany, Autumn 1943 All the decals are printed in Czechia, have good registration, colour density and sharpness, with a thin matt carrier film cut close to the edge of the printing. The stencils are catered for on a separate sheet, with a page of the instructions devoted to their placement, away from the markings options to avoid clutter. As always with Eduard, the Swastikas are provided in two parts on the body of the sheet to comply with local regulations regarding this contentious symbol, and can be brought together to create the symbol if you are striving for historical accuracy and it is permitted in your nation. Conclusion The surface detail on the kit is excellent, with lines of finely engraved rivets adding to the visual appeal (yes, we know rivets aren't holes, but this technique works for most of us though). Add the extra PE detail, and quite a fun set of decal options (I particularly like the night fighters), and you have a winner on your hands. The box art is also striking, so don’t forget that there is a large print of the artwork available to buy without the necessary text and other clutter of the box top. Very highly recommended. Kit EduART Print Review sample courtesy of
- Last week
-
M3 Stuart Early Prod (35412) 1:35 MiniArt via Creative Models Ltd The M3 Stuart was designed before the US went to war, based upon the experiences of the British, which led to the US top brass deciding that their M2 light tank was obsolete. While the radial engined M3 was an improvement over the M2, it suffered from an underpowered M6 main gun at only 37mm, which although it was improved later in the war, the crews had to suffer with it for some considerable time. The British troops in Africa used it first against the superior tanks of the Afrika Korps, but they fared badly in combat, suffering from the lack of range of the Stuart in the wide-open spaces of the African desert. It was fast and manoeuvrable however, and a British driver’s comment that she was a "honey" to drive led to one of its nicknames during the war. The M3A1 was an improved version that deleted the heavy sponson mounted machine guns of the initial production, and some of these used more conventional diesel engines instead of the bulky radials, which gave the crew more room for other equipment. It also had a new turret with a basket for the turret crew to stand in, and no cupola for the commander that gave the tank a lower profile, and added a gun stabilisation system that helped with vertical alignment of targets while the tank was on the move, ironing out the bumps for the gunners. In British service it was known as the Stuart III and with the diesel engine version was designated the IV. It was hopelessly outclassed by Axis armour in Europe for tank-on-tank engagements however, and was soon relegated to infantry support and recce roles, where it performed well. It was more successful in the Pacific theatre against the lightly armoured Japanese tanks in the jungle, where medium and heavy tanks could soon flounder in the mud and heavy foliage in jungle conditions. It continued to be used to the end of the war by the Allies in the Pacific area, although Russia, another user of the Stuart, disliked it intensely and refused to take the upgraded M5 design that followed the M3A3. Variants were used well into the 60s, and Brazil even built their own version with redesigned upper hull that carried a 90mm gun. Paraguay still had a few of its ancient original stock of 12 beyond the turn of the millennium, which is astonishing, considering the age of the design. The Kit This is a new boxing of a very recent tooling from our friends at MiniArt, who are producing an amazing output of new kits and partial re-tools in recent years, which is doubly-impressive given the abominable situation in Ukraine over the last few years. This kit arrives in a top-opening box with a painting of an early production Stuart on the front, surrounded by a herd of zebras, which gives its location as Africa, unless it was plundering through a zoo. Inside the box are twelve sprues of various sizes in grey styrene, a clear sprue, a fret of Photo-Etch (PE) brass in a card envelope, a decal sheet, and the instruction booklet, which is printed in colour on glossy paper, with profiles of the decal options on the rearmost pages. Detail is excellent as we’ve come to expect from MiniArt, and as this is an exterior kit, the interior isn’t provided, but the exterior and running gear are well-defined, and the tracks are supplied as link-and-length, taking the benefits of individual links and making the job a lot less labour intensive without much loss of detail. Construction begins with the vehicle’s floor with a choice of two styles of floor hatch, then making curved transmission armour at the front of the tank, which is detailed with various towing eyes, additional bolt heads that are cut from the sprue runner, and a central frame that can be folded from PE or replaced by a single styrene part. Now the hull sides can be fitted, but not before they are detailed with various external parts, adding final drive housings to the front ends, using the bogie axle ends to locate the parts on the sides of the floor. The rear bulkhead is built with a hatch space in the upper half, gluing it to the rear of the vehicle. The rear hatch is in two sections, one of which has a PE clapping plate, both having handles, posing them closed to hide the lack of engine. Above the hatch is an overhang with a PE mesh horizontal insert and styrene rear, with a couple of towing eyes mounted on the lower edge of the bulkhead. The next assembly is a thirty-cal bow machine gun, which has a vertical magazine moulded into the underside of the breech, finished with a circular mount that is slotted through the glacis plate from the inside, plus a strengthening strap under the driver’s hatch. It is glued into position on the front of the tank, fitting the transmission inspection hatch with handle in the centre, and adding a pair of towing shackles to the front. The driver’s hatch is in two parts, and can be posed closed for battle, or with both parts folded open to allow the driver to see the full vista, which would of course expose the lack of interior. A two-layer T-shaped cross-member is located over the upper glacis, adding a bracket that supports the headlamp, and a pair of bearing spacers to the final drive housings. As already mentioned, the earliest Stuarts had sponson-mounted machine guns, which extend from the main hull out over the tracks, roughly along the middle third of the vehicle’s length. The two sponson floors are glued into position, and two .30cal machine guns are trapped between two-part mounts, one fitted to each sponson, sliding through the front armour. The sides of the sponsons can then be built around the guns, with a short wall to the rear, and a long panel along the side. Two hatches are fixed to the front of the upper hull after adding an extra layer behind, a clear vision port, and openers to the sides. If you intend to pose the hatches up, you have the option of leaving the inclement weather inner hatches in position, which have large panes of glass and windscreen wipers to save filling the tank with precipitation. The open outer hatches are propped up with a pair of short stays from their top hinges, but the usual caveat about the interior still applies. The hull roof is next, starting with the panel that has the turret ring moulded-in, adding additional nuts on the top ring from the sprue runners, and a pair of filler caps on the deck behind it, shaving away clasp details around them. The completed part is lowered into place on the hull, turning to the engine deck next, placing the panel after fitting handles, gluing it in position and fitting a pair of rear lights on brackets to the sides, adding a little connecting wire if you wish. The main deck panel has a PE shroud to the forward edge to deflect incoming rounds or debris, plus another PE bracket for one of the aerials is attached to the right, with another shelf-bracket mounted on the side wall slightly lower and further to the side than the other. The aerial bases are each made from two parts, adding 73mm of stretched sprue, wire, or carbon fibre rod to represent the aerials themselves. A pair of dome-topped cylindrical air-boxes are built from four parts each and are attached to the rear of the sponson on brackets on both sides. We finally get some wheels for the tank, starting with the two-part drive sprockets and a pair of over-size idler wheels, which are trapped between two halves of the swing-arm, adding a PE rim to both sides. The road wheels are mounted in two-wheel bogies, each one made from ten parts, building four in total, handed for each side. The road wheels flex-fit into position between the arms of the bogies, so that they can be mounted on the sides of the vehicle in shallow recesses along with the idlers and drive sprockets, with three return rollers on short axles above the main run. As discussed earlier, the tracks are link-and-length, using long single-part lengths under the wheels, individual links around sharp curves, and shorter lengths where the tracks are relatively straight. The various sections are attached to the sprues at the edges, and each short portion has a unique tab and slot format to ensure that parts can only be put together in the correct manner. There are a few ejector-pin marks on the inside of the longer track link sections, but these are raised and on flat surfaces, so shouldn’t be difficult to remove with a sanding stick or sharp blade, and won’t slow you don’t too much. When the track runs are suitably cured, fenders are added over the open areas, the rear straight sections fitted with a curved end to reduce kicked up mud, while the front section have inner side skirts to prevent mud ingress, which is improved further by gluing a PE web between it and the leading edge of the glacis plate, along with a PE stiffening strap further back. Before we start festooning the vehicle with pioneer tools, a pair of headlamps with clear lenses are placed, one on each fender protected by a PE cage, and both with a short length of wire leading back to hole in the glacis plate. The pioneer tools are fully styrene tools that have their clasps moulded-in, and are dotted all over the horizontal surfaces of the vehicle, including an axe, pickaxe shaft and head, and a shovel. More tools are located on the forward sponsons, adding PE tie-downs around the deck for securing stowage or camouflage. The twin towing rope requires the modeller to provide either a 157mm length of braided wire or thread, fitting a pair of styrene eyes to the ends, and clamping it in place with PE brackets along the left sponson and fender. Now for the turret, starting with the main 37 mm M6 gun, the gun tube formed by a single part with hollow muzzle that is surrounded by a two-part frame, and has the halves of the breech closed around the rear, adding extra detail on the right, and a breech protector to the left side, followed by a four-part pivot that are fixed around the gun without glue, then the coaxial machine gun is attached to the right side of the breech, and its ammo box is located on the left side, fed by a ‘bridge’ of link over the main gun in a guide to the breech of the smaller gun, dumping spent rounds in a box-like bag underneath. The barrel is pushed through the mantlet and inserted into the front of the turret, which has been made from a well-detailed ring, with the faceted turret sides arranged around it after being detailed with vision blocks themselves. The roof has a yoke inserted on its underside in stowed or combat positions, and is glued in place, sliding the mantlet armour over the main and coax guns from in front. The commander’s cupola is similarly faceted, and each side is prepared by fitting a vision block in the slot, creating an asymmetrical hexagonal shape, and deciding whether to pose the turret crew’s vision ports open or closed. The commander's hatch is a flat panel with a lock on the upper edge, and hinges on the lower, which can be fitted open or closed, with more vision ports on the turret sides posed open or closed around the rest of the perimeter. Another .30cal machine gun is trapped between a two-part mount with adjuster handle, and fixed to a short column that is secured to the rear left side of the turret on curved brackets moulded into the surface. An optional two-part ammo box with a length of link can be fixed to the side of the gun, or if you wish to leave it off, an alternative stub part is supplied in its place. With that, the turret can be dropped into position to complete the model. Markings There are six varied decal options included on the small sheet, and you’d still be almost correct if you guessed that they are all in some variation of WWII Allied green, with only their individual markings to tell them apart. The exception is the specially painted 1,000th tank produced, which was painted white to stand out for the ceremony. From the box you can build one of the following: 192nd Tank Battalion, Luzon, Philippines, December 1941 2nd Independent Tank Company, Free French Forces, Kano, Nigeria, 1942 American Car & Foundry Plant, 1,000th Tank 192nd Tank Brigade, Red Army, Volkhov Offensive, Oryol Region, Summer, 1942 US Marine Corps., Australia, Spring, 1943 Brazilian Army, 1944 Decals are by Cartograf, which is a guarantee of good registration, sharpness and colour density, with a thin matt carrier film cut close to the printed areas. Conclusion It’s great to have this much detail present in a newly tooled kit of the diminutive Stuart, or Honey as the Brits called it, and it deserves to become the de facto standard for the scale. If you don’t want to pick up the original Interior kits because they contain too many parts or will keep you occupied to long, then this one should fill the gap perfectly. Very highly recommended. At time of writing, this kit is on heavy discount from our friends at Creative Models Ltd. Review sample courtesy of
-
Fairey Gannet COD.4 (A11009) 1:48 Airfix The Gannet was another great British aircraft that began development while the fires of WWII still burned, and was specifically designed to take advantage of new radar technologies that had been developed during wartime to perform the complete anti-submarine warfare task, taking the role of both the hunter and the killer. Early design work experimented with the use of a single turboprop engine for fuel economy to allow the aircraft a long loiter time, but this was found to be sub-standard, and Rolls-Royce cancelled the engine design to concentrate on more pressing wartime needs. The Armstrong Siddeley Mamba engine was considered as an alternative, and it was decided that two of these engines with a common intake and gearbox would be suitable. Known as the Double or Twin Mamba, that gave the design a wide ‘chin’ and twin exhausts. The engine would power two contra-rotating props that had dual roles, eliminating any torque steer effect on take-off and landing, and giving the crew the option of shutting one engine down to save fuel and extend loiter, as there was enough power in a single engine to keep the aircraft aloft. By 1946 Fairey had been given a contract to produce two prototypes, which first flew toward the end of 1949, and the testing programme ironed out the bugs, which included a crash-landing that damaged one of the prototypes and caused some delays. By 1950 the testing process had progressed to the carrier trials portion, carrying out the world’s first carrier deck landing by a turboprop aircraft. The second prototype was completed later, and had benefited from changes to the design based upon experience with the first airframe, which had now racked up two crash-landings. Other changes to the specification were forced upon them too, including a larger bomb bay, an additional crew seat and canopy, and relocation of the radome, all of which was mirrored on the first prototype to ensure its ongoing usefulness to the testing programme. Successful completion and the increasing likelihood of war in Korea led to an order of 100 AS.1 airframes, reaching service by 1954 after resolving a compressor stall issue that had grounded the first production batch for two months. The AS.4 was created later in the 50s, with better engines and avionics, then to replace the ageing Skyraiders in the AEW role, a fundamental re-design of the fuselage was made to accommodate the large radome centrally mounted under the wings, which was designated AEW.3, and was fitted with a new variant of the Double Mamba, which can be easily differentiated from the earlier marks by the fuselage design and the heavyweight radome underneath. Export customers included Germany, Indonesia, and Australia, where they stayed in service for a long time. In the 1960s the Royal Navy transitioned the ASW role to helicopters, effectively making a proportion of the Gannet fleet redundant, but they were found alternative employment with a few alterations, some performing the Electronic Warfare role, and others converted to mail delivery and communications aircraft, travelling between the carriers and shore establishments. These were designated Carrier Onboard Delivery, or COD.4, and were generally converted from AS.4 airframes. By the late 70s, the British Government had mandated a retirement of the Navy’s last carriers, which it was assured were unnecessary, and the Gannets were retired at around the same time, leaving the fleet with a capability gap just in time to make protecting the “through-deck cruisers” that definitely weren’t carriers, and the rest of the Task Force ships that much more difficult during the Falklands War. The Kit Until last year, modellers in 1:48 had never been well-served with Gannet models, although for years the best choice was the Dynavector vacformed kit, with the Classic Airframes coming second, despite being at least partly injection moulded. Both required more modelling skill than your average injection-moulded kit, and both are long extinct, although I still have one of the Dynavector kits in my stash. This second boxing arrives in a large top-opening box that is filled with seven sprues in Airfix’s recent dark grey styrene, one of which is new to provide the COD.4 specific parts, plus a single sprue of clear parts, finishing off with a large decal sheet and the instruction booklet, which is printed in colour and has two separate A4 sheets of glossy white paper depicting the markings options and stencil locations. If you have seen the first boxing, or newly tooled 1:48 Buccaneer or Sea King, you will know exactly what to expect, which is a ton of detail, clever engineering, and multiple options that give you flexibility of completion of your model without the results looking toy-like. The surface detail is excellent, covering the skin with engraved panel lines and fine rivets, plus deeply recessed detail in the bomb bay, cockpit and landing gear areas, which are the focal points of any aircraft model that carries a pilot. The front page of the instruction booklet carries an emboldened note about nose-weight, as the Gannet was a tail-heavy aircraft in real life, a trait that also extends to the model. You are advised to add 12g to the purpose-made box under the cockpit floor, and a further 55g in the nose area, with a cut-off line shown on the instructions to avoid baulking the prop insert and intake fairings. That’s a lot of weight, so ensure you have plenty to hand, and weigh it accurately beforehand, as once you close the fuselage there will be little opportunity to add more. Remember that if you are planning on installing any aftermarket, the balance may change, and you may have to increase the amount of weight to compensate. Construction begins with the bomb bay for a change. The main length of the bay is moulded as a single well-detailed part, which is completed by adding the front and rear bulkheads, both of which have a gaggle of stencil decals applied to create some additional visual interest. The nose gear bay roof is fitted to the front, and a large H-shaped twin spar unit is laid over the exterior of the bay roof, adding a support on the aft faceted segment, then gluing the first nose weight box over the front of the bomb bay, inserting 12g of nose weight inside. It’s advisable to glue the nose weight in firmly to prevent rattling, and if you use lead shot, it’s possible some may escape if you invert the model, unless you add a lid to the box using styrene sheet. The cockpit floor is a long part that covers the entire length of the existing assembly, overhanging to the rear, and at this early stage only a circular decal is applied to the pilot’s side consoles. The model is flipped onto its back to add the tapered side walls to the nose gear bay, inserting a detailed rear wall flat against the front bomb bay bulkhead to give it some visual impact. Another 180° roll is needed to begin adding detail into the cockpit, starting with a three-part assembly that includes decals for the 2nd crewman’s instrument panel, mounting over a raised block on the cockpit floor. The bulkhead behind the pilot is applied to the other side of the separator, with a curved part linking it to the instrument panel, adding another bulkhead with added seat backrest for crewman no.2, followed by the seat base with recessed pan to accommodate the operator’s parachute pack. The pilot’s seat is a single part, and a short control-column is fitted in front of this, creating his instrument panel and decals to depict the dials, which is attached to the side consoles in his cockpit. Another bulkhead is built with two equipment racks, and a bulkhead with two large equipment boxes mounted within it, behind which the rear seat is fitted, comprising two parts. The fuselage halves are prepared for use by removing a small piece of the aft cockpit coaming, adding cockpit side wall interiors at the front and rear of the compartment, painting the rest of the area in grey, and adding stencil and dial decals to the inserts to add more interest for the intrepid viewer, and a small window under the tail on the starboard side. The starboard fuselage half is then slid into position over the two spars of the cockpit assembly, and at this point the large 55g of nose weight can be added under the cockpit, but taking care not to let it creep forward and baulk completion of the nose. The port fuselage half is slid over the opposite ends of the spars, permitting closure of the fuselage and the hiding of seams in your preferred manner. Once the glue is dry and the seams dealt with, you can choose to depict the rear radome under the fuselage retracted for one decal option, or faired over after removal with a new part. The main gear bays are built up inside the lower halves of the wings, and are just one of three rectangular(ish) spacers that set the distance between the upper and lower skins. The innermost spacer has bay wall detail inserts applied all round its inner face, with a small fire extinguisher installed in the starboard bay, and remembering to test-fit the inner bay doors so that they fit easily into their slots, saving anguish later if you find that they don’t fit. Someone has clearly test-built this model, which is good to know. The ailerons are made from upper and lower halves, as are the inner flap sections, the outer flap panel are single parts that have two fairing bumps inserted into recesses, putting them all to one side until near completion of the wings. You have the choice of building the Gannet with its wings folded for storage below decks, or deployed for flight, with different parts included for both options so that there is no fiddling with wing sections to align them in relation to each other and the ground. To build her ready for flight, the full wing halves are prepared by drilling out flashed-over holes in the lower surface for rockets and pylons if you are using them, then gluing the three internal supports into position on their raised brackets, the innermost one being the gear bay with inserts applied earlier. The roof of the bay is detailed with moulded-in ribbing, and should be painted at the same time as the rest of the gear bay, closing the wing halves and installing them over the spars once the glue is fully cured. The ailerons are then inserted into their cut-outs at the ends of the wings, and a clear wingtip insert is slotted in, masking the tip lights off so that they remain clear after painting. Building your Gannet with its wings folded is a necessarily more complex affair that will result in a more impressive model that will take up less space in your cabinet, but will take more care when building and painting, so it’s a two-edged sword. The only way to get around this thorny decision is to buy two, which is a tempting prospect. The fixed inner wing portion is built first, fitting the already assembled bay inserts into the lower inner wing panel, adding the fold mechanism, then applying the upper wing surface, and installing the flaps into their tracks in the retracted position. Both the inner wing sections are then slipped over the twin spars and glued into position. The central section has holes drilled out for rockets if you plan to use them, adding the inner support box and a two-part fold mechanism to the outboard edge, the outer flap panel (retracted again), and a rib is inserted into the inner edge. The wingtip panel is joined around its support box, adding a clear wingtip to the outer end, a landing light in the leading edge, and fitting a rib into the inboard end. They aren’t added to the model at this stage however, instead putting them to one side while you build the rudder from two halves, the two elevators from two halves each, and the flying surfaces, again from two halves. The fins are inserted into slots in the tail, gluing their flying surfaces to the rear, and adding the little finlets into sockets above and below the elevators, taking care to align them with each other. The version with extended wings can be modelled with the flaps deployed for landing and take-off or flush for normal flight. To pose them flush, they are glued into position without further parts needed, while the deployed option adds two actuator arms inserted into notches in their thick leading edges, which have extra plastic moulded into the forward mounting point, which should be removed after painting and before installation, presumably to aid handling during this process. They are glued into position in their tracks, taking care to have everything painted and weathered to your liking before you do. In case you were wondering, the installation of the mid and outer panels for the wings-folded option are left until much later in the build. The nose of this turboprop is a particular curved shape with a twin bulge in the lower half, and the exterior is moulded as a single part, into which you slide a long prop shaft without glue, instead gluing a washer over it, taking care not to flood the area with too much that may seize the prop shaft inside. A pair of conjoined cylindrical inserts are glued behind the intakes that add extra strakes and some depth to the intake, with a scrap diagram showing how it looks from behind. The completed insert is then offered up to the front of the fuselage, which is when you will find whether you left enough space between the nose weight and the fuselage front. If you can’t fit the part as it stands due to the nose weight taking up too much room, my callipers suggest that there is around 2mm of styrene at the base of the trunking part that could be removed if necessary. Sand and check as you go however, or be prepared to paint the front of the nose weight black if you accidentally break through. This short diversion leads us to the landing gear, which can be portrayed retracted or deployed for landing by using certain parts and omitting others. As you’d imagine, the retracted gear option is the easiest, first building up the main wheels from two halves plus two hubs, which will be used for both options. They are attached to their respective retracted legs that creates enough of the structure to pass inspection once the outer bay doors are installed over them. The nose gear bay is a single part that covers the whole bay. To deploy the gear, the outer main bay doors are slotted into the grooves that you test-fitted earlier, then the gear legs are built from three parts and inserted into the bays, plugging into sockets moulded into the roof, ensuring that the scissor-links point aft. The nose gear bay is prepared by installing a retraction base in the roof, then building up the leg from three parts, plugging it into the bay roof, and fitting the retraction jack frame at the ends of the base and to the forward face of the strut, which requires the jack to be slipped over the leg, and must be done before installing both two-part wheels on the axles, adding another part to the axle between the wheels. The bay doors are split into two sections per side, and they open at the centreline, hinging down at slightly different angles, the large doors supported by retraction jacks near their forward edge. I do love a contra-prop, and have a few in my cabinet already. Each prop has four blades moulded into a central boss, which mounts on a plate behind it. The rear prop has a tapered spinner portion fixed to the front, while the front prop has the tip of the spinner glued to it. The rear prop is pushed over the axle without glue, fixing the front prop in position with a little glue on the tip of the axle. If you used too much glue when securing the prop shaft earlier, the front blades won’t be movable once glued in place, so take care. The next choice is to have the bomb bay open or closed, with a choice of two sensor fits for both options, requiring holes to be drilled out from inside, adding towel-rail and blade antennae, plus a circular sensor near the front of the bay doors. Again, the closed option is simpler, requiring one part with an engraved join line moulded into it and the sensors, sealing the bay detail away forever. The open doors are made from two layers for each side, adding the sensors as above, then installing the bays, using four actuator jacks in each corner to secure it at the right angle, scrap diagrams reminding you of the stencil decals on the bulkheads at the same time. It's now time for some small parts, starting with a pair of two-part empty pylons under the wing outboard of the main gear bays, followed by a sensor that needs two holes drilled in the spine for two decal options, one each side of the centre, which sounds a terrifying prospect until you see the jig that is included. This curved jig has a pair of lumps on the inside, which should marry up with two depressions behind the second cockpit, and the two holes in the rear should allow you to drill two 0.8mm holes accurately to fit the antenna into position. An antenna glues to the fixed portion of the canopy between the front two cockpits, which is next to be glued into place. Most of this will be painted, leaving just two small windows on each side of the part. The windscreen gives you options too, supplying parts with and without a moulded-in wiper blade, catering to those that purchase aftermarket sets that include replacement wipers, saving you some time removing the moulded-in blades and polishing the screen back to clarity. That’s very thoughtful of them, and an option we’re starting to see more frequently in new Airfix kits. There are a trio of pilots in the hands-on-knees pose if you wanted to fill the cockpits, and they’re all moulded identically with bone dome helmets and oxygen masks, unlike the guy pictured in the instructions, who has a WWII era leather helmet. There are three individual canopies for each crew member, and they can all be posed open or closed, as you prefer. Just when you think it’s safe to put the glue away, you need to flip the model onto its back to install the retracted radome for one decal option. While the model is inverted, the arrestor hook is inserted into the step under the tail, fitting a small T-antenna under the port elevator, a small light under the starboard wingtip, and a pitot under the port wing. Lugs are attached under the wing roots to hold the looped ends of the catapult strop, and the tubular exhausts with angled tips are inserted into their fairings on the fuselage sides, the longer edge closest to the fuselage. A pair of two-part cargo pods are made to be mounted under the wings on the pylons made earlier, with two small antennae under the wing tips, and a tiny light under the belly behind the stores bay. You were probably thinking we’d forgotten the folded wing panels, but they’re on the very last pages of the instructions, starting by adding long pivots to the fixed inner panels to mount the centre panel, helped by a scrap diagram. The outer panel is attached to the centre panel via a hook-shaped pivot, adding the ailerons to the rear edge, so that the wing forms a Z-shape when viewed from the front. A rod is used to prop the wings when folded, fitting into the inner rib of the centre section, and a hole under the wingtip, as shown by a silhouette drawing in the top corner of the step. The port centre section has the pitot probe inserted, adding the same short antennae to the outer wing panels as the straight-winged option. Markings There are three decal options included in this COD.4 boxing, two wearing a fetching dark blue scheme over all surfaces, and one in the period’s Royal Navy scheme of Extra Dark Sea Grey over what Airfix calls Beige Green, or Sky if you prefer. From the box you can build one of the following: Fairey Gannet COD.4, 849 Naval Air Squadron, HMS Hermes, 1969.(A) Fairey Gannet COD.4, 849 Naval Air Squadron, B Flight, HMS Ark Royal, 1970. (B) Fairey Gannet AS.4/COD.4, Flag Officer Aircraft Carriers (F.O.A.C.), RAF Changhi, 1965. (C) Decals are by Cartograf, which is a guarantee of good registration, sharpness and colour density, with a thin gloss carrier film cut close to the printed areas. Conclusion It’s a fine model of a superbly ugly aircraft that was also very cool (IMHO), and performed a thankless task of vigilance through the deepest period of the Cold War, then was relegated to the task of postman. It’s well worth picking one up in addition to the more warlike AS.4, and for that matter, any of the boxes that might follow. Show the Gannet more love! Very highly recommended. Review sample courtesy of
-
Very nice. Airfix have been very helpful in providing both the rebarrelled 7.62mm Bren (straight magazine) and the original .303 (curved magazine).
-
Messerschmitt Bf.109E-3 (81791) 1:35 HobbyBoss via Creative Models Ltd With almost 34,000 examples manufactured over a 10-year period, the Messerschmitt Bf.109 is one of the most widely produced aircraft in history and it saw active service in every theatre in which German armed forces were engaged. Initially designed in the mid-1930s, the Bf.109 shared a similar general arrangement with the Spitfire, employing monocoque construction and a V12 engine, albeit an inverted V with fuel injection rather than the carburettor used in the Spitfire. Initially designed as a lightweight interceptor, like many German types during WWII, the Bf.109 evolved beyond its original brief into a bomber escort, fighter bomber, night fighter, ground-attack and reconnaissance platform. The E variant, or Emil as it was more affectionately known was the first major revision of the original design, including an uprated engine and the attendant strengthening of the airframe that was required. It first saw service in the Legion Condor fighting in the Spanish civil war on the side of Nationalist forces of Military Dictator Franco, and then in the Battle of Britain where it came up against its nemeses the Supermarine Spitfire and Hawker Hurricane during the critical fight for the survival of the RAF and Britain, which was key to halting Operation Seelöwe, the invasion of Britain by the Nazis. Like the Spitfire it fought against, it was improved incrementally through different marks, the Emil was similarly tweaked to keep pace, with later variants having additional long-range tankage, plus structural improvements and a simpler squared-off canopy with clear frontal armour, but apart from various field modifications and a few low-volume sub-variants, it had reached the end of its tenure, and was phased out in favour of the Friedrich and later the Gustav. The Kit This is a reboxing of a 2015 tooling by HobbyBoss that was originally marketed as a Bf.109F-4 Easy Assembly Authentic Kit, which is a reasonable explanation of its intent. It has been reboxed several times with new parts in the interim, and is now available again as an E-3 in a new box with a painting of one of the decal options flying in formation with colleagues over broken cloud. Inside the box are two large sprues and two small single-part sprues in grey styrene, a long clear sprue, decal sheet, a sheet of pre-cut paper masks (not pictured), the instruction booklet in greyscale, and a colour painting guide, printed on both sides of a glossy sheet of paper that is tucked inside the instructions. Although this is a relatively straightforward kit that shouldn’t tax anyone including the novice, the level of detail is good, extending to the cockpit, gear bays, and even the radiators under the wings and nose. Construction begins with the cockpit, predictably, based upon a flat floor plate that receives the rear bulkhead and seat frame first, followed by rudder pedals that are moulded to a peculiar carrier, seat adjuster, twin-layer trimming wheel, control column, and a small equipment box that is applied to the floor. The two fuselage halves are prepared next, with plenty of detail moulded into the interior, both in the cockpit and the aft fuselage areas, although little will be seen of the latter. The instrument panel consists of two parts, dial decals and clear gunsight part, gluing it to the starboard fuselage along with a representation of the oxygen system, adding a top bulkhead behind the pilot’s seat, and a pair of exhaust stacks through slots in the nose from within, one on each side. The tail gear leg has a separate side to its yoke to trap the small wheel in place, clipping it into position in the rear under the tail, after which the fuselage halves can be closed, fitting the engine cowling to the nose after the fuselage glue has cured. Inverting the fuselage allows fitting of the chin intake pathway where the oil cooler is located, starting with an insert to which the radiator core is glued, applying the actuator underneath beforehand and adding the three-part cowling after detail painting. The supercharger intake horn is fixed to a recess in the port nose, and a pair of rudder actuators are applied to both sides of the tail later in the build. The lower wing panel is full-span, and has a pair of guides for two radiators behind the cut-outs for the main gear wells, adding an L-shaped tank in the centreline further back before the upper wings are laid over the top, having bay roof detail moulded-in. The trailing edges of the wings are thickened up by adding an insert to them on the inner section, including the flap portions behind the radiator outlets. The completed wings are then glued to the fuselage underneath, preparing the elevators by adding their support struts first, then gluing them into position either side of the tail. You can pose the canopy open or closed, using three parts for open, and a single part for closed, adding head armour and a handle inside, although this is only documented for the closed canopy, but it’s not much of a leap to fit the same parts to the open option, and the arrangement of the open canopy is not shown on the instructions either, so check your references to attain the correct angle. The die-cut masks are applied to the outside of the canopy according to a diagram nearby, which applies to both open and closed options. The three-bladed prop is moulded as a single part that is trapped between the spinner and back-plate before it is fixed to the open nose, with no option of leaving it spinning. The narrow-track main gear consists of the legs, a captive bay door, and the skinny tyre with radial tread and integral hub, plugging them into sockets in the inner end of the bays, mounting a pitot probe under the port wing, and horn balances on the ailerons on the underside of the wings. The last assembly is a two-part fuel tank, which is fixed to a platform with two C-shaped supports, gluing the completed assembly to the belly between the gear legs, which is probably best done following main painting. Markings There are two decal options provided on the sheet, and in traditional HobbyBoss style, no information is supplied for them, but it wouldn’t be too difficult to find the relevant information if you are so minded. Both options have mottle or cross-hatching camouflage over an early war splinter scheme, which could be a little taxing for a novice, but is a common feature of German WWII fighters, so is worth the effort to master if you intend to build more of them. From the box you can build one of the following: HobbyBoss decals are usually fit for purpose, but can be a little lacking in some respects. This sheet is printed in good registration with adequate sharpness and colour density, including the yellow decals. They usually go down well with the use of a little decal solution and some mild patience. Conclusion It’s a straight forward kit of this important WWII German fighter, which offers a surprising amount of detail for the skill level, but perhaps some simpler decal options might have been better suited to the kit’s original intent as an easy model for a novice. That said, there’s nothing quite like setting yourself the goal of learning to paint mottle to push your skill set further. Highly recommended. Review sample courtesy of
-
Ferret Scout Car Mk.1 (A1386) 1:35 Airfix Intended as a successor to the Daimler Dingo, the Ferret was again produced by Daimler following WWII, commencing deliveries in 1950 as the Mk.1, a 4 x 4 wheeled reconnaissance AFV that was powered by a Rolls Royce B60 6-cylinder 4.3 litre petrol that output up to 130hp at peak range. It was larger and more powerful than its predecessor, but used the same suspension layout that gave it a low profile that is advantageous when being targeted by an enemy. The suspension also moderated torque that gave it excellent traction, and prevented the vehicle from bogging down under most circumstances, which coupled with large, run-flat tyres made it a reliable ride unless it encountered larger calibre munitions. The initial design was open-topped, and carried only crew-served machine guns, leaving the vehicle open to plunging fire, shrapnel and grenades, not to mention rain and other precipitation. The Mk.2 added a turret to mount the 7.62mm (.30cal Browning) machine gun, keeping out all the above-mentioned nasties, and protecting the gunner from injury from anything but larger rounds. Almost 4,500 Ferrets were made of all variants before it was replaced, the Mk.2 being the one with most sub-variants, to be followed by the improved Mk.3 that benefitted from a larger hull and thicker armour, and the Mk.4 that mounted the turret from a Saracen armoured car. The mark 5 was adapted with a shallow turret to mount Swingfire anti-tank missiles that were wire-guided. The specification of the ferret varied so much between individual vehicles that it is sometime difficult to tell which variant you are looking at, thanks to interchanging of parts, field modifications, and the availability of spares. A later upgrade was the use of the Austin Princess 4-Litre R engine, which gave a 40% increase in horse-power, and was possible to retro-fit to earlier vehicles, adding yet more confusion to identification. Even though it has left service of the British Army and other original users, of which there were many, there are still some Ferrets in service in many countries, mostly in Africa and the Middle East, where the open-topped variants would at least let out a little accumulated heat. The Kit This is another boxing of a brand-new tooling from Airfix that arrived with only a short preamble in 2023. Modellers of a certain age and nationality will possibly have some fond memories of the type, and as has often been the case with British armour, we haven’t been best served with injection-moulded kits over the years. The kit arrives in a narrow red-themed box with a top-opening lid, and inside are five sprues of varying sizes in a subdued olive-green styrene that’s not too garish, and shouldn’t be hard to cover with paint. There is also a small sprue of clear parts, a decal sheet, and instructions printed in colour with profiles of the decal options on the rear pages. Detail is good, and includes a basic crew compartment with radio gear that will be visible through the roof or any open hatches and should be sufficiently detailed if you include a crew to hide any blank spots. Construction begins with a decision whether to build a Mk.1/1 or 1/2, with a choice of superstructure fitments, ranging from machine gun mounts or a tonneau cover over the open compartment for the 1/1, to a casemate-like armoured superstructure with a choice of searchlight or machine gun for the upgraded 1/2, including guidance on which instruction steps to follow or avoid. The first physical work involves the interior, starting with the floor, onto which a pair of parallel trunks are glued, with the stepped firewall behind, that accepts the radio gear on a double-layered mount to support the two individual boxes, or one combined box, depending on which decal option you are building. A flat seat fixes in front of the radio gear, and another larger one slots over a raised box in the centre of the crew area, adding a seat back that locates on a pair of holes in the rear. After a little painting of the interior parts, the two hull sides are joined to the floor, held at the correct angle by the lower glacis plate that is moulded into the floor. Two hatches are built up with interior faces added that include twin hinges so that they can be fixed into the rear diagonal panel that looks out over the engine deck, a panel that is fitted directly after and has a pair of large rectangular inspection hatches cut out of its angled surface, although there is no engine provided inside. The rear bulkhead is added to the back, then the diagonal crew-compartment forward cheek panels are made with two-layer hatches to be fitted to the front of the vehicle, leaving a central gap for the driver’s hatch and upper glacis plate, which also has a two-layer hatch, then the steering wheel is made with separate central boss, and inserts on a nub below the hatch before it is glued to the front of the vehicle. The hatches to the engine bays have bevelled edges and act as oversized mushroom vents to allow hot air from the motor to escape, dropping over the raised edges of the cut-outs. The suspension is next, starting with pairs of swing-arm mounts in each wheel arch, then adding a two-part drive-shaft to each one, which is linked to the coil springs by an upper control arm for each corner. A bracket is glued to the side of the arch to mount a tie-rod, then the lower control arm is joined to the underside, allowing fitment of the fenders that have separate stowage boxes located on raised guides on the undersides. The fenders on the left side are built as separate items to accommodate the spare wheel, while the right fender is full length, and has a large segmented stowage box, gluing onto the vehicle sides with the help of raised guides. A series of eight loops are added to the undersides along the edges of the undersides, at the front, sides and rear of the hull, after which the wheels can be made and slipped onto their axles. Each wheel is made from two halves, plus a central hub cap, while the spare tyre on the left side has a thicker centre cap, fitting over a circular peg on the side. The glacis is then dotted with lights, pioneer tools, a fire extinguisher, and smoke grenade launchers on the arches at the front, with a choice of capped or uncapped barrels. The headlights and wing mirrors are located lower on the arches, and four lifting eyes are attached to the arches, one per wheel station, with jerry cans fitted over the rear left arch, taking up some otherwise free space. The right rear arch has the exhaust made up with a fish-tail pipe, adding a protective cover and mesh panel holding it level on the sloping rear of the arch. A document box is mounted on one of the diagonal panels on the rear of the crew compartment, then there is a choice of aerials base and insulator styles that fit on the front and rear of the compartment, differing on which decal option you have chosen. The official installation has been shown, but the instruction advises you to check your references, as it was sometimes a case of taking what’s available or easy to install. Before the superstructure can be started, the remaining parts of the hull need to be attached, starting with a three-faceted unditching/sand tray that is covered in lightening holes, and fits to the front of the vehicle on a pair of separate twist mounts for one of the decal options. A choice of two styles of front and rear light cluster are applied to the fenders, and that too depends on your decal choice. There are two styles of superstructure, starting with the faceted casemate, which has a base to which the shallow walls are fitted to increase protection for the crew, especially the gunner. A couple of clear vision blocks are inserted at angles to each other at the front, creating a hatch support for one decal option from four parts, then adding the hatch to the top in either the closed position from a single part, or using two parts to depict it folded back to the rear. A searchlight with clear lens and handle is made, to be fitted later with a Bren gun for one decal option, followed by the alternative flush cover, which starts with a different surround, and needs a hole drilled into it for two of the decal options so that a Browning machine gun can be mounted on a three-part mount with separate two-part ammo box. The same gun can be fixed to the rear by drilling a different hole to accept a two-part mount for the gun and ammo can. The Bren gun can also be fitted to the flush superstructure option, using a two-part pintle-mount, plus an optional ammo can that fits instead of the lower breech plug, which should be cut away before the box is installed underneath. Yet another option for the Bren allows the pintle-mount to be located on the left front of the flush surround, with the last option being a fabric tonneau cover to protect the crew from inclement weather ingress. A further page of the booklet shows how the hatches should look if they are all posed open to cope with a hot day, and includes three additional diagrams that give painting instructions for the various machine gun options. Markings There are three options on the small decal sheet, with British Army vehicles in a variation of colour and location that should suit many of us, and not just standard Bronze Green. From the box you can build one of the following: Ferret Mk.1/1, C Squadron, Ludgershall, British Army, 1980s Ferret Mk.1/2, 7th Armoured Brigade, Operation Granby, Saudi Arabia/Kuwait, British Army, 1991 Ferret Mk.1/1, Queens Royal Irish Hussars, RAC Centre Bovington, British Army, 1959 Decals are by Cartograf, which is a guarantee of good registration, sharpness and colour density, with a thin gloss carrier film cut close to the printed areas. Conclusion The Ferret saw extensive use from outset in the British Armed Forces, including the RAF Regiment for what is now called Force Protection duties. It’s a good-looking model of the type, and if you’re looking to depict a specific example, there are plenty of options in this boxing for the earliest variants. Highly recommended. Review sample courtesy of
- Earlier
-
Russian MiG-35 Fulcrum F (81787) 1:48 Hobby Boss via Creative Models Ltd The Mikoyan MiG-35 is based upon the MiG-29 series of aircraft. Known in the West by its NATO reporting name 'Fulcrum' it is an air superiority fighter designed and built in the Soviet Union in the 1980s, carrying on under the Russian Federation after the dissolution of the USSR. As with other comparable aircraft of that period, such as the Su-27, F-16, F-15 and Panavia Tornado, it was produced in significant numbers and is still in widespread service with air arms around the world. The MiG-29 was developed as a lighter, cheaper aircraft compared to the Sukhoi Su-27 Flanker, an aircraft with which it is broadly comparable in terms of layout and design, if not size and weight. As with the Su-27, the engines are spaced widely apart, with the area between them being used to generate lift and improve manoeuvrability. The MiG-29 is powered by two Klimov RD-33 Turbofans, each of which generates over 18,000lb of thrust in reheat. As with many Soviet types, the aircraft is well suited for use on rough airstrips, particularly as the engine air intakes can be closed completely when on the ground, allowing air to be drawn through louvres on the upper surfaces of the wing roots avoiding FOD. Armament consists of a combination of Vympel R-27 medium-range air-to-air missiles and R-73 or R-60 short-range air-to-air missiles, as well as an integral GSh-30-1 30mm cannon in the port Leading Edge Root Extension (LERX). The aircraft can be used in a range of roles and can carry bombs and rockets in addition to more technologically advanced missiles. The MiG-29 has been widely exported and is still in widespread use with Russian, former Soviet and aligned nations, including several NATO member states such as Poland. Based upon the MiG-29KR, the MiG-35 was developed to display capabilities in 2017 as an all-weather carrier-capable multi-role fighter that incorporates modern technologies that make it comparable in terms of generational capabilities to the Eurofighter, Saab Gripen and Dassault Rafale. Due to its enhanced avionics, it has more autonomy than many Soviet-era and subsequent Russian fighters, the single seater designated as the MiG-35S, and the two-seater the UB. The first production airframes arrived in 2019, and an export option was developed to attract foreign buyers with a revised tail, more powerful engines and other improvements. Only a small order was forthcoming from Russia, which was further reduced to twenty-four airframes, entering service in time to take part in the unlawful invasion of Ukraine, where it saw limited active service notably in 2025, defending against Ukrainian drones, according to the Russian MoD. So far there have been no successful bids to supply foreign operators with airframes, but a carrier specific variant is being worked upon. The Kit This is a new boxing from HobbyBoss based upon their earlier MiG-29K tooling of 2024, but with new parts to depict this upgraded airframe. The kit arrives in a sturdy top-opening box with a painting of the subject on the front, and profiles of the decal options on one side. Inside the box is a cardboard divider to reduce movement of parts during shipping and storage, and most sprues are individually bagged, with delicate parts pre-wrapped in thin foam sheets, secured by tape. There are nine sprues, two fuselage halves and four exhaust nozzles in grey styrene, a long clear sprue in a bubble-wrap envelope, a fret of Photo-Etch (PE) brass backed by a piece of card, decal sheet, instruction booklet in black and white, plus a folded sheet of glossy A3 printed in colour with one decal option per side, and another A4 sheet for the painting and decaling of the weapons that are included in the box. Detail is good, with intelligent use of slide-moulding to create additional features without increasing the part count, and a choice of exhaust nozzles in closed or open positions, with excellent detail moulded into both layers. Construction begins with the K-36D-3.5 ejection seat, which is made from thirteen styrene parts, plus four seatbelts and ejection actuator handle in PE. This is slotted into the front compartment of the cockpit tub, adding the instrument panel and control column, and applying six decals to the panel and side consoles. Additional parts are fitted along with the cockpit sidewalls in both compartments, fixing a rudder bar with two PE foot straps in the front of the cockpit, remembering that most of the rear tub will be covered by an insert later in the build, so don’t waste any time painting and weathering that area. The nose gear bay must be built next, as it will be trapped between the fuselage halves, and this is built up from four parts, with the nose gear leg made from a single strut with integral supports near the top, fitting the oleo and swing-arm to the bottom, plus a clear landing light and other small parts before you attach wheels on either end of the cross-axle, making them from two halves each. The cover for the rear cockpit is raised, and has a grille on the front, plus two small boxes added to the top surface, then the fuselage can be prepared, drilling out several flashed-over holes under the wings, and one on the roof of the space between the engines. The nose gear bay is inserted into its cut-out, adding a pair of extension cups to the main gear bays behind the moulded-in sections, then gluing the cockpit tub into the upper fuselage along with an insert in the nose for a refuelling probe. The two fuselage halves are brought together, fixing the rear cockpit cover and a small spine insert, then building the HUD from a sloped styrene core with clear lens, PE supports for the two clear part, and applying a choice of two decals to the lens before it is fitted in a recess in the cockpit coaming. Soviet/Russian fighters tend to have built-in FOD guards to their intakes, which in this case are supplied as large mesh panels that fit into the front of the inner engine intake trunks, that have a cylindrical profile and are blocked at the inner end by an insert that has the front of the engine moulded-into it, inserting the completed assembly into the engine nacelles, painting the inner surface grey, then adding the roof of the trunks to the sloped forward edge. This is done twice of course, and the two finished assemblies are inserted into the underside of the fuselage after adding extra wall detail to the main gear bays that nestle into the outer sides of each nacelle, and a new sensor fairing on the outer sides. In preparation, two short cowling sections are fitted to the upper fuselage where the exhausts will sit later. The twin fins are each made from two halves plus rudder, but they are equipped with different sensor fits in the trailing edge of the tip, which is further accentuated by the probe and sensors added to the rear, whilst both share the same T-shaped PE aerial near the change of angle of the leading edges of the fins. There is a large tapered cylindrical fuel tank between the engine nacelles, and this is built from two halves that are capped at either end, the nose cone made from two halves to include the forward pylon mount. This and the fins are put to one side while other assemblies are built for the underside of the model. This begins with the landing gear, the main gear made from a thick strut with trailing retraction jack, small captive bay door, and a two-part scissor link, which receives a two-part wheel with circumferential tread moulded-in, although you’ll have to take a sanding stick to them if you wish to depict the weight of the airframe on the tyres. The exhausts have a short two-part trunk as their starting point, with a double layer depicting the rear of the engines and the afterburner rings, then you have a choice of posing the exhaust petals opened or closed, using two different sets of parts to portray the inner and outer layers of the nozzles. The closed nozzles have their inner part inserted from within, while the opened nozzles have their inner layer slid in from the rear due to the angles of the respective parts, with the resulting detail worth the effort. Both sets of nozzles are glued to the rear of the trunking, and are slipped inside the rear of the fuselage, adding the main gear legs and a bay door actuator to each side, then fitting the chaff & flare boxes on the fairings each side of the exhaust trunking, a pylon under each of the inner wing panels moulded into the fuselage, gluing on leading edges slats, and finally the twin fins that are attached to the fairings to the sides of the engines on pegs for strength. Doors are added to the gear bays, flaperons and their actuator fairings to the rear of the wings, a gaggle of antennae under the nose, and mounting the large central tank between the engine nacelles. The next step is to fit the jointing parts to the ends of the inner wing panels, fixing them flat, as this boxing doesn’t have operational folding wings. This involves omitting the hinge parts, laying the hinge cover panel flat to the wing, and fitting the outer wing panel at the same angle as the inner. The new outer wing panels are built from two halves, adding slats at the front and ailerons to the rear. It’s best to test fit this in situ to obtain the correct attitude for the various parts. More probes and antenna are clustered around the nose along with the refuelling probe with its cover, adding a clear lens to the sensor under the windscreen, which is also fitted at this stage. An actuator for the main canopy is installed behind it, and further aft two jacks for the air-brake are glued in position, which might be best done whilst fitting the panel to ensure they all line up. The canopy has a separate styrene lower frame with a cross-brace, four PE latches on each side, and a pair of curved rear-view mirrors in the front frame, fitting to the rear of the cockpit opening on the afore-mentioned jack. The elevators/elevons are single parts that fit into plugs on the side of the fuselage, and a gun fairing is fixed in the leading edge of the port LERX with another pair of PE antennae, one on each side of the new nose cone, which has a separate pitot probe mounted at the tip. Like many Hobby Boss kits, this boxing has a plethora of weapons to suspend from the various pylons under the fuselage and wings. The following are included: 2 x R-77 (AA-12 Adder) BVR A2A Missile 2 x R-73M (AA-11 Archer) Short Range A2A Missile 2 x MSP-418K active jammer pod 2 x PTB-1150 1,150L Fuel Tanks 2 x KH -29T (AS-14 Kedge-B) TV guided A2S Missile 2 x KH-31P (AS-17 Krypton) Anti-Radiation Cruise Missile 2 x KAB-500Kr TV-guided bomb 2 x KH-35 (AS-20 Kayak) Anti-Ship Cruise Missile The various missiles are moulded as two halves, have separate fins fore and aft, and clear seeker heads where appropriate, adding adapter rails as necessary. The KH-35s however have their aft section removed before they are built, fixing folded fins to the sides of the missile, with a scrap diagram showing how they should appear once completed. A diagram at the end of the instruction booklet shows where the various munitions and pods can be mounted, but check your references for real-world load-outs if you prefer. Markings As is common with HobbyBoss, Trumpeter and I Love Kit, there is very little information given regarding the decal choices, other than the aircraft codes. Both choices wear the same two-colour blue scheme, and from the box you can depict one of the following: The various weapons, tanks and pods have a great many stencils that can be applied, using a separate colour page to guide you, all of which adds realism to your model. Decals aren’t always Hobby Boss’s strong point, but these are of good quality with registration, sharpness and colour density that are suitable for the task at hand. They usually go down well, and there are plenty of stencils for the airframe and weapons to add detail to your model, including more detailed instrument panel decals than many other companies provide. Conclusion The MiG-35 is a recent part of the expansive and sometimes confusingly arranged MiG-29 family, and it seems a competent representation of what is a niche modern variant that has so far only been produced in small numbers, including lots of detail and a large quantity of weapons for you to get to grips with. Highly recommended. Review sample courtesy of
-
Speaking of the single drum-fed rear gun. The kit does come with a Vickers K gun. If you want to improve the detail in this area be aware that the upcoming No. 648112 from EDUARD gives you a windmill style spare rack plus ammo drums for a Lewis gun while Quickboost in comparision gives you the same rack but with the correct drums for the Vickers K gun in their new set QB49 162: https://www.aires.cz/en/product/westland-lysander-mk-i-iii-drum-magazines/0-4637/#lightbox/0/ Both offerings nicely fit the recently released Lewis Mk. III and Vickers K resin guns from Quinta Studio, but GasPatch and other companies offer both types, too. These two pictures shows a Vickers K guns mounted though I don't know which was more common or if the Lewis gun was used at all in the Lysander: https://www.worldwarphotos.info/gallery/uk/raf/lysander/westland-lysander-r1999/ https://www.worldwarphotos.info/gallery/uk/raf/lysander/225sqn-2/
-
Supermarine Spitfire Mk.Ia (A05126B) 1:48 Airfix The Spitfire is perhaps one of the best known and well-loved aircraft in Britain, and deservedly so for its work in the Battle of Britain alongside the doughty Hurricane. It thrived in its point-defence role, and shone during its finest hour, then through many upgraded versions and types until the end of WWII and beyond. The Mk.I was predictably the first in-service type, carrying eight wing-mounted .303 Browning machine guns, and by the time hostilities commenced in 1939 many of them were using revised blown canopies that gave the pilot a better field of view with less likelihood of smacking his head against the glazing. Fairly soon it was understood that the Brownings didn’t have enough destructive power, and the Ministry asked for a cannon wing to be developed, with those airframes being referred to as Mk.Ibs, and the original machine gun armed airframes retrospectively designated Mk.Ia to prevent confusion. As the early cannon installations were prone to jamming, sometimes it would have been better to have the more reliable rifle-calibre bullets than 20mm rounds you couldn't fire. The Mk.I was superseded by the Mk.II, Mk.III, and then the Mk.V due to the introduction of the Fw.190 by the Germans that gave the British Spitfire pilots a nasty shock when they first encountered it. The Mk.V gave them the extra horsepower to cope with these pugnacious new Nazi fighters, and so the tactical leapfrog continued to the end of the war with the Mk.22/24 being the last mark of the Spitfire with cut-down fuselage, bubble canopy and the monstrous power of the Griffon engine at the front, the engine shared with the Seafire Mk.45 with a contra-prop. The Kit This is a reboxing of Airfix’s Spitfire Mk.I that has been given new decals and box art to depict it as a choice from a trio of Mk.Is and Mk.Ia. It arrives in a standard Airfix red-themed top-opening box, with five sprues of grey styrene inside, a clear sprue, decal sheet and the spot-colour instructions that have a colour painting guides on the rear page and on a separate sheet of glossy white paper. Detail is good, offering a well-appointed cockpit, moulded-in details on the side walls and in the gear bays, plus restrained engraved panel lines, rivets and fasteners. Construction begins with the cockpit interior, which consists of two inner skins that are decorated with the usual items we all know and recognise instantly. The pilot's seat is made from an L-shaped panel with separate sides, which can either be mounted on an armour panel or without one, with both having an adjustment lever on the right side. The frame behind the pilot has moulded-in lightening holes that you can either fill with wash or drill out at your whim, then add the seat frame and optional head-armour, finally fitting the seat to the frame on its four corners. The rudder pedal assembly goes through a section of the wing spar and has separate pedals that you should leave off if you are intending to fit the pilot, and the control column with separate top is planted in the middle of the sub-assembly. The instrument panel is glued to the next frame forward and has a nice decal with finely printed dials and an outline to help locate it accurately on the panel. A little decal solution should help that to settle down into the recesses nicely. The compass attaches to the rear of the panel, and is then inserted into the port cockpit side along with the rudder pedal assembly and a lever, allowing the two inner halves to be joined and a front firewall bulkhead to be fitted to close in the foot well. The seat assembly and next frame to the rear are slotted vertically into the grooves, and your optional pilot with his two separate arms can be placed in if you intend to use him. Before inserting the cockpit tub you need to paint the interior of the fuselage above the waistline, and remove a small part of the sill if you are posing the canopy closed. Then it slips inside the starboard fuselage half along with an oxygen bottle, and the port side is joined up together with a choice of two inserts in front of the canopy, which is where the fuel tank filler is found on both options. You can also cut out the access door on the left side of the fuselage, bearing in mind that you have a new door on the sprue so you can afford be brutal in removing the excess plastic. The wings are built next, and you have the option of opening up the gun bays in each wing by cutting out three panels on the top and one larger one on the underside, using the instructions as a guide on where to cut. The full-width lower wing has two circular bay walls fitted along with a section of the front spar, which holds the landing gear top sections, before the rear spar and front spar extensions are also attached to stiffen the wing. If you are fitting the guns they are built up as breeches and mounts, then slipped into recesses within the spar, with a pair of boxes straddling the lower cutout. If you’re not cutting out the gun bays, it’s just a case of popping on the upper wings and moving on to joining them to the fuselage after making sure you’ve fitted the light in the belly first. The elevator fins are slotted into the tail at 90° to the rudder fin, then the flying surfaces are added with any deflections that you might wish to portray. The ailerons are also separate and can be posed with the same caveats applied. Under the nose the chin-insert is glued in, noting the Dzuz fasteners there and on the side cowlings. Under the leading edge of the wing there is a two-part intake, then the square radiator bath with textured radiator panels and tubular oil-cooler are added to their recesses, with optional open or closed cooling flaps on the rear of the radiator. The tail wheel was fixed in the Mk.I, so slots into a hole in the tail, and you then have the choice of wheels up or down. In-flight a small portion of the wheels can still be seen, so Airfix have provided a slim wheel to put on the doors so that a realistic look is obtained. For the wheels down option, you have separate struts and doors, which slot into the top-sections already within the bay and have a pair of tyres with separate hubs added, making sure that the slightly flattened portion is facing the floor. A pair of scrap diagrams show the correct angles from the front and sides to help with positioning. A choice of straight or kinked pitot probe goes under the port wing, then the exhaust stubs are glued into the nose, and joined by a one-piece two- or triple-bladed prop, one- or two-part spinner, and three parts that permit the prop to spin if you don’t flood it with glue. You then have a choice of open or closed canopies, using a three-part assembly plus rear-view mirror for open, and two-part plus mirror for closed, remembering to install the clear reflector gunsight lens before gluing the windscreen in. The open canopy also allows the side door to be posed down, which as previously mentioned uses a new hatch part. There is a choice of wide or narrow aerial mast behind the cockpit with small teardrop light, and then if you’ve cut open the gun bays, there are four bay doors on each side that you can place loose on the wings or nearby. Markings There are a generous three decal options included in this boxing, including a French aircraft later captured by Axis forces, an Egyptian-based airframe, and one from Duxford before the war. Spitfire Mk.I, N°.19(F) Sqn., RAF Duxford, UK, August 1938 Spitfire Mk.Ia, N°.1 Middle East Training School, RAF El Ballah, Egypt, 1942 Spitfire Mk.Ia, Armée de L’Air, Orleans-Bricy Air Base, France, captured by Axis Forces, July 1940 Decals are by Cartograf, which is a guarantee of good registration, sharpness and colour density, with a thin gloss carrier film cut close to the printed areas. Conclusion A welcome reboxing of this staple from Airfix, and the variety of decal options are a welcome sight. Detail is good, and you’ll be left with several spare canopy parts for the parts bin. Highly recommended. Review sample courtesy of
-
Spherical Fighting Vehicle TsAMO Project Interior Kit (40003) 1:35 MiniArt via Creative Models Ltd This is a hypothetical design from an alternative reality where ball-tanks were practical, and although there are some quite realistic looking pictures out there on the web, this is a decidedly fictional or "what-if" design for a small infantry tank that might have been quite handy for approaching bunkers or installations with significant light weapons presence. It does appear to have some critical weaknesses though, such as the little outrigger wheels that if shot out, would result in a seriously dizzy crew at best, so it's probably for the best that it remains in the realms of the fantastic. The ball hull is static, with a wide track running around the circumference, propelled by the motor inside. There would be some serious torque transfer to the hull on acceleration or deceleration, but as this doesn't seem to adversely affect those big-wheel motorcycles, it wouldn't be a huge impediment, especially as the major part of the hull won't be moving. There is a crew of five, with the top-most crew member in each side operating the weapons stations, and the front-facing crew driving and crewing the forward machine gun. The final crewman operates another machine-gun that faces to the rear. Oddly, the main guns face sideways in ball-mounts, which would make shooting straight ahead difficult without cooperation from the driver, which could be tricky in such a confined, noisy environment. In reality, it would probably have been an abject failure, but it's an interesting concept nonetheless. The Kit The first boxing of this kit was MiniArt’s initial foray into What-if or ‘alternate timeline’ subject-matter, arriving on the shelves in 2018. A lot of effort had been put into making it appear believable however, including a complete interior, which gives the model more gravitas and believability than an empty hull otherwise would, and opens up the possibility for dioramas or vignettes. The kit arrives in standard sized MiniArt top-opening box, with a painting of a pair of ball-tanks passing a knocked-out German Panzer, and inside are 23 sprues in mid grey styrene of various sizes, a single sprue of clear parts, and a decal sheet. The instruction booklet is bound in a glossy colour cover, with greyscale drawings inside, and the decal options printed on the inside covers front and back. Detail is good for a relatively small kit, and I have to say that this is just the kind of silliness that appeals to me, as it is at least semi-believable, whilst coming firmly from the left-field. Construction begins with the engine, which is quite a complex assembly, and has a large friction roller at the rear to apply power to the track. The crew seats are built up next with foot steps to keep their feet out of the way where appropriate, and then they are attached to the main frame, which consists of two large hoops with cross-members to hold them apart, and retain its shape. Track rollers are fitted to the inside of the frames, with the engine, seats, a fuel tank on a support rack, and ancillary equipment all suspended from this. Ammo racks for the main guns are built up at the same time as the gun breeches and the machine guns, which also have spare ammo cans made up, and all these sub-assemblies are installed into the hull halves, which have cut-outs for the ball-mounts, a radiator grille (backed with a standard-looking radiator), and conformal tank that could contain fuel or ballast. In the centre of each side is a large crew hatch that is operated by a wheel, with curved hinges and interlock mechanism included. With the breeches and machine guns fitted from the inside, and the hatches put in their required positions, the halves are glued to the frames, and the hollow tipped gun barrels are added, plus a headlight with clear lens for night operations (ha!). The track is supplied in four parts with a smooth tread and perpendicular joins to simplify clean-up. The four parts glue around the open section of the hull, and of course the two "trainer-wheels" that stop it from tipping over. The last diagram shows the option of leaving one or both hatches open to expose the interior. Markings As it's all fiction, it's probably more a case of choosing one of the six schemes that appeals to you, and it should be pretty easy to find one you like. You can of course mix and match decals and schemes, as no-one (sane) is going to be complaining that it isn't accurate. From the box you can build one of the following: Unidentified Unit Red Army, Spring 1942 13th Motorcycle Regiment, Red Army, Summer 1942 29th Guards Tank Corps, Red Army, Summer 1943 Unidentified Unit, Red Army, Summer 1944 Captured 5. Panzer-Division, Wehrmacht, Kursk, Summer 1943 Captured unidentified Unit, Italy, 1945 Decals are by Cartograf, which is a guarantee of good registration, sharpness and colour density, with a thin matt carrier film cut close to the printed areas. Conclusion An awesome trip into alternative history that's got a certain hokey appeal, partly because it looks like it could possibly have worked, although it only takes a moment to identify its critical weaknesses. The internal structure has been well thought-out, and the variation in decal options makes for a fun project that shouldn't take too long to complete. Very highly recommended. Review sample courtesy of
-
Miles M.52 Supersonic Test Airframe 1:72, 1:48 & 1:32 AeroCraft Models Following WWII, the jet race had reached a position where resources could be assigned to it, and those of the remaining Great Powers were engaged in an undeclared competition to be the first to reach the speed of sound in level flight, retaining control of the airframe in the process, and maintaining that speed for an extended period. British aviation company Miles had been issued with an Air Ministry Specification E.24/43 in 1943 for an aircraft that could exceed 1,000mph by utilising cutting-edge aerodynamics and design technology, on which work carried on until the end of WWII in absolute secrecy, but with the incoming peacetime Labour Government in 1946, budgets had to be trimmed viciously to bring the country back from the brink of bankruptcy. Once the project had effectively been cut, its existence was revealed to the British public, at which point a lot of criticism was levelled at the government for cancelling a project that could have engendered National Pride at an important time. This led to some additional trials of scale models that were air-launched from Mosquitoes, and a wind-tunnel model that achieved a scale speed of almost Mach 1.4, but its days were numbered. Final cancellation after validating the project’s merits was painful, and the knock-on effect was a blow to Barnes Wallis’ Power Jets, resulting in the cancellation of the development of their afterburning engine, which led to them being swallowed up in Britain’s pell-mell run toward merging as many aviation companies as possible in the shortest time feasible. In America, Bell was suffering development problems with their similarly tasked X-1, and Miles were permitted to share their aerodynamics and engineering data with them, giving valuable resources with which to achieve that goal with Chuck Yeager at the controls, which was incredibly important to American national pride. The M.52’s advanced aerodynamics eventually filtered through to production aviation once supersonic flight became a standard capability for fighters almost a decade later, so Miles’ efforts weren’t wasted. Whether Eric ‘Winkle’ Brown would have been looking forward to performing the test-flights or not, we’ll never know. The Kit This is a range of brand-new 3D printed kits from AeroCraft that are designed and printed by the owner Ali in either 1:72, 1:48 or 1:32 scale to suit your preferred build scale, which broadens the market for this innovative jet that came so close to giving Britain the Supersonic crown. The kit arrives in a white top-folding box with a digital painting of the subject flying high over fluffy cloud, plus the name and scale of the kit. Inside the box are several Ziploc bags of parts, totalling twenty-eight grey resin parts, plus a single clear resin part, accompanied by a small decal sheet, a sheet of pre-cut vinyl masks, and a two-sheet instruction and painting guide to round off the package. As is normal for 3D printed parts, they are attached to their print-bases by many fine fingers that taper at the top end to reduce clean-up once you have liberated the part(s) from the base. A little light sanding is usually sufficient to make any marks disappear, after which you can start putting parts together. This kit is no exception, which I know because I couldn’t resist removing all the parts once I’d finished (and in a few cases before I’d finished) taking the photos. I think I have a problem. Please Note: We reviewed the 1:48 kit from the range, but we understand that the others are different in size only for the most part, and should build in the same manner as the kit detailed here, just to a different size. Detail is excellent, and thanks to the design and incessant march of printing technology, the quality of the parts is equal to the task, given that the M.52 was engineered to be as slippery as possibly by the design team. The part-count is relatively low, which is in part due to the ability of 3D printed parts to have undercuts that would make even resin-casters jealous, and partly due to the slender, simple design of the M.52, which is an elegant pointed tube with a few wings and wheels, to render it to its simplest shapes. The detailed cockpit is held within a teardrop-shaped nose-cone with conformal glazing, a simple engine of the centrifugal-flow type is slotted inside the fuselage along with the exhaust trunking, and single parts are used for each of the five flying surfaces. The rest of the parts make up the three gear legs and their bay doors, plus a pitot probe in the tip of the nose. Construction is likely to begin with the cockpit, as modellers are creatures of habit, although you can start anywhere, as the two large instruction diagrams are provided in the form of exploded diagrams, the top an isometric 3D rendering, while the lower is a line-drawing from the opposing angle. Over the page are detail steps for the more complex parts of the model, which will be of great use when building the cockpit and aligning the components inside the fuselage. The lower nose takes the form of a teardrop-shape from above, inside which a single part that consists of the instrument panel, coaming and nose gear bay that are fitted, along with an L-shaped control column and the pilot’s seat. You have two choices here, including a seat with and without belts, and an instrument panel that either has a representation of the dials, or hollow depressions for you to apply your own dial decals if you prefer. A coaming over the rear of the cockpit assembly covers the back of the seat, and is completed by the addition of the resin cast clear canopy, which will doubtless benefit from a dip in Klear to enhance clarity of the casting, using the supplied vinyl masks to protect the individual panes of the screen until after final painting. The cockpit assembly plugs into the annular intake ring around the front of the fuselage, and here it is critical to leave the four pairs of rods that will key into the depressions in the back of the cockpit surface, as they look uncannily similar to printing supports that are removed at the beginning of the build process, and the kit would be poorer for their accidental loss. Before commencing work on the centre fuselage, it is worth noting a cylindrical part that is referred to as “weight”, to hold the nose of the model on the deck once it is completed. A piece of brass or plastic tube could be fitted with end caps and filled with lead shot or something else suitably dense to give your model the necessary weight to stand on its wheels later. The weight, and a tapered plug slide inside the centre fuselage part, which is formed by a hollow torus with two gear bays, wing root slots, and a keyed rear lip. The aft fuselage is initially a hollow shell, which the exhaust trunk slides inside from the front, keying between two guides on the inside lip that prevents it from pushing too far inside, followed by sliding the engine into the trunk, which again self-seats, leaving the inner exhaust suspended inside. Joining the two ends of the fuselage together and dealing with the circumferential seam in your preferred manner, installing the nose cone in the intake trunk once the two surfaces are painted an appropriate metallic or yellow shade. The wings and rudder fin slot into recesses in the fuselage, using the large jig that has been provided to keep them at the correct angle while the glue cures, remembering to orientate the wings correctly before applying glue, ensuring that the flared wingtips face the correct direction. The elevators are of the all-moving type later used by the X-1, and these fit on pegs in a similar manner to the real surfaces, giving you the opportunity to offset them as you wish. The kit is designed to be built in the gear-down pose, and there are three gear legs and their wheels, plus bay doors supplied for this purpose. During initial testing of the kit’s build it was found that the early gear legs were bending after completion, so Ali has designed a new set that have been printed in a more robust resin, and come with a set of four custom ‘props’ that can be placed under the model to add support long-term. Your other option is to build the model in the air of course, either taking off with the gear still deployed, or airborne after a little adjustment of the bay doors to depict them closed. The main gear legs have a supporting strip between the two tapering struts, which should be removed before building, adding a wheel to the lower of each one, and fitting a two-part wheel and hub to the nose gear leg. Each bay has a single door, with locations called out on the diagrams to assist you. The final kit part is the pitot probe that fixes to the tip of the nose, of which there are two in case one has been bent or damaged in transit, or you’re a clumsy modeller like me. Markings The M.52 never flew as a full-sized aircraft, so its scheme is moot, but can be estimated based upon other projects of the era, which often flew initially in bare metal straight out of the hangar, and were later painted trainer yellow from the habit of avoiding friendly anti-aircraft fire from overzealous gunners. From the box you can choose either of the options below, or make one up of your own to riff on what might have happened. The decals are well-printed with good registration and colour density that should simplify the decaling process. Yellow and black Prototype P symbols are included in addition to the six peacetime roundels, fin flashes, and tail codes. Conclusion If you enjoy researching and modelling projects that almost made it, in this case because of politics and the parlous state of Britain’s finances following WWII, AeroCraft have created this high-quality model of the M.52 in all major aviation scales that will allow it to live on in our cabinets. I really must finish reading the M.52 book I have on my shelf. Very highly recommended. Miles M.52 1:72 Miles M.52 1:48 Miles M.52 1:32 Review sample courtesy of
-
Messerschmitt Me.410A-1 (A04069) 1:72 Airfix The sleekly styled, twin-engined Me.410 Hornisse started life as the Me.210, the intended replacement for the Bf.110 that was already showing its age, and forward-thinking planners correctly anticipated that if war broke out, it would quickly be outclassed, leading to heavy losses. The replacement process was begun before WWII started in the West, but turned into a protracted gestation due to problems that presented themselves before it could be turned into a viable heavy fighter/bomber. The Me.210 was a flawed concept that suffered from unpleasant and sometimes dangerous handling characteristics, garnering such a poor reputation that when the substantial changes needed to fix these problems (initially designated the 210D) were underway, the decision was made to rename it the Me.410 to distance it from its origins. The 410 utilised an improved DB603A engine, lengthened the fuselage over the 210 to improve the centre of gravity, utilising an amended wing planform to give it a constant sweep-back of the leading edge to bring the aerodynamic centre further forward. Coupled with leading-edge slats that had been removed from the initial 210 design, the resulting aircraft that was significantly more pleasant to fly, had a respectable top speed and could carry a substantial war-load. On entering service in 1943, its initial success as a night bomber over the UK was most definitely not a portent of great things to come. The 410 was a day late and a dollar short so to speak, and no sooner had it reached the front-line and started attacking the bomber streams, than the Allies darkened the skies with fast, manoeuvrable single-engined fighters such as the Spitfire and Mustang, which could easily out-fly the 410, a problem that would be exacerbated by later designs such as the P-47 Thunderbolt and the P-38 Lightning. Pitched into battle without fighter cover, they were easy prey to the Allied fighters, and the balance was only slightly shifted by the introduction of Bf.109 and Fw.190 escorts. Production ceased in August 1944 to concentrate dwindling manufacturing capacity on the Emergency Fighter Programme for the ultimately unsuccessful defence of the Reich. Due to its relatively short career, the marks that saw action progressed only as far as the B model, although high altitude C and D models were on the drawing board, but never saw service. Despite its flaws, the 410 was quite innovative in its weapons carriage, and had a nose-mounted weapons bay directly under the cockpit, which could house a palette of munitions, either bombs, cannon, reconnaissance cameras or the 50mm Bordkanone that was used to attack daylight bomber streams. Due to the upgraded engines that gave it more capacity in the bomber role, a pair of bomb shackles had to be added to the inner wing undersides to accommodate the extra load. The twin remote controlled "barbettes" on each side of the mid fuselage were also of note, as they were controlled by the rear gunner from the aft cockpit using a traditional pistol-grip system could also pivot up and down, but the barrels could also be rotated out sideways to fire one of the two barbettes at an off-centre target behind them. Movement and aiming was all carried out using controls attached to the pistol grip, and must have surprised more than one potential assailant. The A-1 model was designated as a Light Bomber, a job that it was well suited to, giving the Allies a run for their money on night operations, where they proved difficult to catch. The 410’s equipment bay right beneath the pilot in the A-1 accommodated the nose armament of a pair of MG17s and MG151/20 cannons, plus shackles for droppable munitions, with a maximum of 1,000kg. A pair of 500kg bombs was the usual, but alternative stores could be carried in the same space. The underside of the nose bay had two clamshell doors that partially retracted into the fuselage, allowing easy exit for the bombs, and offering the crew an immediacy of feedback upon dropping. After the war, several of these interesting aircraft were taken as war prizes by the Allies, but sadly only two full airframes still exist today, one in RAF Cosford in a fully-restored state, which until the 1980s was capable of ground-running despite props that were shortened to equalise their lengths after an “incident”. The other still awaits preservation in the US at the National Air & Space Museum, where it languishes in a queue of spectacularly rare WWII German aircraft. The Kit This tooling from Airfix was unexpected, and a slightly unusual subject matter when you consider its relatively short length of service and numbers. The kit arrives in Airfix’s red-themed top-opening box, and inside are six sprues of dark grey styrene, a separately bagged clear sprue, decal sheet inside the instruction booklet that is printed in colour on matt paper, is accompanied by a single A4 colour printed sheet of profiles for painting and decaling the model, which has the stencils on separate line drawings for clarity. Detail is excellent, and the part-count at 149 is commensurately high, with much work going into the cockpit, weapons bay, gear bays and the other usual focus areas, plus finely engraved panel lines and crisp clear parts that have been engineered in sections to recreate the twin bulged aft sections around the gunner’s position. Construction begins with the cockpit floor, which has the side consoles moulded-in and has decals applied to highlight the details. A window is inserted into the forward floor, installing the gun pack below in what will become the weapons bay. The next step involves fitting the pilot’s seat and the bulkhead with head-rest behind him, followed by control column and a small instrument rack fixed to the floor, then an extension to the cockpit is fitted behind on a lug, which is involved in supporting the frame around the gunner’s position, adding extra details to the frame before joining it, and detail-painting the weapons bay below it. Work on the cockpit stops for a while, as the gunner’s position is built on the wing lower, which must be built next. The lower wings are moulded almost full-span, drilling out flashed-over holes depending on which decal option you have chosen. A combined spar and gear bay bulkhead part is inserted into grooves in the lower wing, strengthening the assembly further, then adding the gunner’s compartment, which is made from a tub with a separate rear that is covered with moulded-in radio gear boxes, and the seat on the top edge of the area. It mounts in the centre of the wing aft of the spar on three turrets, the forward edge of the compartment resting against and overlapping the spar. A triangular door insert fills the main gear bay opening for the gear-up option, or the bays themselves are installed, with plenty of moulded-in detail for the avid viewer to look at. The fuselage must be completed next to join the two crew compartments, in advance of finishing the wings. The starboard fuselage half has an electrical panel applied near the rear of the cockpit, and half of the pilot’s instrument panel plus decal at the front, adding a bulkhead to the front of the tail-wheel bay, painting it all interior green RLM02. The port side has just the instrument panel half installed with decal at the front, then has the cockpit glued into position, with location assisted by a scrap diagram nearby, then the fuselage halves are joined around a toothed drum without using glue, which will form the base for the rear gun barbettes. Once the glue has cured and you have dealt with the seams in your usual manner, the fuselage is lowered onto the lower wing, taking care not to damage the gunner’s compartment, and is glued in position, followed immediately by the two upper wing halves with moulded-in upper nacelles. Once the glue has cured and seams are dealt with, you have a choice of dropped or retracted leading-edge slats, using different parts for each option, and ensuring you don’t get them mixed up between wings. The elevators are next, and again you have a choice by using different parts, offering dropped elevators without having to do any additional work, or you can pose them neutral by replacing the lower section that has the flying surfaces moulded-in. The assemblies fit into slots in the tail with zero dihedral, and the rudder panel is inserted into the moulded-in fin, which can be posed deflected as you wish. The engine nacelle fronts are made from two halves each, adding the cooling bays from two more parts each underneath, then sliding them into position in the wing fronts, leaving the small gear bays open to receive the struts later in the build. The two-part weapons bay insert is glued into place under the nose to complete its distinctive snub-nosed profile. The next choice is whether you wish to depict the radiator fairings with the cooling flaps open or closed. The radiator cores are common to both options, and the two sides are fitted together on a trio of turrets, then they are inserted into the radiator fairing of choice, adding the sides to the assembly appropriate to the position. The outer flap panels are inserted into gaps in the wings behind the radiators at 10° deflection for the open option, then the fairings are installed into the depressions in the underside of the wings to complete them. The ailerons are next in line outboard, and are fitted with a pair of horn balances into slots in the parts before they are installed in their bays, and these can also be posed deflected if you wish. There is still much to do, starting three-part tubular night-flying exhausts, or with exhaust stubs that are moulded on a carrier, and are slotted them into the nacelles on each side, then adding flare hider panels that help protect the pilot’s night vision and make the aircraft less visible at night. The rear defence barbettes on the sides of the fuselage must be glued carefully to ensure they remain mobile, adding the gun barrels into the slots at the rear of the fairings to complete them. If you are building your model on the ground, the main wheels of the 410 are supplied in well-detailed halves with a smooth tyre that has a little sag moulded-in to depict the weight of the aircraft compressing them. Each gear strut has a separate scissor link spanning the black gaiter over the oleos, adding a retraction jack behind the leg as they are inserted into the bays, gluing the wheels on the inboard side, and fitting a bay door to the front of the bays. For retracted wheels, a single part covers the tail-wheel bay, which is substituted by a pair of linked open bay doors for the wheels-down option, after which the nicely detailed tail-wheel strut with moulded-in wheel is glued into the bulkhead inside the bay. The next option is dependent upon whether you drilled out holes in the lower wing earlier, which receives two bombs on pylons. The three-bladed props are moulded as one part, and are trapped between the spinner and back plate, then a stepped washer is slipped over the axle at the rear without glue, and is trapped in position by another washer that is glued into position to allow the prop to remain mobile unless you overdo it. The two completed props are slotted into the fronts of the engine nacelles, and these can be left until after painting to avoid damage or messing up part of your paint job. Before the canopy can be installed, two triangular supports are added to the space between the crew positions, and the gunner’s two-part control centre with pistol-grip is fitted at the rear of his compartment. The unusual glazing strip that extends the pilot’s view over the nose is inserted, then the complex shaped canopy is built from three components. The windscreen has the entire canopy roof moulded-in, and it is completed by gluing the two side glazing components to the sides to achieve the correct tapering, whilst bulbous shape at the rear. This is glued into position along with a radio mast offset to the starboard roof frame between the crew stations at an angle to the vertical from the front, adding a pitot probe to the port wingtip, and if the aircraft is wheels down, a crew access footstep that drops from the fuselage on the port side. Under the fuselage are fitted a long towel-rail antenna and another straight mast with a bulbous end. Markings There are two decal options on the sheet, which share the same splinter scheme on the wings, but have different patterns and mottling on the fuselage. From the box you can build one of the following: W.Nr.10185, U5+KG, 16./Kampfgeschwader 2, Amsterdam-Schiphol, Netherlands, October 1943 U5+CX, 13./Kampfgeschwader 2, Coulommiers, France, August 1943 Decals are by Cartograf, which is a guarantee of good registration, sharpness and colour density, with a thin gloss carrier film cut close to the printed areas. Because of the proximity and limited space between the fuselage and engine nacelles, scrap diagrams show the locations of the various markings and stencils in those locations that would be invisible on standard profiles. Conclusion This is an extremely well-detailed modern kit with an interesting choice of decals and plenty of build options to personalise your model. Very highly recommended. Review sample courtesy of
-
M3 Lee Medium Tank (63521) 1:35 I Love Kit via Creative Models Ltd In the years before WWII America realised that they were lagging behind in respect of armour, a fact that became especially clear when Germany came out from under the Versailles treaty to show off and then use their new tanks and Blitzkrieg tactics against their European neighbours. The M3 Lee was conceived in 1940 as a medium tank carrying a powerful 75mm gun, partly for manning by their own crews, but also because Britain had requested a large number of tanks to make good their losses from the Dunkirk withdrawal. The resulting Lee was a decent tank but suffered from a high silhouette and limited traverse of the sponson-mounted 75mm gun, although it was still widely used in Allied service despite these deficiencies. In British service it was known as the Lee if it was fitted with the original American turret, or the Grant when using the lower-profiled British specification turrets. The Lee was used primarily in Africa and the Pacific theatres where 2nd line equipment was deemed adequate to be fielded (for the most part) against the enemy, aided by the fact that the Japanese were generally far behind with their tank designs and tactics. It underwent some substantial changes including cast, then welded and back again to riveted hulls, plus changes in the power pack and deletion of the side doors to add needed stiffness to the hull. The riveted hulls suffered from rivets popping off inside and becoming projectiles when hit, which could be just as lethal as a penetrating round and was never fully eliminated. The Kit I Love Kit have created their own line of newly tooled kits of the M3 Grant/Lee, starting in 2021 and carrying on with various new boxings in the following years, plus this new boxing of a Lee at full height, evidenced by the cupola and machine gun turret on the main turret, in a similar format that the early Grant Mk.Is were based upon. The kit arrives in a top-opening box with a painting of the vehicle on the front, and a cardboard divider in the lower tray to keep the hull parts and other sprues from rattling around during transit. Inside the box are twelve sprues and three individual parts in sand-coloured styrene, eight brown sprues, a clear sprue, a small Photo-Etch (PE) brass fret, an instruction booklet printed in black and white, and a sheet of painting and decaling profiles printed in colour on glossy paper. Detail is good for this exterior kit, although there is no rolled steel armour texture moulded into any of the plates, and a very fine sand-cast texture is present on the turret parts, which could be improved by using liquid cement and a rough brush to stipple the sand-cast texture a little deeper, and texture could also be added to the main armour panels if you feel the urge. Construction begins with the running gear for a change, making up the bogies from two wheels on a pair of swing-arms each, being careful to orient the Vertical Volute Spring Suspension (VVSS) parts correctly, using the scrap diagram to assist you. Six bogies are made in total, with return-rollers in the top of the units, held in place by the front panel that also holds the swing-arms in position. The rear bulkhead has a pair of access doors with PE hinges fitted into the hatch, adding exhausts and more towing eyes with shackles, plus idler wheel axles before it is mated to the rear of the lower hull part, mounting the glacis assembly to the other end, adding two bolted flanges to the centre, and inserting a pair of towing eyes with shackles in slots at the sides of the final drive housings. The bogies are fixed three per side on raised plates moulded into the hull save for the drive axle that is separate, making the drive sprocket from two parts, and the idler wheels from four parts each so that the tracks can be installed. The track links are made from four parts each that have a total of six sprue-gates to remove, with 77 links per side, and no ejector-pin marks to deal with, thankfully. Once the tracks are in place, the fenders are detailed with PE shackles and light cages, adding the lights with clear lenses, and the round-down ends to the rear of each one, locating them on the sides of the hull on two lugs per side. A machine gun turret is first, inserting a two-part gun with pivot into the turret drum, and locking it in place with a pair of pins, adding a two-part hatch to the top, two vision slots with hatches to the sides, and a pair of small parts on top of the mantlet, setting it aside for the turret. The mantlet has the barrel inserted, pushing a .30cal machine gun through from the inside, clipping it inside the upper turret, then closing it in by gluing in the lower turret, which acts as the trunnions for the pivot point of the main gun. The turret roof has a simple two-part mushroom vent, then the machine gun turret is dropped into the hole in the roof, fixing two aerial bases and a rolled PE part into the roof, and an armoured hatch with clear glazing on the right cheek of the turret. The vertical step behind the turret has a viewport with clear slot inserted, fixing two C-shaped and T-shaped PE parts in a small recess on the opposite side, adding an aerial base to one side with separate spring base. The upper deck is started by adding clear lights to the rear edges of the area along with exhaust mufflers, fitting them to the edges of the deck once it has been detailed with pioneer tools, a towing cable, PE mesh and brackets. Two hull side panels have hatches with vision ports, handles and latches inserted, removing some details from the upper hull part as indicated, then installing the vertical step made earlier, a T-shaped stiffener to the roof, and adding the side panels over the blank sides of the upper hull, fitting filler caps, lugs and more hatches with clear slots, plus two stowage boxes to be fitted on the sloped sides of the engine deck, which is slotted into position and snugged up against the vertical step behind the turret ring, and topped with a pioneer tool after drilling out holes in the lids, sliding the engine deck into position last. The turret can be twisted into position at this stage, but it is probably best to install the 75mm gun first. A semi-cylindrical mantlet is clipped vertically into the surround, gluing a plate across the back to prevent it popping out again, slotting the barrel into the hole in the mantlet, and adding a small part to the top of the surround, which includes a pivot peg that is locked in position in the starboard hull without glue, the top peg held in place by the two-part roof section, which has a periscope added to one side of the pivot. The completed upper hull is then glued into place on the lower, fitting the cover panel over the rear of the vehicle, completing the model. Markings There is only one decal options on the sheet, but as usual with Trumpeter/HobbyBoss/I Love Kit there is no information offered on the location, period or regiments of the decal options, but the vehicle codes should allow the intrepid modeller to find out the back-story if they feel the need. From the box you can build the following: The entirety of the sheet is printed in yellow, so while registration isn’t relevant, colour density and sharpness are perfectly adequate for most modellers, but if you’re a stickler, you could do worse than check your references before proceeding to paint. Conclusion A well detailed exterior kit of the M3 Grant that should satisfy many, although there are many other options on the market. This early variant option should be easy enough to paint in a single predominant shade of green, and offers plenty of opportunity for some weathering or fading of the paint with age. Highly recommended. Review sample courtesy of
-
- 1
-

-
- I Love Kit
- Creative Models Ltd
- (and 1 more)
-
I built the KH one…. Well, I say I built it…it was more an exercise of perseverance (Percy who?) or plastic masochism.. I think I bought when it came out (2017?), started it, got as far as the fuselage put together, intending to scratch build an entire engine for one side… swore a lot, got sick of it and put it away.. moved house twice, picked it up again in 2024, by which time BlackDog had released an engine, so bought that, muddled through..swore a lot.. but finished the damned thing, and it now sits on the shelf with lots of opened panels, as a reminder that if I can finish that, albeit over 7 years, then I can finish anything ! But by Dawkins, you couldn’t pay me to make another one! actually it sits next to a revell 48th Tornado F3, also with opened panels galore…so using the Law of Sod..please..Airfix 🙂
-
Why? Don't you like cats? I was forced to order two as only one & three RAF Buccs would't have jumped the "free shipping" bar. (or that's what I keep telling myself)
-
I suspect the cold, dead, dull hands of the accountants in some of this; extra parts cost extra money, but when they can include similar antennae in the gorgeous Victor kits one does wonder. It's entirely possible that the design team did provide for [some of] The "missing" bits but the bean counters said "you're not having that". I suspect that their bill for saving Hornby £x thousand will be at least £x thousand plus quite a lot so that they can pay for their new BMW/Mercedes/Audi/Ferrari/whatever......
-
Hi Steve, that's poor . It seems Airfix are rushing out kits without doing their homework. I know they need profit to survive but no excuse with all the references available. The mistakes with the Mosquito B.XVI bomb bay springs to mind. Before you all shout we are all modellers and easy to correct ,proper research beforehand should have prevented mistakes.
-
My kit arrived late last week and the instructions have been carefully perused. As yet I've found no mention of the exhaust flame dampers, parts L7, L8 and 2 x L9, which were fitted to both B-17 and B-24 when operated operationally. These parts are shown installed in steps 72 and 73 of the instructions for the earlier Fortress III boxing (A08018). For those without access to these instructions and/or Scalemates (with has the Australian version) L9 (port outer) is mounted 8mm back from the front end of H1 and L7 (port inner) is mounted 5.5mm back from the extreme forward tip of H3. On the starboard side L8 is inboard and the other L9 outboard mirroring the port side. Missing from the kit altogether are the windbreaks ahead of the open waist windows and the drip rails above the forward ends of these. They are illustrated in Martin Streetley's The Aircraft of 100 Group. (If you're building this or the earlier boxing either get hold of a copy of the book or make friends with someone who already has one). Also on the "Missing in action" list are a small antenna just forward of the bomb bay and the Piperack jammer antennae on the wing uppersurfaces (probably better made from toothbrush britles anyway) and LORAN antenna. In all fairness the ECM fit changed very rapidly, and not all of the aircraft had all of the same bits of kit at the same time. To be honest I'm very grateful that Airfix have given us a kit of any of 100 Group's unusual B-17s at all (and roll on the 100 Group B-24 boxing!). Having nearly built the original new-tool B-17 when it came out I'm really looking forward to getting on with this kit (and maybe digging the earlier 100 Group boxing out from The Loft of Doom for a comparison build).
-

Airfix Boeing B-17G/Flying Fortress Mk.III (A08018A) 1:72
Hardtarget replied to Mike's topic in Kits
Delivered Dorval 13/8/44; To RAF [KJ109]; 214 Sq BU-V RCM Oulton, Nfk. 1699 Flt 4Z-C Sculthorpe, Nfk. 223 Sq 6G-F Oulton, Nfk Struck Off Charge 11/3/47. Source: The B-17 Flying Fortress Story -
 The turret fitted Ansons had a Lewis machine gun. Those without a turret had the Vickers weapon. At least that is what some really old reference books I have detail. I am all up to being corrected with some modern day, (this century) references.
 -
Very cool kit of the tank which is very important today due to Ukrainian War. Poland and Chechia donated literally hundreds of them in various variants (basic and modernised and uparmoured ones) and Ukrainians camouflaged and modified them even in more interesting ways (net is full of detailed photos), so there are plenty of options for both beginner, medium ambitious and totally advanced modeller!
-
Very interesting proposition, and - at least in Poland - a bit less expensive than original Revell boxing.
-
Got this kit and now have it already half built (a conversion into uparmoured Ukrainian version) and find it very good. True there are some simplifications (especially compared with the excellent Flyhawk kit) but all these are reasonable to obtain great buildability not loosing too much detail.


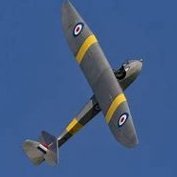


-
Forum Statistics
253.8k
Total Topics4.4m
Total Posts -
Member Statistics
36,741
Total Members5,082
Most Online
-
Who's Online 157 Members, 6 Anonymous, 856 Guests (See full list)
- tonyh
- modelling minion
- Hindsite
- Creepy Pete
- cvrle
- Drakendk
- raider of the lost part
- Skawinski
- Blue Monday
- LansVVS
- Trenton guy
- psdavidson
- IanF
- DaleRFU
- Col.
- Paul Gross
- robstopper
- Work In Progress
- gengriz
- Silverkite
- gingerbob
- frapes75
- grgattermeyer
- Overlord
- Irish 251
- Chuck1945
- neil5208
- Dmitriy1967
- Paulaero
- Skodadriver
- Axiseagles
- ozzrahog
- Garry737
- daniele0865
- jsolo
- Stef N.
- epozar
- stever219
- RAF4EVER
- Arthur Miggins
- Billos
- PHIL B
- MikeC
- WorstKaasScenario
- ToE1984
- Andrés S.
- Circloy
- billn53
- VMA131Marine
- Muddyf
- Daniel Gastelumendi
- Ali62
- Ger Darkly
- Bullbasket
- CrazyCrank
- MikeA
- Enzo the Magnificent
- Rob K.
- Johnson
- Tbolt
- Nymond
- Botan
- FG2Si
- Ad-4N
- cmatthewbacon
- Phew7410
- SNAFU
- Davi
- andyworkshopman
- Fritag
- Taylor Durbon
- 2996 Victor
- Jeff Crytzer
- alanbeeb
- Pat55
- Market Garden
- veg
- NavyWessex
- Stickleback
- Pier Grizi
- Russmeister 101
- BritJet
- Seamus
- Artillery93
- JWM
- dolphin38
- R T Fishall
- Brucem
- theplasticsurgeon
- thepureness
- Farmerboy
- Spiny
- vppelt68
- philp
- Sgifford
- Mr_Sworld
- gbondoni
- Toryu
- Sergii
- juancho142
- Hunker
- Harry Lime
- CT Modeller
- ModelingEdmontonian
- Urshimato
- jhutchi
- martinjpayne
- Parabat
- Tijuana Taxi
- Albatross A
- dambuster
- TEXANTOMCAT
- echen
- HAMP man
- Dudko210
- 12jaguar
- FinnAndersen
- Graham Boak
- Pete in Lincs
- Benbow
- Fnick
- Mark Proulx
- Allan31
- HarryHobbyin
- Alex1978
- AlbertLima
- PhantomBigStu
- GaryShwod
- 12by12
- Peter O
- Matt Crane
- tonya442
- bigbadbadge
- hakkikt
- Wm Blecky
- Chrisj2003
- plastiksurgeon
- Dave Swindell
- Jens
- gwyndaffandy
- Columbia20713
- donkeychomp
- rod mcq
- Jamesmodels
- Paul Thompson
- GiampieroSilvestri
- modelldoc
- Werdna
- Redstaff
- franki84
- okmodels
- RMP2
- Doccur
- Dancona
- YorkshireT
- amblypygid
- yves