
Search the Community
Showing results for tags 'MiniArt'.
-
The last radio message sent by the survivors of Col John Frost's paras at the north end of Arnhem Bridge, just before they surrendered on 20th September 1944. This small diorama consists of a mixture of Miniart, Dragon and Tamiya figures. The Miniart ones were disappointingly poor and softly moulded, only saved by being supplied with resin heads(although still not as good as Hornet). The guy being searched had to have a hand transplant as the originals were like spades! Luckily I had a couple of Alpine ones in the spares box. The seated figure is an amalgam of bits from the box with a green stuff putty blanket. Road is made from individually cast and laid plaster cobbles, which took a while but I think looks better than moulded roads. Zen modelling at its best. Discarded webbing is made from masking tape and spares from the Miniart box. All comments welcome as usual
-
Chandler’s Family Refugees (38089) 1:35 MiniArt via Creative Models Ltd During WWII there were millions of displaced populations created by the advances of the Nazis across Europe, escaping from combat or persecution, resulting in huge streams of humanity making their way to a perceived safer part of their own or a neighbouring country. People took only what they could carry, unless they were lucky enough to possess a motor car or some kind of transport such as a cart, whether hand-pulled or horse-drawn. People would take their truly important belongings, loading up with their most valuable goods, whether monetarily or otherwise, often comprising items that might be of use in their profession or as currency to trade when they arrived at their destination. The Kit This set supplies two figures, plus the possessions that they are carrying, and a trolley with more of their personal effects onboard. The set arrives in an end-opening figure-sized box, and inside are six sprues in grey styrene, plus a sheet of instructions, and a small decal sheet containing labels for various items. The parts for each figure are found on separate sprues for ease of identification, and parts breakdown is sensibly placed along clothing seams or natural breaks to minimise clean-up of the figures once they are built up. The sculpting is typically excellent, as we’ve come to expect from MiniArt’s artists and tool-makers, with natural poses, drape of clothing and textures appropriate to the parts of the model. Both figures are wearing overcoats, the lady wearing a full-length fur coat that goes down to her knees, her legs formed by separate parts that plug into the underside of her coat. The gentleman’s jacket is full length, and the tails are moulded as part of the rear panels in two sections, hanging down past where the legs join at the waist for realism. He is wearing a soft cap with a minimal peak, while the lady has a headscarf covering her hair and a gramophone in her hands, both of them tramping toward hopeful safety, the gentleman pushing the cart with the rest of their remaining possessions in front of him. The accessories are contained on four sprues, and include parts for the one-wheeled barrow cart on one sprue, a sprue of sacks with contents pressing against the material from within, a sprue of suitcases and a hat box, and the final sprue providing parts for a five-bulb standard lamp, a gramophone with horn, some of which aren’t documented in the instructions, but are simple to put together. Markings Whilst there aren’t any specific colours you must paint the figures and their possessions to make them accurate, there are some helpful suggestions included on the guide on the rear of the box, with a chart that shows colour swatches for Vallejo, Mr.Color, AK Real Color, Mission Models, AMMO, Tamiya and colour names to assist you, using a letter code in blue boxes to correspond to the suggested colours. There is a small sheet of decals in the box, which gives you badges, stickers and logos for their belongings. Decals are by Cartograf, which is a guarantee of good registration, sharpness and colour density, with a thin matt carrier film cut close to the printed areas. Conclusion The figures are expertly sculpted, and they have a care-worn look to them that would be typical of anyone that has been displaced by war, their profession is semi-implied by their luggage, and their downtrodden demeanour that contrasts with the luxury possessions worn and carried by the lady gives a clue to their past. Highly recommended. Review sample courtesy of
-
Just finished this trumpeter 1/35 Challenger 2, and it was nothing if not challenging! Maybe because I have recently been on a diet of Tamiya AFV's, but this one was a challenge. Poor mould quality and poor fit seemed to beset most of the parts on this one so glad to at least get it over the line and finished. Figures are from Miniart. Airbrushed with Tamiya acrylics
-
Wooden Pallet Set (49016) 1:48 MiniArt via Creative Models Ltd There can’t be many people in the modern world that haven’t either come across, stumbled over, or had to move a pallet at some point in their lives, and while they are a very useful method of transporting goods in standardised quantities, once their load has been shed, they can be a nuisance. They’re supposed to be recycled back into use to carry on their load-bearing role, but a lot get left behind only to be ripped apart and burned, reused as rough timber, or even recycled into furniture by enterprising souls, and there are more than zero books on making things from left-over pallets - I found two in a search lasting a few seconds. What this means is that they’re not far away from ubiquitous, and seldom can you travel far in industrial or shabby areas without seeing at least one, so they’re a useful diorama tool. The Set This set arrives in a figure-sized box with a painting on the front and brief instructions on the rear, and contains five sprues of pallets, with four pallets per sprue, totalling twenty pallets in-all, which will make quite a stack. Construction is simple, but clever. The top surface is moulded as a single part, while the lower section is moulded as three parts joined together with three spacer bars that are cut off after the two sections are joined together. Each rod narrows at the end so that clean-up will be minimal, although you must be careful with them as the joins are necessarily weak, and won’t stand up to bending. Place the top upside-down on your cutting mat, lower the linked lower rails over the little guide markings on the upper part, applying glue carefully to avoid disturbing them. Clean-up of the sprue gates and spacers can be left off until after the glue has set, making life easy for yourself. These smaller scaled parts don’t have wood grain moulded into the parts , but with the drop in scale that shouldn’t matter too much, and anyone with a shabby brush and some oil paint can always add wood texture themselves after an initial coat of light brown. For the pallet nerds amongst us here, the pallets scale out to 800mm x 1200mm, which is the equivalent to EUR1 in the Euro Pallet table, and ISO1 in the ISO pallet table. Isn’t that nice? What it shows some serious attention to detail that must have been acquired with the aid of copious cups of coffee to avoid nodding off! Whether the nail holes are moulded in the correct manner, and if there are 75 of them is for you to research, as I’ve had enough and need a break! Conclusion Twenty pallets for your post WWII diorama. Not very exciting in themselves, but necessary if you’re depicting any kind of storage, shipping or factory type scene. Highly recommended. Review sample courtesy of
-
Omnibus Crew & Passengers (38092) 1:35 MiniArt via Creative Models Ltd We’re all familiar with the word bus, a shortened version of the original Omnibus, which in typical human fashion was shortened because that fraction of a second would be far better used doing something else. Originally intended as transport for the masses before the motor car became prevalent, the bus was highly popular until after WWII, when cars became more convenient and relatively affordable, winding down to a mode of transport that was frowned upon as being inconvenient, sometimes dirty, and dangerous, as well as no-longer the cheap option that it once was. If we go back to the 1920s and 30s however, it was a hugely popular method of transport that was used by people as an alternative to the expense of a taxi-cab, and was a lot faster than walking. As such, ladies and gentlemen of working and lower middle class would use it to travel around their town or city, while the vehicles were crewed by a driver, and a conductor or conductress, allowing the driver to concentrate on driving, letting the conductor look after the passengers, collect fares and issue tickets with relevant change. During wartime, the conductor job was sometimes taken over by a woman to free up men for military service, as was common in many home-front industries. The Set We reviewed The London General Omnibus Company (LGOC) Omnibus X a few years ago, one boxing of which can be found here. This set of figures is intended as the human component of the model, and contains six figures, four passengers and two crew. It arrives in a figure-sized box, and inside are six sprues in grey styrene. A composite painting of the figures is printed on the front of the box, with the same figures separated with part numbers and paint codes with arrows acting as the instructions and painting guide in one set of drawings. Underneath is a chart containing colour swatches, plus paint codes for Vallejo, Mr.Color, AK Real Color, Mission Models, AMMO, Tamiya and colour names for those that don’t have access or don’t use those brands. The crew comprise a male driver in a seated position with his hands on the wheel, and feet on the pedals, wearing a long uniform coat and peaked hat, the standing conductress wearing a similar coat with a softer, wide-brimmed hat, plus her ticket machine and change pouches at her waist and lower chest. The seated passengers include a gentleman with a bowler hat and walking stick, two ladies with wide-brimmed hats in early 20th century dresses, and a police officer with the traditional domed helmet and uniform appropriate to the era. The parts for each figure are found on separate sprues for ease of identification, and parts breakdown is sensibly placed along clothing seams or natural breaks to minimise clean-up of the figures once they are built up. The sculpting is typically excellent, as we’ve come to expect from MiniArt’s artists and tool-makers, with natural poses, drape of clothing and textures appropriate to the parts of the model. The ladies have a parasol and open book, and one of their hats has a ring of flowers around the band that is made from two sections, with a purse on her knee under one hand. All the figures have flat tops to their heads to accommodate the hats appropriate to their roles in the set, the ladies and police officer having a smaller dome that is used to locate their hats correctly during construction. Conclusion Another realistic, life-like figure set from MiniArt that will be perfect for inclusion in your LGOC bus kit, either separately or in a diorama setting. Highly recommended. Review sample courtesy of
-
P-47D-30RA Thunderbolt Advanced Kit (48029) 1:48 MiniArt via Creative Models Ltd The Thunderbolt developed from a series of less-than-successful earlier designs that saw Seversky aviation change to Republic, and the project designation from P-35, to P-43 and P-44, each with its own aggressive sounding name. After a realisation that their work so far wasn't going to cut it in the skies over war-torn Europe, they went back to the drawing board and produced the P-47A that was larger, heavier and sported the new Pratt & Whitney R-2800 18-cylinder radial that would also power the B-26 Marauder, P-61 Black Widow and F4U Corsair. With it they added eight .50cal Browning machine guns aligned along the axis of flight in the wing leading edge. The P-47A was still a small aircraft, and was initially ordered without military equipment to allow faster completion, but it was considered inferior to the competition then available, so an extensive re-design was ordered that resulted in the much larger P-47B, firing up to 100 rounds per second from the eight .50cal wing guns, and with a maximum speed of over 400mph, leaving just the fuel load slightly short of requirements. It first flew mid-1941, and despite being a heavy-weight, its performance was still excellent, and the crash of the prototype didn’t affect the order for over 700 airframes, which were fitted with a more powerful version of the R-2800 and a sliding canopy that made ingress and egress more streamlined, particularly when bailing out of a doomed aircraft. Minor re-designs to early production airframes resulted in a change to the P-47C, which meant that fewer than 200 Bs were made, the C benefitting from improved radio, oxygen systems, and a metal rudder to prevent flutter that had been affecting control at certain points in the performance envelope. A quick way to spot a B is the forward raked aerial mast behind the cockpit, as this was changed to vertical on the C and beyond. The production from a new factory that had been opened to keep up with demand led to the use of the D suffix, although they were initially identical to the C, but the cowling flaps were amended later, making it easier to differentiate. Of course, the later bubble-canopy P-47s were far easier to tell apart from earlier marks, and constant improvement in reliability, performance and fuel load was added along the way. The P-47D-25 carried more fuel for extended range, including piping for jettisonable tanks on the bomb racks for even more fuel. Taking a cue from the British designers, the bubble-top was developed and that improved all-round visibility markedly, although like the bubble-top Spitfires, later models incorporated a fin extension to counter the yaw issues that resulted. TheP-47D-30RA was fitted with air-brakes and built at the Evansville plant, technically identical to the 30RE that was built at Farmingdale. Its weight, firepower and seemingly unstoppable character led to the nickname ‘Juggernaut’, which was inevitably shortened to ‘Jug’ and led to many, many off-colour jokes during and after the war. Jokes that are still soldiering on to this day, despite being eligible for a pensioner’s bus pass. The Jug was used extensively in the European theatre as an escort fighter, where it performed well in its ideal high-altitude environment. Later in the war when the Luftwaffe was a spent force, it also went on to become a highly successful ground attack fighter, strafing and bombing targets of opportunity, and eschewing camouflaged paintwork to add some extra speed with a smooth (and shiny) bare metal finish. As well as flying with the US forces, many P-47s were flown by the other Allies, including the British, Russians, and after the war many other countries as the remainder were sold off as war surplus. The Kit This is another reboxing of a brand-new tooling from MiniArt, and is labelled an Advanced Kit because it includes an additional sprue of plastic parts, and a fret of Photo-Etch (PE) brass to increase the level of detail of the kit, including the gun bays, fins for the bombs, and the ability to open the engine cowlings to display the excellent detail that is mostly hidden away on the Basic Kit. The kit arrives in one of MiniArt’s sturdy top-opening boxes with a dramatic painting of the subject on the front, and profiles of the decal options on one side, reserving the other side for practical details and text. Inside the box are nineteen sprues in grey styrene, although in our sample many of the sprues were handily still connected by their runners, which simplified photography. There is also a clear sprue, a sheet of PE in a cardboard envelope, two sheets of decals, and the instruction booklet, which is printed on glossy paper in colour, with profiles for the decal options on the front and rear pages, plus detailed painting and decaling information for the weapons and tanks on the next page. Detail is beyond excellent, as we’ve come to expect from MiniArt in the last several years, with fine engraved panel lines, recessed rivets, plus raised and recessed features where appropriate, as well as fine detail in the cockpit, wheel bays, plus gun bays in the wings and engine. If you’ve seen their AFV kits you’ll know what to expect, but this is special in this reviewer’s humble opinion. Advanced Sprue & PE Construction begins with the highly detailed cockpit, starting with a choice of seat style. One option has the seat put together from base, back and two side parts, which have elements of the seatbelts moulded-in, and are finished off by putting the remainder of the lap belts on the seat pan. The other option uses new parts to build the seat without belts, adding the belts from the PE sheet separately. A pair of supports are inserted into recesses in the back of the seat, then it is installed on the ribbed floor, which has control column, seat-adjuster, and two other levers inserted, after which the rear bulkhead, one of the cockpit sidewalls and the front bulkhead are fitted, trapping the rudder bar with moulded-in pedals between them. The starboard sidewall has an oxygen hose added, and a scrap diagram shows the detail painting as well as the location of the decals that need to be applied. The head cushion is fixed to the head armour, then the other sidewall is detailed with four controls and a PE wiring loom, numerous decals and more detail painting, so that it can be inserted along with the instrument panel and auxiliary panel, both of which have decals for the dials, with a choice of styles for the main panel. The tail wheel is made up in preparation for closing the fuselage, building a four-part strut that holds the wheel on a one-sided yoke, then adding a small curved bulkhead with sprung bumper at the front, or a most simplifies three-part assembly. The fuselage halves are further prepared by adding two extra detail parts to the short sill panels that have ribbing moulded-in, and should be painted to match the cockpit. At the rear on the underside, the supercharger fairing is slotted into the starboard fuselage along with the tail gear bay, and at the front, a cooling vent and an insert are added to the underside, fitting another vent to the port fuselage half in the same place. The fuselage can then be closed around the cockpit, adding the aerial mast into a slot in the starboard spine, although whether that will remain there until the end of the building and painting is a moot point, and I’d be tempted to nip it off at the base, gluing the base in to act as a socket for the aerial after the heavy work is over. The engine is created by joining the two highly-detailed banks of pistons together by a keyed peg, adding exhaust collectors at the rear, the push-rod assembly to the front, the ends of which mate with a circular support that is the frame onto which the cowling panels are added later. The reduction-housing bell is detailed with magnetos and other parts, plus a collet at the centre where the prop-shaft would be. This is joined to the front of the engine as it is mounted to a bulkhead at the rear, again on a keyed ring. The convex firewall at the front of the fuselage is detailed with a ring of fasteners on a PE strip that curves around the edge, and the cylindrical intakes with PE mesh grilles. There is a fuselage insert in front of the cockpit, and that has the two-part gunsight with clear lens, PE backup sight and link-plate added to its mating point, adding more equipment and a PE lip to the coaming before it is inserted under the coaming and joined by your choice of complex or simple firewall that closes the front of the fuselage. The intake trunking at the bottom of the nose cowling is made from five parts and installed in the lower panel, and you have a choice of open or closed top cowling panels by using additional parts. To leave the cowling open, the engine is fitted to the detailed firewall along with the lower cowling and the three sections of cooling gills. the closed option is surrounded by all four cowling segments, and at the rear you have a choice of installing open or closed cooling gills, using different parts to achieve the look you want, sliding the assembly over the completed engine, to which you can add the wiring loom if you are feeling adventurous, using the helpful diagrams near the back of the booklet, which also includes diagrams for extra wiring in the gear bays. The rudder is completed by adding an insert at its widest point (the bottom) to avoid sink marks, and it is mated to the fin on three hinges, allowing deflection if you wish. Under the tail, your choice of bare or canvas-covered wheel assembly is inserted in the bay, with doors on each side, or if you are building your model in flight, a closed pair of doors is supplied as a single part, adding a small outlet further forward under the fuselage. Note that these closed bay doors can be used effectively as masks by gluing them in place with a relatively weak adhesive for later removal. The upper wing halves have well-defined ribbing detail for the gear bays moulded-in, which is augmented by fitting two rib sections, front and rear walls, and an additional structure that has a retraction jack pushed through a hole in one of the wall segments. The gun bays and their extensive ammunition stores are supplied in this boxing, using different upper wing panels with the bays opened. The gun bays themselves are built from a mixture of styrene and PE surfaces, making up a four-compartment box into which the gun breeches are inserted, linking them to the outer wall with ammo feed chutes, and placing the ammunition boxes with open tops into the upper wing from within. The closed bay option is shown with just the barrel stubs projecting from the leading edge, while both options install the wingtip lights and a pitot probe in the starboard wing. A scrap diagram of the lower wing shows the location of the flashed-over holes that you can drill out for rocket tubes or pylons, then the flaps are made from two sides, plus a pair of hinges, and these are glued into the trailing edge of the wing with the ailerons, then the lower wing can be glued to the upper, along with two inserts at the tip and to the rear of the gear bay, which includes a flush landing light. Three PE bay edge strips are inserted over the open gun bays, adding a PE indicator and PE bay prop to hold the styrene panels at the correct angle, the gun bay hinging forward, the ammo bay hinging aft. The same process is then carried out in mirror-image for the other wing, omitting the pitot probe and landing light, after which the wheels and their struts are made up, each wheel made from two halves plus a choice of three hub types, and two styles of tyres are also provided, one without a flat-spot, the other under load on the ground, leaving it to your taste. The struts are detailed with separate compressed or relaxed oleo scissor-links plus stencil decals, and they are mated with their wheels, plus the captive gear bay doors, the lower door made from two layers, again to avoid sink-marks. The wings are glued to the fuselage with an offset joint making for a stronger bond, and the elevator panels are each slotted into the tail, and have separate flying surfaces that can be posed deflected, each one a single part. If you are building your model with the gear down, the inner gear bay doors are fitted to the fuselage, which contains the inner edge of the main gear bays, so remember to paint that while you are doing the bays. If you plan on making an in-flight model, there are two single parts that depict the closed main bays, or you can insert the two struts with their wheels for the grounded aircraft. The four centreline supports are fitted between the main bays for some decal options, then the model can be flipped over to stand on its own wheels so that the canopy can be installed, gluing the windscreen at the front, and deciding whether to pose the blown canopy open or closed. The prop is also fitted, and this is made up from two parts glued perpendicular to each other, each holding two blades in opposition, and the spinner with PE washer is glued into the front section. The Jug could carry quite a load, whether it was extra fuel or bombs, and all these are included in the box, starting with the two-part pylons, which can be depicted as empty by inserting a cover over the business end. You have a choice of four styles of tank, a 108gal compressed paper tank with a ribbed nose and tail, a 200gal wide and flat tank, the third 150gal streamlined tank with flat mating surface, and the last one slightly smaller at 75gal. All but the third option has a pair of sway-braces between them and the pylon, which fit into slots in the pylons. They are built in pairs to fit under the wings, but the first two options can also be used solo on the centreline support. The bombs use the same pylons, and can be built in 1,000lb, 500lb or 250lb variants, each one made from two halves for the body and two parts for the square tails or thinner PE fins if you prefer, and mated to the pylon by a pair of sway-braces that varies depending on size. There is also a smoke generator that looks like a drop-tank with a spout on the rear, which would be used to lay smoke for the Allied troops below to cover their actions, at least temporarily. Markings There are three decal options in this boxing, all with very little camouflage and some very colourful nose art to draw the attention. From the box you can build one of the following: 366th Fighter Sqn., 358th Fighter Group, ‘Orange Tails’, 9th Air Force, Spring 1945. Pilot: Lt. Ike Davis 509th Fighter Sqn., 405th Fighter Group, 9th Air Force, Germany, May 1945. Pilot: Capt. Milton William Thompson 379th Fighter Sqn., 362nd Fighter Group, 9th Air Force, Germany, Spring 1945. Pilot: Col. Joseph L Laughlin Decals are by Cartograf, which is a guarantee of good registration, sharpness and colour density, with a thin matt carrier film cut close to the printed areas. Conclusion MiniArt aren’t the only choice in this scale for a Thunderbolt, but I have a feeling that this rapidly becoming the de facto standard, as their selection of variants and detail level widens. The detail is exceptional and even better than the alleged ‘Basic Kit’ that preceded it. VERY highly recommended. At time of writing, this kit is at a healthy discount from UK importers, Creative Models Ltd. Click the button below to pay them a visit. Review sample courtesy of
-
Cheese Products (35656) 1:35 MiniArt via Creative Models Ltd Cheese. It’s based on stale milk, with some extra steps of course as otherwise we’d all be making it! There are so many varieties of cheese on the market these days that your head would spin if you were asked to count them all. During the early 20th century in Europe there were a number of prominent cheese varieties, many of which were produced in discs that are referred to as wheels, cutting a wedge out as you need it, or as it is sold to a customer from a cheese purveyor. The Set The sprues from this set of diorama accessories have been seen before in the figure set from MiniArt by the name of “Cheese Sellers”, which we reviewed here at the end of last year. Now, if you need more cheese (and who doesn’t?), or don’t particularly want or need the figures, you’ve got your wish. The large cheeses are found on two sprues, plus another three with smaller cheeses and some meat, some of the cheeses of the holey variety. There are also three sprues of trays, each containing parts for three of them, the planked bases having the longer sides moulded-in, adding separate ends with handles cut-out of the centre. Markings You are at liberty to paint the trays any colour you like, but the cheeses are usually somewhere between yellow and orange, with a few exceptions such as Edam with its waxy red covering, and Brie that is covered in a white waxy ‘crust’. The decal sheet that is included with the set is printed with a host of labels for your painted cheeses, three of them larger, the rest in medium and small sizes, which should be enough to finish the cheeses included in the box, especially if you apply decals just to the top cheese of any stacks you make. Decals are by Cartograf, which is a guarantee of good registration, sharpness and colour density, with a thin matt carrier film cut close to the printed areas. Conclusion 1:35 cheeses. They could be described as a niche product, but if you want or need some, these are perfect for your requirements, and I’ve managed to complete the review without any cheese-related puns. Can’t be bad, but it won’t last in the comments. Highly recommended. Review sample courtesy of
-
Refugees Teacher’s Family (38086) 1:35 MiniArt via Creative Models Ltd During WWII there were millions of displaced populations created by the advances of the Nazis across Europe, escaping from combat or persecution, resulting in huge streams of humanity making their way to a perceived safer part of their own or a neighbouring country. People took only what they could carry, unless they were lucky enough to possess a motor car or some kind of cart, whether hand-pulled or horse-drawn. People would take their truly important belongings, loading up with their most valuable goods, whether monetarily or otherwise, often comprising items that might be of use in their profession or as currency to trade when they arrived at their destination. The Kit This figure set supplies two figures, plus the possessions that they are carrying, and a trolley with more of their personal effects within. The set arrives in an end-opening figure-sized box, and inside are six sprues in grey styrene, plus a sheet of instructions that also has several pieces of art printed on it to use with the picture frames that are included on the sprues. The parts for each figure are found on separate sprues for ease of identification, and parts breakdown is sensibly placed along clothing seams or natural breaks to minimise clean-up of the figures once they are built up. The sculpting is typically excellent, as we’ve come to expect from MiniArt’s artists and tool-makers, with natural poses, drape of clothing and textures appropriate to the parts of the model. Both figures are wearing overcoats, the lady wearing a full-length mack that goes down to her knees, her legs formed by separate parts that plug into the underside of her coat. The gentleman’s jacket is shorter, and the tails are moulded hanging down past where the legs join at the waist for realism. He is wearing a Trilby or Homberg-like brimmed hat, while the lady has a headscarf covering her hair, both of them striding purposefully toward hopeful safety. The accessories are contained on four sprues, and include parts for the trolley cart on one sprue, a smaller sprue of picture frames for use as detailed above, a sprue of suitcases and other bags, and the final sprue providing parts for a table lamp, a wireless set, and a globe in a finely-carved rotating mount with four ornate legs with feet carved into the ends. You’ll have fun painting the globe, but it doesn’t have to be too detailed to look the part. The eight paintings supplied on the accompanying instruction sheet that is printed on glossy paper include some very famous paintings that are almost certainly intended as reproductions, given their provenance and likely cost even in the 1940s. You simply cut them from the backing paper and fix them in place on the narrow rim around the inside of the frame in much the same manner as a real picture frame. If you want to add glass to the frame, some thin acetate sheet would be much easier to cut to shape than trying to adjust the size and shape of a glass slide cover that is often used to depict broken glass in dioramas. Conclusion The figures are expertly sculpted, and they have a care-worn look to them that would be typical of anyone that has been displaced by war, their profession is semi-implied by their luggage, and their downtrodden demeanour gives a clue to their likely state of mind. Highly recommended. Review sample courtesy of
-
 US Tank Repair Crew with Continental W-670 Engine (35461) 1:35 MiniArt via Creative Models Ltd The Continental W-670 engine was a seven-cylinder radial powerplant that was initially designed as an aircraft engine, but was later adapted to be used in vehicles, the most famous of which would probably be the M5 Stuart light tank. It displaced 11 litres, and output between 230-50hp, but like other radial engines used in AFVs, the design led to a relatively high profile to the vehicle’s hull. The motor was air-cooled, which was an ideal method for aircraft that were flew through the sky at hundreds of miles per hour, but on the ground inside a heavily armoured vehicle that was barely able to break 20mph on rough ground, the cooling was achieved by a large diameter fan and regular maintenance. The Stuart’s installation could be maintained inside the vehicle by removing exterior panels, although deep maintenance or repair would be easier with the power plant removed by a hoist to access the areas buried deep in the hull. The Kit This set consists of two mechanics hard at work maintaining a W-670 engine in the back of Stuart light tank, and is intended for those that perhaps didn’t get the Interior kit, but would now like to incorporate a maintenance situation into the model, perhaps without bothering with the rest of the interior, or using the extra engine as one on the bench with an Interior kit-based diorama. The two engine sprues are clearly from the new MiniArt Stuart kit, whilst the figures are new as far as we can divine. The set arrives in a shallow top-opening box, with four sprues of grey styrene in a heat-sealed bag, plus a short instruction booklet in colour on glossy paper. There is a table of colour codes that includes swatches plus, Vallejo, Mr.Color, AK Real Color, Mission Models, AMMO, Tamiya and generic colour names that are cross-referenced with green colour call-outs throughout the instruction steps. All seven cylinders are moulded with separate head parts, three pairs of which are linked by a narrow, curved rod. A conical fairing is arranged around the forward end to duct the cool air from the large cooling fan, with a cross-brace and circular boss across the open space at the forward end. The fan is mounted on this boss, with a stub-axle on the outer face, with all the blades moulded into this well-detailed part. The tinwork is substantially different from an aviation variant of this motor, but the push-rods, intake hoses and ancillaries are similar, while the exhaust take-off doesn’t have the same space constraints on it. The two exhaust manifolds carry the fumes from three and four pistons each, reducing to two larger pipes that end with a stepped joint to strengthen the join between it and the exhaust pipes. The intake manifold at the bottom of the engine is fed by two pipes that head up the sides of the engine, covered by a substantial engine carrier beam that also holds additional ancillaries, with the hole in the centre allowing more to protrude. More ancillaries including distributor and belts are layered over the carrier, with two tubular mufflers attached to the tops of the exhaust pipes, after which it is fitted into the engine bay, which you’ll need to prepare by painting and weathering in advance. The figures are two US mechanics in simple overalls, wearing short-peaked caps, while they carry out their work. One is crouched low with his sleeves rolled up, and is wielding a spanner at around eye-level, the other man stepping down into the engine bay with one foot, the other knee supporting him on the deck along with his right hand on the engine, holding a pair of pliers in his left hand, either admiring his colleague’s efforts, or getting ready to step in should his friend fail with his spanner. The parts for each figure are found on separate sprues for ease of identification, and parts breakdown is sensibly placed along clothing seams or natural breaks to minimise clean-up of the figures once they are built up. The sculpting is typically excellent, as we’ve come to expect from MiniArt’s sculptors and tool-makers, with natural poses, drape of clothing and textures appropriate to the parts of the model. Markings As already mentioned, the colour call-outs are provided through the instruction steps, and there are no decals supplied in the box. The colour chart should offer all the information you need to choose the correct colours, even if you don’t use any of the product ranges that are mentioned. Conclusion Great news for those with an exterior-only Stuart, or one from another brand, and as usual with figures, they give a human scale to any model. Highly recommended. Review sample courtesy of
 -
MiniArt US Fuel Drop Tanks & Bombs (49015) 1:48
Mike posted a topic in Aftermarket (updates/conversions)
US Fuel Drop Tanks & Bombs (49015) 1:48 MiniArt via Creative Models Ltd Most US fighters and fighter-bombers could carry additional equipment under their bellies or wings, whether it was extra fuel, rockets or bombs. MiniArt’s excellent new 1:48 P-47D Thunderbolt comes with a stash of weapons and tanks, which they have tooled in excellent detail, and are now released as a separate boxing for those who are short on such things for use with other kits, and don’t want to bother with the expense and complexity of resin weapons sets for whatever reason. This set arrives in a figure-sized box with side profiles on the subject matter on the front, and painting and decaling instructions on the rear. In addition, a sheet of instructions to build the assemblies are also included inside the box, which has ten sprues of grey styrene, a Photo-Etch (PE) fret in a cardboard envelope, and a decal sheet to round out the package. From these components you can build the following: 2 x 10⁸Gal Paper Drop Tanks 2 x 200Gal Drop Tanks 2 x 150Gal Drop Tanks 2 x 75Gal Drop Tanks 2 x 1,000lb AN-M65 Bombs 2 x Smoke Grenades 2 x 1,000lb AN-M59 Bombs 2 x 250lb AN-M57 Bombs 2 x 500lb AN-M58A1 Bombs 2 x 4.5” Rocket Launcher Tubes All the tanks are built in pairs to fit under wings, but can also be used solo under the centreline, making them from two halves each, with the 150Gal option having an attachment insert added in the top. The bombs can be built in 1,000lb, 500lb or 250lb variants, each one made from two halves for the body and two parts for the square tails, although this boxing also includes a full set of PE stabilising fins to replace the styrene option if you wish. The smoke generator is basically a two-part drop-tank with a two-part dispenser spout under the rear, which would be used to lay smoke for the Allied troops below to cover their actions, at least temporarily. The final item is a pair of three-tubed ‘Bazooka’rocket pods, which are made from two halves, plus inserts front and rear, and they have their mounts moulded-in, ready to attach directly under the wings of your model. As a note, the rocket pods weren’t generally carried alongside wing tanks due to the likelihood of ignition, thereby removing the wings and forcing the pilot to walk home. Markings As already mentioned, the painting and decaling instructions can be found on the back of the box, and a colour chart at the bottom shows colour names, swatches and codes for Vallejo, Mr Color, AK RealColor, Mission Models, AMMO, Tamiya, for completeness. Decals are by Cartograf, which is a guarantee of good registration, sharpness and colour density, with a thin matt carrier film cut close to the printed areas. Conclusion If you’re a little short of things to hang under your 1:48 US WWII fighter/Bomber, this set is a cost-effective solution that uses reliable styrene to provide the details, making for a simple upgrade. Highly recommended. At time of writing, this set is currently on healthy discount with Creative Models Ltd Review sample courtesy of -
 Hi folks. Just wrapped up MiniArt's inaugural aircraft kit as 'Hairless Joe', Col. David Schilling's 56th FG ride. 🙂 TTFN Steve
- 11 replies
-
- 36
-

-
- P-47D
- Thunderbolt
- (and 1 more)
-
Sd.Kfz.234/2 ‘Puma’ (35419) 1:35 MiniArt via Creative Models Ltd Armoured cars and their derivatives were a dominant part of German military thinking after WWII, as they were prevented from having tanks or other types of heavy weaponry by the Versailles Treaty, at least until they unilaterally set its terms aside once Mr Hitler was firmly ensconced as the country’s mad dictator. Although it closely resembles the earlier Sd.Kfz.231, the 234 was based upon a more modern ARK chassis, while the 231 was built on the GS chassis. The 232 Schwerer Panzerspähwagen was available in 6- or 8-wheeled formats, with the number of wheels appended to the designation, and it was the 8-Rad that the basis for the 234, following on later in 1940 and learning from issues encountered with earlier designs. The new turret was designed by Daimler Benz, while the engine was a Tatra air-cooled diesel unit, powering all eight wheels that were also all steerable. To add to the ease with which the vehicle could be driven, there was an additional driver’s station at the rear, complete with a steering wheel that gave it the capability of reversing out of trouble with similar speed and dexterity as driving forward – a facility that came in very useful in the event of an ambush or stumbling into an enemy position. The 234/2 was the initial variant and the most prevalent, as well as being the best known, probably because of the (comparatively) big 50mm gun in the turret. Oddly, it was replaced less than a year later with an open-turreted /1 variant that mounted a smaller 20mm cannon, and concurrently another variant with a short-barrelled 75mm K51 gun under the /3 designation. This variant was also short-lived, increasing the fire-power substantially with an installation of the powerful Pak 40, although the extra weight caused extreme stress to the 234’s chassis and running gear. All the variants after the /2 were open-topped, leaving the crew exposed to the elements, incoming plunging fire and explosive charges lobbed in by the enemy. To keep them out of range however, a single MG42 was coaxial with the main gun - a very capable machine gun against troops and lightly armoured targets. The armour built into the vehicle could deflect light-arms and smaller cannon rounds, with 30mm of sloped armour on the turret, and up to 100mm thickness on the mantlet, but at the rear the protection was only 10mm, as was the roof of the /2. Over 100 /2 vehicles were made before it was superseded, and despite being the most well-known, there were around 200 of the later /1 produced, with roughly 90 of each of the other two made before the war ended. The Kit This is a new tooling from those dynamos at MiniArt, the first in a line of boxing that will include Interior Kits, and doubtless the other variants that we’ve spoken about above. We’ve had other kits of the type in this scale previously, but not for some considerable time, and it’s fair to say that armour modellers with an interest in this genre are very pleased. The kit arrives in a standard-sized top-opening box with a painting of a 234/2 on the battlefield, passing a flaming tank that has been knocked out, and with a few soldiers in the hazy background. Inside the box are twenty sprues of various sizes in grey styrene, a clear sprue, a fret of Photo-Etch (PE) brass, decal sheet, and the instruction booklet that is printed in colour on the outer pages on glossy paper, with profiles of the decal options on the inner and outer covers. The detail is excellent, as usual, restricted mostly to the exterior for this boxing, but the next review of this type will be the Interior version of the same kit. The hatches can be posed open or closed, although with limited appeal for this boxing, PE details, and the surface detail is fully realised with weld seams and exterior structure well defined. Construction begins with the lower hull, starting with the narrow bottom section where the drive-shafts and suspensions are located, which is made from three faces, two internal bulkheads, and two steering actuators, one at each end. The hull floor has tread-plate moulded-in and a cut-out that’s ready for the interior kits, which is sandwiched between the two outward sloping sides, adding a rear bulkhead behind the engine compartment. The two assemblies are mated, fitting the first parts for the suspension to the sides, and a U-shaped stiffener in the centre of the lower portion. Despite the exterior-only nature of the kit, various internal parts are installed in the lower hull, with side doors and their locking mechanisms, and an inner stiffener in the centre of the crew space. The upper hull has inner structure of the vision ports applied, plus hinge-points for the driver’s hatch and building two vision ports for later installation, and an optional stowage box for some decal options. The upper hull has the engine deck filled with cooling vents that can be posed open or closed by using different parts, with two solid doors at the sides, locating it in the cut-out in the back of the deck, then adding the rear bulkhead with hatch, mating the upper and lower hull assemblies, fitting the vision ports and a hatch with separate hinges and handles in the square cut-out in the glacis plate. Suspension and steering parts are assembled on the underside of the hull, making up four axles on each side, replacing left with right-handed hubs on the relevant side. Either four or six triple-handled Jerry cans with PE central weld-flares and cap are made and wrapped in PE straps that secure them to the vehicle later, making up both sides of the sponsons and installing the rear carcasses of the flush stowage boxes, and adding the leaf-spring suspension units, plus making a start on the external parts such as the jack, two mufflers and another stowage box, then going on to fit steering linkages and other detail parts before the sponson sides are glued in place, finishing the ends with additional parts. The doors can be fitted open or closed by using different parts, with a selection of stowage boxes made up and used for different decal options. The spare wheel is the first to be made, making it from either four centre laminations and two exterior faces to create a detailed tread pattern, or using a simpler two-part wheel structure if you prefer, fitting it to the bracket on the rear of the vehicle, with a muffler on either side of the sloped rear of the sponsons. More stowage boxes and the requisite number of Jerry cans are made and mounted on the engine deck, again for the decal options, plus pioneer tools and a fire extinguisher on the left sponson. More detail parts are dotted around the hull, including width-marker lollipops, headlight(s) depending on your chosen decal option, pioneer tools, an antenna with PE star-shaped tip, then crushing it all while you fit the tyres (I hope I’m joking here), which are made from four laminations and exterior faces, one of the inner parts a tapering hub that will be seen once the wheels are installed on the eight axles. This exterior kit includes most of the breech of the 50mm gun, starting with the breech halves and twin recuperators on top, which slot into the rear of the mount, passing through the turret front and held in place by the circular inner mantlet. The breech and stock of the MG42 are slotted through a slot to the right of the main gun, and this is installed in the front of the turret, with the turret floor added underneath. A two-part periscope is applied to either side of a roof cut-out, with an aerial on the rear edge of the roof, extending the breech with a short peg that supports the cast mantlet, which has the muzzle of the MG42 inserted into the small hole to the right. The two circular hatches on the roof are made up with vision blocks, handles and latches, and can be posed opened or closed, which could be pertinent if you are planning on placing figures in the hatchways. The main gun is moulded as a single tube with pegs at either end, and a three-part flash-hider fitted to the noisy end, and the thick end inserted into the mantlet, all of which are keyed to ensure correct alignment. A pair of triple-barrel smoke grenade launchers are glued to a PE bracket, and these are mounted on the sides of the turret after adding a styrene L-shaped base to the sides. A circular shell-ejection hatch is fixed to the rear of the turret along with a lifting hook, with one on the forward edge of each side to finish the build, dropping the turret into the ring, which doesn’t have a bayonet lock, so you’ll need to be careful when inverting the model. Markings There are six decal options included on the sheet, all of which have a base-coat of dunkelgelb or dark yellow, with a variation of green and red-brown camouflage on all but one of them, as they were later war after German armour had transitioned away from Panzer Grey. From the box you can build one of the following: Unidentified unit, Eastern Front, Summer 1944 Pz.Aufkl.abt.2, 2.Panzer-Division, France, Normandy, Summer 1944 SSPz.Aufkl.Abt., 1. SS-Panzer-Division ‘LSSAH’, France, Falaise, Summer 1944 Pz.Aufkl.Abt.20, 20. Panzer-Division, Eastern Front, Summer 1944 Pz.Aufkl.Abt.2, 2. Panzer-Division, Battle of the Bulge, Belgium, December 1944 Pz.Aufkl.Abt.7, 7. Panzer-Division, Poland, Spring 1945 Decals are by Cartograf, which is a guarantee of good registration, sharpness and colour density, with a thin matt carrier film cut close to the printed areas. Conclusion The 8-rad armoured car is an appealing subject to a lot of modellers, and the Sd.Kfz.234/2 is one of the fun ones with a large gun. The detail is excellent, and I can’t wait for the /4 with the even larger gun. Very highly recommended. Review sample courtesy of
-
G506 4x4 1.5T Panel Delivery Truck (38083) 1:35 MiniArt via Creative Models Ltd The Chevrolet G506 truck formed the basis of a range of 4x4 load-carrying vehicles that could carry up to 1.5 tonnes of cargo, men or equipment. They were initially made under the 4100 code, then were renamed as the 7100 series, and usually had a standard enclosed cab, with a 3.9L straight-6 engine under the bonnet, and a four-speed “crash” (non-synchromesh) gearbox putting out a little over 80hp through all four wheels. It rapidly became the Allies’ standard light truck, and served in substantial quantities on the Western Front, with the Soviets on the Eastern Front, and the forces fighting Japan in the Far East. There were plenty of variants, some in US Army service, others in USAAF service, with almost 50,000 of two specific types, the G7107 and G7117 sent over to the Soviets in large numbers under the Lend/Lease program. The G7105 variant was a fully-enclosed van bodied truck that had a full metal bodyshell to protect the contents, and thanks to its twin wheeled rear axle, it was capable of carrying the same load as its open-topped siblings. They were used extensively by the Signal Corps, but are relatively rare in the overall panoply of chassis types for this series. Their low production quantities and participation in WWII trimmed their numbers further, so they are quite rare compared to others of the type, but some still survive of course, and can be seen occasionally at historic vehicle rallies and get-togethers of like-minded enthusiasts. The Kit This is a new civilian boxing of a recent G506 tooling from MiniArt, and is one of an expanding range that is to be found in your favourite model shop. It’s a full interior kit, with engine, cab and load area all included along with some appealing moulding and detail, particularly in the cab and those chunky tyres. It arrives in one of MiniArt’s medium-sized top-opening boxes, and inside are fourteen modular sprues in grey styrene, a clear sprue, Photo-Etch (PE) sheet in a card envelope, decal sheet and glossy instruction booklet with colour profiles on the front and rear pages. Detail is excellent, and well up to MiniArt’s usual standards, using PE parts to enhance the model, and finely moulded details of the chassis, running gear, cab and interior areas. Construction begins with the ladder chassis, which has leaf-springs fore and aft, cross-braces and rear towing eye fitted to create the structure, then has the fuel tank with PE retention bands, PE rear bumper irons formed around a styrene jig, and axles installed on leaf springs, before the brake drums/hubs, battery and external brackets are added to the chassis rails. The transfer box and drive-shaft join the two axles together, and a steering linkage and box are inserted into the front of the chassis, then the engine is built up based on the straight six-cylinder block, with carburettor, dynamo and transmission added, plus the serpentine pulleys and fan at the front. The engine and substantial front bumper iron are fitted to the chassis, assembling the exhaust and its muffler, which slip into the underside of the chassis from below, held in position on PE brackets at the exit. The wheels are made up with singles at the front, made from two parts each, and with twin wheels at the rear, again with separate outer sidewalls. Each wheel slips over its respective axle, with the hub projecting through the central hole. The three-part radiator housing is layered, with the rear part having a cut-out that allows the air from the fan to cool the radiator when stationary, mounting on the front of the chassis and mating to the input and outlet pipes already in position. The crew cab is next, beginning with the firewall and forward sidewalls. The firewall is detailed with dash pots fixed to the forward side, and is set aside until it is needed toward the end of building the bodyshell, which is next. The sides of the van have a separate ribbing insert on the insides, to be joined to the floor after the raised platform for the crew seats is installed, fixing two four-part seats on top, and a small forest of levers in the centre of the floor. The rear light clusters are mounted on PE brackets on the rear of the side panels, one per side, and as is often the case with instruction steps, they may be better left of until after main painting. The floor is inverted to install the sidewalls, putting a short fuel filler tube on the outside that matches up with the extension within that leads to the tank. The rear valance plugs into the floor on two pins, joining the two side panels together on the lower edge. The rear doors and their interior cards are assembled with their handles, locking mechanism in a fairing with a flat PE surround, plus handles on both sides of the right door, and clear window glass with rounded corners. The dashboard inserts into the A-pillars that are moulded into the roof, with seven decals for the instruments and stencils on the glove box, plus two more on the headliner near the rear-view mirror, which installs into the front of the roof panel. The steering column is joined to the underside of the dash, adding a courtesy light and six curved ribs to the inside of the roof in grooves. The crew doors and their interior cards are assembled with handles and window winders, plus the clear window glass that can be posed open or closed at your whim. The windscreen frame has the two clear panes fitted, and has a pair of PE brackets and styrene wingnuts that are installed either vertically for closed, or at an angle for open, with a scrap diagram showing the correct orientation of the various parts, and below it on the scuttle is a ventilator panel that can be open or closed as you prefer. The steering wheel is fixed to the top of the column, the diagonal kick panel is joined with the firewall and fitted out with three foot pedals, and a button that I think is the parking brake. The roof and firewall assembly are fitted to the growing bodyshell assembly, while the rear doors are installed within the frame in the open or closed position if you prefer, adding a short stay at the hinge-side from wire of your own stock. Two rear arches with running boards are fitted under the floor into recesses, projecting past the line of the bodywork to encompass the twin rear wheels, then with the body righted, a wing mirror is glued onto the cab in front of the driver’s door at handle-height on a long strut with PE brackets at the bottom, posing the doors open or closed again as you wish. The body and chassis are mated, and a choice of cowling panels fit to the sides of the engine compartment after adding a V-brace under the bonnet, then fitting the front wings that incorporate the forward section of running boards under the doors that joins up with the rear boards. The front of the vehicle has its headlights with clear lenses plus sidelights fitted to the wings, and PE windscreen wiper blades are hung from the top of the frame on styrene arms, then the front grille is built. You may have noticed that this appears on the sprues too for a simpler build process, but a more detailed and realistic grille can be fabricated from the PE parts on the fret. It is constructed completely from PE, and two styrene jigs are included on the sprues to assist with accurately forming the correct shape. The lower rail, light cages and curved side panels are made up on one jig from a single piece of PE, while the centre panel is folded up on another, then they’re joined together ready to be attached to the front of the engine bay. There are two PE brackets stretched across the front of the radiator, but if you elected to use the styrene grille, this process is condensed down to nipping the part from the sprue, cleaning the sprue gates, and gluing it to the front of your truck, removing a small curved section from the left of the styrene grille as it is glued in place. The bonnet can be fitted open or closed with a PE stay that is provided in the centre of the panel for the open option. The spare tyre is built from two parts like the rest of the wheels, and is mounted on a two-part L-shaped bracket, the bottom tubular end gluing into a hole in the left side of the bodywork. A choice of PE number plate holders are supplied for the front, and another for the rear, with an optional pair of roof-mounted searchlights on the forward corners of the roof above the windscreen. Markings There are four decal options on the sheet in various colour schemes with various operators, and from the box you can build one of the following: US Air Police, Late 1940-50s Rescue Vehicle of the Wendling Volunteer Fire brigade, Austria, early 1950s Stake & Grille, Texas, early 1960s Ambulance, Maryland, USA, early 1960s Decals are by Cartograf, which is a guarantee of good registration, sharpness and colour density, with a thin matt carrier film cut close to the printed areas. The spelling of “Stake” in option C is incorrect if it relates to meat, with the silhouette of a buffalo implying it might? Check your references on that one, as I struck out looking for photos in the short time I had available. Conclusion This is an interesting civilian variant of the G506 chassis, and looks different out of its usual green colouring, which with the detail that MiniArt pack into all their kits, makes an impressive model. Get one quick before Creative run out, or the discount ends! Highly recommended. At time of writing, this kit is available from Creative Models Ltd at a substantial discount Review sample courtesy of
-
M3 Stuart Light Tank Initial Prod. (35425) 1:35 MiniArt via Creative Models Ltd The M3 Stuart was designed before the US went to war, based upon the experiences of the British, which led to the US top brass deciding that their M2 light tank was obsolete. While the radial engined M3 was an improvement over the M2, it suffered from an underpowered M6 main gun at only 37mm, which although it was improved later in the war, the crews had to suffer with it for some considerable time. The British troops in Africa used it first against the superior tanks of the Afrika Korps, but they fared badly in combat, suffering from the lack of range of the Stuart in the wide-open spaces of the African desert. It was fast and manoeuvrable however, and a British driver’s comment that she was a "honey" to drive led to one of its nicknames during the war. The M3A1 was an improved version that deleted the heavy sponson mounted machine guns of the initial production, and some of these used more conventional diesel engines instead of the bulky radials, which gave the crew more room for other equipment. It also had a new turret with a basket for the turret crew to stand in, and no cupola for the commander that gave the tank a lower profile, and added a gun stabilisation system that helped with vertical alignment of targets while the tank was on the move, ironing out the bumps for the gunners. In British service it was known as the Stuart III and with the diesel engine version was designated the IV. It was hopelessly outclassed by Axis armour in Europe for tank-on-tank engagements however, and was soon relegated to infantry support and recce roles, where it performed well. It was more successful in the Pacific theatre against the lightly armoured Japanese tanks in the jungle, where medium and heavy tanks could soon flounder in the mud and heavy foliage in jungle conditions. It continued to be used to the end of the war by the Allies in the Pacific area, although Russia, another user of the Stuart, disliked it intensely and refused to take the upgraded M5 design that followed the M3A3. Variants were used well into the 60s, and Brazil even built their own version with redesigned upper hull that carried a 90mm gun. Paraguay still had a few of its ancient original stock of 12 beyond the turn of the millennium, which is astonishing, considering the age of the design. The Kit This is a new boxing of a brand-new tooling from our friends at MiniArt, who are producing an amazing output of new kits and partial re-tools in recent years, which is doubly-impressive given the situation in Ukraine over the last few years. This kit arrives in a top-opening box with a painting of an initial production Stuart on the front, clearly illustrating the prominent machine gun on the rear of the turret and the stowage carried by many vehicles of this type. Inside the box are fourteen sprues in grey styrene, a clear sprue, a fret of Photo-Etch (PE) brass in a card envelope, a decal sheet, and the instruction booklet, which is printed in colour on glossy paper, with profiles of the decal options on the rearmost pages. Detail is excellent as we’ve come to expect from MiniArt, and as this is an exterior kit, the interior isn’t provided, but the exterior and running gear are well-defined, and the tracks are supplied as link-and-length, taking the benefits of individual links and making the job a lot less labour intensive without much loss of detail. Construction begins with the vehicle’s floor with a choice of two styles of floor hatch, then making curved transmission armour at the front of the tank, which is detailed with various towing eyes, additional bolt heads that are cut from the sprue runner, and a central frame that can be folded from PE or replaced by a single styrene part. Now the hull sides can be fitted, but not before they are detailed with various external parts, adding final drive housings to the front ends, using the bogie axle ends to locate the parts on the sides of the floor. The rear bulkhead is built with a hatch space in the upper half, gluing it to the rear of the vehicle. The rear hatch is in two sections, one of which has a PE clapping plate, both having handles, posing them closed to hide the lack of engine. Above the hatch is an overhang with a PE mesh horizontal insert and styrene rear, with a couple of towing eyes mounted on the lower edge of the bulkhead. The next assembly is a thirty-cal machine gun, which has a vertical magazine moulded into the top of the breech, finished with a circular mount that is slotted through the glacis plate from the inside, plus a strengthening strap under the driver’s hatch. It is glued into position on the front of the tank, fitting the transmission inspection hatch with handle to the centre, and adding a pair of towing shackles to the front. The driver’s hatch is in two parts, and can be posed closed for battle, or with both parts folded open to allow the driver to see the full vista, which would of course expose the lack of interior. A two-layer T-shaped cross-member is located over the upper glacis, adding a bracket that supports the headlamp, and a pair of bearing spacers to the final drive housings. As already mentioned, the earliest Stuarts had sponson-mounted machine guns, which extend from the main hull out over the tracks, roughly along the middle third of the vehicle’s length. The two sponson floors are glued into position, and two .30cal machine guns are trapped between two-part mounts, one fitted to each sponson, sliding through the front armour. The sides of the sponsons can then be built around the guns, with a short wall to the rear, a long panel along the side. Two hatches are fixed to the front of the upper hull after adding an extra layer behind, a clear vision port, and openers to the sides. If you intend to pose the hatches up, you have the option of leaving the inclement weather inner hatches in position, which have large panes of glass and windscreen wipers to save filling the tank with precipitation. The open outer hatches are propped up with a pair of short stays from their top hinges, but the usual caveat about the interior still applies. The hull roof is next, starting with the panel that has the turret ring moulded-in, adding additional nuts on the top ring from the sprue runners, and a pair of filler caps on the deck behind it, shaving away clasp details around them. The completed part is lowered into place on the hull, turning to the engine deck next, placing the panel after fitting handles, gluing it in position and fitting a pair of rear lights on brackets to the sides, adding a little connecting wire if you wish. The main deck panel has a PE shroud to the forward edge to deflect incoming rounds or debris, plus another PE bracket for one of the aerials is attached to the right, with another shelf-bracket mounted on the side wall slightly lower and further to the side than the other. The aerial bases are each made from two parts, adding 73mm of stretched sprue, wire, or carbon fibre rod to represent the aerials themselves. A pair of dome-topped cylindrical air-boxes are built from four parts each and attached to the rear of the sponson on brackets on both sides. We finally get some wheels for the tank, starting with the two-part drive sprockets and a pair of over-size idler wheels, which are trapped between two halves of the swing-arm, and adding a PE rim to both sides. The road wheels are mounted in two-wheel bogies, each one made from ten parts, building four in total, handed for each side. The road wheels flex-fit into position between the arms of the bogies, so that they can be mounted on the sides of the vehicle in shallow recesses along with the idlers and drive sprockets, with three return rollers on short axles above the main run. As discussed earlier, the tracks are link-and-length, using long single-part lengths under the wheels, individual links around sharp curves, and shorter lengths where the tracks are relatively straight. The various sections are attached to the sprues at the edges, and each short portion has a unique tab and slot format to ensure that parts can only be put together in the correct manner. There are a few ejector-pin marks on the inside of the longer track link sections, but these are raised and on flat surfaces, so shouldn’t be difficult to remove with a sanding stick or sharp blade, and won’t slow you don’t too much. When the track runs are suitably cured, fenders are added over the open areas, the rear straight sections fitted with a curved end to reduce kicked up mud, while the front section have inner side skirts to prevent mud ingress, which is improved further by gluing a PE web between it and the leading edge of the glacis plate, along with a PE stiffening strap further back. Before we start festooning the vehicle with pioneer tools, a pair of headlamps with clear lenses are placed, one on each fender protected by a PE cage, and both with a short length of wire leading back to hole in the glacis plate. The pioneer tools are fully styrene tools that have their clasps moulded-in, and are dotted all over the horizontal surfaces of the vehicle, including an axe, pickaxe shaft and head, and a shovel. More tools are located on the forward sponsons, adding PE tie-downs around the deck for securing stowage or camouflage. The single towing rope requires the modeller to provide either a 157mm length of braided wire or thread, fitting a pair of styrene eyes to the ends, and clamping it in place with PE brackets along the left sponson and fender. At the rear of the engine deck, a PE rack is made from a single PE part that is folded into a shallow base for ten three-handle Jerry cans with separate caps and handles, all of which are secured to the rack by pushing a flat bar through the handles, and locking it in place with a hook on each end. Now for the turret, starting with the main 37 mm M6 gun, the gun tube formed by a single part with hollow muzzle that is surrounded by a two-part frame, and has the halves of the breech closed around the rear, adding extra detail on the right, and a breech protector to the left side, followed by a four-part pivot that are fixed around the gun without glue, then the coaxial machine gun is attached to the right side of the breech, and its ammo box is located on the left side, fed by a ‘bridge’ of link over the main gun in a guide to the breech of the smaller gun, dumping spent rounds in a box-like bag underneath. The barrel is pushed through the mantlet and inserted into the front of the turret, which has been made from a well-detailed ring, with the faceted turret sides arranged around it after being detailed with vision blocks themselves. The roof has a yoke inserted on its underside in stowed or combat positions, and is glued in place, sliding the mantlet armour over the main and coax guns from in front. The commander’s cupola is similarly faceted, and each side is prepared by fitting a vision block in the slot, creating an asymmetrical hexagonal shape, and deciding whether to pose the turret crew’s vision ports open or closed. The commander's hatch is a flat panel with a lock on the upper edge, and hinges on the lower, which can be fitted open or closed, with more vision ports on the turret sides posed open or closed around the rest of the perimeter. Another .30cal machine gun is trapped between a two-part mount with adjuster handle, and fixed to a short column that is secured to the rear left side of the turret on curved brackets moulded into the surface. An optional two-part ammo box with a length of link can be fixed to the side of the gun, or if you wish to leave it off, an alternative stub part is supplied in its place. With that, the turret can be dropped into position to complete the model. Markings There are four decal options included on the small sheet, and you’d be right to guess that they are all in some variation of WWII Allied green, with only their individual markings to tell them apart. From the box you can build one of the following: Royal Tank Regiment, British Army, Egypt, Summer 1941 2nd Armoured Division, South Carolina, USA, Autumn 1941 1st Armoured Division, Rock Hill, South Carolina, USA, Autumn 1941 1st Armoured Division, Rock Hill, South Carolina, USA, Autumn 1941 Decals are by Cartograf, which is a guarantee of good registration, sharpness and colour density, with a thin matt carrier film cut close to the printed areas. Conclusion It’s great to have this much detail present in a newly tooled kit of the diminutive Stuart, or Honey as the Brits called it, and it deserves to become the de facto standard for the scale. If you don’t want to pick up the original Interior kits because they contain too many parts or will keep you occupied to long, then this one should fill the gap perfectly. Very highly recommended. At time of writing, this kit is benefitting from a healthy discount at Creative Models Ltd Review sample courtesy of
-
Tempo A400 Tieflader Pritsche (38045) 3-Wheel Beer Delivery Truck 1:35 MiniArt via Creative Models Ltd The A400 Lieferwagen was another of Hitler’s standard vehicles that is perhaps lesser known than the Beetle. It was originally designed as the E400 and produced by company Tempowerk Vidal & Sohn from 1938, and was joined by an identical Standard E-1 that was manufactured in another factory. It was one of the few factories that were permitted to carry on making civilian vehicles, although this permit was eventually withdrawn as the state of the war deteriorated for Germany. After WWII ended, the company began making the type under the original E400 name, and it often had a different BMW-esque twin panelled front grille. It continued in production until 1948 when it must have dawned on someone that one wheel at the front was a genuinely bad idea, even if it was cheaper to produce. A concept that lingered on in the UK much longer so old folks with motorcycle licenses could scare other road users effectively, and by carrying a football in the boot, they could emulate a giant whistle. It’s an old joke, but it checks out. Unsurprisingly to anyone that watched that episode of Top Gear, the wagon was a little unstable in the corners due to its single front wheel, and the weight of its front-mounted engine probably made matters worse, with a chain drive from the motor to the wheel. The two-stroke 400cc engine in the A and E output 12 hp that gave it sluggish performance at best, which was probably just as well due to its legendary front wheel instability. The driver was situated behind the front wheel and short cowling that hid the motor away, with a pair of side doors for entry and exit, and a single-panel windscreen that overlooked the bonnet/hood. The open load area was to the rear of the vehicle, with drop-down sides and rear tailgate for easy access to the contents. The Kit This is a reboxing of a recently tooled kit from MiniArt, and gives the modeller some more civilian choices. This unusual little vehicle arrives in a small top-opening box, and inside are eight sprues of varying sizes in grey styrene, a sprue of clear parts, a fret of Photo-Etch (PE) in a card envelope, a small decal sheet and the instruction booklet on glossy paper with colour profiles on the front and rear pages. It’s a full-body model even though that body is small, so you’ll get to build all the internal parts and during the process possibly learn a little about how it works. Detail is as good as we’ve come to expect from MiniArt, with a lot of it and what there is well-finessed. Carefully considered use of slide-moulding also improves the detail without increasing the part count, and makes parts like the forward cowling a feast for the eyes. Construction begins with the small cab floor, which has a planked texture engraved on its surface, and is fitted out with foot pedals, a hand-brake lever and narrow cylindrical chassis rail, plus a battery attached to the floor on the left. The front bulkhead has a clear windscreen with rounded corners popped in, a short steering column and a dangling lever, with the windscreen wiper motor cover added to the top of the screen frame, leaving the two bunny-ear indicators intact because they are suitable for this version, and drilling two holes in the top corners of the frame. The windscreen assembly is attached to the front of the floor with a pot for the washers and the conversion stub of the steering column, with a pair of PE wiper blades added in a boxed diagram below, plus a bonnet-hook in the centre. The padded bench seat for the crew is slotted into the floor, and the back cushion is attached to the rear bulkhead that has two side parts and a small clear window for later joining to the floor, and you’ll need to find some 0.3mm wire 24.6mm long to represent the linkage to the floor-mounted brake lever and the back of the cab. The steering wheel and rear bulkhead are glued in with the roof placed on top, then the two crew doors a made up, having clear side windows plus winders and handles that are quite delicate for realism, then they are installed on the cab, remembering that they hinge rearward in the manner sometimes referred to as suicide doors. The rear chassis is built around a cylindrical centreline part with the back axle and its triangular bearers slipping over it and having hubs with brake discs added at each end. A sturdy V-shaped brace is added between the ends of the axle and the other end of the cylindrical chassis rail, with a large jointing part between them. The rear wheels are made from a main part that includes the tyres and back of the hub, with a choice of two inserts slipped inside to represent two different hub cap styles, that are then fitted onto the axles on short pegs, with a brake-line made from some more of your own 0.3mm wire and suspended from the frame on PE brackets that are folded over the wire and are closed up then glued to the frame with an etched-in rivet giving the impression that it is attached firmly to the chassis. The load bed is a single flat slab with planking engraved into both sides, adding PE brackets to the rear, two of which mount the rear lights, and deep side rails with curved rear ends, head-board, and a PE number-plate frame that is fixed to the tail-gate, which can be posed open or closed, adding a pair of mudguards to the exterior sides, one on each side. Small clasps are included for the corners of the tail-gate, and the peg should be cut off for the closed option. The little engine is one of the last assemblies, and is superbly detailed with a lot of parts representing the diminutive 400cc two-stroke motor and its ancillaries, including radiator, fuel tank, exhaust with silencer and chain-drive cover that leads to the front axle. The completed assembly comprises the motor, axle and the fork that attaches to the front of the cab and is wired in using three more lengths of 0.3mm wire from your own stocks, which the instructions advise you makes you an “experienced modeller”. A relatively fast way to earn that badge! After the rear axle and chassis tube have been fitted under the load bed and mated with the cab, the slide-moulded cowling for the engine is fitted-out with a choice of two fine PE radiator meshes, an internal deflector panel, PE numberplate, a pair of PE clasps on the lower rear edge of the bonnet, and a tiny hook on the top in between two rows of moulded-in louvres. The cowling can be fixed in the closed position or depicted open, when the little hook latches onto a clip on the roof’s drip-rail, holding it up past vertical against the windscreen. A couple of headlamps with clear lenses are fitted on the sides of the cowling and a pair of wing mirrors on an angled arm are glued to holes in the front of the bulkhead on each side, with a PE bracket giving the appearance of that the etched rivets are what holds it in place. MiniArt have considerately included a whole sprue of parts for you to add to the load bed of your newly-minted A400 wagon, including six barrels in two different sizes, which you may have seen in other sets from MiniArt at some point. You can use those at your whim, either vertically or horizontally by resting them on a simple trestle that is included, ready for transport the frothy elixir to a thirsty clientele. Markings There are three decal options on the sheet, all painted in bright non-military colours and decorated with the markings of the job it is tasked with. From the box you can build one of the following: Berlin, late 1939-40s Berlin, 1940s Hamburg, 1940s Decals are by Cartograf, which is a guarantee of good registration, sharpness and colour density, with a thin matt carrier film cut close to the printed areas. Conclusion Another bright and detailed boxing of this diminutive wagon, dressed to provide the masses with some alcoholic libations after a hard day’s work. Detail is excellent, the decals are crisp and clear, and the inclusion of a load of barrels will finish the look. Highly recommended. At time of writing, this kit is currently on a healthy discount at Creative Models Ltd Review sample courtesy of
-
German 7.5cm Anti-Tank Gun Pak40. Mid Prod with Field Artillery Crew (35400) 1:35 MiniArt via Creative Models Ltd As WWII loomed, Nazi high command got wind of new tank developments in Soviet Russia, and realised that their 3.7cm Pak36 was inadequate for the task ahead, starting work initially on the 5cm Pak38, which was abandoned in favour of a 7.5cm barrel once the rumours were confirmed. It was essentially a re-engineered Pak38, with everything enlarged to suit the bigger rounds, in development between 1939 and 41, with the name Pak40 given to it during its gestation. As Operation Barbarossa began, the project was given a higher priority, and early examples reached the Eastern Front in late 1941, becoming the Wehrmacht’s standard artillery piece from then on, with a total of over 23,000 built before the end of WWII. The success of the weapon was such that it was also re-developed into a main gun for use by tanks and other armoured vehicles, such as the StuG III and Panzer IV, as well as a relatively makeshift mount on the Marder series of self-propelled guns. It was an effective artillery piece, capable of penetrating the armour of everything the Allies fielded, from the Sherman to the Pershing in US service, and the IS heavy tanks that the Soviets operated. It was a heavy piece however, and that affected its mobility, particularly in bad weather where it was prone to bogging down in muddy terrain. It shared its projectile with all German 7.5cm rounds, but was mounted in a larger brass cartridge casing that gave it more power and range than the smaller rounds fired by the KwK variant used in the armour installations. Other variations included the driver bands around the projectile and the method of initiating firing, using traditional percussion caps for the Pak40, and an electrical mechanism for the KwK. Three types of round were available, an armour-piercing explosive round, an armour-piercing kinetic penetrator with a tungsten core, and the standard HEAT or High Explosive Anti-Tank round, each of which differed in shape and colour of the projectile, and were marked with stencils accordingly. The Kit This a new boxing of a recent tool from MiniArt, who have created a new and expanding range of PaK40 kits that appears to be growing every month, this one portraying a mid-production artillery piece with a crew of four operating it. The kit arrives in a modest top-opening box, and inside are sixteen sprues of various sizes in medium grey styrene, a cardboard envelope that contains a sheet of Photo-Etch (PE) and the decals, plus a glossy-covered instruction booklet in A5 with colour profiles printed on front and rear covers. Detail is exactly what we’ve come to expect from MiniArt, and is of course excellent throughout, with options to pose the model in transport mode or ready for action, plus the four crew figures, whose poses are suitable for an action situation. You also get a few shells and fluted metal cases to dot around the gun if you intend to place it in a diorama. Construction begins with the chassis of the gun, on which the wheels and trails are installed, fixing many parts on it, adding brakes to the axles and a front fender, then cutting some lengths of wire from your own stock to link the brake cylinder to the pistons, with PE tie-downs holding them to the underside, and additional scrap diagrams showing the completed loom from above and below to help you with location. The trails are detailed with tools, grab-handles and spades at the rear, plus additional parts that differ depending on whether you are opening them up for combat, or ready for transport. They are mated to the chassis and locked in place by the top pivots, again changing some parts and their positions depending on the option you have chosen. A choice of two methods of attaching a shovel to the bottom plate are offered, one using a simple pair of PE clasps, the other creating a fully articulated retention clamp for the handle. The finished plate is fitted vertically for transport, but tipped up horizontally for action. There are two configurations for the gun, the traditional ready-for-action pose with the trails spread, plus the transport option for towing by a vehicle. The trails have a pair of cross-braces with a winding-handle to draw and hold them together during towing, with a towing bar connecting it to your choice of prime-mover. The mid-style wheels are laminated from three layers plus a choice of central boss at the front and one style at the rear, making up two of these and fixing them to the ends of the axle. The gun barrel is a single part with a keyed peg on each end, the thicker end inserting into the eight-part breech, which includes a sliding block if you leave it unglued. The barrel slide is made up from three sides and an end-cap, adding more details on the sides, and a cover on the front portion made from three sections. The barrel drops over the slide with the addition of a small PE crutch and is surrounded by a pair of pivots to the sides, the elevation arc-gear under the slide, and a few other detail parts, popping the pivots into the trunnions that glue to a detailed bottom plate, holding the gun in position from there. Dampers with corrugated gaiters are attached to the trunnions, with different parts for transport and combat positions, then the adjustment wheels and their actuators are fixed onto the left side, with a stubby axe on the right, again with a choice of styrene or PE socket and clasp on the handle. The sighting gear is also installed on the left, then it’s time to protect the crew from incoming fire. A U-shaped armour panel is built from two layers of styrene with a PE layer in between them, slotting it over the barrel from above and mounting on four supports, adding an additional link on each side using scrap diagrams to locate them properly. The cheek armour panels are also two layers per side, with cylindrical stowage items including a torch to the inner face before they are mated with the centre armour and braced by additional links to the sides of the trunnions, with an angled PE lip on the inside just below the top edge. There are three choices of muzzle-brake, each one made from similar but slightly different shaped parts, plus an optional part that depicts the muzzle covered with a bag, adding a PE ring to prevent debris ingress. The gun is then lowered onto the chassis, locating the pin in a corresponding hole in the top. To add detail around your model, a set of ten ready rounds are included on a sprue, and four empty brass casings on their own sprue with hollow ends thanks to some sliding moulds, plus a sprue of four individual shell canisters that have a hollow end and a separate cap, and these can be posed open or closed if you wish. Stencils for the shells and boxes are included, as well as a full painting guide next to the colour chart that gives codes for Vallejo, Mr Color, AK Real Color, Mission Models, AMMO, Tamiya, as well as swatches and generic colour names. Figures There are four crew figures included in the box, and the parts for each figure are found on individual sprues for ease of identification, and parts breakdown is sensibly placed along clothing seams or natural breaks to minimise clean-up of the figures once they are built. One crewman is prepping the next round, while another is aiming the gun from behind the shield. The remaining two crew are behind the splinter-shield, one stood with his hands on the back of the breech, the other kneeling alongside the gun with his hand on one of the trails. The sculpting is typically excellent, as we’ve come to expect from MiniArt’s artists and tool-makers, with natural poses, drape of clothing and textures appropriate to the parts of the model. The two accessory sprues include all the equipment typically carried by soldiers, such as Kar98 rifles, MP40 SMGs, pistols in and out of holsters, ammo pouches, map cases, binoculars, gas mask canisters, water bottlers, bayonets, Stahlhelm helmets without covers (the two figures have helmets that are covered), entrenching tools and other pouches of differing types. There are plenty of accessories to go around, with more besides that can be added to your spares box or used elsewhere. Markings There are four decal options included on the glossy pages of the instruction booklet, with different colour schemes relating to their service location. From the box you can build one of the following: 16. Panzer-Division Wehrmacht, Italy, Autumn 1943 Unknown Unit, Eastern Front, 1944 Unknown Unit, Normandy, June 1944 Unknown Unit, 1944-45 Decals are by Cartograf, which is a guarantee of good registration, sharpness and colour density, with a thin matt carrier film cut close to the printed areas. Conclusion This is an incredibly well-detailed kit of an important German artillery piece that ruined many an Allied tanker’s day, with options for transport or combat. The crew give it some scale and presence, and they’re ready for action in the box. Very highly recommended. Review sample courtesy of
-
StuG III Ausf.G Alkett Prod Oct 1943 Interior Kit (35352) 1:35 MiniArt via Creative Models Ltd The StuG is a popular German WWII AFV, and the more you learn about it, the more obvious it becomes why. The SturmGeschutz III was engineered based upon the chassis of the Panzer III, but removing the turret and front deck of its progenitor, replacing it with an armoured casemate that mounted a semi-fixed gun with limited traverse. It was originally intended to be used as infantry support, using its (then) superior armour to advance on the enemy as a mobile blockhouse, but it soon found other uses as an ambush predator, and was employed as a tank destroyer, hiding in wait for Allied forces to stumble haplessly into its path. With the advances in sloped armour employed by the Soviets, the original low velocity 75mm StuK 37 L/24 cannon was replaced by higher velocity unit that was also used in the Panzer IV for tank-on-tank combat, extending the type’s viable career to the bitter end of WWII. The earliest prototypes were made of mild steel and based on Panzer III Ausf.B chassis, and they while they were equipped with guns, they were unsuitable for combat due to the relative softness of the steel that would have led to a swift demise on the battlefield, being withdrawn in '41-42. By this time the StuG.III had progressed to the Ausf.G, which was based on the later Panzer III Ausf.M, with a widened upper hull and thicker armour to improve survivability for the crew. Many of the complex aspects of the earlier models that made them time-consuming and expensive to produce were removed and simplified to ease production bottlenecks, which led to several specific differences in some of the external fitments around the gun, such as the Saukopf mantlet protector. The Ausf.G was the last and most numerous version, and was used until the end of the war with additional armour plates or lengths of track often welded or bolted to the surface to give it enhanced protection from the Allied tanks and artillery, especially the Sherman Firefly with its devastatingly effective main gun. The Kit This is a new boxing of MiniArt’s recently tooled StuG.III kit, this time depicting production from the Alkett factory in Germany, who were involved in the production of StuGs later in the war. It is an interior kit, and arrives in a standard top-opening box in the usual MiniArt style, with attractive artwork on the front and profiles on the side. Inside the box are sixty-one sprues in mid-grey styrene, one in clear, two large frets of Photo-Etch (PE) brass parts, decal sheet and glossy instruction booklet with colour profiles on the front and rear covers. Detail is excellent throughout, which is just what we’ve come to expect from modern toolings by MiniArt, with so much detail crammed into every part of the model, which includes the complete interior and individual track links. Construction begins with the interior, which is built up on the floor panel, receiving the torsion suspension bars with their fittings, a pair of runners to support the engine, and a covering part that makes moving around less of a trip hazard for the crew, while carrying the support structure for the gun, which is made up from some substantial I-beams that have a traverse shoe placed on top to give the gun its limited 15° travel for fine-tuning aim. The rear bulkhead panels are set against the engine mounts to give them the correct angle, then the firewall bulkhead is made up with small drawers and various other details added before it is fitted into the floor. The driver’s seat is built from numerous parts on a shaped base, and controls are placed within easy reach of his feet and hands, with the option of adding a linkage for the hand controls from your own wire or rod stocks. Attention shifts to the transmission that distributes the engine’s power to the drive-wheels, diverting the output 90° into the drive sprockets at either side of the front of the vehicle. It is made up from many finely detailed parts, with gear housings and their retaining bolts on each side, moving out to the brakes and clutches, then rearwards to the drive-shaft that leads back under the gun mount then into the engine compartment. It is set into the front of the vehicle, crowding the driver, but leaving space on the floor for two shell storage boxes that have holes for the individual shells to be inserted after painting and application of their stencil decals, as per the accompanying diagrams. The engine is then built up from many more parts, resulting in a highly detailed replica of the Maybach power pack, including all the ancillaries and pulleys that you could wish for. The engine bay is detailed with extra parts in preparation for the installation of the block to make it sit neatly on the mounts, with a large airbox to one side with a battery pack on top. The sides of the hull need to be made up in order to finish the engine bay, and these two inserts are outfitted with final drive mountings, strapped-on boxes, gas-mask canisters, pipework and the outer parts of the brake housings, complete with the spring-loaded shoes straight out of a 70s Austin Maxi. Unsurprisingly, another big box of shells is made up and placed on the wall, and in the engine compartment a large fuel tank is attached to the side, with a fire extinguisher placed next to it. These two highly detailed assemblies are offered up to the hull along with the front bulkhead, which has been detailed beforehand with various parts, and the glacis plate with transmission inspection hatches that are given a similar treatment, including an instrument panel for the driver’s use that comes with dial decals to improve realism. A few other parts are inserted into the front of the hull to integrate the sides with the other parts, and the glacis is laid across the front, supported on three sides, adding a bullet splash deflector near the aft edge. Tank engines are under immense strain pulling the huge weight of the vehicle and its armour around, so they need an effective cooling system to be able to cope. Two radiator baths with mesh detail engraved are built up and attached to a hosing network, with a fan housing on the top and more hosing across the top, plus take-off pulleys and belts providing motive power for the twin fans inserted into the top of the assembly, with even more hoses and other details added before the completed system is inserted into the rapidly dwindling space within the engine compartment. On the top of the engine a pair of small canisters are attached to depressions on each side of the apex, and these appear to be air cleaners, as they resemble compact versions of the Fiefel units seen on the rear of early Tigers. Moving forward, the transmission inspection hatches are fitted with a choice of open or closed, as is only fair for such a highly detailed model. The rear bulkhead is detailed with towing eyes and exhaust mufflers with short pipes fixed to the outer sides. An overhanging frame is made up at the rear and has a PE mesh part applied along with a covered port for manual starting of the engine, and this is installed mesh-side-down on the top side of the bulkhead, with a pair of thick pipes slotted into place between the mufflers and manifolds once the glue is dry. Additional ‘tin-work’ air guides are later placed under the overhang, with an overhead diagram showing how the assembly and rear of the vehicle should look once completed. The auxiliary towing eyes on the edges of the rear bulkhead have pins threaded through, with PE retaining chains added before the lower hull is put to one side for a while. The gun is represented in full, with a complex breech, safety cage and cloth-effect brass-catching basket present, plus a large pivot fitted onto the trunnions on the sides of the assembly. Elevation, traverse, coaxial MG34 and sighting gear are installed on the breech, with a small seat for the gunner on the left side to keep him stable while aiming at his next target. Before the gun can be fitted, the walls of the casemate must be made up, and these are encrusted with yet more detail, including a pair of MP40 machine guns with ammo pouches, equipment and stencil decals on the rear panel with a circular extraction fan in the centre of the wall. The detailed radio gear is bracketed to a shelf that is installed on one sidewall, with more boxes and stencils adding to the chaos of the area, plus the option of adding wiring from your own stocks to improve the detail even more, helpfully noting lengths and diameters you should use. The other side is also decked out with boxes that require more wiring, all of which is documented in scrap diagrams where necessary to help in increasing the authenticity of your model, which is all joined into the shape of the casemate with the addition of the front wall that is detailed on both sides, and has a large cut-out to receive the gun in due course. The front of the casemate is built out forward with a sloped frontage and some appliqué armour, then the commander’s cupola is prepared with seven clear vision blocks, lenses and PE detail parts, set to the side for later, while the casemate is dropped over the front of the lower hull and joined by the breech assembly, which is covered by a mantlet after armoured protectors to the mounting bolts have been glued over them. A choice of bridge insert over the top of the barrel encloses the breech, then it’s time to prepare the roof with some interior details before encasing it, then making a choice of how to finish the commander’s cupola in either open or closed pose, but you just know you’re going to leave it open to show off all your hard work. It has PE latches and a set of V-shaped binocular sighting glasses in the separate front section of the cupola that can be open or closed independently to the main hatch to allow the commander to stay (comparatively) safely within the casemate during battle whilst still able to use the glasses. The gunner’s hatch is a simpler affair consisting of a clamshell pair of doors, with a handle added to the inside. This hatch can also be closed, but why would you? There is also a fold-down splinter-shield for the roof-top MG34 machine gun that can be stored away or flipped-up for action if you prefer. The engine is still hanging out at the back at this stage, which is next to be corrected, building up the engine deck with short sides and armoured intake louvers on the sides, which are covered with PE meshes as the deck is glued down onto the engine bay, allowing the viewer to see plenty of engine detail through the four access hatches. A piece of appliqué armour is added to the slope at the rear of the deck, then an armoured cover to the extraction fan is added to the back of the casemate, with short lengths of track to each side as extra armour and spares in the event of damage. The tracks are held in place by a long bar that stretches across most of the rear of the casemate. Under these are sited the barrel cleaning rods, lashed to the deck with PE and styrene parts, then the four hatches are made with armoured vents, and all of these can be posed open or closed as you wish. One variant has a shallow equipment box attached between the two aft hatches, while two more have pairs of road wheels skewered to the two aft hatches by lengths of rod, swapping out a smooth hatch for one with indents to help locate the pins. Currently the StuG has no wheels, so the addition of the swing-arms with stub axles are next, adding the highly detailed final drive bell-housings under the front, plus additional suspension parts that improve damping further. The idler adjuster is covered with armoured parts, and more pioneer tools are dotted around the sides of the engine deck, after which the paired wheels are fixed to the axles, with drive-sprockets at the front and spoked idler wheels at the rear that have PE outer rings, plus a trio of twin return rollers on short axles near the top of the sides. One decal option has a large wooden box made for it, and fitted with a PE padlock, hasp and staple. It is fixed to the rear of the engine deck later in the build. The tracks are individual links that are held together by friction, using between 92-94 links per side, and each link has three sprue gates to clean up, with zero flash to deal with. It’s probably best to set them in position with liquid glue once they are correctly arranged on the vehicle’s wheels for safety’s sake. Once they’re in place, the fenders are attached to the hull sides, with L-brackets, the mudguards and PE fittings added once the glue has dried. More pioneer tools and stowage are added to these, as space was a premium on these vehicles, and every flat surface ended up with equipment on it. This includes a convoy light and either a highly detailed PE wrapped fire extinguisher or a simplified styrene alternative if you prefer. Shovels, pry bars, track-tools, jack block and the jack are also found on the fenders, as are the two towing cables, which have styrene eyes and you’ll need to supply the cable material yourself, with a pair of PE tie-downs holding them in place on each side. A pair of antennae mount on the rear of the casemate, and for one other decal option there is a run of track across the lower glacis on a PE rail. Another option has more track on the casemate sides that are again secured by PE rails. The barrel of the gun has a bulky inverted Saukopf cast mantlet cover, which is made up from a single part that is attached to the front earlier on, into which the single-part barrel slots, tipped with a choice of two detailed three-part muzzle brake to give it the correct hollow muzzle. It slides over the recoil tubes of the gun, closing the last unintended view of the interior. Different stowage boxes are included for the decal options, plus the afore mentioned track across the bottom of the lower glacis, which is augmented in one option that includes an extra length in front of the gunner’s position. Another option is the addition of Schürzen or side skirts that pre-detonate shaped-charge rounds to weaken their penetrating power. These are made from four PE sheets with angled front parts to prevent digging into the ground, onto which the hanging brackets are glued, again using PE parts for scale fidelity. An additional layer is added at the top, and they fit on pegs that are moulded into the mounting rails, which have three additional support brackets fixed to each one before installation, the schürzen panels just relying on gravity to hold them in place, which is probably why many of them were either mangled or lost altogether when travelling or fighting over rough ground. Annealing the sheets with a flame and letting them cool naturally will soften the brass and enable easier bending of the parts if you wish to replicate this on your model. Markings There are four decal options on the sheet, all of which have a base coat of dark yellow (dunkelgelb), with either dirt or various camouflage shades overlaid. From the box you can build on of the following: SturmGeschütz-Abteilung 278, Kryvyi Rig/Nikopol District, Ukraine, December 1943 SturmGeschütz Brigade 281, Eastern Front, Winter 1943-44 Unidentified Unit, Eastern Front, Spring 1944 Unidentified Unit, Eastern Front, Autumn 1944 Decals are by Cartograf, which is a guarantee of good registration, sharpness and colour density, with a thin matt carrier film cut close to the printed areas. Conclusion A stunningly detailed model of an impressive tank destroyer that saw action the Eastern and Western fronts in relatively large numbers. There’s enough detail for the most ardent adherent to dig into and spend many hours painting and weathering the interior and exterior. Very highly recommended. Currently on offer at Creative Models Ltd Review sample courtesy of
-
Marston Mat (49017) 1:48 MiniArt via Creative Models Ltd During WWII, temporary airfields were quickly created near the battlefront on flat ground by the linking together of stamped steel planking that had the weight reduced by punching out holes in the centres where it wouldn’t weaken the structure. These were known as Perforated Steel Planking (PSP) or Pierced Steel Planking, and were used commonly in all theatres of war, reducing mud and slurry build-ups, and providing a flat and tough surface for aircraft to land, take-off and taxy along, plus a road for other vehicles to avoid creating ruts in the surface. The holes however led to an element of dust and debris being kicked up, which is known in aviation as Foreign Object Debris or FOD, so the design was later changed to reduce the possibility of rocks and soil penetrating the planking. By the time of the Vietnam War, the M8A1 design had been formalised and was used to great effect. It was lightened by the use of corrugations to provide more strength from less material, and was capable of supporting the larger, heavier jet aircraft that were more prevalent. The Kit This new backdrop kit arrives in a top-opening box with a painting of the subject and a greyscale P-47 on the top, and inside are just two large pieces of styrene with Marston Mat texture moulded into the top. Each part is 316mm x 227mm x 9mm deep, and they can be used separately as individual bases, or they can be glued to another (or more) to create a larger area. If you’re planning on building a bigger base by gluing them together, strengthening the bond by drilling out space for a couple of small bolts would be useful, especially if you have some narrow metal strips to add to the outer faces to spread out the forces. That might just be me being over-cautious though, as I have a penchant for over-engineering things. Markings The mat was stamped from sheet metal, and then dipped in an anti-corrosion coating to protect it from short-term rusting, which it usually accomplished, save for areas that became exposed due to scratching or other damage, with the majority reaching the job site with an oily steel colour at its surface. In action it was seldom around for long enough to become seriously corroded, but if used for extended lengths of time beyond its original era, it can take on a dense rust colour after many years exposed to the elements. Most of the time during WWII it was usually seen as either its original colour or would take on the colour of the substrate on which it was laid, as the lightening holes would allow some material to pass through, which was something addressed in later variants. Conclusion A quick, easy base for your model, and I’m certain MiniArt have their own brand-new P-47 Thunderbolt in 1:48 in mind, judging by the box art. You could put a WWII fighter-sized model on one sheet, or go larger if you wish, or need the extra space for your scenario. Highly recommended. Review sample courtesy of
-
I am not sure if I am in the right category with this. The truck itself is a civilian build (so I am ok here) - it was taken into military service (so, not civilian?) - and I build it to go along with my 1/35 German Schnellboot (so: maritime?).... But here it goes ... I have build so far ONE 1/35 scale vehicle: a VW Schwimmwagen, about 46 years ago (no kidding). Otherwsie 1/35 was not my scale, mostly due to the space requirements of the completed kits. (although, I do build 1/20 F1 cars - go figure). I limited my military building mostly to 1/48 to go along with my aircrafts. But I was always envious of the variety of kits available in 1/35. When I now got ready to build the Schnellbooot mentionend earlier, I wanted to have a supply delivering vehicle on the pier. Partly due to availabla space on the jetty and party because I just loved the looks of this car, I picked the Tempo A400 form Miniart in the milk delivery version. For the diorama, the car was taken into Kriegsmariene services (although it had to travel a long way to the Black Sea - but I have a pic of one of these cars in Egypt, so I considered myself here still within the realm of the possible) and delivers not only milk, but also fruits and vegetables. The build was a bit more difficult then I thought. Not sure if it was my fault, but some parts just didn't fit 100% as the instructions suggested. But I think I fixed most booboos. The truck is shown with the hood raised to show off the nice details of the kit's engine. And I picked a mixture of the milk decals available in the kit, just because I could Oh, and I skipped the roof railing, because I saw desaster loominng in transporting open milk crates on a slightly curved roof. As always, thanks for looking and all & any comment wellcome. Btw, you find the mentioned Schnellboot here: Cheers
-
 MiniArt is to release 1/48th Republic P-47D/M Thunderbolt kits. Source: https://miniart-models.com/wp-content/catalogue/2022/index.html - ref. 48001 - Republic P-47D-25RE Thunderbolt - advanced kit - released - https://miniart-models.com/product/48001-p-47d-25re-thunderbolt-advanced-kit/ - ref. 48009 - Republic P-47D-25RE Thunderbolt - basic kit - released - https://miniart-models.com/product/48009-p-47d-25re-thunderbolt-basic-kit/ - ref. 48012 Republic Thunderbolt Mk.II. - Royal Air Force - advanced kit - https://miniart-models.com/product/48012-thunderbolt-mk-ii-royal-air-force-advanced-kit/ - ref. 48015 - Republic P-47D-28RE Thunderbolt - basic kit - released - https://miniart-models.com/product/48015-p-47d-28re-thunderbolt-free-french-air-force/ - ref. 48023 - Republic P-47D-30RE Thunderbolt - basic kit - released - https://miniart-models.com/product/48023-p-47d-30re-thunderbolt-basic-kit/ - ref. 48029 - Republic P-47D-30RA Thunderbolt - advanced kit - released https://miniart-models.com/product/48029-p-47d-30ra-thunderbolt/ Have a look at the kits reference numbers, there's room enough for Mustang, Spitfire, Bf.109, Fw.190, Zero, Hurricane etc. 😜 V.P.
- 305 replies
-
- 8
-
-
- P-47
- Thunderbolt
- (and 1 more)
-
PaK 40 Late with Elite Artillerie Regiment Crew (35409) 1:35 MiniArt via Creative Models Ltd As WWII loomed, the Nazi high command got wind of new tank developments in Soviet Russia, and realised that their 3.7cm Pak36 was inadequate for the task ahead, starting work initially on the 5cm Pak38, which was abandoned in favour of a 7.5cm barrel once the rumours were confirmed. It was essentially a re-engineered Pak38, with everything enlarged to suit the bigger rounds, in development between 1939 and 41, with the name Pak40 given to it during its gestation. As Operation Barbarossa began, the project was given a higher priority, and early examples reached the Eastern Front in late 1941, becoming the Wehrmacht’s standard artillery piece from then on, with a total of over 23,000 built before the end of WWII. The success of the weapon was such that it was also re-developed into a main gun for use by tanks and other armoured vehicles, such as the StuG III and Panzer IV, as well as a relatively makeshift mount on the Marder series of self-propelled guns. It was an effective artillery piece, capable of penetrating the armour of everything the Allies fielded, from the Sherman to the Pershing in US service, and the IS heavy tanks that the Soviets operated. It was a heavy piece however, and that affected its mobility, particularly in bad weather where it was prone to bogging down in muddy terrain. It shared its projectile with all German 7.5cm rounds, but was mounted in a larger brass cartridge casing that gave it more power and range than the smaller rounds fired by the KwK variant used in the armour installations. Other variations included the driver bands around the projectile and the method of initiating firing, using traditional percussion caps for the Pak40, and an electrical mechanism for the KwK. Three types of round were available, an armour-piercing explosive round, an armour-piercing kinetic penetrator with a tungsten core, and the standard HEAT or High Explosive Anti-Tank round, each of which differed in shape and colour of the projectile, and were marked with stencils accordingly. The Kit This a new boxing of a recent tool from MiniArt, who have created a new and expanding range of PaK40 kits that is growing every month, this one portraying a late model artillery piece with a specialist crew operating it. The kit arrives in a modest top-opening box, and inside are seventeen sprues of various sizes in medium grey styrene, a cardboard envelope that contains a sheet of Photo-Etch (PE) and the decals, plus a glossy-covered instruction booklet in A5 with colour profiles printed on front and rear covers. Detail is exactly what we’ve come to expect from MiniArt, and is excellent throughout, with options to pose the model in transport mode or ready for action, plus the four crew figures mentioned above, whose poses are suitable for an action situation. You also get a few shells and wooden cases to dot around the gun if you intend to place it in a diorama. Construction begins with the chassis of the gun, on which the wheels and trails are installed, fixing many parts on it, adding brakes to the axles and a front fender, then cutting some lengths of wire from your own stock to link the brake cylinder to the pistons, with PE tie-downs holding them to the underside, and additional scrap diagrams showing the completed loom from above and below to help you with location. The trails are detailed with tools, grab-handles and spades at the rear, plus additional parts that differ depending on whether you are opening them up for combat, or ready for transport. They are mated to the chassis and locked in place by the top pivots, again changing some parts and their positions depending on the option you have chosen. A choice of two methods of attaching a shovel to the bottom plate are offered, one using a simple pair of PE clasps, the other creating a fully articulated retention clamp for the handle. The finished plate is fitted vertically for transport, but tipped up horizontally for action. There are two configurations for the gun, the traditional ready-for-action pose with the trails spread, plus the transport option for towing by a vehicle. The trails have a pair of cross-braces with a winding-handle to draw and hold them together during towing, with a towing bar connecting it to your choice of prime-mover. The late-style wheels are laminated from three layers plus a central boss front and rear, making up two of these and fixing them to the ends of the axle. The gun barrel is a single part with a keyed peg on each end, the thicker end inserting into the eight-part breech, which includes a sliding block if you leave it unglued. The barrel slide is made up from three sides and an end-cap, adding more details on the sides, and a cover on the front portion made from three sections. The barrel drops over the slide with the addition of a small PE crutch and is surrounded by a pair of pivots to the sides, the elevation arc-gear under the slide, and a few other detail parts, popping the pivots into the trunnions that glue to a detailed bottom plate, holding the gun in position from there. Dampers with corrugated gaiters are attached to the trunnions, with different parts for transport and combat positions, then the adjustment wheels and their actuators are fixed onto the left side, with a stubby axe on the right, again with a choice of styrene or PE socket and clasp on the handle. The sighting gear is also installed on the left, then it’s time to protect the crew from incoming fire. A U-shaped armour panel is built from two layers of styrene with a PE layer in between them, slotting it over the barrel from above and mounting on four supports, adding an additional link on each side using scrap diagrams to locate them properly. The cheek armour panels are also two layers per side, with cylindrical stowage items including a torch to the inner face before they are mated with the centre armour and braced by additional links to the sides of the trunnions, with an angled PE lip on the inside just below the top edge. There are three choices of muzzle-brake, each one made from similar but slightly different shaped parts, plus an optional part that is covered with a bag and PE ring to prevent debris ingress. The gun is then lowered onto the chassis, locating the pin in a corresponding hole in the top. To add detail around your model, a set of ten ready rounds are included on a sprue, with another two on the figure sprues, and four empty brass casings on their own sprue, plus a pair of shell boxes that have slots for three shells each, and are made from individual sides, bottom and lid made from strip wood, plus handles, and these can be posed open or closed if you wish. Stencils for the shells and boxes are included, as well as a full painting guide next to the colour chart that gives codes for Vallejo, Mr Color, AK Real Color, Mission Models, AMMO, Tamiya, as well as swatches and generic colour names. Figures There are four crew figures included in the box, and the parts for each figure are found on sprues for ease of identification, and parts breakdown is sensibly placed along clothing seams or natural breaks to minimise clean-up of the figures once they are built. Two crewmen are handling shells, one prepping the next round, while the other feeds a round into the breech, the remaining two crew are crouched behind the splinter-shield spotting and adjusting the aim and range of the gun. The sculpting is typically excellent, as we’ve come to expect from MiniArt’s artists and tool-makers, with natural poses, drape of clothing and textures appropriate to the parts of the model. The two accessory sprues include all the equipment typically carried by soldiers, such as Kar98 rifles, MP40 SMGs, pistols in and out of holsters, ammo pouches, map cases, binoculars, gas mask canisters, water bottlers, bayonets, Stahlhelm helmets without covers (the figures’ helmets have covers), entrenching tools and other pouches of differing types. There are plenty of accessories to go around, with more besides that can be added to your spares box or used elsewhere. Markings There are four decals options included on the glossy pages of the instruction booklet, with a number of different colour schemes relating to their service location. From the box you can build one of the following: 3 Panzer-Division ‘Totenkopf’, Operation Citadel, Summer 1943 3 Panzer-Division ‘Totenkopf’, Operation Citadel, Summer 1943 3 Panzer-Division ‘Hitlerjugend’, Normandy, June 1944 6 Freiwilligen-Sturmbrigade ‘Langemark’, Narva, Summer 1944 Decals are by Cartograf, which is a guarantee of good registration, sharpness and colour density, with a thin matt carrier film cut close to the printed areas. Conclusion This is an incredibly well-detailed kit of an important German artillery piece that ruined many an Allied tanker’s day, with options for transport or combat. All it needed was a crew to give it some scale and presence, and they’re waiting, ready for action in the box. Very highly recommended. Review sample courtesy of
-
SturmGeschütz III Ausf.G April 1943 Alkett Prod. (72106) 1:72 MiniArt via Creative Models Ltd The StuG is a popular German WWII AFV, and the more you learn about it, the more obvious it becomes why. The SturmGeschütz III was based upon the chassis of the Panzer III, but removed the turret and front deck, replacing it with an armoured casemate with a lower profile that mounted a fixed gun with limited traverse. It was originally intended to be used as infantry support, using its (then) superior armour to advance on the enemy as a mobile blockhouse, but it soon found other uses as an ambush predator, and was employed as a tank destroyer, lurking in wait for Allied forces to stumble haplessly into its path, where it could be deadly. With the advances in sloped armour employed by the Soviets, the original low velocity 75mm StuK 37 L/24 cannon was replaced by a higher velocity unit that was also used in the Panzer IV for tank-on-tank combat, extending the type’s viable career to the end of WWII. The earliest prototypes were made of mild steel and based on Panzer III Ausf.B chassis, and whilst they were equipped with guns, they were unsuitable for combat due to the relative softness of the steel that would have led to a swift demise on the battlefield, being withdrawn in '41-42. By this time the StuG III had progressed to the Ausf.G, which was based on the later Panzer III Ausf.M, with a widened upper hull and improvements in armour to increase survivability prospects for the crew. Many of the complicated aspects of the earlier models that made them time-consuming and expensive to produce were removed and simplified by that time, which led to several specific differences in some of the external fitments around the gun, such as the Saukopf mantlet protector. The Ausf.G was the last and most numerous version, and was used until the end of the war with additional armour plates often welded or bolted to the surface to give it enhanced protection from Allied tanks and artillery. The Kit This is a new boxing of a recent tooling from MiniArt in their nascent 1:72 armour line, which is bringing high levels of detail to this smaller scale, with MiniArt’s engineers and tool designers applying their skills to a scale that has been neglected to an extent for many years. The kit arrives in a small top-opening box, and inside are nine sprues of various sizes in grey styrene, a small clear sprue with decals in a Ziploc bag, a Photo-Etch (PE) brass fret in a card envelope, and the instruction booklet in full colour in portrait A5 format. Detail is excellent, including weld-lines and tread-plate moulded into the exterior of the hull, with plenty of options for personalisation, and link-and-length tracks to provide good detail without making the building of the tracks too time consuming or complex. Construction begins with the lower hull, which is put together with five parts creating the ‘tub’, then adding the three-part glacis plate at the front, and the exhaust assembly at the rear, accompanied by duct-work and overhanging vents with a PE mesh panel underneath. Various suspension parts are applied to the sides that have the swing arms and axles already moulded-in. Six paired return rollers are made up, along with twelve pairs of road wheels, plus two-part idler wheels and drive sprockets, which have an alternative front sprocket face for you to choose from. Once all the wheels are installed on their axles, the tracks can be built, utilising the long lengths on the top and bottom, adding shorter lengths to the diagonal risers, and individual links around the sharper curved sections toward the ends of the runs. There are eight individual links at the rear, and six at the front, plus another between the lower and its diagonal, each link having three sprue gates in sensibly placed locations. The gun shroud is built from four parts and mounted on a carrier between a pair of trunnions, which is then fitted to a pivot plate and set aside while the casemate front is made from two sections. First however, the fenders are glued to the sides of the hull, locating on three lugs moulded into the sides. The gun shroud is slotted into the casemate, with a mantlet slid over the front, after which the lower heavily armoured and bolted lower casemate front has a vision slot and armour cover applied before it is glued to the bottom of the casemate, along with the sides and rear bulkhead, attaching it to the lower hull while the glue cures to ensure everything lines up, remembering to remove two bolt-heads from the cheeks of the casemate before you move on. A convoy light is glued into the centre of the glacis, then the engine deck is made, fitting two-part sides, and a single rear panel that is aligned when the deck is installed on the rear of the hull. Two PE grilles are glued over the outer cooling intakes, and a length of spare track is fitted over the rear bulkhead of the casemate, adding armoured covers over the five vents on the engine deck, with a choice of cast or bolted vents on those at the rear of the deck. A choice of three styles of cupola can be made, each one made from a differing set of parts, based around the commander’s vision blocks and central hatch, adding wire grab handles from your own stock where indicated, then inserting the completed assembly in the cut-out on the roof, adding a periscope forward of the cupola from within the roof. The barrel is moulded as a single tubular section with a hollow muzzle glued to the business end, and sleeve moulded into the front of the saukopf, which is an inverted trapezoid, with a stowage box in the middle of the engine deck. PE brackets are added around the vehicle, with pioneer tools built up and fitted where there is space as the build progresses. The gunner’s hatch can be posed closed, or replaced by two separate parts in the open position, adding another scratch-built grab handle from wire, then fitting a drum magazine to the supplied MG34, sliding it through the frontal bullet shield with PE support and another DIY grab handle before putting it in place in front of the gunner’s hatch. Towing eyes are supplied for the tow cable, but you must provide the braided thread or wire to make the cable itself, attaching one to each fender, fixing fire extinguisher, jack block, jack, barrel cleaning rods etc. to various places, and two stacks of wheels are mounted on long pins on the rear of the engine deck on the aft vents, again on pins made from your own wire stocks. Two aerials of 30mm each are also needed to fit on the bases on the rear of the casemate. There is also the option to add Schürzen to the sides of the vehicle, which is intended to reduce the impact of shaped charges by pre-detonating them. The retaining brackets are attached to three brackets, one on each side of the casemate, from which the PE schürzen sections are mounted on hooks, each panel added separately to allow the modeller the possibility of damaging them individually and even removing some panels as if they have been lost earlier. A pair of short rectangular panels are laminated to the upper section where they protect the casemate, doubling the thickness, and presumably the safety of the crew in the casemate. Markings There are five decal options on the small sheet, with various schemes all with a base coat of dunkelgeb, with various camouflage options over the top. From the box you can build one of the following: StuG.Brig.303, Finland, Summer 1944 StuG.Abt.2 ‘Dad Reich’, Eastern Front, Kursk Area, Summer 1943 III./Pz.Rgt.36, 14th Panzer Division, Eastern Front, Autumn 1943 StuG.Abt.185, Eastern Front, rpresumably Autumn 1943 StuG.Abt.201, Operation Margarethe, Hungary, March 1944 Some of the decal options can be modelled with or without Schürzen, and those options have profiles with and without on the same in the instructions. If you want to see full sets of profiles for the vehicles with or without schürzen however, they are available on MiniArt’s website here in the Side Views tab. Decals are by Cartograf, which is a guarantee of good registration, sharpness and colour density, with a thin matt carrier film cut close to the printed areas. Conclusion MiniArt have brought their talents to bear on 1:72 scale armour, releasing a subject they have already researched for their extensive 1:35 scale StuG range, resulting in a highly detailed model with plenty of options for personalisation, and an ongoing broadening of the range available. Highly recommended. Review sample courtesy of
-
P-47D-30RE Thunderbolt BasicKit (48023) 1:48 MiniArt via Creative Models Ltd The Thunderbolt developed from a series of less-than-successful earlier designs that saw Seversky aviation change to Republic, and the project designation from P-35, to P-43 and P-44, each with its own aggressive sounding name. After a realisation that their work so far wasn't going to cut it in the skies over war-torn Europe, they went back to the drawing board and produced the P-47A that was larger, heavier, and sported the new Pratt & Whitney R-2800 18-cylinder radial that would also power the B-26 Marauder, P-61 Black Widow and F4U Corsair amongst others. With it they added eight .50cal Browning machine guns aligned along the axis of flight in the wing leading edge. The P-47A was still a small aircraft, and was initially ordered without military equipment to allow faster completion, but it was considered inferior to the competition then available, so an extensive re-design was ordered that resulted in the much larger P-47B, firing up to 100 rounds per second from the eight .50cal wing guns, and with a maximum speed of over 400mph, leaving just the fuel load slightly short of requirements. It first flew mid-1941, and despite being a heavy-weight, its performance was still excellent, and the crash of the prototype didn’t affect the order for over 700 airframes, which were fitted with a more powerful version of the R-2800 and a sliding canopy that made ingress and egress more streamlined, particularly when bailing out of a doomed aircraft. Minor re-designs to early production airframes resulted in a change to the P-47C, which meant that fewer than 200 Bs were made, the C benefitting from improved radio, oxygen systems, and a metal rudder to prevent flutter that had been affecting control at certain points in the performance envelope. A quick way to spot a B is the forward raked aerial mast behind the cockpit, as this was changed to vertical on the C and beyond. The production from a new factory that had been opened to keep up with demand led to the use of the D suffix, although they were initially identical to the C, but the cowling flaps were amended later, making it easier to differentiate. Of course, the later bubble-canopy P-47s were far easier to tell apart from earlier marks, and constant improvement in reliability, performance and fuel load was added along the way. The P-47D-25 carried more fuel for extended range, including piping for jettisonable tanks on the bomb racks for even more fuel. Taking a cue from the British designers, the bubble-top was developed and that improved all-round visibility markedly, although like the later mark Spitfires, later models incorporated a fin extension to counter the yaw issues that resulted. Its weight, firepower and seemingly unstoppable character led to the nickname ‘Juggernaut’, which was inevitably shortened to ‘Jug’ and led to many, many off-colour jokes during and after the war. Jokes that are still soldiering on to this day, despite being eligible for a pensioner’s bus pass. The -30RE was built at the Farmingdale factory, and was fitted with dive brakes and some other minor changes, such as the fillet on the fin for added stability. The Jug was used extensively in the European theatre as an escort fighter, where it performed well in its ideal high-altitude environment. Later in the war when the Luftwaffe was a spent force, it also went on to become a highly successful ground attack fighter, strafing and bombing targets of opportunity, and eschewing camouflaged paintwork to add some extra speed with a smooth (and shiny) bare metal finish. As well as flying with the US forces, many P-47s were flown by the other Allies, including the British, Russians, and after the war many other countries as the remainder were sold off as war surplus. The Kit This is a variant of a brand-new tooling from MiniArt, in the process of creating a range of kits that are set to become the de facto standard Thunderbolt in this scale. The kit arrives in one of their sturdy top-opening boxes with a dramatic painting of the subject on the front, and profiles of the decal options on one side, reserving the other side for practical details and text. Inside the box are nineteen sprues in grey styrene, although in our sample many of the sprues were handily still connected by their runners, which simplified photography. There is also a clear sprue, two sheets of decals split between markings and stencils, and the instruction booklet, which is printed on glossy paper in colour, with profiles for the decal options on the rear pages, plus detailed painting and decaling information on the weapons and tanks on the back page. Detail is phenomenal, as we’ve come to expect from MiniArt in the last several years, with fine engraved panel lines, recessed rivets, plus raised and recessed features where appropriate, as well as fine detail in the cockpit, wheel bays and engine. If you’ve seen their AFV kits you’ll know what to expect, but this is something special in this reviewer’s humble opinion. Construction begins with the highly detailed cockpit, starting by putting the seat together from base, back and two side parts, which have elements of the seatbelts moulded-in, and are finished off by putting the remainder of the lap belts on the seat pan. A pair of support are inserted into recesses in the back of the seat, then it is installed on the ribbed floor, which has control column, plus seat-adjuster, and two other levers inserted, after which the rear bulkhead, one of the cockpit sidewalls and the front bulkhead are added, trapping the rudder bar with moulded-in pedals between them. The starboard sidewall has a hose added, and a scrap diagram shows the detail painting as well as the location of the decals that need to be applied. A cushion is applied to the head armour, then the other sidewall is detailed with four controls, numerous decals and more detail painting, so that it can be inserted along with the instrument panel and auxiliary panel, both of which have decals for the dials, with a choice of two for the main panel. The tail wheel is made up in preparation for closing the fuselage, building a four-part strut that holds the wheel on a one-sided yoke, then adding a small curved bulkhead with sprung bumper at the front, or an alternative assembly can be made from four different parts plus wheel, which is less detailed as the mechanism is hidden by a canvas cover. The fuselage halves are new toolings that have a fillet moulded into the spine in front of the tail fin, and are prepared by adding two extra detail parts to the short sill panels that have ribbing moulded-in, and should be painted to match the cockpit. At the rear on the underside, the supercharger fairing is slotted into the starboard fuselage along with the tail gear bay, and at the front, a cooling vent and a centreline insert are added to the underside, fitting another vent to the port fuselage half in the same place. The fuselage can then be closed around the cockpit, adding the aerial mast into a slot in the starboard spine, although whether that will remain there until the end of the building and painting is a moot point, and I’d be tempted to nip it off at the base, gluing the base in to act as a socket for the aerial after the heavy work is over. There is a fuselage insert in front of the cockpit, and that has the two-part gunsight with clear lens added to the centre, and another equipment box on the port side before it is inserted and joined by a firewall that closes the front of the fuselage. The engine is a highly-detailed assembly that is created by joining the two fully-rendered banks of pistons together by a keyed peg, adding the push-rod assembly to the front, the ends of which mate with a circular support that is the frame onto which the cowling panels are added later. The reduction-housing bell is detailed with magnetos and other parts, plus a collet at the centre where the prop-shaft would be. This is joined to the front of the engine as it is mounted to a bulkhead at the rear, again on a keyed ring. The intake trunking at the bottom of the nose cowling is made from five parts and installed in the lower panel, and you have a choice of open or closed vents on the sides of the fuselage by using the appropriate parts, and in the same step, the rudder is completed by adding an insert at its widest point (the bottom), to avoid sink marks, following which it is mated to the fin on three hinges, allowing deflection if you wish. Going back to the engine, the finished assembly is enclosed by four segments of cowling, and at the rear you have a choice of open or closed cooling gills, using different parts to achieve the look you want. Under the tail, your choice of wheel assembly is inserted in the bay, with doors on each side, or if you are building your model in flight, a closed pair of doors is supplied as a single part, adding a small outlet further forward under the fuselage. The upper wing halves have well-defined ribbing detail moulded into the interior, which is augmented by fitting an insert, two rib sections, front and rear walls that form the tabs to mate to the fuselage, and an additional structure that has a retraction jack pushed through hole in one of the wall segments. The flaps are made from two sides, plus a pair of hinges and these are glued into the trailing edge of the wing with the ailerons, the remaining details of the gear bay, which includes another retraction jack, the gun barrels on a carrier to achieve the correct vertically stepped installation, plus a pitot probe, and the wingtip light, which can be fitted now because the complete tip is moulded into the upper wing so that it can be portrayed as scale thickness. A scrap diagram of the lower wing shows the location of the flashed-over holes that you can drill out for weapons, then it can be glued to the upper, along with an insert at the rear of the gear bay, which includes a moulded-in dive brake, and another near the tip with a flush landing light. The same process is then carried out in mirror-image for the other wing, omitting the pitot and landing light insert, after which the wheels and their struts are made up, each wheel made from two halves plus a choice of three hub types, and two styles of wheels are also provided, one without a flat-spot, the other under load on the ground, leaving it for you to decide which you prefer. The struts are detailed with separate oleo scissor-links and stencil decals, and are mated with their wheels, plus the captive gear bay doors, the lower door made from two layers, again to avoid sink-marks. The wings are glued to the fuselage with a stepped joint making for a stronger bond, and the elevator panels are each slotted into the tail, and have separate flying surfaces that can be posed deflected, each one a single part for finesse. If you are building your model with the gear down, the inner gear bay doors are fitted to the fuselage, which contains the inner edge of the main gear bays, so remember to paint that while you are doing the rest of the bays. The engine assembly with cowling is also mated to the firewall, locating on a pair of alignment pins. If you plan on making an in-flight model, there are two single parts that depict the closed main bays, or you can insert the two struts with their wheels for the grounded aircraft. The four centreline supports are fitted between the main bays for some decal options, then the model can be flipped over to stand on its own wheels so that the canopy can be installed, gluing the windscreen at the front with a rear-view mirror on a stalk above the frame, and deciding whether pose the blown canopy open or closed after gluing a stiffener across the underside. The prop is also fitted, and this is made up from two parts, each consisting of two blades in opposition, and the spinner is a separate part that slots into the front section. The Jug could carry quite a load, whether it was extra fuel, rockets or bombs, and all these are included in the box, starting with the two-part pylons, which can be depicted as empty by inserting a cover over the lower surface. You have a choice of four styles of tank, a 108gal compressed paper tank with a ribbed nose and tail, a 200gal wide and flat tank, the third 150gal streamlined tank with flat mating surface and a peg at the rear that can be removed, and the last one slightly smaller at 75gal. All but the third option has a pair of sway-braces between them and the pylon, which fit into slots in the pylons. They are built in pairs to fit under the wings, but the first two options can also be used solo on the centreline support. The bombs use the same pylons, and can be built in 1,000lb, 500lb or 250lb variants, each one made from two halves for the body and two parts for the square tails, and mated to the pylon by a pair of sway-braces that varies depending on size. There is also a smoke generator that looks like a drop-tank with a spout on the rear, which would be used to lay smoke for the Allied troops below to cover their actions, at least temporarily. A large diagram shows the correct location for all the pylons and their loads, the centreline option having no additional pylon, mating via the four sway braces fitted earlier. Markings There are two decal options included on the large sheet, both of which have substantial differences in nose art on each side, which is why we’ve included a look at both side profiles to avoid confusion. The first page of profiles are in greyscale, and detail the location of the many stencils worn by the Jug, including the pylons, all to avoid over-complication of the main profiles. From the box you can build one of the following: 346th Fighter Sqn., 350th Fighter Group, 12th Air Force, Italy 1945. Pilots: Major Charles Gilbert II & 1St Lt. Homer J St.Onge 509th Fighter Sqn., 405th Fighter Group, Spring 1945. Pilot: Col. Chester Van Etten Decals are by Cartograf, which is a guarantee of good registration, sharpness and colour density, with a thin matt carrier film cut close to the printed areas. The instrument decals on the sheet are separated by a box of dotted lines, and you have three choices of style. One is complete with the grey instrument panel for an all-in-one solution that is very realistic, while the others have just the dials that are printed in the shape of the panel, but are individual decals, so remember not to put them all in the water at once. Conclusion Another P-47D from MiniArt, expanding their catalogue further. Don’t fret, I’m sure the razorback will be along soon enough. Very highly recommended. Review sample courtesy of
-
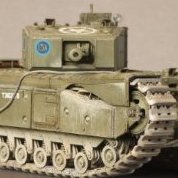 My finished Dingo Mk III, 1:35 by MiniArt. Kit: this is MiniArt’s Mk II kit built as a Mk III. The Mk III is very difficult to get hold of, but the Mk II contains all the parts needed to build a Mk III except for the canvas roof. Vehicle: A D squadron, 11th Hussars Dingo photographed in Tonning, Germany in 1945. It lacks the armoured roof so is either a Mk III or a Mk II converted to a Mk III. Reference photo at the bottom. The Build: The kit is pretty good out of the box but for this one I wanted to match my reference photo as much as possible, include detail I've discovered while researching, and expand my scratch-building skills. The Vickers K Gun is a spare from the Dragon SAS ETO jeep, the spare magazine drums come from Tamiya’s old desert SAS jeep, and the British Gerry cans, RAC helmets, and some stowage come from MiniArt kits. The wheels are Def Model weighted wheels, which freed up a wheel for the spare at the back. There is considerable scratch building as well. I'm pleased with the way this one is coming out but may build something larger next to let my eyes recover! Muddy footprints on the front from the crew climbing in and out. I drilled out the lightening holes in the brackets for the sand channel just below the front storage box as they are solid in the kit. The fatter roll is from a stowage set, the thinner one is the rolled up canvas roof which I scratch built and is often mounted higher, but from my reference photo I think on this vehicle it was lower. Quite a bit of chipping round the engine deck. It's a single metal cover and the examples I have seen are quite battered from being taken on and off all the time. Hidden now but I added the brake and electrical cables behind each wheel. There is no light on the rear mudguard as that seems to have been a post war feature. There is little mud or dust of the Dingo's wheels in my reference photo, I suspect it spent the last few days running along roads rather than cross-country. I replaced the protective ring round the base of the antennae with one from my stash box as the one provided is very thick. It is not quite square but I left it at a slight angle to represent wear and tear on the vehicle. Some interior shots. The war has just ended so my crew have got a camera out to take some snaps. The map is a WW2 British military map. I added the tan rectangles on the cabin lip which are the padding used to cushion the armoured roof if it was carried. Mk IIIs still had them in case it was decided to re-fit the roof later on. I have no clear photos of the mounting for a single Vickers K Gun so simply used the one from the Dragon jeep kit. I think in reality the mounting was thinner and simpler, but for practical model building this one works fine. The canvas cover for the rifle breech is scratch built, as are the brackets holding it in place at either end - MiniArt provide the rifle but nothing to secure it in place. You can just make out the scratch built gear pre-selector through the steering wheel on the right. I don’t have a clear photo of the interior of this Dingo so had to use some creative thought on where spare magazines would be kept. Some Dingos were equipped with twin Vickers K Guns and had racks holding half a dozen magazines on the cabin exteriors, but for mine with a single gun I have just stashed them in likely places in the cabin. It is almost impossible to access the interior of the cabin after it has been closed up so you need to plan painting and weathering (such as the colour of muddy footprints) in advance so it matches the exterior. A 1:35 Dingo is a small model! My Dingo collection - this Mk III on the left, a Mk II of the Inns of Court Regiment in the centre, and a Mk Ib from the 1st Armoured Division HQ on the right. My reference photo - Tonning, May 1945
 -
MiniArt British Armoured Car Crew Special Edition (35387) 1:35
Mike posted a topic in Diorama & Accessory
British Armoured Car Crew Special Edition (35387) 1:35 MiniArt via Creative Models Ltd All forces during WWII operated armoured cars, which whilst they were generally ineffective against tanks, were of immense use of great use when fighting infantry and lightly armoured vehicles or emplacements. They were also useful for reconnaissance, as they were able to cover greater areas in a shorter time than a similar-sized foot patrol, and had at least some level of protection if they should run into enemy forces, with the capability of withdrawing quickly, enabling the intelligence to get back to HQ for dissemination and a suitable response. This set contains five crew figures for a British armoured car of WWII, and arrives in a figure-sized end-opening box with a painting of the crew on the front, and instructions on the back, reusing the same painting but with arrows in blue pointing out suggested colours, and black showing the parts used for each one. Under the instructions is a chart that gives codes for Vallejo, Mr Color, AK RealColor, Mission Models, AMMO, Tamiya, plus colour swatches and generic names for completeness. Inside are five sprues of various sizes in grey styrene, two of which contain the figure parts, while the remaining three are full of accessories that can be utilised to personalise the figures, or as equipment to stow around the vehicle or diorama you are creating, with some finding their way into the spare parts box. The crew are in various poses, the most amusing of which is the driver, who is hunched over a large steering wheel, looking very intensely in the direction they are (hopefully) travelling. Three more figures are standing, two with one foot raised on something, the commander looking through his binoculars, while the other rests one hand on his hip, the other on a part of the vehicle. The fourth crewman is standing in a hatch with one hand on the deck, while he talks on the radio, whilst the final seated figure is leaning slightly back, supporting himself with one arm, and shading his eyes with the other hand. He and one of the standing figures are wearing shorts and have their long-sleeved shirt sleeves rolled up, while the rest of the crew are in long trousers and have their sleeves rolled down. This is because three of the crew are more suited to a North African location, whilst two are intended to be in European service. The commander is suitably ambiguous however, and can be used in either locale, and if you place some of the figures in turrets or hatches, their pant legs or nobbly knees won’t be seen anyway. The parts for each figure are found in separate areas of the sprues for ease of identification, and parts breakdown is sensibly placed along clothing seams or natural breaks to minimise clean-up of the figures once they are built up. The sculpting is typically excellent, as we’ve come to expect from MiniArt’s artists and tool-makers, with natural poses, drape of clothing and textures appropriate to the parts of the model. Conclusion Superb injection-moulded styrene figures from MiniArt that will bring any British Armoured car to life, with clothing suitable for hot or cooler climate operations. Highly recommended. Review sample courtesy of


.thumb.jpg.ad2b820bfdebfdb8541e9255a05f38c7.jpg)