

gengriz
-
Posts
1,094 -
Joined
-
Last visited
2 Followers


Recent Profile Visitors
7,980 profile views


gengriz's Achievements
")
Very Obsessed Member (5/9)
4.2k
Reputation
-

P-8A Poseidon MRA.1 "Pride of Moray"
gengriz replied to gengriz's topic in Ready for Inspection - Aircraft
Hi Pete, no, they are all plastic (with a little resin for small complex parts). I guess it is shortish run, but it has location pins etc and fit of smaller parts (like the cockpit) is good. Larger parts need some out the box thinking to get them all together properly; the after-market Air Graphics fuselage sleeve insert is a good example of something that the kit designer ought to have addressed, perhaps with some internal bulkheads. - I still recommend the kit, but its not one for the beginner. -
P-8A Poseidon MRA.1 "Pride of Moray"
gengriz replied to gengriz's topic in Ready for Inspection - Aircraft
The engines were difficult all round. I gave up on the instruction sequence and inserted the hot end resin into the casing from the front, using floods of superglue to fix it (the tabs didn't match the resin). I also chopped most of the resin block off the blades and removed the fixing tab so that I could insert the entire assembly (including the intake lip surfaces) from the front after painting. I seem to remembe rthat I still needed a little scraping with the knife to get them in. Thanks! The angles were entirely dictated by how low I could get the camera without having my house/conservatory/trees in the background. -
This one has occupied me since Christmas. It's not an easy kit to build, with quite a few significant pooh traps, not least the 5 part fuselage. As I often find with big kits, I was getting a little tired of it by the end. Nevertheless, I am very pleased with the results and now struggling to find a place to display it! The kit comes from BPK (£99.99 via Jadlam) and the decals from Air Graphics (£21.99 via Hannants). Sadly, the kit does not have an opening weapons bay, and the nice looking Air Graphics resin one was out of stock by the time I looked. Given the problems I had fitting the existing weapons bay door covers, I suspect that fitting the resin might have been challenging. Equally sadly, the RAF have not procured wing pylons or anything to hang on them, so my wings are bare, although I am looking at how I can put together a set of SPEAR 3 Missiles to hang from the wings in the future. Brush painted as usual with Humbrol enamels (I used 127 Ghost Grey, which is a little too blue for Boeing Grey (gray?), but matches my own photos quite well) with a darker grey wash in the panel lines. I added two cockpit crew and one side observer, just to give the kit a bit of life! Like with the E-3D kit I did a few years ago, I have managed to leave the wing and centre section loose (at the cost of a slightly gappy join) which will help with storage and transport. Photographing kits of this size always poses me a problem, so I am afraid I have had to photoshop some extraneous detail (my conservatory, house and cherry tree) out of some of the pictures.
- 15 replies
-
- 92
-

-

-
The Hellcat seems to be my "go to" subject for when my modelling is a bit distracted. I'm deep in a BPK P-8A at the moment (fuselage complete, wings built about to be painted, engines being built), but progress is fairly slow, so I'm doing other things in the sidelines. This is the 1/72 Academy kit, using Freightdog decals for an aircraft of 808 Sqn immediately after WW2, at Trincomalee in Ceylon (Sri Lanka). 808 were part of the British East Indies Fleet, operating from escort carriers HMS KHEDIVE and HMS EMPEROR. The chequered cowling is a bit out of the ordinary for an RN aircraft, which adds a bit of interest for me ! FredT
-
And so this is Christmas and what have we done?
gengriz replied to gengriz's topic in 2023 Year Book
A quick add of the finshed Sea Prince for completeness: -
Hunting Percival Sea Prince T.1
gengriz replied to gengriz's topic in Ready for Inspection - Aircraft
Its Humbrol 209 Fire Red enamel. A white base coat (yellow may be better) then 2 thinned coats of the red. It was looking a little light, so I mixed some dark red into it. Wasn't sure how well the paint would mix, but it was OK and gave a slightly darker and less translucent finish, as well as hiding some of the brush marks from the first coat. I've tried the Revell fluorescent enamels as well, but I think the Humbrol is a little easier to apply evenly.- 14 replies
-
- 1
-
-
- Special Hobby
- 1/72
- (and 1 more)
-
Hunting Percival Sea Prince T.1
gengriz replied to gengriz's topic in Ready for Inspection - Aircraft
Sorry to hear that; fortunately there was no warping on mine, although they were a pig to attach straight. The locating holes on one side were further forward than the other! The wing roots were my biggest problem, and I didn't even attempt to increase the diameter of the hole in the cowling which is way too small.- 14 replies
-
- 1
-
-
- Special Hobby
- 1/72
- (and 1 more)
-
Hunting Percival Sea Prince T.1
gengriz replied to gengriz's topic in Ready for Inspection - Aircraft
There is another website? 🤪- 14 replies
-
- 1
-

-
- Special Hobby
- 1/72
- (and 1 more)
-
Definitely my last build of 2023 ! This is the Special Hobby kit of the Percival Pembroke, which also includes parts (cabin interior, nose, short wing tips) for the earlier Percival Sea Prince T.1, as used by the Royal Navy's 750 Sqn to train navigation and ASW. A rather obscure aircraft (although 41 were built), the Sea Prince saw wide use by the RN, in Culdrose, Lossiemouth, Brawdy and Hal Far (Malta). As well as radar (with multiple displays for the trainees), it has a small bomb bay and wing pylons for practice weapons. Sea Princes were used from 1951 until 1977 when they were finally replaced by the Jetstream. The earlier short-nosed Sea Prince C.1 and later long-nosed C.2 were used for transport and logistic purposes (Valom has a kit out for this variant). The RAF also operated an upgraded version of the Prince with extended wingtips and a greater range/payload, known as the Percival Pembroke. It's quite a difficult kit to build, requiring lots of filling, sanding and then filling again, but it's definitely worth it, although I really hate brush painting that fluorescent paint ! Merry Christmas to all! FredT
- 14 replies
-
- 38
-
-
- Special Hobby
- 1/72
- (and 1 more)
-
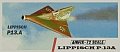
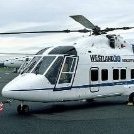
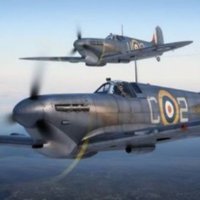
Quite a busy year really. I progressed my Malta project and added quite a few odds and ends. I didn't manage to do the "large aeroplane" that I am trying to do each year (since the stash really must be reduced somehow), but there are 2 lined up and ready to go next year. First off, the ancient Airfix Whirlwind helicopter as a HAR.3. Then as a HAR.21 Then a Malta-based Sea Gladiator (Matchbox) and to go with it, an MC.200 Saetta (Hobby Boss) Two S.70 helicopters next, a Hasegawa SH-60B Seahawk And an Italeri/Revell UH-60A Black Hawk Back to Malta for a Hurricane (Revell) And to pair with it, an Italeri CR.42 Falco Following a trip to a Star Wars Convention in April, a Tie Fighter (Bandai/Revell) A Ukrainian Mi-24V Crocodile (Hobby Boss / Foxbot) with "angry eyes" Then back to the battle over Malta during WW2 for what was, I think, my favourite build of the year, a Supermodel CANT Z.1007 Sucked in by the gravity well of bland grey aircraft at RIAT, I built an Academy F-35A with its icy runway parachute housing And the new Airfix F-35B Suitably numbed by the F-35s, back to Malta and another ridiculous camouflage scheme, this time for an RE2000 Falco (Supermodel). I'm getting better at hand brushing these now.... And to go with it, a Malta-based Spitfire Vb (Airfix) October saw an "almost Malta" build of the old Airfix Hudson, operating out of Gibraltar And as if the Italian camouflage wasn't bad enough, I built an ancient Airfix Storch November saw a bit of sanity return, with a build of the (very nice) Sword Fairey Gannet AEW.3 ... and a rebuild/repaint of an older Airfix Buccaneer Gannets remained the flavour of the year, with a Trumpeter T.5 and whilst the multiple coats of dayglo treacle dried, an old FROG Supermarine Attacker kept me busy One little project that snuck in across the year was a Dragon 1/72 Thales Bushmaster, in a specuilative colour scheme And finally. December's build is another dayglo treacle-fest. It isn't complete yet, and probably won't make the end of the year, but here is a sneak peak....
- 11 replies
-
- 21
-
-
Been there, done that ! (I think my proportions are a bit better than those on the real thing)
-
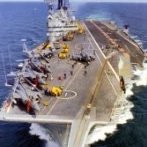
This one was finished yesterday and I'm pleased with the way it has turned out. It's the Sword Gannet AEW.3, which I understand is about to be re-released. This one doesn't have the resin radar operators' interior, but apparently the re-release may! The kit has a number of shortfalls (the cockpit canopy being the most obvious), and some of the detail is overdone, but it certainly looks like a Gannet. Markings are for A Flight in HMS HERMES (I already have a more colourful B-Flight model). I created an ink-jet decal for the distinctive A-Flight tail marking which is missing from the kit.
-
I had worked that out whilst trying to find pictures of it, but wanted to keep the coloured tails and the hump to add interest to what is effectively a grey jellymould plane . However, I think I can confidently say this build went wrong in just about all respects. I may change the numbers and paint the fins grey, but I think this one will just slink to a dark box in the garage and I will start again. Danish next time. I'm determined to get some colour, but no tinted canopy and no pods....
-
My second F-35 build of the month was the Academy F-35A, using Xtradecal set X72338 for an aircraft of the Royal Norwegian Air Force. Apart from the unusual splash of colour that this aircraft wears, my interest was also piqued by the drogue parachute hump fitted to Norwegian aircraft to help with landing on icy airfields. The Academy kit is superb, but unfortunately, this build had a few snags along the way. Firstly, I attempted to tint the canopy (the clear one just looked wrong alongside my Fujimi F-35s). This went badly wrong, with the entire canopy fogging. I polished it back to an acceptable state, then after I had attached it to the kit, much of it fogged up again!!!! My second issue was the decals. The critical coloured decals (40L and 40R - Norwegian flag plus squadron symbols celebrating 75 yrs of the RNoAF) are missing from the sheet ! I spoke with Hannants who confirmed that all of their current stock has this error and they would speak with the printer. They may be able to sort it out in due course, but I'm not holding my breath and if an update sheet ever arrives I can always add it later. Disappointing. By this stage, the new scratch built "hump" was already on the kit, so no chance of changing nations, but I have to confess that with the fogged canopy and the missing decals, my enthusiasm to complete this build was a little dampened. Fade to grey! FredT
- 6 replies
-
- 28
-
-
F-35 Binge - An Airfix F-35 joins the rest
gengriz replied to gengriz's topic in Ready for Inspection - Aircraft
My first two included as much colour as I could muster: I still have this picture in my mind of one with very a large Queen Elizabeth crest on the upper surface ! Some day.....