Jump to content

All Activity

This stream auto-updates

  1. Past hour
  2. A top tip for young players! Nicely fettled, Enzo.
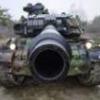
  3. Great model with just the right amount of weathering. The yellow marker flags add a nice, bright touch of detail: I assume for marking areas of NBC warfare contamination.
  4. In 1981, an article on this topic was published in the German model building trade magazine. The complete article can be found here. *.PDF-File ülease! (website without https-protokol) In total: The span of the horizontal stabilizer was changed several times due to stability problems both in the drawings and in the original. That's why the information is different. I calculated this part again and got the following result: According to the measurements, the following values emerged Original: 2.65 m 1:48 --> 5.52 cm 1:32 --> 8.28 cm The dimensions of the model: TAM: 5.5cm (Delta: 0.2cm) ... DR: 6.8cm (Delta: 1.3cm) ... Zipper: 8.8 cm (Delta: 0.5 cm) ... So that's it for theory and practice - whether I go to the Technology Museum in Berlin again... we'll see!... let's see! In any case, that's enough at this point, thank you for your attention, there will be an article about the Dragon AND Tamiya model. I will create a mold for the three dragon models and make three casts for correction.
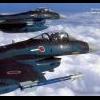
  5. Very nice. I was never really into japanese aircraft, but there is something about them.
  6. Lovely build, Pat. Great to see all that black plastic retained, which only highlights the detail of the bits that are painted. It’s a good nose sitter too - let’s have spinning props in the gallery! Well done, wot’s next? All the best. Mike
  7. Eduard provide alternative parts for the various variants represented by their decal sheet, and helpfully make the call-outs in the instructions as to which alternative you should use. However, that means I've had to do a bit of detective work to determine which bits to use for my chosen aircraft. It's serial number 44-15052, which makes it a P-51D-15NA, built at Inglewood. Fortunately for me, Option C in the kit is also an Inglewood-built D-15, so I'll follow the parts choices for that option, with the exception of the canopy. I found a colourised photo of 'Lullaby', which although not great quality, does show the canopy shape with the high point over the pilot's head, so I'll be using that part, again helpfully provided by Eduard! (Photo from www.littlefriends.co.uk)
  8. I love the weathering and the muddy tyres: it looks like the driver took the vehicle through the company latrines. Great work.
  9. Why not, Pete? I’m using belt, braces, buttons zips and velcro on this build, all to keep that light ‘in’! There might be one last chance to conduct a test before the fuselage halves get joined permanently.
  10. Hawker Siddeley HS.748 in 1/72 sounds like a typical Valom project; a medium sized British twin-engined aircraft with military and civilian usage that hasn`t been kitted and unlikely to attract the attention of Airfix or Revell.
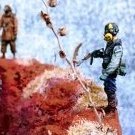
  11. Nicely modelled modern armour. The close up of the figure in the welding goggles is very imaginatively lit.
  12. Very effective faded black look to the finish, well done.
  13. There is something about Japanese fighter planes, something exotic, something mysterious. It makes you all the more happy when you find a really "colorful" Army aircraft that looks good. The aircraft was flown by the 1st Hiko-Sentai commander, Major Kinshiro Takeda, stationed in Hanoi in October 1942. What makes this machine noticeable is the so-called “leader markings”, a special marking of the machine’s rank using stripes. That was an invitation to build exactly this machine. Overall, Hasegawa has produced a great kit whose accuracy of fit and originality can be rated very high. I have a little more wear on my machine than can be seen in the photo. It took me a while to find this template. © Model-Art: Ki-43 (Japan)
  14. Outstanding work Mark, as James says you cannot tell the area of paint you touched up at the wingroots from the rest of the paint work. You did better with PPP than I do as every time I use it and try to wipe excess away it removes almost everything I applied. The decals on the tanks have turned out really well and have a very realistic worn look about them, an unintended consequence of Eduard's decal design.
  15. Lovely finish on the Gannet - I like the additional wing detail and an exceptional paint job. I’m gonna do one of these (nostalgia build) if I get time. (Oops, hope the Hosts don’t notice that slip up…!) Well done, Colin. All the best. Mike
  16. Superbly modelled artillery piece on a cordite stained landscape. The solitary figure is excellent.
  17. Yes Steve: a lightweight-spec E-type. It had a bit of a moment at the first corner early on then loads of grass removal!
  18. It looks very smart! I like the "one engine closed down for endurance" setting. Regards, Adrian
  19. G'day @Cavalcante, there is another possibility for you to consider. But first, have you a particular attachment to HMS Abelia? If so, then I understand you wanting any model of her you build to be accurate. A number I ships that I've modelled have appealed to me for a specific reason and hence I've gone to a bit of trouble in researching them for an accurate model. And most of these have been ships with only a few sister-ships. But many of the escort vessels, Flower class included were built in large numbers. And as @robgizlu has said above (and you've probably gathered for yourself anyway) there were a lot of variations in the Flower class corvettes. Many of them would have served in often appalling conditions with their crews enduring considerable hardship, all helping to win the war, with many never being given the opportunity to take part in a specific action that made it into the lime-light and the history books - they simply slogged it out unrecognized for as long as they were needed. The point I'm trying to make is this - If you don't have a particular attachment to HMS Abelia (or any other specific Flower class) why not make a generic ship of the class, either short- or long- foc'sle type? This will save you a lot of research into a particular vessel, and possibly some disappointment if you find later that you've made a mistake, such as wrong camo patterns, slightly different equipment fittings etc. The hulls and superstructures will be similar if not identical between ships, and any model you make will be immediately identifiable as a Flower class. I did this when I scratch-built a Flower class corvette in 1/600 scale about a year ago. There were no kits available in my preferred scale that I was aware of, hence the scratch build. Admittedly my model is rather basic but I enjoyed building all the same, and I've labelled her a long-focsle Flower class corvette. Something for you to consider. HTH. Regards, Jeff.
  20. Good start on the cockpit detailing, which always improves these old kits. I’m also a big fan of painting wings before assembly to get that neat demarcation but more often than not get a bit of glue oozing out and ruining everything! Hope it goes well for you. All the best. Mike
  21. cleaning please - problem with server: Error 500
  22. Great model in a fine muddy diorama.
  23. Very neat model. The grumpy, shirt-sleeved figures dragging the camouflage netting add a nice bit of life to the diorama.
  1. Load more activity
×
×
  • Create New...