Sci-Fi Content
Showing topics in Science Fiction Discussion, RealSpace Discussion, Work In Progress - SF & RealSpace, Ready for Inspection - SF & RealSpace and Sci-fi & Real Space Reviews and articles posted in for the last 365 days.
- Today
-

STINGRAY & Launch Pen 3
Gimme Shelter replied to Gimme Shelter's topic in Work In Progress - SF & RealSpace
Italic or standard font? for as many photos I can find of Stingray with an italic No 3, there seem to be just as many showing her with a non-italic number, so I opted for the non-italic option -
close up, those are welding wire. 😉
-

Photoetch Apollo Lunar Module 5 "Eagle"
AdrianMF replied to Flying Badger's topic in Ready for Inspection - SF & RealSpace
Nice PE! 1/144 steering rockets are tiny! 20 landing, 12 lift off should presumably be 22? Regards, Adrian - Yesterday
-

Apollo LEM photoetch **Finished**
Flying Badger replied to Flying Badger's topic in Work In Progress - SF & RealSpace
Its finished now so here is the RFI thread: -
Apollo LEM photoetch **Finished**
Flying Badger replied to Flying Badger's topic in Work In Progress - SF & RealSpace
Yeah those were very very fiddly and slow. On top of which you knew when you finished one cone there were another three to go on this RCS thruster block and another three other blocks to make. I nearly cried when the cone fell off the fourth of four cones on the first block I built due to metal fatique. Fortunately they include several spares for this part which is nice of the designers. FB -

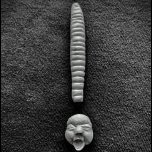
Sevan's Cyberman build
Galligraphics replied to pockets's topic in Work In Progress - SF & RealSpace
That looks fantastic! Takes me back to the 80s... -
Apollo LEM photoetch **Finished**
AdrianMF replied to Flying Badger's topic in Work In Progress - SF & RealSpace
Good on yer for trying something different! I'm still conditioned by the plastic model that my brother built in 1969 (I think it was the Revell one because it had the command module and the last booster stage*) to think of that as the definitive version. Although a fair proportion of the builds I've seen since have been covered in gold foil (from fag packets?) (although Bourneville Plain wrapper would have worked), so you can't actually see the structure.** And I can't even imagine taking a tiny flat piece of metal and forming it into a collection of four tinier cones! Regards, Adrian * now that I think about it ISTR that there was an upright from the lunar crater base so you could model the CM in low moon orbit, like about 30 feet above the surface! (edit)** it turns out that the 2019 re-release of this kit (thank you scalemates) includes a chunk of gold paper, with neither plain chocolate or cigarettes to go with it! -
Dry fitted and some seam work still to do but she's had a coat of primer. John
-

1/20 Wave Ma.K Prowler
Pete in Lincs replied to robw_uk's topic in Work In Progress - SF & RealSpace
Yep, like that wiring. Very neat and as per Kreiger lore. -
Thanks, need to look at that some more
-
 Putting this together... Mistakes were made. Lessons learned. And on the forth attempt I actually manged to properly mask the canopy!
-
- 2
-

-
A very fine Cyberman he is too. I can almost hear David Banks voice... James
-
A neat little scene - good posing of the AT-ST too, looks very inquisitive!
-
my wiring on external engines for your reference. 🙂
- Last week
-
At least it isn't legless!!! All parts clicked on to allow easier painting
-
Calling this done, have added some Flory dark dirt and watercolour to the blaster and stuck some wiring loom cloth tape to the supplied strap to make it look more realistic and some washi tape to the strap ends and drilled the gun and used some cut pins as rivets to attach and painted the heads .
-

STINGRAY & Launch Pen 3
John_W replied to Gimme Shelter's topic in Work In Progress - SF & RealSpace
Oh dear, that means if there was a Stingray 15 it had a pen with the same number... -

Halcyon Alien Space Jockey TheB version
81-er replied to Theb's topic in Work In Progress - SF & RealSpace
You must have sorted it as I can see the pics, those are absolutely superb, Brian! James -
Halcyon Alien Space Jockey TheB version
Theb replied to Theb's topic in Work In Progress - SF & RealSpace
Seems Imgur has changed some stuff and now I can't seem to post pics... I'll figure it out! 😆 -
Halcyon Alien Space Jockey TheB version
Theb replied to Theb's topic in Work In Progress - SF & RealSpace
Couple of pics of the little guys I sent out. Not particularly happy with the end result but I do like the revised tripod! or rather quadpod! -
STINGRAY & Launch Pen 3
Gimme Shelter replied to Gimme Shelter's topic in Work In Progress - SF & RealSpace
PS - If it all goes wrong with the main hull masking, I'll convert the model to one of those grey ones which look pretty cool too ! -
STINGRAY & Launch Pen 3
Gimme Shelter replied to Gimme Shelter's topic in Work In Progress - SF & RealSpace
Thanks Pete - from all that I know of the show (very little to be honest) the series was focused solely on the antics and adventures of WASP's (World Aquanaut Security Patrol) submarine No 3 - Stingray. The WASP fleet consisted of at least 26 vessels according to the WASP Technical Operations Manual ! However, it's not yet happened - we've got to wait until 2069 for these little fish: and a further more years from then to 2070 for these !! -
STINGRAY & Launch Pen 3
Pete in Lincs replied to Gimme Shelter's topic in Work In Progress - SF & RealSpace
Very neat masking and painting. Here's a thought. Stingray bore the number 3. So there must have been at least two others of this class? I don't recall any mention of them in the TV series, or in the TV21 weekly comic which I used to buy religiously. -
already included in kit, could set in transport / launch mode. 😉 although general QC of goodsmile is below standard, but it will publish some less popular kit like this one.
-
I was wondering abbout this effect, as I was considering to use it on the Mach 2 Vostok kit. As I cannot get my hands on that model, it is a bit of a mute point for me right now. But I am pretty sure, any sparkle added at this scale would be over the top and just not looking "right". I think plain flat white would do it. I use flat white primer for the "normal" white paint on my launch systems. Sometimes, I haven't really figured out what causes that effect, the primer develops a little bit of a 3D structure that reminded me of an ice cover. Maybe some try and error on some surplus plastic pieces?


.thumb.jpg.ad2b820bfdebfdb8541e9255a05f38c7.jpg)
-
Forum Statistics
254.7k
Total Topics4.4m
Total Posts -
Member Statistics
36,884
Total Members5,082
Most Online
-
Who's Online 143 Members, 4 Anonymous, 856 Guests (See full list)
- Tim R-T-C
- politicni komisar
- Farmer matt
- Scott Garard
- Brian r l
- Longbow
- Roland Pulfrew
- gamblor916
- foeth
- Mick Clarke
- Mr T
- Neil.C
- ocatlub
- sloegin57
- othertales
- mikesmodels
- nigelshipp
- Dr Evil
- Beardybloke
- RevDWC
- PROPELLER
- NuisanceValue
- MCD081
- Pagey
- alhenderson
- Sgifford
- AlbertLima
- Hornet133
- SnøMotion
- PhantomBigStu
- Mals Way
- ceeb555
- crvena petokraka
- Zephyr
- Apophis
- VG 33
- GiampieroSilvestri
- scautomoton
- Battle4123
- PattheCat
- Ngantek
- AT7GMK
- Kevin Aris
- Johnson
- lazyeagle
- Robert Shedd
- Dave Spencer
- AntPhillips
- Sebastien
- Angus Tura
- GordonM
- Marco F.
- rholland
- Tyas
- DD_Crash
- Billydick
- modelldoc
- Dave Slowbuild
- Work In Progress
- Flyingdutchman
- Doc72
- Alex.B
- Popkaz
- Parabat
- Mpfiend
- ltdann
- Latinbear
- mnord
- Gooney Fan
- Technics
- SteveBrooking
- talbot
- Redboost
- BD757
- newvall
- joesoe
- Dudko210
- samhobbs
- cobraleader
- rod mcq
- RidgeRunner
- VolkerR.
- Reini78
- WH_Models
- szeregowy
- Jose Luis
- Tbolt
- Lord Riot
- 2996 Victor
- Fin
- Dudzio
- Archelaos
- gwyndaffandy
- Skawinski
- Jochen Barett
- Duggy
- Simo5555
- Axiseagles
- M.T.Dolby
- Mark Copeland
- Illusive
- Nick Nichols
- Patrik
- busnproplinerfan
- Viking
- sorleygoldie
- NavyWessex
- psdavidson
- mark.au
- Tabio
- Bejay53
- Muzz
- Boffin79
- olavhome@online,no
- Brad
- hakkikt
- sampanzer
- billn53
- zebra
- Keeff
- Totally Mad Olivier
- delide
- Soumcouy
- Tom Murphy
- Scout712
- MOK61
- Stormcrow
- Redstaff
- Phil Evans
- Marlin
- CT Modeller
- AlexM19
- Joao Augusto
- luxskater
- neil5208
- R T Fishall
- Charlie Hugo
- Plastica
- Moggy
- Mycapt65
- Paul Lucas
- TheKinksFan
- Davi