Leaderboard
Popular Content
Showing content with the highest reputation on 02/04/22 in all areas
-
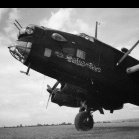
On the evening of 24th April 1944 Lancaster 'B' ND467 of 83 squadron, with W.O. Ken Lane at the controls, took off at 20.46 hrs from RAF Coningsby. Nearly four hours later, over Munich, they were coned by searchlights. Almost predictably the starboard inner engine was hit by flak, caught fire, and was feathered shortly afterwards. Then the port outer was hit, caught fire and feathered. Then the port inner cut - leaving one functioning engine. Thankfully the Flight Engineer, Flt.Sgt. Dick Raymond, managed to get that engine restarted. The crew then jettisoned everything they could and W.O. Ken Lane brought the Lancaster back to England on the two remaining engines. They made an emergency landing at RAF Lashenden in Kent - with 180 miles still to go to Coningsby. RAF Lashenden was an Advanced Landing Ground with fairly basic facilities designed to prepare for the eventual move to northern France. It was home to the 354th Fighter Group with their Mustangs (the 354th were the self-styled 'Pioneer Mustang Group'). Seeing an RAF Lancaster there would have created a fair bit of interest – perhaps the reason for this photo: (For those that like to know these things P51-B, AJ-R 42-106593 in the foreground was the regular mount of 1Lt Albert G Redfern of the 356th FS, 354th FG) Ken Lane's log book rather underplayed the event : 'Coned and hit by flak over target. Returned on two engines. Landed at Lashenden'. Flt Sgt Dick Raymond, who re-started the port inner, was nineteen. Thanks to Ken (and Dick), the crew of the 'Lashenden Lancaster' survived the ordeal and returned to RAF Coningsby in ND467 later on the 25th. Ken Lane was awarded the Distinguished Flying Cross for this. Less than a month later, on 22nd May 1944, the same crew were in Lancaster 'H' and part of fifteen aircraft from 83 sqn on an operation to Brunswick, Lower Saxony, Germany. They were shot down over the Dutch/German border. The ORB simply states: “Missing. This aircraft not heard of since take off.” Three of the crew of seven did not survive and are buried at Emmen, Drenthe, Netherlands with the rest becoming PoWs in Stalag Luft 7, Upper Silesia. Dick later said: “As I fell out of the plane, I felt it explode. I thought Ken had died but to my delight, he set off his parachute and it threw him through the roof. The only bad thing that happened to him was his flying boots fell off.” The ORB has a hand-written note about F/Sgts Davies, Hall and Jones being 'buried at Emmen' – that must have been added later when the news got back to the squadron. Dick Raymond (and, I assume the other surviving crew members) later walked the Death March towards Berlin during one of the coldest European winters in the 20th century. Ken and Dick survived the war and went on to be very close friends - being each other's best men at their respective weddings. In late July 2019 Dick Raymond, the last surviving member of that crew, returned to RAF Lashenden – now Headcorn Aerodrome – his first visit there since that night in April 1944. To his surprise (and delight) Ken Lane's daughter (who had arranged his visit) also attended. This then is my attempt at ND467 the Lashenden Lancaster - a B. Mk. III - using the Hasegawa 1:72 Lancaster B Mk I / III kit. The extras were an Eduard p.e. set for the interior, replacement .303 barrels from Master – fantastic little things – and Eduard masks for all that glazing. The build, as you might expect, was largely trouble free. The only real problem I had was with the undercarriage which I think Hasegawa made unnecessarily complex. I got there with help of reference photos – as I couldn't figure out what the instructions meant – and with creative use of three different types of glue. And a bit of robust language. Anyway she stands up on her legs ok. I also replaced the vertical parts of the nose aerials with brass rod as the plastic looked rather chunky. Paints are Xtracrylics and Tamiya acrylics over Ultimate primer (grey on top, back underneath) with various shades of grey pastels for the exhaust stains (which took ages and look rather better on the model than in the pics). I built up the wings and fuselage separately which made painting and handling a lot easier I painted the black wing walkway markings as I've had too much experience of long thin decals. And that red square outline on the starboard wing. The decals are from the spares box and I must admit I struggled a bit with silvering on the fuselage markings - you can see that in a couple of the images. A first for me – some pics to start against a white background (which seems to have turned blue) - and then a few with my usual rather daft attempts at creativity. And lastly an attempt to recreate that photo of the Lashenden Lancaster and the P-51: Not quite right historically of course - the invasion stripes give that away - but it is a 354th FG plane. All the best Mark34 points
-
Hi Everyone, Thought I`d subject you to some photo`s of my latest effort My attempt at Italeri`s 1/48 Sioux kit Built virtually from the box Only additions being some control cables running though the tail boom and some radio/headphone leads in the cockpit Finished to represent an Australian chopper during the Vietnam war Always been interested in doing one of these but put off due to the delicate appearance ...... ...but actually wasn`t too bad, only vague parts locations on the instructions caused any difficulties Still not entirely certain I got them 100% right but not going to loose any sleep over it. Hope you enjoy the pic`s, thanks for looking Cheers Russ25 points
-
Another model from my yard. MiG-29A Fulcrum Trumpeter 1:32 with minor modifications, but made straight out of the box.23 points
-
Well it took a bit longer than anticipated but this cold-war Mig is finally done! It's ICMs 1/48 version of the Mig-25 PD with the challenge of a mostly monotone grey colour scheme. The main colour is MRP traffic Grey but I used a fair bit of artistic license when pre-shading with various other colours such as brown. Note no missiles or fuel tank in this shot. Eduard photo-etch was used to enhance the various aerials and intakes, along with a Master nose probe. Decals are by Begemot and went on fine. The base is made from mdf sprayed gloss black with a Soviet star added. The acrylic rods were bent into shape using a heat gun and 'gentle' persuasion. Although panels were mainly different shades of aluminium, I added random shades of metallic colours such as titanium to provide an interesting (in my eyes!) patina to the rear fuselage. The large fuel tank is detachable as it's held on by magnets. I used the kit missiles which were ok with a bit of work and added magnets so they can be added and removed easily. The pilot is an Aerobonus one which also came with a very nice seat though you can't see that much with the canopy closed! I used Alclad metals on the rear and weathered with brown washes. I went for blue lights from the exhaust just to add a bit of colour but best viewed in the dark! I lit the cockpit with a couple of red LEDs as I had no idea what they actually used and red seemed appropriate. I liked the ICM kit, it's well detailed and goes together nicely. It's certainly a big and imposing fighter! Thank you for looking!22 points
-
Good morning, all. I bought this Vindicator HiPM kit in ...1996: Even two, in fact, because a shop was offering a very attractive price during a sale at that time. I understood why this model had to be left on their hands. It's a good short run for families: At the time it was the only SB2U available in 1/48 scale. Accurate Miniature has since released one, which has been taken over by Azur in a French version. So why do I want to build this one? Because it's unsaleable. Because I don't like to throw things away, especially at a time when we're so used to recycling. Because I own it for my Midway theme. Because I'm not afraid of chips. I don't dwell on the history of the aircraft, and I get my hands dirty. A lot of deburring has to be done on the parts, especially to get something presentable in the cockpit: I thought I would refrain from using evergreen, but now I can't ignore the obstacle: Here is a picture of the bath before painting, just to keep a white memory: Working with multiple materials, to vary the techniques (and pleasure!😆). I only kept the plastic rectangle which suggests the body of the machine gun. The barrel is made of tubes. The "turd" behind the headrest is the dinghy storage bag. I used the box piece that I worked and wrapped in a piece of plastic bag, all glued with cyano. The drape with the folds stands out in the paint. I have included some boxes and other controllers, the radio block: Painted with a roller: HiPM did not show the windows under the cockpit, I added them: I upgraded the engine cover with the long air intake from the model 3: I made a cast of some parts of the Accuratre Miniature kit, like the landing gear struts: Here is the result: On the morning of 4 June 1942, the crew of 2LT J.Cosley and gunner PFCC.E Cayer were about to take to the air in the SB2U Vindicator, serial number 2094 and registration 7 in VMSB-241: The plane is soiled with dust from the Midway runways: The Vindicator will take off with a 225 kg (500 lb) bomb, as it does not have enough power to carry a 454 kg (1000 lb) bomb: Enjoy. Regards, Eric-Snafu3516 points
-
So at long last I'm done with this one. Shake-n-bake it most definitely wasn't. Build (mostly) over in:14 points
-
Lloyd C.V Lukgraph 1/32 The model has been really pleasant to build. The woodgrain is Lukgraph's decals. I've added some minor details like the binoculars or the anemometer. The propeller has been laser-cut by my friend Michał Jakś and carved by me. Overall I'm quite happy with the result. I hope to see more Austro-Hungarian subjects coming from Lukgraph.14 points
-
This is my 3rd P-40 by SH and I must say I like the kit (there are two more waiting in my stash). I used SBS resin wheels and Kamizukuri paper seat belts plus a Master gunsight and Pitot tube. Paints are Gunze as usual, all decals by Xtradecal. Lady Godiva was used by No. 5 squadron SAAF in Italy, 1944. Thanks for looking.13 points
-
Hello, this is my Tamiya 1/32 P-51K. I used an Eduard set for the cockpiit placards, while the wheels are from Reskit. Cheers!13 points
-
13 points
-
Hi Gang, Here is my Kit Form Services 1/24 L118 105mm Light Gun. This is modelled as near as I could ascertain to how they would have looked during the Falklands War. This is a resin, white metal, etched brass and various rods and tubes kit, described on the box as 'for the experienced modeller'. While it wasn't too difficult there were some sticking points. It was great fun to build though, something very different for me. I know the square root of bugger all about artillery so I hope I've got it right. I had planned on adding some more weathering (just shades of soil / mud on the tyres really) but my order of materials went awry and I'm still waiting for them. I'll finish it off when they arrive, or maybe leave it as is? It's a weird shape for a model, and doesn't fit my soft box very well, so I've got a bit creative with the angles and crops. The last one is a hand held phone shot. Thanks for looking in, Gareth12 points
-
Hi, Potez 452 was a catapult based observation hydroplane of French navy. During war between France (Vichy) and Siam, what happened between November 1940 to January 1941, the French navy operated there a squadron named "Section d'Hydrovaions dela Marine" (SHM) which based in Ream (now in Cambodia, some 100 km south west of Phnom Penh on a sea shore ) . The unit operates 8 hydroplanes: two Loire 130 (SHM-1, SHM-2), three beautiful tiny float plane Guordou-Lesuurre 832 (SHM-3,SHM-4, SHM-5) and three Potez 452 (SHM-6, SHM-7, SHM-8). Model made of the kit by Azur (1/72) depicts Potez 452 No 14, SHM-7 which before became SHM-7 served on cruiser Lamotte-PIcquet. The model was subject of some changes, some details in engine (like intake below cowling, for instance) were added. The struts were thinned and detiled. A propeller was exchanged. A symbolic (not very acurate) beech buggy was added made out of scratch. Here she is: Comments welcome Regards Jerzy-Wojtek12 points
-
My Phantom build joins the Gallery, the twelfth completion so far. It all fell into place once I abandoned thoughts of upgrading the airframe with a few aftermarket accessories. You think I would have learned by now. Here it is, complete with a shop display base for it to sit on... And with a bit of green baize underneath the two... Build thread here:12 points
-
I made this about two years ago, as I was unable to find a Razorback version (very soon afterwards I bought a Corgi Die-cast P-47 Razorback; but one day I will make one as a kit). It was a nice enough kit to assemble, went together nicely, no issues but the red Indian decals on the nose were rather argumentative! Out of all of the decals on this (and there are a good few!) the red Indian gave me the worst behaviour. It was also before I'd started using Decalset & sol so I reckon Humbrol's 'Decalfix' was part of the agro too. It took numerous attempts to get right and each time it curled itself under at the edge of the cowl flaps; in the end I had to use a fine sewing needle and use a magnifying glass to see wot I was doing properly, and carefully uncurl the decal, using lots of water and decalfix and in the end I got it. It was one of my excursions into using masking tape too, I'd say I won that one. It was also well before I'd started thinning my paint, it all went on straight from the pot. This was P-47D-25-RE 'Chief Ski Umah II' (G9*J) the aircraft flown by Lt. Duane Buholz; 509th FS, 405th Fg, 9th USAAF 1944. I love this model; I wasnt as keen on it until I'd completed it, but I like the P-47 in all guises, Razorback or Bubbletop.11 points
-
Hi guys, I present to you this Egyptian Su-20. There is no kit available of this subject, so it is in fact a mix of the Su-7 and Su-17 (old and venerable kopro kits). A lot of scratch work has had to be done, some examples here. The pictures Hope you like it11 points
-
11 points
-
The Academy Warrior is not a bad kit, but the Idlers are not up to the job, I had to reinforce with a substantial metal rod, after they both gave way, when I fitted the rubber band track. If I built another one, I would replace the rubber band tracks with individual links, which would reduce the likelihood of damage. I went for a smooth overall UN white finish, with muddy weathering. Thanks for looking.10 points
-
Hi all and here's something very different for me - I haven't built a 1/35 AFV kit in about 30+ years. A good friend was hosting a 'Military Cars' GB and I wanted to support it and him with a build. The short build thread is here but to recap: Kit: Tamiya 35224 Schwimmwagen Scale: 1/35 Paints: Tamiya Acrylics,, Revell Aqua Colour. Oil pin-wash and pigments Extras: Stowage from Value Gear, spare wheel & Panzerfausts from my friend Pat with second spare wheel from fellow modeller Marko K (thanks lads) My inspiration was a Schwimmwagen pictured at the Kaiserbaracke Crossroads during the Battle of the Bulge. I really enjoyed getting out of my modelling comfort zone with this and am thinking about another 1/35 kit soon. Some of my efforts at weathering are a bit heavy-handed but learned a lot and had fun with it. Tamiya_Schwimmwagen_ (10) by Dermot Moriarty, on Flickr Tamiya_Schwimmwagen_ (3) by Dermot Moriarty, on Flickr Tamiya_Schwimmwagen_ (2) by Dermot Moriarty, on Flickr Tamiya_Schwimmwagen_ (6) by Dermot Moriarty, on Flickr Tamiya_Schwimmwagen_ (9) by Dermot Moriarty, on Flickr Thanks for looking and happy modelling. Cheers, Dermot10 points
-
Hi! This was another quick build, having finished it over the course of about 4 months (on and off project), I'm happy I finished it today because on Saturday I'm leaving the workbench for 9 days to go to Gran Canaria! I digress, here are the photos. I'll take better ones tomorrow. Messerschmitt Bf109E-3 flown by Werner Pichon-Kalau von Hofe, III,JG 51, France, 1940. Here she is next to my old (approx 4 years ago Bf109) Thanks for looking!10 points
-
Greetings Friends! Well, just like the letdown my favorite Football team gives me... I was on the way to scoring big with this excellent ICM Bomber kit. This He111H is a really large model in 1/48 and the fit was really good, except for a few spots easy to fix. I kept doing well on each step of this kit and thought it was going to be my best model... THEN, I pulled off the masking on the side windows and discovered I had hit them with overspray from the inside (somehow). Flustered I goofed up gluing in a gun in the lower gondola and crazed the window... Well, I was 'Almost Famous' as we say in the Horse Show World! I really enjoyed this build and have a lot of pride still in the build. The Kit was fantastic and I highly recommend it! Go get one while you still can, as it was a great effort from ICM... I did add a few things: The Eduard 'Look' PE harness and Instrument panel, Eduard Resin Wheels, and scratch build decals to match a sharp scheme I found on the internet. I have seen reference of this airplane in Norway in April 1940, but also in France in Summer of 1940. Its from KG100, and had the undersurfaces painted in BLACK but still had the crisp topside splinter cammo. The Red 'F' decals were custom decal and custom painted. I liked this scheme with the red spinners, and its unique in that its not on a decal sheet anywhere. The profile painting for this He111H had the bomb bay compartment side windows open, so I left the windows in, many He111's had these painted over or sheet metal covered. This is actually a neat feature of the kit as the bomb load and the Bomb racks are visible in these windows. This bird also had a more advanced Navigation system with THREE masts. I had to scratch build the extra two masts, but many He111H's had these three masts. The undersurface Insignia is painted out and slightly visible and that came out nice. Exhaust is on lower surface only because this 'H' bird had the 'log' type manifolds and dumps the exhaust under the wing. ICM gives you (2) highly detailed engines with full engine mounts to build and I left some of the doors open on the left hand engine. Its really nice kit! Enjoy the photos and let me know what you think of her. This kit kept me out of the bar for a great 2 week build.10 points
-
Revell 1/48 Sukhoi SU-25 This little entry is an OLD boxing of Revell's 1/48 Sukhoi SU-25. Inaccuracies abound in the kit. I supplanted Eduard's P/E set for the Frogfoot, Quickboost's bang seats, and other modifications either, scratch built from rod and strip or, 3d printed. The paint was Mig-ammo Tamiya and Alclad II. The build thread is here: Thanks for stopping by and having a look see.9 points
-
Hello! This is my most recent project. Nothing else to add, or praise, regarding this wonderful kit. It is a pleasure to build and everything works just fine, even the decals. Except for the roundels, that I've painted using masks, all others reacted really well to Gunze's Mr Softer. This particular kit represented a Spit in 1940, so perhaps I may have weathered it a little bit too much, for they should have been relatively new then. But, it's done! Hope you'll enjoy! Cheers!8 points
-
A few years ago I invented beach footwear for people with one leg. It was a flop.8 points
-
I glued the sides on last night and today fixed the horizontal pieces that you see here forming the bottom of the sponsons, the parts that overhang the tracks. They need paint of course and note that I accidentally sprayed the port side piece green while it was on the sprue. I may have to do some masking before I hit it with the white paint. Suddenly there seems to be very little room in there and the guns and turret basket aren't fitted yet. There's never any spare space in a tank, is there? While I'm here, I wanted to show you a properly focussed picture of the cutaway bogie. I'm rather chuffed with it. As the hull sides are major structure I wanted to give them plenty of time to set before I go any further so I shifted my focus to the engine. There's already a problem in the engine bay. There's an unexpectedly tall vertical fuel tank that fits in the corner and will conflict with my cutaway horizontal fuel tank in the sponson, both sides! There are a number of possible solutions, I just have to decide which one I like best. Here's the cylinder bank with the pushrods and rocker covers installed. The push rods are one piece, thankfully, but one piece with 23 sprue attachments to detach and clean up. The rocker covers are all separate; nine with the oil pipe attached and nine without. When it's painted, this will look amazing. This is the rear of the engine and will be almost completely hidden by the intake and exhaust manifolds, the magnetos, auxiliaries, and the main engine mounting beam. This is the front of the engine dry fitted into the cooling fan shroud. It's an aero engine of course, the Wright Whirlwind, designed in 1928 and still in production in the 1950s. Where the propeller should be, they fitted a clutch and a cooling fan. That's the fan and clutch, totally hiding the cylinder bank. Nor much point wiring up the spark plugs then. Or is there? I'm cleaning up the remaining pieces so that I come to understand it in three dimensions before I start trepanning the engine. It would be such a shame to waste it all. This is most of the rest of the engine but there will be other pieces scattered around the rest of the sprues too. Somewhere in there. 😄 Seriously, the blue boxes are emptying fast. It's very encouraging, as are all of you with your likes and comments. Thanks for the boost. 35h0m8 points
-
During my visit at HpH/Infinity Models factory we discussed some new plastic models. In the 1/32 Infinity range this will be A-20 Havoc, Savoia Marchetti SM.79, Dornier Do-17, Saab Draken and Saab Gripen. In 1/48 they will release a new B-26 Marauder.7 points
-
Here we go 4th time to the well as it seems. If I finish this it'll be a new personal record for builds finished in 1 GB. What am I presenting for your amusment today you may ask? Welllllll, How about taking Monograms A-26A/B and converting it to an A-26K SEAC Counter Invader. In addition the kit I've added SAC metal landing gear a. OzMod's A-26K resin set annd Eduard's A-26 P/E set, Squdron's vac canopy set and Aeromaster's "Air War Over Vietnam Pt VII A/B-26K Invaders 2. Anything else I'll scratch build or 3D print as needed, which will probably be a lot. I hope I can get this done in time and if there is STILL time left, maybe I'll "Shudder" try for 5 builds completed. But in any event, all comments, ideas, and suggestions are always welcome. So let's start engines and hit the taxi way.7 points
-
Hi Everyone I’m calling the Wicked Wabbit done. This is the truly excellent Tamiya 1/48 scale P-47 and it’s been in a state of partial completion for about four years, wish I’d just settled down and got it done in one session. It’s also the first time I’ve used a Montex mask and wet transfer set and it won’t be the last, they really are superb and make the model sing. Other than that, the model is basically out the box except for the seat belts which are home made. Hope you like it.. Kind regards Trace7 points
-
Earlier this week I posted photos of my latest completion, the Convair F-102. I took another model to the airport for the same photo session; it's one that was finished in the Spring of 1989. It was the fourth model I finished after returning to this hobby around 1988. By this point, I had learned that I needed gloss coats for decals, and a flat clear for final coats. I had started using Testors Glosscoat and Dullcoat lacquers in the little spray cans. Things went well until it was time for the final clear flat on this Harrier. At the time, I had an hour off for lunch and I wanted to finish the model after eating lunch one fine Spring day. I laid the Dullcoat on too heavily though and it "melted" small divots allover the upper surface! Arrrgggh!!! And there was nothing I could do about it...😪 I remember modifying the rear exhaust nozzles so that they could be rotated down like the two front nozzles. One thing that bugged me then, and does to this day, is Monogram's "goof" with the mounting of the rear main landing gear. Installed per instruction, they end up sitting just above the surface of the ground. I guess I could say the Harrier was in take-off mode and just lifting those. For that reason mostly, I had never taken a single photo of the model in all the years since its completion. Friday's trip to the airport seemed like a good time to remedy that! She isn't much to brag about I'm afraid, but it is an example of my work from many years ago. So, here are a few pics of the old Marine Harrier. Thanks for stopping by and thanks for your interest! '7 points
-
I really think I might have saved this. The paint job looks good. I spent some time taking care of the metal areas on the exhaust nozzle; attached the undercarriage. The next couple of days will see the ordinance readied for attachment, then decals, etc...I'm hopeful. --John7 points
-
Sorry for not much action on this but busy with some major home repairs after the storms and looking after aged parents So small update managed to get a wash on the decks and the mast is painted. Stay safe beefy7 points
-
#7/2022 And my dad´s next addition to the French at war theme. AMG kit which is somewhere between shortrun and mainstream. Dryfitting is important Painted with Tamiya X-32 Titanium Silver. Plastic rods used for the missing nose gun barrels. Also used rods to replace the badly molded gondola barrels. The kit comes only with a spinner that has the external starter adapter stub. Therefore used a spinner from an Eduard P-39 kit, also exhausts are from an Eduard P-39 (molded more nicely). As seen on pics, all French P-63 had the front wheel hub covers removed, kit wheel is covered. Aftermarket P-63 wheels from Reskit and True Details also have only covered front wheels. Bought Eduard Brassin P-39 late wheels. The tire of the front wheel was too narrow, thin and square, but the rim looked perfect. So my dad sanded away the tire, drilled out the hub cover of the kit wheel and inserted the Eduard rim into the AMG tire. Added 20g nose weight. EZ line for the antenna wire. Build thread here https://www.britmodeller.com/forums/index.php?/topic/235105690-guerre-dindochine148-bell-p-63c-kingcobra-armée-de-l’air/ In 1945 France received 114 P-63Cs. Initially stationed in North Africa, they were sent to Indochina in 1948/49. Due to lack of spare parts (the USA didn´t send any because they wanted to end the French imperialism) only about 60 aircraft were servicable. In 1951 the Kingcobras were replaced by Bearcats. Model shows an aircraft of GC II/5 "Ile-de-France" DSC_0001 by grimreaper110, auf Flickr DSC_0001 by grimreaper110, auf Flickr DSC_0002 by grimreaper110, auf Flickr DSC_0003 by grimreaper110, auf Flickr DSC_0004 by grimreaper110, auf Flickr DSC_0005 by grimreaper110, auf Flickr DSC_0006 by grimreaper110, auf Flickr DSC_0007 by grimreaper110, auf Flickr DSC_0008 by grimreaper110, auf Flickr DSC_0009 by grimreaper110, auf Flickr DSC_0010 by grimreaper110, auf Flickr DSC_0011 by grimreaper110, auf Flickr DSC_0012 by grimreaper110, auf Flickr DSC_0013 by grimreaper110, auf Flickr DSC_0014 by grimreaper110, auf Flickr DSC_0015 by grimreaper110, auf Flickr DSC_0016 by grimreaper110, auf Flickr DSC_0017 by grimreaper110, auf Flickr DSC_0018 by grimreaper110, auf Flickr DSC_0019 by grimreaper110, auf Flickr DSC_0020 by grimreaper110, auf Flickr DSC_0021 by grimreaper110, auf Flickr DSC_0022 by grimreaper110, auf Flickr DSC_0023 by grimreaper110, auf Flickr DSC_0024 by grimreaper110, auf Flickr6 points
-
I purchased this Gannet kit a fair while ago as I couldn’t lay my hands on a Revell one in my price bracket, as I kept being outbid on - well you know where. I thought at the time that I should have waited and I’d have got a Revell one eventually, but then I found a post by somebody saying the Revell Gannet had a problem with the shape of the underside of the tail where the arrestor hook mounts. so I was now glad I’d got the Frog/Novo kit. I don’t know it’s Frog or Novo as it was listed with no box or instructions. It just arrived in a flat brown box with the pieces sellotaped to thin packing material. I’d gone to build it a few times, but knowing the modifications I wanted to do to it, I wasn’t quite ready to start it so other models from the stash were chosen. So I started it. The WIP is here The intention was to build the Gannet with it’s weapons bay doors open - which in turn meant 3D printing the weapons rack (or my rendition of it anyway). I also wanted a proper cockpit so that was 3D printed as well, and also a Trumpeter photo-etch kit interior kit was added). The wheel bays also needed cutting out and 3D printing, which in turn led to the main landing gear being 3D printed also. Landing lights and wing tip lights were made from clear sprue and fitted. The wheels were replaced with more 3D printed items. And finally, the original cockpit canopies were replaced with Falcon vacuum formed replacements. I had a few interruptions during the build but I was determined to get it finished to a better than average finish which I think I’ve done. And finally, photos of my growing FAA family.6 points
-
Hi all A bit more done on the cockpit A quick test of the bang seats and just about got away with it and it all fits. Chris6 points
-
I worked up the nerve to glue the wings on today, after fettling them to within an inch of their lives to ensure they stuck. I also dug out my EBMA jig to keep everything in order while the glue sets up, which makes it a must-have. The wings are almost a butt-joint in shallow sockets, apart from one location tab that projects about 2mm inside the fuselage, so it's key to get a good joint. I flooded the area with liquid glue and held them in place for a few minutes while I watched some Galactica 80. Remember that? It's a bit more hokey than the original, as most of it is based on earth, presumably to keep the budgets down, one of the main reasons the original got cancelled. It was costing over $1m per episode, with much of it being spent of the SFX. I digress. That's not like me! I snapped a pic on my phone where it's sitting next to my photobooth, as I daren't move it for now. I'll take a proper pic later.6 points
-
This is slow going. Trying to cobble together decals from a variety of sources, none of which are any good. Ho hum, it is what it is. Will try and get this finished tomorrow and then I can crack on with the SHAR. Seriously tempted to build the SHAR as Matchbox intended! SD6 points
-
I've been waiting for the sun to come to take some photos. But now with cloudy skies and snow in the air I have used a flashlight for illumination. The parts of the body aren't yet cemented together. I wanted to show the frame with the motor first. For the chrome stripes I have used Molotow Liquid Chrome. . . . Now she already looks a bit like the reference car in the title.6 points
-
Greetings fellow Shermaniacs! Well an interesting time has been had doing a compare and contrast between the various components which should all be the same...but they're not....and they don't match any plans, dimensions or photos I've found. The picture below shows a bit of the problem Not a single dimension on those two matches, in some cases not even close. The E8 hull on the RHS is too narrow by 2mm+ the other by only 1mm. The engine decks are different widths with the E8 being right but the outer plates have been molded at the wrong angle hence the narrow hull. However the E8 kit contains TWO engine decks the original hinged type and the later torsion bar type which was fitted when the tanks were rebuilt post-WW2. Sprue T goes into the spares box followed by the turret Sprue J, and Sprues B, N and Q, both sets of tracks go in the bin. They are chunky and hard to fit then will sag into the sprocket over time even without tension. The Firefly will have a set of T66 track taken from a Tamiya M4A3E8 the T68 will have 3D printed T84 rubber chevron track. Having far fewer parts around made the next bit much easier and will be a tactic employed in future. So the first job is to modify the hull tub to the M4A3 configuration I found it easier to remove everything behind the escape hatch to get a flat surface the reinforcing angles are Plastruct angle, the reinforced floor is 0.25mm and the other parts 0.5mm sheet. On the hull sides the upper suspension mount and final drive locating pin have been filled with stretched sprue. Finally I turned to the rear plates The M4A3 G1 part is pretty good, the E8 plate M55 (LHS above) is appalling but at least the hinges are better. Note the difference in size!! They're attached for now but I'm not sure they'll remain... Turning to Sprue H from the VVSS kit I cut the bottom of the rear bustle from the base cutting vertically added a 1.75mm spacer to the top and attached it to the turret top, as molded the bustle is far too short. The turret top piece needs the undersized loaders hatch filling and a strip adding to the outer edge of the commanders cupola to correct the exaggerated curve of the corner. Once set solid the molded detail can be removed including the strip round the commanders hatch. The final task this session was to reduce the HVSS frame L20 by 1.0mm, This is simple: remove the damper assembly, cut 1.0mm from the top edge of the frame, stick it back together. 12 times in this case. Now I need some skull-crusher coffee and put my thinking head on while I work out what I'll do about the hull tops. Large hatch M4A3s were built at two plants Chrysler Detroit and Fisher Tank but both these projects are Fisher vehicles as they built all the Jumbos and 75mm wet tanks. I know that I'll only correct the hull top once and then get copies cast. However I do it it'll be tedious... 'til next time Thanks for reading and see you soon.6 points
-
Well, with my M10 build (not part of the GB) going swimmingly and being close to complete, I decided to start the Easy Eight. I like that Tamiya ditched the die cast hull with this model and instead opted for a multi piece plastic hull since the metal hull led to minor fit issues on other kits. The upper hull and lower hull went together pretty quickly and that's all I got for now. Had a small glue mishap on the transmission cover but I planned to enhance the cast texture there anyways, so no issue.6 points
-
BEA 'Red Square' Viscount. Welsh Models 1/144 with 26 Decals. This is one of my 1/144 models from my slowly building collection of aircraft flown by my father in a flying career just short of 30,000 hours over 40 years. In that whole time, this one was memorable for all the wrong reasons. I was recently looking through his log book(s) and came across this one, which he explained to me as having been a fearful experience. July 18th 1966 was a routine internal German flight from Franfurt, one of many made that week, with my father as first officer paired with the same captain all week and sharing turns as the handling pilot. This was one where he was doing the take off and landing. All pre flight checks completed on G-AOJD, including free and clear movement of all control surfaces, they taxied out and were cleared for take off. Accelerating down the runway, passing V1 and Vr, the aircraft was rotated and left the ground, commencing the climb. At this moment the elevator locked solid and there was no fore and aft movement on the control column. The elevator was locked in the up position. He cut all four throttles, and got the aircraft back on the ground in a not too neat arrival. (Strictly against the rules as once you have passed Vr and left the runway you must carry on and gain height). '"We broke all the rules, and got away with it, as Frankfurt had a decent long runway, Had this been Templehof we couldn't have done it, and would likely have ended up in the blocks of flats. We taxied back in in complete silence. Not a word was said to me then, or since. I should have been given a real 'rollicking' but nobody ever mentioned it again But you have no time to analyse and think about the situation, you have to act. Every rule in the book tells you not to do it, but there was a disaster going to happen. The cause was found to be a plate covering one of the elevator hinges which had been binding against the elevator as it moved. This had been happening for some time, and at the moment I pulled back to rotate it had fractured and broken off. Rather than flutter away harmlessly, it shot back and wedged itself in the gap between the servo tab and the elevator itself, causing the jam. The engineers found the strip of metal had bent fully at 90 degrees". Sobering story, G-AOJD went on to serve until 1976 when it ended its days on the Jersey fire dump . While not a peaceful end it was far better than it nearly had. The logbook entry that started all this off. It was underlined in black at the time. Flight time is logged as 8 seconds. Thanks for looking, John5 points
-
BOAC Super VC10 Mid 1960s This is the Roden 1/144 kit with Two Six decals built from the box except for a bit of sanding around the nose to reduce the sharpness of the change in profile from parallel to tapered in plan view, and addition of the two small fences on each wing leading edge. I also emphasised the flaps, slats and spoilers slightly by some light scribing before highlighting with mid grey paint to get them to stand out a little more than the panel line engraving, which is nice but just a little heavy for this scale.5 points
-
Hi, here some pics of my Eduard Z-526AFS in 1:48. Add the 3D printed Brassin Cockpit and Wheels, the rest is OOB.5 points
-
Greetings, My latest work Hasegawa Saab 35 Draken 1/72, one roundel near the nose flew away by wind while taking picture. Cheers5 points
-
hi folk's finished and should be galleried later.What a great little kit for it's time not perfect by any means but stands up to it's then rival's well.Flown by Sqn.Ldr. John Waddy 80 Sqn.RAAF in the Pacific theatre.15 1/2 victories in the middle eastern theatre.5 points
-
Hello, The chassis is unmasked. The gray reinforces the contrasts and brings a little more realism in my opinion… Next very soon. Pascal5 points
-
I just recently completed the old Airfix kit of the Hampden with most of an Airwaves PE interior installed. The PE parts really help with an otherwise bare interior. Falcon vac transparencies were used except for the nose, the Airfix part was used there after all the framing was sanded off. I also sanded down the exterior rivets until just a hint of them remained. Markings are for a 408 Sqn. RCAF machine, summer 1941. Thanks for looking! -Dan5 points
-
Airfix: https://www.facebook.com/officialairfix/posts/10159720694311271 Pepelatz collab with Hasegawa: https://www.facebook.com/pepelatzmodels/posts/1572440629794880 Zvezda: https://www.facebook.com/photo.php?fbid=2062687657205337&id=100003923675305&set=p.2062687657205337&source=47 V.P.5 points
-
I’ve come to the realisation that my eyes, club fingers and patience are not up to PE apart from the bigger pieces. Shame, but there is no point getting annoyed and this taking the enjoyment from the hobby for me. Also, when you look at some parts (especially from newer kits like this Tamiya Sherman) it makes me wonder if the PE is really needed in some areas. The Voyager part which needs all the bends is 13mm long, the Tamiya part is in the pink circle and looks good to my dodgy eyes! BTW I do realise that PE can really enhance a model and I take my hat off to people who can do it. I often look at others work with my chin on the floor at how people can do such detailing, sadly it is beyond me. George5 points
-
Hooray! I got the nerve-wracking alclad part done today. I say nerve-wracking because with such a mirror like finish, any minor screw-up becomes a major screw up. As expected it took longer to mask than paint. Here's where I was at after masking: I then proceeded to paint. I had to judge how much to put on before removing the wing panel masks, which was tough. But I guessed and stopped to remove the panel masking: I then went back to painting with broad, even strokes and when I liked the contrast between the wing panels and their surroundings, I stopped. I used a cloth diaper to gently remove the paint dust, removed the masking, and here we are: I'm very happy with how it all turned out so far! I like how the difference between the darker metal and lighter metal is very subtle. As it should be. I could probably apply the aqua gloss at this point and be OK, but I'm going to let it sit until tonight. The Aqua Gloss stage is the next nerve-wracking part....5 points
-
After re-watching the movie again, it seems that the HA-1112's were painted in the same colors as the the Casa-2111's, close to 70/71, so that's what I've gone with. Prior to the final paint, I've added the vent tubes on the lower cowl, and the prominent de-icing tubes on the windscreen ... ... I also did a 4 blade prop for 'Falke's' chevroned aircraft, on the ground it was a 3 blade, but the flying aircraft all had 4 blades. The end is in sight, then onto the Hurricane XII flown by Christopher Plummer (Sqdn Leader Harvey) during the opening airfield strafing scenes. Guess at some point, I'll have to make a 1/48 70mm Cinimascope camera! Colin5 points
-
Thanks Mark, appreciated. I've now repainted the base slabs with a concrete mix and added splatter and various stains and marks. There's still more general weathering (no relation) and dirtying up of the grass edges to be done but I want to end up overemphasizing the display base to the point where it overshadows the model itself. I've also 3D printed, painted and weathered a few fuel/oil drums, fuel line, hand pump and ammo boxes (yet to be painted) to add a bit more interest but I think that'll be about it, re my comments above. More soon... Melchie5 points
This leaderboard is set to London/GMT+01:00



.thumb.jpg.d17ff607fc7e89ed057e63fcb6f2a888.jpg)

