Leaderboard
Popular Content
Showing content with the highest reputation on 07/12/20 in all areas
-
Evening all, A couple of quick builds I've just completed, kits of which I have had in the stash for many years and only just found the inspiration to build. I added pavla cockpit sets, nozzles and gun pack, plus a master pitot. Painted with MRP paints and W&N oil washes. Thanks for looking, gazza l First up the FSR-1, a few shape issues I feel, particularly around the cockpit/nose, plus the very deep panel lines. The FA-2 a slightly better kit but still with the deep panel lines.26 points
-
Hello everyone I've just completed the Airfix Beaufighter X, so I thought I'd post some images of the finished model. It's my first ever Beaufighter, which, considering how much time and pocket-money I spent on models in my youth back in the 1970s and 1980s is a bit of a miracle... There's a Work in Progress thread here: As I mentioned in the W.i.P. thread, I chose this particular Beaufighter as it had a local connection to the North East, as its pilot, Flt. Lt. James Davies Taylor, D.F.C., was born in Sunderland in 1921. He served with 236 Sqn, was awarded the D.F.C. in October 1944, but was killed whilst serving with 84 Squadron in Indonesia on December 8th 1945. It's been a very enjoyable build, with some pretty minor hiccups along the way - it was certainly more 'shake and bake' than the Airfix 1/72 Blenheim I did before it... It's pretty much 'mostly' OOB, with a few extra aerials, some scratchbuilding in the middle and rear fuselage (which needless to say you can't really see...), Eduard etch sets for the cockpit and undercarriage, Quickboost exhausts and my own decals printed by DrawDecal for the MB-M codes. Base is my own, done in Photoshop and spraymounted onto a sheet of 3mm polyboard. Anyway, on to the photos: I had some great fun with the weathering, and I'm pretty pleased with it. Thumbs up to Airfix for such a great kit. Cheers Simon19 points
-
I am gradually building my way through the current and former European national carrier airlines and here is the latest addition to the collection. The final of the 2018 FIFA World Cup was between France and Croatia. France won 4-2 but getting to the final was a tremendous achievement for the Croatian team and it inspired Croatia Airlines to apply celebratory titles to veteran A319 9A-CTL “Pula”. They brighten up what is already a fairly colourful livery and hopefully make for an attractive model. The model is, of course, from the Revell kit. The build is OOB apart from replacement winglets and a few small details. White paint is Halfords Appliance Gloss White. The blue lower fuselage, now sadly a thing of the past, is Halfords Gadget Blue. (It’s from the same range as Racking Grey). Airbus Grey is Holts HL Grey 01. Contrary to what is shown in the decal instructions, Croatia’s A319s seem to have plain grey wings which cuts down on the masking. Metallics are by Tamiya and Revell. Decals are by BOA with Authentic Airliners windows (note that the cabin window spacing on the sheet doesn’t match the real A319 particularly around the emergency exits) plus some odds and ends from the spares box. Thanks for looking and constructive criticism is always welcome. Dave G (Edit: New photos with corrected Croatian flag now uploaded) With the opposition from the World Cup final, another of my national carriers collection19 points
-
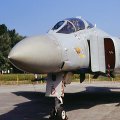
This is my Monogram Phantom in 1/48 scale. It took me quite some time to finish. Especially the intakes took quite some filling and sanding. It's more or less OOB, but I used a decal sheet from Caracal (ANG Phantoms) and an an-alq119 from the Italeri RF-4E kit. Paints I used were mainly Vallejo and Mig Ammo acrylics. Some oils for washing and weathering. When kit has raised panellines I use nail buffers to remove the paint from the panellines. O, and I added some RBF tags from Eduard and scratchbuilt rear-view mirrors and some other stuff for the cockpit. Hope you like my Spook.. Kind regards, Gerben17 points
-
Hello everyone! Just finished the "good old" Hasegawa Bf109 G-4 1/32 in ProModeler (Monogram) boxing, released in the early 2000s. Overall still a great kit, built with some add ons like MDC trop filter, brass pitot tube, Uschi (Rig That Thing) elastic thread for the antenna, PE seatbelts and small plastic/metal bits to improve the appearance of this well known Gustav. Painted with Model Master enamels (RLM 78/79/80), clear coated with acrylic Mr. Color matt and gloss varnishes. Decals from the box. National emblems, A/C number and tactical markings masked and sprayed accordingly. Thanks for watching! Oscar15 points
-
Hi Folks,this is Mistercrafts boxing of Heller's venerable Sabre,only when reaching the decal stage and they disintegrated did I fall back on a set of Heller originals pity as the Spanish scheme looked nice hence the yellow fuel tanks!13 points
-
Hi there, cobbled this one together completely OOB. Finished with Humbro & Halfords Aerosols. The kit decals were good apart from the roundels which looked a bit odd in colour so I used Airfix ones from my spares box. I used Mig Ammo oil brusher silver to do the engine panels and black eyeshadow for exhaust staining, a very restrained wash and then Halfords Satin laquer. All in all a great fun kit to build, and I have another couple in the stash!13 points
-
Hi all This is my first post for a long time but I have been building away. It is the Kinetic Sea Harrier FA.2, Only extra is the Eduard cockpit set. Painted with Hataka paints. The build went together a lot better than I expected and looking forward to making a GR3 and T2 next.13 points
-
I take thousands of aircraft pictures each year, many really, really please me and I will watch an occasional slide show on my PC for my entertainment. There are many which merit being printed and framed but I have one I am really really fond of. Taken at the "Wave" Waddington Aircraft Viewing Enclosure Car park on one of the first days of Exercise Cobra Warrior in August 2019. The jets were taking off just as I parked the car..oh the noise! I raced to open the car boot, get out my camera bag and assembled the big lens to the body, ripped off the lens cap and fired away with what ever settings I had put in the camera at my last shoot... I was truely fortunate to get some good 'uns, For a while I have been toying with getting a really big print done.. I went ahead and did it ,at 100cm x 75cm the acrylic print is BIG. For the office on the wall above my desk:12 points
-
Hey all, Winter is upon us! That means an excuse for staying indoors where I am. Sometimes I think my hobby is adding to the stash, but I swear it's building models. Here's the old Hawk kit of the Westland Lysander - with decals provided by @Dunny (many thanks again!). I found this one stalled for a while as I wasn't too impressed with it - there's essentially no interior detailing whatsoever and I didn't have the right decals yet. I made the tops of the ladder rungs white as I had read they did that to make it easier to see at night. I ended up doing very minor surgery to it, as the fuel tank didn't actually have anywhere to join. It's essentially asking you to glue a flat piece of plastic to a round piece...not too impressed. I just heated up the end of a paper clip and poked a hole. I'm glad to add this to the collection but I'll definitely be grabbing the Eduard boxing to really make a go of it. Thanks for reading, on to the pictures! PS apologies for the amateur photography, just used my phone.12 points
-
Hi, everybody! It's my next model from Ukraine manufacturer "ICM". The kit is very good, highly recommended.12 points
-
I decided to do a quick project and build a Fokker D.VII in the colours of Finland. Eduard's model sticks together very nicely and quickly, in fact the project took 4 working days. The most difficult thing was with the selection of paints, but I managed to choose green from Bilmodel, navy blue from the MR Paint palette, blue is Gunze RLM65, only the black and brown one I had to mix myself up and somehow I also managed. This is my 41st model this year - straight out of the box and no weathering. So don't be too strict with your judgement.12 points
-
Good day ! Allow me to present a model of this bison to your court. An old Polish LWS-6 ZUBR gun from BROPLAN. I was interested in the prototype itself and the desire to overcome this set. I didn't have anything to do with vacushki before, and I don't think I'll contact them in the future either. I was busy with the model for a long time, I had to finish a lot, think, experiment. At the end, I picked up the covid and tried to finish it without improvement. You can read about the prototype here: https://topwar.ru/22676-polskiy-sredniy-bombardirovschik-p-30-lws-6-zubr.html In General, I think that the set won, although sometimes it made me think. At the end, a few photos of the construction site. Painted as usual Mr. Hobby and Valejio. Smeared it with art oil. Enjoy your viewing. Sincerely, Mikhail11 points
-
Hello My latest model off the production line is Eduard's 1/72 Spitfire Mk IX completed in the markings of No. 611 Squadron at Biggin Hill, 1943. An excellent kit, of course, although I found construction a bit fiddly in places and had a minor canopy disaster along the way. I used Tamiya paints rather than my usual Gunze and Vallejo for this build, followed by a bit of light weathering with oils, pigments and a silver pencil. I think it's my first 1/72 Mk IX Spit since wrestling with the Italeri kit many years ago. There's obviously no comparison! Best wishes, Ian11 points
-
Dear fellow Britmodellers, here's my 1/72 Kovozávody Prostějov Lavochkin La-5F (KPM0174). This is one of the new boxings from KP with updated moulds (finer surface details), released in 2020. I built from the box except for the pitot tube and the tail fin antenna which I replaced with wire. Markings represent "White 94", an aircraft of 159. GIAP, operating in the Leningrad region, in summer 1944. Painted with Gunze/Mr. Hobby acrylics. Photgraphs by Wolfgang Rabel. Thank you for your interest in this topic, best greetings from Vienna!10 points
-
*Heads to Ebay.... Well somebody's going to be getting a drawing pin in their kit it seems. Nonsense. This thread is always full of charity and tolerance. (Dispatches assassins) A universe the size of the fog here since Sunday morning and still below freezing: Heated up last evening though by cooking hot dogs over an open fire with the family: Ancient pleasures are the best imo.... Despite the lure of a misty outdoors, some thoughts emerged in relation to next steps with the Vixen(s), coloured here to break each down into their main printable units: There's smaller sub-assemblies for things like the engine, radar, undercarriage &etc. of course, but these all have to be incorporated into the larger issue of how the main elements will be eventually assembled in a particular order. I did up a second similar sheet as well, this one going around the airframes section-by-section to note any tasks still outstanding, either because they need designing from brass or vacforming, or because like the refuelling probe (this only for XN708, XJ481 didn't seem to have one by the time of the Martel trials) and wing stores I'd neglected to CAD these up for resin printing: XN708 has most work to do on it for brass parts (green): As well as the wing tanks, XJ481 also has what I'm referrring to in technical terms as 'that weird Martel thing' under its port wing: It's essentially the seeker head from a Martel attached to a rear fairing (don't know if this latter a custom-made fairing or cannibalized from an existing store). You can see it better in this close-up of the XJ481 illustration in Balch's Testing Colours volume: The perspective on this shot is a tricky one in regard to the port side - I've diagrammed that Martel ther as being on the middle pylon but not entirely sure it isn't the inner one. Any thoughts? Right. Coffee over and back to the grindstone. Tony10 points
-
10 points
-
Hi all, Here's my completed Spitfire Mk Vb. Only took me around 9 months to finish! It's an OOTB build, but I used AM decals as I didn't like either option offered by Airfix. Fiddly kit to build, and I'm glad it's finally finished to be honest! Thanks for looking Matt9 points
-
Thanks for the feedback guys. It's much appreciated. As @ivan-o says it's time for the curvy bit. It pretty much followed the same process as the hull apart from where it was easier in a couple of places to change the colour order. Again with the tape removed there were a couple of touch-ups to do but I'm pleased with the results. A few images of the turret and hull reunited gives you an idea of the complexity of the scheme. I'm not the quickest of modellers and I estimate it took me around 18 hours and an awful lot of Tamiya masking tape to get to this point. Next job will be to attach the details that were left of for the basic painting and then I will give it all a coat of semi gloss. Wayne I believe they call it scale colour, where the further you get from an object lighter colours appear darker and darker colours appear lighter. I don't think that's the case here though. If you look at images of the Challenger 2 that they have recently done in this scheme you can see that the MIG colours are a pretty good match to it. I'm ok with it now though. It will darken down when the final finishes are added. I hope. 🤞 I have to say John that although it looks like a daunting scheme it really hasn't been that bad. It's time consuming but really rewarding when that tape comes off. I would say go for it. Although that Challenge 2 does look good in this scheme.9 points
-
Some of you may remember me eventually turning out the Hansom Cab a couple of years ago, a long and protracted road but I am happy we got there in the end. This time I am turning my eye to the horse drawn buses which made Birmingham (not alone of course, but I am a Brummie and not even ashamed of it guys) the workshop to the world. As factories were opened they needed men and womens to get down and dirty making their products and as Brum got bigger a transport service was needed to feed the factory's desire for more, more, more employees. Birmingham's first horse buses first ran in May 1835 and by 1869 there were 20 horse buses in service on 15 routes. Trams drawn by horses came later, in 1873, hmm maybe later... Anyway a reminder if you dont mind me slowing the section down to hoof pace I shan't be making wheels with fellies and the like, in this scale I am going to stick with my own tried and tested method of protractoring away any plasticard that isn't a wheel rim. And using these as wheel hubs. 👍 So that is me, this will be my fourth piece of Brummie Victoriana and maybe this is a time to show what I have in mind. A B.C.T Co Ltd 'bus unloading, possibly at New Street near the station. Allegedly, so little of Birmingham's great Victorian buildings was left after a town planner got his bulldozers into them in the fifties and sixties that it is difficult to identify the place definitely (rant over, no promise that it won't recur as we get into the business) This style of 'bus with three windows is more commonly photographed than the four window style popular in "that London" and is intended to be what I build if progress happens If... These happy folks look as if they are in their Sunday best which gives me to think they must be boarding the Balsall Heath 'bus to ride to Cannon Hill Park. Anyway, this is the plan Co-incidentally these are the plans The Model Wheelwrights kindly supplied me copies of their plans of the London Omnibus by John Thompson which have given me immense amounts of useable data and sizing clues (the plans had some scale info but were reduced from the original before I got them and I have had to resize and scale them as I go along, this is going to slow me down. If you thought the Hansom's pace was glacial, this time consider continental drift as a pace maker. (I was a little scathing about town planners destroying the Victorian infrastructure in Birmingham, but Manzoni did not get it all) Here is a Victorian bus in Sparkbrook with the same road now courtesy of Google Maps And a shot of the planning underway Work has begun on the lower deck foot well. And the BCT Co Ltd markings are being adjusted to. Well this is me at the moment, if you are interested on riding the bus please kick in with any comments helpful or not. (I am used to being told I am a dumb dolt ) Glue and knife time now, ciao.8 points
-
8 points
-
A tad more done tonight, more weathering of the hull sides and front, plus a bit more subtle chipping. Chipping kept to a minimum and only around the high traffic areas that would get warn away, some subtle new rust in and around a few areas. Will be adding some rain marks and a bit more dust and splattering once the running gear is sorted out. Cheers Dan8 points
-
With tanks and infantry, the Grenadier Guards managed to fight through Hunner Park to the south end of the road bridge. Machine guns firing, heavy weapons in action, shaking the streets with their explosions, covering everything in clouds of dust from the pulverized masonry. The bridge was shaking with the explosions. Skidding, shaking, firing the Guards' tanks, they reached the other side. The attack to seize the Nijmegen road bridge (Waalbrug) was carried out by the senior battalion of the Armored Guards Division. AoS sign white 51 over red square is owned by the 2nd Btn Guards Grenadiers. The division's second senior battalion, 1st Armoured Btn Coldstream Guards, AoS sign white 52 over red square, was not on the bridge at the time, but was employed further east of the corridor to aid the American 82nd Airborne. The scene of this Diorama is about the 2sd Welsh Guards on their way towards the Arnhem road, 21/09/1944. To make this diorama, I used a 12X12in base. There are 14 figures in total. The vegetation is Woodland Scenics. The street floor was sculpted to look like the brick floor. Also including the building's architecture, I hope I have managed to make the scene look as close as possible to what it was at the time, of a Dutch city. A military police officer from the Guards Armored Divisional Provost Company guides traffic near the bridge. The figure of the MP is Hornet, as are the 2 figures of tankers. The Cromwell tank in full markings: The Guards formation badge and the AoS sign of a white 45 on a green and blue square, identifying the armoured recce regiment of an armoured division. Also show is the bridge classification marking. The old and good kit of Tamiya Dingo, The figure of the officer and the sniper are Hornet, with resin heads. The Dingo figures are Miniart. The plaque on the wall: “Verboden Toegang” (Forbiden Access). With the marks of the 2nd Armored Battalion Irish Guards. Dingos were used as vehicles in liaison tasks. It was the Shermans of the Irish Guards who led the advance of the Waal across the road to Arnhem. The AoS sign of a White 53 on red square of the Irish Guards, The seated figure has headphones for the radio operator. The accessories that complete the model are made of resin. Jerrycans are from Tamiya. Miniart British Tank Riders (35118). Cromwell has a very large empty space, so the choice to place the figures there was obvious. It was not common for the British to use tanks to transport troops, just as the Russians did with their infantry, but for the scene, I believe he agreed, just to symbolize the need for the hurry to send infantry to the other side of the Waal. The C Squadron sign in the White is cleary visible on the stowage Box on the side of the vehicle. A beautiful final view of the diorama, showing the Cromwell Tank of 2nd Welsh Guards crossing the street at Nijmegen. An C Squadron Sign (circle) enclosing a number 1 is barely visible on the left rear hull of the model. The classic British Red Phone Box, making its presence here. I believe it is not common to be seen in the Netherlands, but I found it interesting to add it to the diorama. There is an illustration of the box cover of the Master Box 3533 kit, which served as inspiration. Highlight for the German / Dutch bilingual sign warning of danger of mines. The figures are Tamiya. The last is Hornet. The bike is Master Box. I respect those who in the past have fought for this bridge. In terms of model making, it was a lot of fun to make this Diorama. The hard work in doing it was a pleasure. Thanks for watching! Fábio.7 points
-
Latest build from me depicting the loss of Panavia Tornado GR.1 ZD791 on the very first day of the Gulf War, January 17th 1991. Crewed by John Peters and John Nichol, their Tornado was hit by both a surface to air missile as well as taking hits from 23mm flak. Both survived the ejection and were taken prisoner and were released at the end of hostilities. This is a 1/32 scale Revell kit, the aircrew being aftermarket items. Not a perfect build and certainly some artistic licence was used, hopefully this depicts a well known incident from the first day of the Gulf War. Last picture is a link to Flickr showing a video of the flickering lights representing flames. Not sure it really works, but it was the first time, so very much a learning curve.7 points
-
Hi everyone, This is my latest model: Academy’s new 1/72 F-14A depicting “Wichita 103” in 1985 using DXM decals. This is an excellent kit and my favorite that I have built. The engineering is very good and the exterior shape perfect to my eyes. The DXM decals were also quite good, but missed a few things: the gear door placards used by VF-1 were missed and the anti-skid walkways looked a tad off in shape. I used the Furball-Aero VF-111 and their VF-41/VF-32 set for these details. The kit went together very quickly and was built in 2.5 months with most of that time spent post-construction on painting, weathering, and dilly-dallying . Aftermarket details include Quickboost intakes and ventral fins (to spare ejector mark filling), Master pitot, DXM VF-1 decals, and seats/throttle, control stick, and canopy details from an Aires cockpit set. The cockpit is very nice, especially with a few small editions. I wouldn’t bother adding the whole Aires set, definitely not worth the effort given what can be accomplished with the base cockpit. I also detailed the nosegear wheel well with lead wire and a few parts from the Hasegawa kit. The kit was painted with Mission Models acrylics with MRP for the metallics. MRP’s new acrylic metallic for brush painting are really nice, by far the nicest that I’ve tried. Weathered with oil paints. I highly recommend this kit to anyone with an interest in Tomcats or USN aircraft. It is a joy to build, takes to detailing well, and looks great once finished. The cockpit was hard to see in the winter light today, so I included a construction shot and another photo taken with a flash. Detail is very nice for an injection kit if you add aftermarket seats and a few details like a better stick and throttle. All comments and feedback welcome. Best, Nick7 points
-
Evening folk,s. Another "keeper" from last week's cull is this one from a few years back,a great kit from Eduard less over engineered than some of their offerings.Many thanks for looking in.7 points
-
This year has been one of older kits for me, and by older I am talking from up to 40 years ago! So back to 1978 and the ESCI 4011 Vought F-8E Crusader, a fighter regarded by many as the 'Last of the Gunfighters'. Prior to 1978 there was a 'quarter scale' motorised F8U offering from Lindberg which dated back to the Fifties and we had to wait until 1988 for the excellent Monogram kit. So for ten years the ESCI kit was the best we had and, of course, I wanted one! It was never to be but I snagged one on eBay many years later for a grand total of £5.40! I started putting the kit together this summer and I scribed all the panel lines and cemented the fuselage and wings together. I was surprised at just how large the Crusader was for a single engine jet. It stalled because it had reached the filler and sanding stage (which I detest) and I went on to build two F-15A Eagles instead. I still have a lot of enthusiasm for this kit so thanks to a KUTA I will endeavour to get it completed by February 2021. On to the photos:- IMGP4068 by Ghostbase, on Flickr The top side of the F-8 has come out quite well, I am happy with the scribing and the parts have fitted together pretty well, maybe just a little more work needed on the top wing/fuselage join. IMGP4069 by Ghostbase, on Flickr This is the part that put me off, the under fuselage join is very poor and the wings to body join requires a lot of filler! I think I have to be realistic and accept that it won't be anywhere near perfect but then again, how visible will the underside be? IMGP4070 by Ghostbase, on Flickr Not going to get started for at least a week however from the seven kits on the 'shelf of shame' this is the one I most want to get finished. Michael6 points
-
My take on the Trumpeter 1/72 kit of this beast of a recce bird. Main points from the build were the addition of vertical spreaders made from sprue to make sure that the rear fuselage does not have a valley running down its spine, and a little reshaping of the tail to correct it to the later vs early shape. It was also worth studying pics of the real aircraft being modelled as there seem to be some differences in avionics fits between aircraft (i.e. some have more protrusions at the rear end than others!). vig8 vig7 Decals came from a Wolfpak Decals sheet showing a colourful bird with bicentennial markings. One thing I found interesting about Vigilante markings is that the white areas on the upper surfaces of the wings seem to extend beyond the moveable control surfaces (the Trumpeter paint scheme has this wrong) and neither did the Wolfpak instructions show it. Also the all moving horizontal stabilisers are edged in white when you might expect them to be all white. Curious to know what the thinking was - it has the effect of making the plan view of the aircraft look smaller from above which perhaps was the rationale? vig6 vig10 Paint was trusty Gunze Aqueous LGG/ White with Insignia Red nose, and Burnt Iron on the slots and rear end/ burner cans. The Master brass pitot finished it off nicely. vig4 Hope you like - must have been quite a sight to see one of these launching/ recovering!!! vig1 vig3 Pat6 points
-
6 points
-
Right, off with the brim, front and back: Some Green Stuff blobbed on: Older readers will recognise that the one on the left is having his hair dried using one of those hoods with the tube, just like your Mum had. Good enough at this distance: No, I'm not going any closer6 points
-
Tamiya P 47 D Razorback "HUN HUNTER XIV" LT Col WYMOND 65 Fighter Squadron 57 Fighter Group Alto Corsica 1944 Humbrol brush painted Eagle Strike Decals Yahuu models instrument panel Pavla resin seat Build thread here Patrice6 points
-
Hello my Friends. This is my latest. First time I put an aircraft on a base(printed off the internet) Had lots of fun with this and added a bit of weathering with oils and pastels. All the best. Ralph.6 points
-
Thank you Ced - mostly down to the new vibrating tool The bad fit at the trailing edge it's just what it is: bad fit i tried to mitigate it somewhat, see below... Thanks for the vote of confidence, CC You have another one? You truly are a glutton for punishment... Cheers Erwin, thank you - glad you like it Thank you Johnny The sander proved very useful, and saw more action, see below. OK, done with the mailbox, on with the update; BTW I'm in the middle of a looong WE because it's bank holiday in Italy tomorrow and we get Monday and Tuesday off, so expect more Lots of pic to follow - I warned you... I tried to fix the wings trailing edges by filling it in with PPP: still there, but less evident Then a test fit of the bomb racks, to see if there were any holes to be filled in The blind holes on both wings had to go, they are for the R version, so I filled them in with CA+flour ... and forgot to take a pic afterwards There were a few things I wanted to get out of the way before joining the wings to the fuselage; one being the landing light. After assembling the top and bottom part of the wings, some gaps remained I filled them in with plasticard cutouts and added some PPP to smooth thing out As you can see, Italeri didn't bother moulding the framing around the light on the bottom side of the wing, so I had to do that then I painted the interior with RLM02 on the sides and a mix of Lifecolor Dark Tan, Red and Yellow for the back plate; the light bulb received a silver coat on its back side Then I glued the clear cover on: talk about bad fit.... Actually, bad shape rather than bad fit; out came again the new sander, starting with the coarser grit to reshape the lens Then a smooth-out with the medium grit then a polish and a further polish with a sanding stick I had to go back on some spot that showed scratches, using wet sand paper and re-doing the polishing Then I brushed on some Aqua gloss The clarity isn't bad, but the distortion is just awful; in hindsight, I should have vacformed a replacement for the clear cover. It doesn't look all that bad from the correct distance, I guess I'll have to live with that. Another task to complete before gluing the wing to the fuselage: the kit provides a PE panel for the fuselage, right in front of the windscreen: I glued it in with Gator's Grip and run some PPP on the back part to fill in the gap with the windscreen; now, each side of this panel, there are two hatches on the real aircraft, which sit slightly proud of the fuselage. To replicate them, I used some tape to copy the shape I then stuck it to a 0.1mm brass sheet and then cut out, bent to shape and glued int, first with Gator's Grip and then securing the edges with CA Last thing before mating wings and fuselage: a dry fit of the tail planes which showed that the supporting arms have a fit issue both sides, on the aft arm - fuselage side also, the elevators hinges are in the wrong position, so I'll have to correct them With all of that out of the way, I did a dry fit of the wings with the fuselage: it showed a step at the root both sides also, the wing root fairing at the trailing edge wasn't aligned with the wing (again, both sides) so I had to reshape it To reduce the step, I inserted some spacers inside the wings, held in place with bkue tack Another dry fit: not perfect, but definitely better That means less work to do to fix them. Eventually, I committed to gluing That's it for now, more tomorrow. All comments welcome Ciao6 points
-
6 points
-
Small if time consuming update today... Exhausts almost done, shades of grey with a rust wash and a dust of soot pigment. Along with the exhaust a dribble of rust staining, whilst armour plate won't corrode, certainly in this time frame the steel fastenings, brackets etc would... Thanks for looking Cheers Darryl6 points
-
Last but 1 update on this I hope small jobs completed this last 2 weeks its on wheels at last doors fitted handles fitted bonnet on grill on few bit left to do rear doors to fit, all glued and painted just need clicking in place trying not to break hinges touch up paintwork where’re required and a bit of weathering then it’s done and I can finish the talbot6 points
-
Ok back on to this build…..well for one further day before I head off to work for a couple of weeks. Well a bit has happened since the last update, the Poll is over, filled he stash up even further and I’ve just become a Granddad! Not too sure about the last one ….way too young to be a Granddad! Ok not a lot to show…namely because I forgot to take photos , was getting too carried away with the build! The intakes are on (these are what I forgot to take photos of), as per previously mentioned the RHS one went on without issues, the LHS……there are gaps and it’ probably all my fault. Stretched sprue was used to fix them, have tidied them up, but will give it 24hrs to cure properly. I ended up having to use a wee bit of filler in places, again it’s probably my fault….but this model is a wee bit unforgiving if you don’t fit bits exactly where they’re meant to go. The cockpit is now pretty well done. The new 3D decals have been added to each seat, this time I used some special PVA glue on them, worked a treat. They do look quite good I think. I really do like these Quinta Studio interiors, can see myself buying quite a few more. Ok another tricky bit I found with the instructions when I comes to fitting the rear seat. The instructions ask you to fit both seats with their bulkheads fitted first before fitting into the cockpit tub. If you do this, you end up with this, the front of the seat is hard up against the control stick mount, and the back hard up against the fuselage! There’s no way the rear seat is going to click into place without breaking something!! So the easy way to do it is, fit the rear bulkhead separately, then cut off the bottom locating pin on the rear of the injector seat, then fit the seat. It’ll then click in place and sit perfectly. Gosh the cockpit looks amazing, it has to be one of the best-looking cockpits I’ve built…… and it’s all those cockpit 3D decals, a shame though I could match the colours! Even with the canopy closed you can still see all the details. Got the weapons loadout all sorted, plus I’ve decided to build her with slats & flaps up. On the ground they are always up, the elevators will have a slight droop and the lower intake doors will be open too. https://photos.smugmug.com/photos/i-PJsptT3/0/L/i-PJsptT3-L.jpg Tomorrow I’ll finish up clearing everything up ready for painting. I’m going to be trying AK Interactive's Real Colors lacquer on her for the main colour, I just can’t get my usual MRP paint. Seeing she’s the single grey all over I’ll spend lots of time per-shading etc, to help break up the flatness on a single colour. Plus these aircraft were kept pretty clean when compared to their Russian cousin’s.6 points
-
More weld seams on starboard side. Not got much done this weekend - real life stuff in the way - but still a little more midships... ... and for’d: Under paint after clean-up, I reckon this will work. More soon Crisp6 points
-
6 points
-
5 points
-
This is the old Tamiya mold from the 80's which was updated with scribing, riveting and using the superlative SBS cockpit. The famous Tainan Kokutai sent a detachment of planes to Buna from where they attack Port-Moresby and Milne Bay. The Tainan Kokutai was the first unit to receive the new Zero model and used them straight away. Those old Tam Zeros are much more true than their Hasegawa counterparts. As a matter of fact there is not a single decal used on this model but home made masks, and the result is what you see: Buntaicho plane from the 4th chutai of Lt Inano kiku'ichi. best regards. 02E1EA4E-AC0C-4436-9E2F-198E3FB1057C_1_201_a by jean Barby, sur Flickr 1435CAF7-D3C2-4587-BB84-BD6BDBEE3D9B_1_201_a by jean Barby, sur Flickr 4F602681-3626-4074-AEE0-2610FDBFDAA3_1_201_a by jean Barby, sur Flickr 7E121D69-10B6-4DCC-B4EA-A36BBF924EEC_1_201_a by jean Barby, sur Flickr 8AFDE401-15E7-4B41-B3FB-1B1FD1CCD15E_1_201_a by jean Barby, sur Flickr 97D197C2-AD5E-470E-9331-DA98AB4F48BA_1_201_a by jean Barby, sur Flickr C6AB556F-6C9C-4351-9A24-E286E3A3AC83_1_201_a by jean Barby, sur Flickr5 points
-
We're moving house in April and I'm getting a lot more space to build models 🙂 .... To celebrate that fact I thought I'd build something big! This arrived today, courtesy of @Andy J who slam-dunked this one in the dying seconds of an auction on e-bay for me 🙂 . Seller didn't ship to NL so Andy was happy to be a go-between. This kit is getting quite rare, and the box is huge.... My biggest box up until now was the one Revell's Krupp Titan is in. This box is 1,5 times bigger still. What can I say, I'm a sucker for big boxes. A huge amount of plastic in there... And for fun, a comparison between the Scania T143's cab which is pretty big in 1/24, and the Pete's in 1/16: Yeah!5 points
-
Thanks Cliff. I love this kit. I will have to set it aside for the next few days as I want to focus on meeting the Hawk GB deadline of the 13th... But this is where I am right now. As you see, one of the struts broke, but it broke at the point where I attach it to the underside of the top wing. No big deal. --John5 points
-
Hello Dears, Trim adjustment knobs made from sprue gates... Adding details in an Eduard kit ?? Sure we can !! Low mojo this evening... But Whatever... Take care Gents !! CC5 points
-
And it's done. What a fun little kit. Maybe some day I will do a bomber version in a more challenging camouflage scheme. More pics in the gallery.5 points
-
Got some yellow paint from Setchfields in Poole when we were there on Friday so got to give Wing Commander Owen & his Nav some lifejackets and some yellow stripes on their bang seats! Now it is carefully packed in bubble wrap and a box to await repatriation whilst the Harrier continues apace!5 points
-
My original hopelessly ambitious plan was to actually install the torpedo tube, for no other reason than it would have been right. But, it's very hard to do, in particular the cowling on the outside of the tube is really thin and the strength at this scale just isn't there, so scratch that daft idea Holes below blocked up and more adjustment with the filler, still trying to get the scalloped edge the right shape and sharp However, the torpedo tubes stick out from the surface ~6 inches, though the Germans probably thought in cm, so 15 cm. This presented a challenge solved with wood and copper The doors will probably be etched, they wrap round the edge so two etched plates back to back Here are these stubs mounted on the hull (nicely out of focus, sorry) More interminable sanding and priming, 6 coats so far I think, its getting to a position where I might be happy. Certainly its to the point where I can focus on the other hull details starting with the propellers. Here are the turned shaft ends fitted, note also the very slight wedge feature on the stern to help keep the bow down at speed and the holes for the rudder shafts Bit tired of sanding, my left index finger is already so rubbed down that my fingerprints are almost missing, makes the biometric iphone access touch and go.....☝️5 points
-
Morning ladies Thanks Keith - I will skin the wings with plastic, vacform the fuselage (adding stringer efects to that), skin the nose in metal but for an actual fabric effect I am not sure yet how I will do that ..after a little interlude on the wings, I went back to the cockpit.. here, behind the instrument panel, you can see some shapes for the ammo boxes and feed / eject chutes - they are the diagonal lines above the left & right bits of the panel, and the ribbed metal panels below it - it turns out the mysterious cogwheel assemblies to the sides of the upper IP are also related..... ..I went back to my chap with some drawings to see if he had any for these, and lo and behold we have these two.. the box.. ..and the feed chutes - note the cogwheel gubbins can be seen here... ..I made scale drawings from these drawings and cut out the shapes in litho - with these i used plastic stock to bulk out the shapes & skin them.. ..same principle for the boxes and their attatched feed chutes... here I am aligning the chutes with the real-world position of the guns in the model via stock blanks.. ..also satisfying to find the cogwheel thing I made aligns perfectly - i just need to figure out how to break them out of this sheet and fit them (or not, I may just leave as the IP covers most of this...) ..here the guns have been painted, they have also been adjusted as the R/H gun cocking handle is actually inboard, plus both cocking handles have been shortened as per pics... ..also the mounting frame has been constructed from soldered brass parts with some castings ground from tiny aluminium blocks.. ..it is critical to ensure all these sub assemblies work as a whole and fit with each other, so everything was dry assembled - here the seatbelts have also been made from rolled lead.. ..I can't actually assemble it until the IP is complete as there is no way to add it after assembly - I should get the instrument decals sometime in January so all this will be shelved until then... ..so likely back to the wings - I have been experimenting - the tips are hard as there are compound curves the sheet doesn't want to take, and in one good skin, I found the Tamiya thin pooled in places (because I sloshed it on) and deformed the thin skin - so lots more to try / learn... ..until next time.. TTFN Peter5 points
-
HobbyBoss's F4F-3 Early converted to a Martlet III (F4F-3a) HobbyBoss 1/48 Martlet III by Jim Fox, on Flickr HobbyBoss 1/48 Martlet III by Jim Fox, on Flickr HobbyBoss 1/48 Martlet III by Jim Fox, on Flickr HobbyBoss 1/48 Martlet III by Jim Fox, on Flickr HobbyBoss 1/48 Martlet III by Jim Fox, on Flickr5 points
This leaderboard is set to London/GMT+01:00
















.thumb.jpg.cfc129272ffec824439b15e6013d5952.jpg)

