All Activity
- Past hour
-

Lesser Known Classic GB Chat
marvinneko replied to JOCKNEY's topic in Lesser Known Manufacturers Classic GB
Hi Mark My Oxford is a Mk.II Not that I'm fussed about it, but apparently the difference was the lack of turret. -
I use my 400 grit sharpening plates for fuselage halves (and other things) It looks like these https://www.amazon.ca/Diamond-Sharpening-Honeycomb-Surface-Kitchen/dp/B0DLNLFDL2/ref=asc_df_B0DLNLFDL2?mcid=3f4bbf481c09336685982f9ba060eb4c&tag=googleshopc0c-20&linkCode=df0&hvadid=721322443847&hvpos=&hvnetw=g&hvrand=12729406421146206516&hvpone=&hvptwo=&hvqmt=&hvdev=c&hvdvcmdl=&hvlocint=&hvlocphy=9000945&hvtargid=pla-2394683626467&psc=1&hvocijid=12729406421146206516-B0DLNLFDL2-&hvexpln=0&gad_source=1
-
update some progress
-

1/32 - Avro 504K by Roden - in project - release in ?
LN-KEH replied to Homebee's topic in The Rumourmonger
There should be no lack of interesting colour schemes and versions of the Avro 504K when they get around to release it. -
I'm relieved - I just noticed the lock date on the album was saying the 20th and came here for answers. Glad I did before I started playing Russian Roulette with varnish over fresh oils and pigments 🫣
-
Done! Added to the original cults page.
-

Gecko Land Rover Mk.1 FV 180001-Korea
f matthews replied to f matthews's topic in Work in Progress - Armour
I would LOVE either!! -
A solar-powered hamster - what will they think of next?
-
we're in free fall
-
Thanks, Mark! I think I muck around with older kits because it feels like anything I do is an improvement , whereas with a nice kit... it would be all risk of mucking it up! Tonight's nuttiness is making some oxygen tanks out of stretched sprue... which looked pretty nice before I mucked them up gluing them with a band across... ah well. And a parachute bin for our radioman... And here the oxygen is on the wall, and the parachute bin is on the hump by the radio position And yes, it all might be seeable! and the tanks would be opposite the door... I suppose the main thing left is the radio mast from the hump through the ceiling. Diagrams show it centred but instructions say it should be 8mm to left of the centre line. That seems like a lot!
-
https://flic.kr/p/2rex1oo
-
Hi guys! I'm excited to be here. I'm mainly interested in modern warships and aircraft, and I also enjoy 3D printing. Hope to sharing and learning from you! Cheers!
- Today
-
Lesser Known Classic GB Chat
Illusive replied to JOCKNEY's topic in Lesser Known Manufacturers Classic GB
99 kits in a pile, take one down, 100 kits in a pile. -

Sword 1/72 T-39A Sabreliner 62-4462 20th TFW
billn53 replied to Lightningboy2000's topic in Work in Progress - Aircraft
Very respectable madness. I approve! But, the airbrake doors look overly thick, you might want to replace them with thinner plastic card. -
 Hello all, As much as I would like to build an Irish Spitfire, I am more inclined to build an aluminum Egyptian trainer (which may have a combat record). In reviewing photos and records of factory colors, I “think” the color should be “high speed silver”. I believe the standard factory finish was applied, (however it could be a grayish silver??). Can anyone tell me the finish of later production Spitfire Tr. 9’s (such as the Egyptian machine), and secondly, in terms of keeping the silverish finish in scale, what is the best Gunze or Tamiya (or any paint) color to use for a 1|48 subject? I intend to weather it with dust and grime consistent with unpaved Egyptian airfields of the post war era. Please see attached photo—the only one I have seen of an Egyptian Spitfire trainer
 -

Lockheed U-2A - HAWK MODELS 1/48 - walkaround
dnl42 replied to vags's topic in Ready for Inspection - Aircraft
Outstanding! All the more so given the basis! -
who pushed the button?
-

Lockheed U-2A - HAWK MODELS 1/48 - walkaround
Screech replied to vags's topic in Ready for Inspection - Aircraft
Beautiful Dragonlady! -
I'm not sure, but are'nt they also solar powered ?
-
 Found what I'm looking for with these guys: https://www.hannants.co.uk/product/AT-RE72505?result-token=zHEej
 -
Not in crowded elevators
-
Lockheed U-2A - HAWK MODELS 1/48 - walkaround
TheyJammedKenny! replied to vags's topic in Ready for Inspection - Aircraft
Wow! I'm really impressed with your work. The scale weathering and metallic finish are just perfect. -
This is the first edition of this kit from 1980, kit number 14. Having seen a few of these Arados built years ago in the original Heller GB, i fancied building one myself. Only to discover i didn't have the Heller kit, however i did have this one instead This GB is the ideal chance to get this one built and add another build to Marks ever growing build list. Cheers Pat
-
1/72 Revell Fw-200A
TheyJammedKenny! replied to Roman Schilhart's topic in Ready for Inspection - Aircraft
Wonderful job on a rather indifferent kit. I had this one, and it's not one of Revell's best efforts, unfortunately. They could have done so much better! But you took this in hand and made it beautiful. -
Wow! MADNESS. It's brilliant--looking forward to how you proceed with this, as it's a great subject and an aircraft with some character.


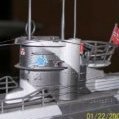
.thumb.JPG.ebe7bd09037c033b484e59e59a925a45.JPG)


-
Forum Statistics
254.7k
Total Topics4.4m
Total Posts -
Member Statistics
36,889
Total Members5,082
Most Online
-
Who's Online 56 Members, 1 Anonymous, 523 Guests (See full list)
- Nick Nichols
- lewfer
- Charlie Hugo
- dalea
- acnewbie85
- Wolf
- JOCKNEY
- marvinneko
- ModelingEdmontonian
- SleeperService
- FerM
- mjfigg
- t15dja
- Marcus.Q1000859
- Centollaman
- Tincan_Warspite
- dgorder
- Robin-42
- Slater
- mark.au
- jkbanch
- rabblesatcloudnine
- cobraleader
- Nachtwulf
- rhamilton007
- dnl42
- mike_hore
- aidy
- David M
- Michael Taylor
- okazaki
- gaputz
- Finntrol5
- Rabbit Leader
- Blackbrazen
- Justin S.
- mdesaxe
- Keith Begley
- hanrahans731
- firefly7
- 28ZComeback
- DocMark
- Morantbay
- Russmeister 101
- Jo NZ
- RedHerring
- derekS
- Jeff.M
- Tbolt
- buccymad
- MOK61
- f matthews
- LN-KEH
- ChicagoTom
- Chuck1945
- PBoilermaker