All Activity
- Past hour
-
No worrys...i know it,thank you for taking the time to reply...i am not bothered about the hood/bonnet...all part of the fun
-
i do plan to start youtube...instead of a shopcard i could send my fellows a painted spoon with a custom decal made at my own personal expense of my logo....hopefully not crushed in the post (shipping) I could use real spoons good old Sheffield steel to be safe...MR Hobby make a wonderful metal primer in a spray can (rattle can)
-
.thumb.jpg.0bc57cb4bb3dec8e063e1951db6690c2.jpg)
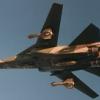
Revell 1:32 Meteor F.8 - Yes, that one... the very first!
Ad-4N replied to Warwolf's topic in Ready for Inspection - Aircraft
Looks great, but I am very concerned this Meteor has only one seat. The best Meteors always have two seats. -
Looks very nice. I can’t imagine a 50 year old kit being an easy build, and you accomplished it well. I’m no expert on colours but it looks familiar, with respect to similar aircraft I have seen in references. I am likely thinking of the Hasegawa issue.
-
Source: https://m.academy.co.kr/article/공지사항/1/4503/ V.P.
-
 Lovely job! I always wondered about that silver option in the Airfix Mossie and now I know it can look great. Regards, Adrian
 -
 No need to bump GB threads so long after GB itself ended, so I'm moving this build to personal KUTA thread. If you're still subscribed here feel free to resubscribe over there as well: In the meantime new foil coat is done, went over it with two layers of Arcus A005 varnish with regular and annoyingly increasing silver paint touch-ups needed and now preparing decals. I'll post the pic later in KUTA thread but I'm kinda impressed in more ways than one tbh.
 - Today
-

DH Sea Vixen FAW2 - High Planes1/72
J.C. Bahr replied to Pat C's topic in Ready for Inspection - Aircraft
Glad to hear! This was one of my more fun & fulfilling kit-bashes, that I would highly recommend to anyone that is comfortable hacking and splicing parts. High Planes definitely got the nose, fuselage & canopy much better than any of the other existing kits for sure. Hope it's still available, but not sure on that. 🤔 -

1/48 Hasegawa early Israeli F-4E
Charles68 replied to Charles68's topic in Ready for Inspection - Aircraft
Hi, First, thank everyone for the kind words and corrections. Super appreciative of all here at BM!! These pics do not do these kits any justice. They have all had reveal posts here since i joined in 2021 if you wanted to go look at each individual kit for better pics. -
Wow! Just twigged to this build, and have copied in entirety in hopes that my partially build Hudson gets off the Shelf of Doom. I did approach the fuselage depth problem by inserting a long skinney wedge fron the tail to about 2/3rds of the way forward. Congratulations Peter on a wonderful build!
-
 Daylight. A slightly overcast day is good, softens the shadows.
 -
 Beautiful work! Great scheme... and huge respect for following through on the fix
 -
1/48 Hasegawa early Israeli F-4E
Charles68 replied to Charles68's topic in Ready for Inspection - Aircraft
-
Kriegsfischkutter—1/72–Special Navy
ArnoldAmbrose replied to Jeff.M's topic in Work in Progress - Maritime
G'day Jeff, I have seen photos of German sailors wearing them, (don't know where now), but as you say, what else would they wear? And keeping them stored near their action-stations makes sense to me. I recall doing it during my naval reserve training many years ago. Regards, Jeff (the other Jeff 🙂). -
Really beautiful work... so tidy. And great looking schemes, too. Paint colours and tone are really appealing.
-
Bonus model alert! Hornby train sets in the 19980s used to contain a free card tunnel. I put it together while eating my cereal this evening:
-
 Star decals made a Kiwi armour sheet in 1/48
 -

Jo-Han 1970 Cadillac Eldorado (1/25)
UberDaveToo replied to TimJ's topic in Lesser Known Manufacturers Classic GB
When cars were as wide as they are long today... ...My second car. The wasn't so nice by then, I sold it because it was so fast it was scary. -

Australia and New Zealand group build part II - Chat
Corsairfoxfouruncle replied to Corsairfoxfouruncle's topic in ANZAC 2 GB
Please jump in to the build JW -
Looks great! With a nice vac canopy there will be plenty to see. Regards, Adrian
-
Like anything, after all the fruitless visualizing, there comes a time to plunge in and see what happens And the winner for most butchery 🔪 of an innocent mess of plastic is.... 🤡 Dear old dad went through a phase of collecting racks of old equipment in the 70s and 80s. It was a cheap way of getting LEDs and other bits and bobs he used for his many inventions. He filled the garage with the stuff. Obviously my radio set was not good enough... even the photos show a multi-tier rack. So let's make some bits... And hack something a little Dr Suessian together.... better. We also need some levers for the console. So let's make some holes. Also note the hump I added between the seats for the hydraulic pump... another lever will be needed. And then ensued a long period of painting and adding seatbelts and harnesses and levers with knobs on them and hydraulic pump handle. I managed to lose my oxygen bottles trying to paint them, but that's ok... I made another set with stretched sprue, and a couple extra to make fire extinguishers. So here we have a cockpit. From bottom left, electrical panel, then oxygen cylinders against wall. Then radio rack and chair, and a parachute bin behind it. Closer... Front view... note brass fire extinguisher on window frame behind pilot seat. Harnesses on seats. Hydraulic pump handle between seats. Some levers in the console with coloured knobs. I think the right seat slides wayyyyu back so a bomber can crawl under the IP into the nose. I beliece the yoke may be removable and rudder pedals lowered. So perhaps my single yoke should go on the left. A view through our open doorway... I hope we'll see this stuff with the canopy on. There was a lot of glass on the Oxford so 🤞 And here we zoom out a bit... my big table is crowded with stuff and I have been living in is tiny square for hours 😛 So, need to add pilot yoke to left. And... the aerial mast that goes down through the cockpit. The complication is the whole multilayer fuselage issue.
-
Cookie VI and Friends
Corsairfoxfouruncle replied to Cookenbacher's topic in Work in Progress - Aircraft
That French Mustang is great looking Cookie. -
1/72 - B-1B Lancer - by Modelcollect
ElectroSoldier replied to 172flogger's topic in The Rumourmonger
They can do that. It doesnt change my opinion of it though. -
 Hello. This weekend i decided to buy a cheap Modelex kit. Ive built several of these Heller tooling kits before, and they are quite cheap and simple so they always make up for a fun build. The owner of my to-go hobby shop told me that the Modelex He-112 is very good, so i decided to test it out. It is in fact VERY good. Everything snaps into place perfectly and it is overall surprisingly detailed for a 30-piece kit. The clear parts (canopy) are of very good quality and i did not encounter a single problem while building it. Heck, i barely had to remove any excess plastic. The decals are pretty good although slightly off-center, which is still an improvement from 10 years ago when Modelex decals sucked. I find this kit extremely fun for a quick build and would recommend to anyone in the south american continent looking for dirt cheap weekend fun. For the paint scheme, it came with 3 possible schemes, two of them german and one romanian, and the kit features the possibility of converting to the B1 version for the romanian scheme. I decided to go for the german because it looked cooler, but i will probably do the romanian version one day. It was a bit hard to mask the cammo but i think i did alright, although i did slightly mess up the colors and the two shades of green ended up looking too similar and are barely distinguishable under poor lighting. I did some weathering like paint chipping, but not too much since these airplanes were not heavily used, and i did not encounter any problems during this stage neither. I took several pictures of it, but my phone camera seems to mess up the colors and get them too dark or too brown whenever the light source is my lamp. I do not know how to fix this but it messes up my pics, specially german ones since their color schemes are always so gray-ish. I had to download a camera app to get better results, which are still not ideal. If anyone has a solution to this, i would be pleased to hear it out. I hope you can still enjoy the photos and have a nice week. If im correct, this will be my last post here in a while since i am moving away to study in a few weeks and i don't think i will be building anything during the semester. Martin.


-
Forum Statistics
254.8k
Total Topics4.4m
Total Posts -
Member Statistics
36,910
Total Members5,082
Most Online
-
Who's Online 33 Members, 1 Anonymous, 1,118 Guests (See full list)
- Ad-4N
- Planebuilder62
- jimmaas
- bianfuxia
- Tony Tyreman
- ChicagoTom
- hiddeous1973
- bjohns5
- Pete Field
- Kiwidave4
- zebra
- Chippy
- sloegin57
- fubar57
- Richard S
- MrKnighter
- Jim Barr
- billn53
- misterblank
- Mcdood
- Seawinder
- kapam
- Centollaman
- Rabbit Leader
- Dave Klaatu
- OmarA
- marvinneko
- Greg B
- Tincan_Warspite
- Andwil
- Kyle H
- Mycapt65
- rhamilton007