Leaderboard
Popular Content
Showing content with the highest reputation on 24/09/23 in all areas
-
I thought I would show off all my Phantoms to everyone here. I know its a popular subject so I hope you like what you see. They were all built quite sometime ago. The RAF one and the yellow bird model are Fujimi kits. The 892 one is from the Airfix kit. 14 Squadron RAF Bruggen 1970, Modeldecals, Fujimi kit. Airfix kit. and decals ( complete with all that stencilling provided too!) In fact, this is the second time I've built this kit. The first one being sold. 767 Squadron FAA. Fujimi kit and decals. I noticed when I lined these up how the size of the Royal Navy titles differ between the Airfix and Fujimi ones are. I suspect the latter are wrong asthe Airfix ones look truer. I had contemplated in repainting the Fujimi one and use the left over Airfix decals for it.27 points
-
Evening all, My latest completion is the beautiful 1/72 Hurricane IIc from Arma Hobby. An absolute dream to build, this was less than five days work from start to finish. Finished completely OOB using primarily Mr Color and Tamiya paints. I'm rarely 100% happy with my models but I'm pretty pleased with this one! Arma Hobby 1/72 Hawker Hurricane IIc by Shaun Schofield, on Flickr Arma Hobby 1/72 Hawker Hurricane IIc by Shaun Schofield, on Flickr Arma Hobby 1/72 Hawker Hurricane IIc by Shaun Schofield, on Flickr Arma Hobby 1/72 Hawker Hurricane IIc by Shaun Schofield, on Flickr Arma Hobby 1/72 Hawker Hurricane IIc by Shaun Schofield, on Flickr Thanks for looking, comments welcomed as ever Shaun25 points
-
This is Hasegawa`s Fw190A-5, an old kit which is not up to today`s standards with regard to detailing, but with good shape and fit. Decals are a mix of Hasegawa and Eagle Cal. The checkerboard and the black sides of the fuselage were spray painted, the camo was done freehand with paints by Gunze and Tamiya. The seatbelts are from HGW, they look great but are a pita to assemble. Brake lines and gear indicators were added. Thanks for looking Volker19 points
-
Oh did I enjoy this build. The accessories were great fun to make. Some of them were from the Miniarts Instrument set, Piano set and Cafe set but all the cloths, rail, basket, cymbal and stage sets were scratch. It was also great to play with a bit of colour for a change. The ICM Retriever was a bit marmite however the end result is very nice indeed. I just love that lorry, so very British. Almost a throwback to 1930s design, no doors, big, brutish but did the job admirably. The tilt frame and cover is all scratch too. I do like doing canvas. The issues with the ICM kit is it's neither one nor the other in terms of early or late versions. I scratched the cab cover and sides to make it more of a late version with the windscreen however there are a few elements which are missing. There should be a sort of folding ladder thing over the spare wheel. Speaking of wheels this is a typical kit with nylon tyres. Don't get me started on that! The full story is in the WIP but long story short I had a saviour in the form of @THEscaleSHOW who was also in the process of building one of these and 3D printed a set of excellent tyres for me. Thank you very much. Saved the day 😉👍🏻 Another issue which I didn't realise was wrong and trusted the kit is the spacing of the tie down hooks along the side.I got a PE set for this and replaced the moulded ones like for like however as you can see in the pic they aren't spaced evenly so the rope is all over the place! As with most of my builds a rabbit hole of a subject develops and in this case it was an ENSA troop, which were part of the NAAFI, ready to move on to the next gig with just some of their kit waiting to be loaded. So anyway, on with the show 👯♂️🤩🤡 (Apologies for the pics. I have a new phone and I haven't sorted the settings yet!) (Yes I need to sort out a backdrop and no I'm not going to put it on a proper diorama. I like this set up 😊) Was trying for some pathos with the helmet and feather bower 😁 Some repurposed ammo cases 20 years before Keith Moon! A little additional comfort for the driver Cheers all Andrew17 points
-
Hi again. Some more of my older builds. This time all to 1/144th scale and depicting water bombers or fire fighters if you like. A Model CL-415, 2049 Greek Air Force. All the red trim lines and walkways are from the Syhart decal sheet, serial from a generic numeral set by Modeldecal and roundels/ fin flash from ESCI 1/72 F-5A decals. A Model CL-215 kit and its decals. Catalina by Minicraft, decals by Can Mil Air. White stripes from decal striping sets. Minicraft DC-6b and kit decals. I have one other fire bomber, a Martin Mars, to add here when I find the pics. Well thats it folks. The end of my water bomber story.... for now... Thanks for your support and comments.16 points
-
This is my build of the Anigrand 1/72 resin Lockheed XF-90 Penetration Fighter. The XF-90 was one of three contenders (also the MacDonnell XF-88 Voodoo, and the North American YF-93A) for the Air Forces Penetration Fighter competition of the late 40's/early 50's. The idea of a penetration fighter was a long range jet fighter that could penetrate enemy territory and neutralize the target's defenses, both air and ground, ahead of the bombers. As it happened while the XF-88 won the competition none of the contenders was ordered and the role was not filled until the the F-101 Voodoo came along. This kit was given to me as a partial started bagged kit with no instructions or decals. Luckily I was able to order a set of decals from Anigrand and download the instructions from Scalemates, The original owner, not the kit donator, had not done any constructions but had started prepping the resin parts; straightening the fuselage halves and filling the panel line trenches common with Anigrand kits. I had tried to fill the Anigrand panel lines in the past using Squadron green putty with only limited success. They used a red/brown filler with the same limited success. Since it was partially done I decided to try filling them with Mr. Surfacer 500 and then lightly sanded them smooth. This worked very well and left me with very subtle panel lines that are visible under the Alclad Aluminum finish but would disappear under any other finish. This is what it looked like after sanding and polishing. The gray is the Mr. Surfacer and the red/brown is the original owners filler, note that what ever it is it dried full of pinholes that had to be filled with Mr Surfacer. The resin itself was free from pinholes. Finally note that Anigrand drilled the holes for the main gear completely through the wing. In the bag of parts was also a complete set of white metal landing gear. I am assuming that they came from either the Maintrack or Wings vac kit. I used them instead of the resin gear and they proved nice sturdy. The vac canopy was easy to cut out but was a little large for the cockpit opening. With a little sanding and squeezing it worked fine. The Anigrand decals worked well with no silvering The red and white lines came from Fantasy Workshop lines sheets. I used a Master MIG 17 pitot tube. Other then filling the panel lines the build was quick and simple and took about 10 days. and produced what I thing is a nice looking model. I had been planning that this build would have been my third F-89 Scorpion, this time an F-89C using the Revell F-89D kit and the Blackbird conversion set. But the parts of the Revell boxing I had were warped and the wings were warped to the point of not being usable. I ordered another box from Germany that has yet to arrive. So I built this kit and planned to do the F-89C after but, then the completest part of my nature kicked in and I had to get the Anigrand XF-88 and YF-93A kits and while I was at it I got the XF-84H and XF-83. So I will be doing the F-89C sometime but next up will be the North American YF-93A Enjoy14 points
-
Hi all I present my latest build Kinetic’s 1:48 T-Harrier (K48040) as with a lot of my models I wanted to do the kit in something other than the kit supplied markings so chose to do a Indian Navy Harrier. Well this has been a build of ups and downs a certainly nearly beaten me on more than one occasion but I was determined to get if done (well almost) I may revisit it at some point to finish some minor details but for now I’m done with it. anyway this was another kit picked out of the stash by my wife as this has been the theme this year. I purchased some aftermarket bits for it. Eduard Big ED set containing sets (48945)(49882)(EX576)&(FE883) Master brass pitot (AM-48-069) Model Alliance Decals BAe Sea Harrier pt.1 (MA-48153) Tmayia paints used throughout windsor and newton gloss and satin varnishes flory dark dirt wash and Abteilung Starship filth oil paint thanks for looking and happy modelling13 points
-
Hello folks, After seven months, I finally managed to finish this project. This is the superb 1/35 M551 Sheridan Tamiya kit 35365 with a lot of extra details. The kit is easy to build and everything fits perfectly, I didn't encounter any obstacles during the assembly process. It has been a very pleasant kit to build indeed. I spend most of my time adding details and applying weathering techniques. Thank you to everyone who followed the assembly process, Cesar13 points
-
Postscript' A couple pics of my first Airfix Phantom. Jubilee decals from leftovers of Fujimi kit. I would like to add them to the second I built if any one has them to spare.13 points
-
This is Hasegawa's 1/48th Scale Phantom FG1 I added a resin cockpit from Aires and Quik Boost FOD screens. The rocket pods are from ResKit. The decals are from CtA depicting an FG1 of 892 NAS. Painted with Xtracolor enamels. Here she is with a couple of other of my Phantoms: Thanks for looking, Angelo12 points
-
Hello model builders, I just finished this and thought you might like to have look. The M1070 is a military heavy prime mover, an 8x8 tractor: This is an interesting rig, an 8x8 powered by a Detroit Diesel engine. It's role for civilian uses varies dramatically from it's intended role as a tractor, to wrecker conversion, heavy haul, and some other uses that have left me wondering, like a water truck, dump truck and even an RV, none of which seem to optimize the potential versatility of such a rig. So, I wondered, what other uses could be interesting, and thought about it's potential use as a heavy vocational truck in oil fields: Obvious uses include a prime mover or a typical bed truck (images on the right above), or, as I enjoy scratch building, how about a twin steer 8x8? So, I opted for the latter -which I realize is completely impractical, as these are now old rigs, but fun to try and build. And my version - which includes a variety of changes to the Hobby Boss kit, stretching the frame, making up three winches and a bed, twin steer, and numerous other modifications. The twin steer set up was quite a challenge - it's posable. And here is how it turned out: For this, I used a prototype Western Star 8x8, which has the wood bed insert, which I like. For what it's worth, it was a pain in the neck spooling those winches - very slow going! I picked the livery to look like a rig in use by a big company, and added some light weathering. There is an after market resin engine installed, but it's barely visible, so no pictures here. - This was a fun build. If I were to try it again I might decide to make it a proper cabover, as the engine is already under partially under the cab, or, go the other way and make it a proper long nose - anyway, it's done now! Thanks for having a look Cheers Nick10 points
-
Very brief update. Decals in situ, no humbrol tube glue was involved in this operation....(if you've read an admission in Maddoxs wonderful Stug thread you'll know). I was concerned how the ID marking on the turret roof would work out (star with ring). However, thanks to Tamiyas consideration I need not have worried. All five sections went down perfectly even with the antenna mast in situ. That'll be all on the Comet for at least a fortnight as a couple of weeks in Wales is upon us! (I have optimistically taken a kit or two away with me so I might get chance to at least build something whilst watching the rain....) Atb Darryl10 points
-
If you don;t want to waste time on rumours about new kits, this is probably not the forum you should read9 points
-
Shadow Kreations from the U.S 1/4 scale kit of "Samara from the Well" , a fantastic sculpt of Samara Morgan from the 2002 psychological horror film "The Ring". Samara was born with supernatural powers where she could imprint thoughts into people's minds. Given up for adoption by her birth mother, who was fearful of her abilities, she was adopted by the Morgan family however being unable to control her abilities led to the death of all the horses on their ranch. Anna Morgan, her adoptive mother who is aware of her abilities, throws her down a well where Samara survives for 7 days. Her spirit lives on as she burns her image onto a video tape that anyone watching will die after 7 days unless they can get someone else to watch the tape. The Ring provides one of the iconic moments in modern horror films where we see Samara crawl out of a TV screen and go from being on video to suddenly being in the room. Finished in a mix of acrylics, oils and pastels.8 points
-
Just completed, this is my model of the Gulf Porsche 917K driven in the 1000km race at Spa in 1970 by Jo Siffert and Brian Redman. For this race, the JW team modified the engine covers of their 917s by adding an upswept partial infill of the valley in the engine cover. A full width spoiler was fitted across the tail. This improved downforce but induced very little additional drag. Thus, speed through the fast corners was improved and lap times were dramatically reduced – ten seconds quicker than the outright (Formula 1) circuit record during practice. Siffert and Redman went on to win the race at an average speed of just over 149mph. This is a Provence Moulage kit that I purchased, part started, on eBay. I stripped the paint, corrected a slight twist in the body and then made the necessary modifications. The infill in the engine cover valley was made from 10thou plastic card, supported by three suitably curved sections of 20thou card. The full width spoiler was made from two lengths of 20thou card set at the appropriate angles. The upper NACA ducts on the engine cover were incorrectly orientated, so I made inserts from plastic card, excavated the resin, and fixed the replacements in the correct positions, i.e. pointing downwards slightly. The access hole for the battery cut-off switch was the wrong shape so I drilled a suitably sized hole, and inserted a short length of plastic tube. The cockpit roof vent was replaced by a vac-formed plastic card item. Repairs were also required around the rear wheel openings as the resin was very thin, and peppered with lots of air bubbles. Paint was Humbrol enamel, with markings from the kit, Indycals, and the spares box. To prevent the orange side panels showing through the roundels, I used sections of roundel to act as an "undercoat". The metal finish of the infill was silver Xtradecal cut to shape using a photocopy of the card section as a template. The black lines on the nose and sides was Xtradecal 0.5mm stripe. They didn't look right, so they were removed, and replaced by Fantasy Printshop 0.25mm black stripes after this photo was taken. Wheels and tyres are by Remember, with Virage sidewall decals. Thanks for looking. Trevor8 points
-
This is a recently (almost) finished build of a P-51 for the Netherlands East Indies Air Force. Model is Airfix, paint is AK true metal wax steel and aluminium. Not totally finished yet, I need to do some weathering..8 points
-
Many thanks Keith, it's all done now. I've spent a couple of hours, going over the smaller items that I'd missed out, starting with the rear lights. I touched in the left hand one with a tiny dab of Tamiya Clear Red, and the right hand one with some black (although it's difficult to see in the photo). The wooden parts of the pioneer tools were given a thin coat of burnt umber oil paint and this was gently wiped away with a slightly damp brush until I was happy with the outcome. The metal parts were painted black, as was the bow machine gun barrel. The tow wire was painted with ExtraColour Oily Steel. Last job on the hull was to glue in place two 3mm lenses for the headlamps. The writing on the oil drum was my attempt at Hebrew. It should have been yellow, but I didn't have a water colour pencil in that colour. There wasn't much to do on the turret. The two aerial bases were painted black and then the insulators were given a thin wipe of burnt sienna oil paint. And finally, unless something rear it's ugly head in the photos to embarrass me, a piece of gloss black painted card was pushed up into the commander's periscope to act as a lens. And that, ladies and gents, is the end of this build, one which I thought at one point, would never be finished. Lessons have been learnt, not least of which is to make sure you have all of the necessary components to hand before starting a build. Thanks to all those who have given me encouragement through the build. Once I've made a suitable, simple base, I'll put it into RFI. John.8 points
-
Morning all This weekend's progress. The engine is in! I also added more pipework. I would have added the other braided line on the left but I broke the connector... not a biggie since I had to make some for the right hand side. Merciless close pics as always Thanks for looking, Nick8 points
-
Just arrived this week, a custom-made lighted display case for my Bounder (plus my Fishbed and RSR). This was made by Bases By Bill ( basesbybill.com ) at a very reasonable price. My case was hand delivered by the man himself, but his cases are designed to ship flat, with easy assembly.8 points
-
Went into Southampton for music in the city... didn't listen to much music! 😄 but did see these beauties parked up. The next two are for you @Spiny And a couple more Nick8 points
-
Well, it's been a while, though I've not been idle I made a start rusting the pug up with some Vallejo pigments applied on top of a Tamiya brown panel liner wash and after that was done, put some vegetation growing on the horizontal surfaces Javis scenics static grass stuck to Kristal Kleer The, assembly of the rest of the scenic elements on the base Including some wildlife And that's all done The rust is a bit lighter than I would have liked, but I'm happy with the effect The photo booth makes it look even lighter than it actually is Overall, I'm happy with the end result I seriously doubt I'd have ever tried something like this had it not been for this group build Thanks to @JeroenS @Marklo and @Bobby No Mac for stepping in to run the GB after the departure of @Bertie McBoatface Also, his overlordship @Enzo the Magnificent for doing what he does And everyone else for Looks, likes and comments I'll post pics in the gallery soon(ish) /P7 points
-
Good afternoon, Dear friends! I am pleased to publish for you more detailed photos of the fuselage parts of the J-22 scale models7 points
-
The seat are quite fiddly. I love the extra detail the Eduard metal parts give, but oh my, you do have to be careful bending the stuff. I tried gluing the paint back down in places and having to re-paint where it came off. A little oil wash and Matt finish, I have to say I’m quite pleased.7 points
-
How do chaps, Finished these a little while back. Victrix 28mm French Artillery 1804 to 1812 set. This was a single sprue i got off ebay for a fiver. Went with the bi-corn hat as i quite like the look of them. Uniforms are probably not accurate but i enjoyed doing them all the same. Painted in GW Contrast paints apart from the cannon barrel which is Vallejo Bronze. And here's a bonus shot of a Victrix 54mm French Grenadier i've been pootling with today! Regards, Steve6 points
-
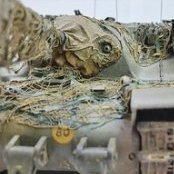
After the relative frivolity of the ENSA Leyland Retriever I'm going for something big, dark, menacing and brooding. What better than a 1960's OTT British tank - the Conqueror MkII by Amusing Hobbies. Another new manufacturer for me so this will be an additional adventure. On first inspection it's not looking too bad. As with all these big babies they can look deceptively simple as the main bits are big and obvious. Instructions seem nice and clear and logical Some examples of the sprues. Nice detail and crisp as are pretty much all kits today. As a comparison it's Tamya. My only complaint so far is there are quit a few ejector marks in very obvious places and quit a few large 'ejector lumps' which need removing. Also there a some large seam lines. Both of these put it below Tamya. But let's see how we get on. A bag of rope- nice A bag of springs - optional if you want movable suspension, again nice A Bag of Decals - bit limited but that appears to be what they had A Bag of PE - I like this, Amusing Hobby have got it right - Looking through the kit what you get is what you need with additional clever bits (see below). Really like, thank you AH Pretty much half the kit is the suspension and wheels So yeah, this looks like quite a nice simple reasonably quick build I'm looking forward to getting on with this one, Oh!.............................. Anyway the paint scheme options are pretty limited as these were only used in West Germany in one colour. This seems to be the most colourful! And we dig the first sod. Note the flash and that rather annoying ejector pin with flash on the left hand side. The spring isn't the most realistic either but is better than the real one which ois thin and spidelly for the job. This is hardly noticable under the side skirts and a liberal splash of black pinline should sort it out. Looking forward the main questions to look into are: 1. What exactly IS Deep Bronze Green. I have a bottle of Vallejo DBG. a. Was it gloss? I've seen a few pics of these glossy b. Did the gloss last in the field? 2. What field kit did they have? ~Same as WW2 as a lot of stuff seemed to survive until the 80's The main theme of this build is going to be Camo nets. I suppose this is going to incorporate a lot of lessons learnt on the Tortoise build. Cheers All Andrew6 points
-
Hello everyone, This is 1/32 Revell Hawker Hurricane Mk.IIb from RAF No79 Sq Fairwood Common, South Wales in July 1941. Cockpit modified with Eduard Space set. I have used Eduard Brassin exhaust set Main wheels are from Barracudacast Paints : Gunze Sangyo acrylics Happy modelling6 points
-
Wonder if it was a Black Buck Vulcan, and they made the same mistake with the picture? 🤣6 points
-
Calling the Gannet finished although I'm bound to find something I missed - Stretched sprue antenna wire added and tensioned using the smoking match trick. Fitted canopies. RFI https://www.britmodeller.com/forums/index.php?/topic/235130770-dynavector-gannet/ CJP6 points
-
Nearly done, I’ll get the light box out and take some proper pics, thanks for the generous comments gentlemen, that Seaking may have to stay in the stash, l fancy Tamiya’s Comet next!6 points
-
Evening all, I know the internet is awash with images of this kit, but I'm going to share mine anyway This is the Tamiya kit, which is the best model I have ever had the pleasure to build. It's not perfect - the tailplanes are an inconvenient gimmick, the conical pegs for the wheels baffling (although I used Eduard wheels, which probably didn't help), the lack of options for more common airframes is frustrating and the pylon situation is a bit annoying - but it's as close as I've yet seen. This one is done in the markings of VF-32 from 1966, a scheme fortunately lacking stencils and provided by Meridia-Hobby Decals (very nice). A Quickboost resin tail tip is required as it's not in the kit, as are the early MB seats (by Eduard), and for complete accuracy I should have used a Hypersonic nose pod, which has the shorter front. Empty LAU-7 launchers are by Quickboost, the centreline pylon is from Hypersonic and the wheels are also Eduard (and were simply used because I messed the kit wheels up). Paint is mottling of Hataka, AKRC and Mr Color shades of FS16440. Comments welcome Jon5 points
-
When I was a child in the early '60s, kit manufacturers would use the sides of their boxes to advertise other models you could buy. I was always enthralled with this one: but it was never in the stores where I grew up. Many decades later, I found this and was compelled by my childhood memories to pick it up: (Fortunately, I didn't have to save up for it with my 25-cent per week allowance!) If you're not familiar with the M-50 Bounder, here's a short description I found online: Although built only in prototype form, this design by Myasishchev was an extremely advanced turbojet-powered bomber with supersonic flight capability. In configuration, the Myasishchev M-50, codenamed 'Bounder' by NATO, had a shoulder-mounted cropped delta-wing, a conventional tail unit with all-swept surfaces, and landing gear comprising retractable tandem main units mounted on the fuselage centerline, each with a four-wheel bogie; while retractable outrigger balancing struts, each with two wheels, were mounted near the wingtips. The slender area-ruled fuselage provided pressurized accommodation for a crew of three and incorporated a large weapons bay. Power was provided by four wing-mounted Soloviev D-15 turbo-jets of 13000kg thrust in underwing pods. First flight of the M-50 is thought to have taken place in 1957, and the last of several prototypes, re-designated M-52, took part in the Soviet Aviation Day fly-past in 1961. A-Model's M-50 comes in a huge box containing the fuselage and wings, made from fiberglass, and hundreds of styrene parts: I'd never dealt with fiberglass before . . . The scribing for the panel lines was very poor, so I filled it in with Mr Surfacer and re-scribed. Overall fit during assembly was 'iffy' and typical of short-run kits -- nothing that a modeler with a moderate amount of experience couldn't handle. Details can be found in my WIP here: https://www.britmodeller.com/forums/index.php?/topic/235122095-boundless-ambition-a-models-172-m-50-bounder-supersonic-bomber/ I built my Bounder pretty much out-of-the box, but with a couple of additions that I'll point out when I get to the photos. Speaking of which, let's get on with it! First, a few 'beauty shots' taken far enough away to get the entirety of this enormous model in the frame: And, from a bit closer in: Next, some selected details, starting with the nose: Miniworld metal nose probe, to replace the kit's crude offering: The kit comes with a rather nicely detailed cockpit which, unfortunately, cannot be seen through the small canopy glazings: Even the ejection seats are invisible! (Inside joke -- Check the WIP if you don't get it) The M-50's wingtip engines had no afterburners, and the kit simply has an empty hole leading to a crude rendition of the engine outlet. I spiffed mine up with nozzles from the spares box: The underwing engines did have afterburners. I wasn't happy with the kit's details, however, so replaced the afterburner cans and engine nozzles with resin aftermarket items meant for the Tu-22 Blinder (The Blinder's engines were a later, higher-thrust version of the Bounder's engines.) The M-50 was meant to be armed with nuclear-tipped air-to-surface missiles. These were never carried on the prototype aircraft, but I indulged in a bit of "whatiffery' and added a pair of A-Model's AS-4 “Kitchen" missiles: The Bounder's tail surfaces were all-moving, so I left gaps where the vertical and horizontal stabilators meet the empennage: I added brake lines to the well-detailed main landing gear using lead wire: I did the same for the rear gear, but not much is visible there! The outrigger wheels' legs were too short and didn't reach the ground (a common complaint about this kit), so I lengthened mine using brass tubing: I was struck by the contrast in this photo of Russia's newest supersonic aircraft being towed by an ancient tractor: So I did the same for my model: The ChTZ S-65 tractor came pre-assembled from Easy Model (Trumpeter) -- all I did was to add a bit of weathering The tow 'bar' I made from Evergreen scaffolding: The figures are from various sources. I've posed them to suggest a disagreement between the pilot and tractor driver about where to park the monster: As a side project, I built Modelsvit's MiG-21F (contemporaneous with the M-50) to help show the enormous size of the Bounder: ( More Fishbed RFI pics here: https://www.britmodeller.com/forums/index.php?/topic/235126022-the-bounders-little-escort-modelsvit-mig-21f-fishbed ) It took me four months of more-or-less continuous effort to build my Bounder, and one side project wasn't enough. My other was to convert A-Model's NM-1 prototype test aircraft into the proposed RSR supersonic reconnaissance jet. Here it is alongside its bigger cousin: (More photos here: https://www.britmodeller.com/forums/index.php?/topic/235127574-tsybin-rsr-supersonic-reconnaissance-aircraft-conversion-from-a-models-172-nm-1-flight-test-prototype/ ) That about wraps it up! Thanks for viewing, and please post your comments! I'll take a few days off, then start on my next project (something a lot less supersonic, and a lot smaller/easier!). Stay tuned!5 points
-
Horses nearly finished I'm very happy with them. The detail on the saddlery was added with a mixture of contrast paints for the black leather and the blue of the trim everything else is picked out in Vallejo Acrylics some drybrushing on the sheepskin. Half of the horses now at this stage the rest are due to get their tack sorted shortly.5 points
-
Hmm, this won't measure up then... it's a pretty nice kit Details day today. Seat belts, a persistent source of amusement for my daughter: The foil is country-accurate (and jolly nice too). To reproduce the chain seat belts, I have wrapped some super thin copper wire round the silver wire, slid it off and crushed it flat. Detail painting and gunk wash next...5 points
-
The decals were a little think but I gave them a coat of Micro Set and then settled down nice and tight. These will dry overnight than a touch of weathering and whatever else I can do to spruce this up and it will be in the bag. stay tuned for the final episode.5 points
-
I only used the Sharks mouth and the squadron lettering form the Otaki Kit. The colour register on the roundels was incorrect. So I liberated what was needed from Techmod's British National Insignias 1940-1943. I'll let these dry the begin the final weathering and add anything else I had overlooked. So one more day and this should be in the bag.5 points
-
I had to scrounge in the spares box for some type of squadron lettering . The SAAF marking were for a 1946 unit. This meant i also had to change the roundels on the underside. It took a bit of MIcro Sol to get everything to settle over the raised detail. I'll let these dry over night then finish this up tomorrow with weathering and a matte varnish coat along with any other little bits I forgot to add. The finish line is almost in sight.5 points
-
Could have at least said "Sorry guys, we thought it would be ready but it's not. Keep your eyes peeled". I would have respected the honesty. Will Arma be cheeky and suddenly get their P-51D out first? If they do my money will go to them.5 points
-
Thanks Rob. I’m hopeful of good things. I seemed to spend ages yesterday doing bits and pieces. It doesn’t look like a lot of things got done. A lot got done, in fact. The characteristic belly radiator, for example. The intake is cast resin, the body a two-part injection moulded affair. Many prototype photos show the rear flap open, even on the ground, so I wanted to replicate that feature. The plastic parts had an engraved flap, but in entirely the wrong place. It was also far too small. I spent a few minutes peering at various images, and took the plunge, chain-drilling and excising a more suitable space. I’ve still to make the flap, which I think will be thin brass sheet as it needs to be curved in exciting directions. Inside the radiator cowling, I stuck a pair of bits of styrene tube to represent the rear of the radiator cores. They’ll barely be seen, but the gaping void needed something inside. Tiny resin intake scoops flank the radiator. Pavla, thankfully, provided three, but didn’t provide any clue as to location. More piccy peering! I noticed characteristic vents, particularly on the port side cowling panel. The smallest brass tube I have is 0.3mm, but is indistinguishable from solid. The next size up was 1mm, which is oversize. Too bad, say I, so the vents just under the exhaust shrouds were done. The others have been represented by 0.5mm brass wire. This is the contents of the "things to fit" box. The prop and exhausts come from the bits box. The instrument panel must be fitted inside the front of the cockpit greenhouse. The undercarriage has been assembled, and the retraction rods remade in brass wire. Nearly there, I think. Except, the elephant in the room… The kit came with the early and later variants of the clear parts. I wanted the early, more upright windshield version. The later part got hijacked for and destroyed by another Miles Master build. The problem, which can just be seen, is the top of the windshield is very thin, and over the years in its box has been squished. There's a depression in it. I’ve been trying to figure out how to deal with this for simply ages. My current plan is to dip the canopy in very hot water and see if I can gently press the depression back out. If I can’t, then the model will end up with a depressed windshield, which will be depressing me.5 points
-
Working on the Falke’s hatches . And yes, I know the Falke Pkf 85 didn’t have a red crowbar until after Operation Super Hammer, but I’m building it my way!5 points
-
And painted: Tomorrow I will give it all a wash, do the leather, black and aluminium details, add seat belts and sort out the propeller before gluing the halves together. ...and I have just realised I need to do the interior of the oil cooler insert and tailwheel well before sticking it together.5 points
-
Again some progress today! Had a couple of hours so after another gloss coat it was wash on and wash off.5 points
-
Thanks, its certainly going to be custom 🤣 Dont worry there's still plenty of time and opportunity to screw it up! 😄 However I have made progress (hopefully in the right direction 🙏). There are a couple of kits available for a real mini where you cut the inner wings and engine bay out and replace them with a cradle which holds the Honda engine and from which the new suspension is mounted. Normally I would have made a structure like this out off styrene rod, but in this case I've had to use brass for strength. Also due to the size off the cradle it would be impossible to solder the joints because as soon as you tried to solder the second joint the heat transfer would melt the first joint. Luckily though I have been pleasantly surprised just how strong a joint can be achieved with thin superglue. Something I'm particularly pleased with is the offset on the bottom front rail as this fits perfectly in the original attachment points of the bonnet which will make attaching to the final model so much easier. Its going to be tight, but initial impressions suggest it might just fit. I'm now just trying to work out what to tackle next either mount the engine or work on the front suspension. The Engine is from ZoomOn, not only does it look top notch, but they sent me free stuff with it👍. Thanks for looking ‐ Andy5 points
-
5 points
-
The weekend of June 3rd and 4th saw another hurdle jumped for Phantom F-4J(UK) ZE360 and the BPAG Team. The first J79 engine has now been removed from the aircraft for the first time since at least February 1991 with the weekend providing some steep learning curves for the team. 1 2 3 4 5 6 7 8 If you want to know more or get yourself involved with any of the various British Phantom projects the group are involved with, please click either of the following links below. Become a member here - https://www.facebook.com/groups/bf4pag Public page here - https://www.facebook.com/BPAGofficial5 points
-
Thanks Craig. This may be an old kit by todays standards, but with a little spit and polish, it works up to an acceptable level. Which also means boys and girls its time to give the last installment of my desert trilogy. After having gotten the decals to finally settle down I did the same as my other two builds. First a dark wash, since this has heavily raised detail, most of the wash went to control surfaces. Although some of the wash did help to begin the "dirtying process" by adding some grime to everything. Then a light misting with some Vallejo Beige and an AK Pacific Sand wash to build up the sandy dirtiness. I then took a hairy stick and some Tamiya Flat Aluminum and added wear and tear to areas of high useage, wing wak areas, around the canopy and around the engine cover panels. The last thing I did was to give everything a Matte Varnish before using Oily Black for the engine grime and around the guns. Thanks for following along on this little jaunt. And also thanks for all the comments and encouragements along the way. I'll have the final images up in the Gallery monetarily. But before that I want to thank @Dansk, @modelling minion, and our own @Enzo the Magnificent for putting on this little sandy clambake. I don't know if I'll be able to get another build in before it closes up shop for the year, but if not, Stay safe, stay healthy, and Model on!4 points
-
Managed to get a bit done today between domestic stuff, one step back, 1.5 steps forwards! I've decided to leave the guns out for simplicity on the lower gun position, but have fitted some frames and armour plate as best I could from photographs. I also realised that the bomb bay tapers going deeper at the rear including the bomb bay door line down the fuselage. The easiest fix for this was to add pieces of tapered plastic to correct the door line, but it's obvious now when you look in the bomb bay because the side walls show the taper after correction. Hopefully when loaded with bombs and the doors being in the way, it's less noticeable and being underneath, I'm less concerned. The other thing I did was make a cut out for the machine gun in the nose section and add a piece of brass tube filed to profile... It's all looking a bit basic at the moment, but it will come together once everything is tidied up. The strips of masking are just a guide for where the frames are to fit the internal ribbing. Fiddly stuff that is taking time, but worth it. Cheers Neil4 points
-
4 points
-
Here's my completed Halifax from the re-decalled red box. The moulds were totally worn out, canopy fit was non-existent, but with a bit of work (a lot!) I managed to make it resemble a Halifax at least. I don't see them for sale anymore so the moulds must be completely worn out. Time for a re-tooling!4 points
-
Thanks a lot guys. Well, more pipe work. Now also the fuel pipes are ready for primer and paint – or perhaps first cutting to pieces to make them fit... I have begun gluing the sections together according to my head rather than the instructions. Time will tell if this was a good decision or not… The combustion chamber only really fits one way so that’s easy. The exhaust manifold is double checked and again to be as aligned as possible while the epoxy cures.4 points
-
New Academy boxing - ref. 12361 - Beechcraft T-34B Mentor - US Navy - VT-5 Training Air Wing Sources: https://www.hannants.co.uk/product/AC12361 https://mmzone.co.kr/mms_tool/mt_view.php?mms_db_name=mmz_media&mms_cat=[����] �&no=8670&keyword=&where=&mode=&start_page= Review: https://mmzone.co.kr/mms_tool/mt_view.php?mms_db_name=mmz_media&no=8670 V.P.4 points
This leaderboard is set to London/GMT+01:00














.thumb.jpg.2c282efcc138b7cf7f1e1586a9c534d2.jpg)
