JeroenS Posted July 18, 2020 Share Posted July 18, 2020 Aw crap! That sucks mate! Those decals were pretty good there... Put it behind you 🙂 A soak in ISO will do the trick nicely with your Tamiya paint. 1 Link to comment Share on other sites More sharing options...
Windy37 Posted July 18, 2020 Share Posted July 18, 2020 It's an awful feeling seeing that happen before your eyes and not being able to do anything to stop it . Gary . 1 Link to comment Share on other sites More sharing options...
Bengalensis Posted July 18, 2020 Share Posted July 18, 2020 That's too bad, not something one wants to experience. I'm not really familiar with the products you have used, so can't offer any advice I'm afreid, but I hope you can find a way to recover and make a gentle strip to start over again. There's so much good work invested so it's well worth a new attempt. 1 1 Link to comment Share on other sites More sharing options...
Spiny Posted July 18, 2020 Share Posted July 18, 2020 I'd have to agree with Jeroen that 99% IPA (isopropanyl alcohol, not India Pale Ale) is the way to go for stripping the paint. Fortunately the price seems to be coming down after soaring in the early days of the pandemic (it also makes a good sanitiser). I suspect you will need to separate body and chassis though as it wouldn't be the easiest thing to do to repaint inside. As for the reason for the paint going like that, it's purely an educated guess but what's the humidity like with you (judging by the cricket, quite high I'd imagine)? I got myself a cheap hunidity gauge for the garage just for spraying, and try to only spray when humidity is below 70% as high humidity can cause paint issues. 1 Link to comment Share on other sites More sharing options...
Steve Noble Posted July 18, 2020 Share Posted July 18, 2020 I think the problem is the paint (red) was too thick and not properly dry when you sprayed the clear over the top of it. It continued to dry, causing shrinkage, which resulted in the clear cracking, hence the cracks. Strip it and repaint. If you use the same paint let it dry for some extra time before clear coating it. 1 Link to comment Share on other sites More sharing options...
silver911 Posted July 19, 2020 Share Posted July 19, 2020 If I may offer a cheaper alternative to IPA...good old 'Dettol'...an over night bath and job done. It will strip pretty much any paint from white metal/plastic or resin...with no ill effects what so ever. Pound shops are the cheapest (obviously)...you really want the darker kind...stronger than the lighter shade for some reason. Ron 1 Link to comment Share on other sites More sharing options...
Redstaff Posted July 20, 2020 Share Posted July 20, 2020 On 18/07/2020 at 14:36, pau10wen said: I could almost live with the body, but I'd rather strip it all and try again, if I can get hold of the decals quickly anyway, Hi Paul That's a blow, seen the odd wrinkles before but never a total attack like that, it's a shame as you were on the finishing straight 🙄 Have you figured out what happened yet? Have you got sorted with the decals yet? If you can't get them quick enough drop me a PM and you can have my set and replace them when the others come Ian 2 1 Link to comment Share on other sites More sharing options...
pau10wen Posted July 20, 2020 Author Share Posted July 20, 2020 8 hours ago, Redstaff said: Hi Paul That's a blow, seen the odd wrinkles before but never a total attack like that, it's a shame as you were on the finishing straight 🙄 Have you figured out what happened yet? Have you got sorted with the decals yet? If you can't get them quick enough drop me a PM and you can have my set and replace them when the others come Ian You're too kind Ian, thanks for the offer. I'm an impatient so and so (which may explain the paint disasters, still not sure?) so I've already ordered another set from hiroboy, along with some zero paints cossack red which I didn't have last time, so should get the colour bang on hopefully. Thanks though matey👍 I've had a weekend of successful scraping believe it or not, very therapeutic. I'm almost fully stripped back to white and ready to give a light sanding already. Was going to go the isopropyl route but the scraping went very well 😊 1 Link to comment Share on other sites More sharing options...
pau10wen Posted July 20, 2020 Author Share Posted July 20, 2020 On 18/07/2020 at 20:44, Spiny said: I'd have to agree with Jeroen that 99% IPA (isopropanyl alcohol, not India Pale Ale) is the way to go for stripping the paint. Fortunately the price seems to be coming down after soaring in the early days of the pandemic (it also makes a good sanitiser). I suspect you will need to separate body and chassis though as it wouldn't be the easiest thing to do to repaint inside. As for the reason for the paint going like that, it's purely an educated guess but what's the humidity like with you (judging by the cricket, quite high I'd imagine)? I got myself a cheap hunidity gauge for the garage just for spraying, and try to only spray when humidity is below 70% as high humidity can cause paint issues. I was more likely to try the pale ale option Friday 😂😂😂 Humidity could be a cause, I am in a garage in the UK though so it hadn't been my first thought, lol. Almost fully back to primer stage with some scraping, but thanks for the excellent advice 👍👍 Link to comment Share on other sites More sharing options...
pau10wen Posted July 20, 2020 Author Share Posted July 20, 2020 (edited) On 19/07/2020 at 00:21, Steve Noble said: I think the problem is the paint (red) was too thick and not properly dry when you sprayed the clear over the top of it. It continued to dry, causing shrinkage, which resulted in the clear cracking, hence the cracks. Strip it and repaint. If you use the same paint let it dry for some extra time before clear coating it. It's a good shout Steve, I think there's a possibility of this being a contributing factor too. The decals went on fine, and the fine coats of clear were also OK. I left then to dry covered in an upside down plastic box (I use the lid as a base and the box as a dust cover/preventative. I did leave them under there longer than usual due to work commitments (and forgetting to let them breathe once they weren't tacky) I'm thinking this will have caused too much humidity/moisture in their little personal greenhouses. It's a learning curve, and I'm at the bottom 😂😂😂 Thanks for the suggestion and advice though, I'll deffo keep an eye on the thicknesses of paint and dry times on the next go! 👍 Edited July 20, 2020 by pau10wen Link to comment Share on other sites More sharing options...
pau10wen Posted July 20, 2020 Author Share Posted July 20, 2020 On 19/07/2020 at 12:30, silver911 said: If I may offer a cheaper alternative to IPA...good old 'Dettol'...an over night bath and job done. It will strip pretty much any paint from white metal/plastic or resin...with no ill effects what so ever. Pound shops are the cheapest (obviously)...you really want the darker kind...stronger than the lighter shade for some reason. Ron Thanks Ron, good tip! I'll beat it in mind for the next few nerve racking days of trying a repaint 😂😂😂👍 Link to comment Share on other sites More sharing options...
pau10wen Posted July 20, 2020 Author Share Posted July 20, 2020 On 18/07/2020 at 17:02, JeroenS said: Aw crap! That sucks mate! Those decals were pretty good there... Put it behind you 🙂 A soak in ISO will do the trick nicely with your Tamiya paint. Thanks jeroen, we'll just have to go for a reload and see what happens next, lol Got the better red paint coming with new decals, and I can not re-make the mistake of using the grey primer this time when I have white here too. Hopefully easier to get a nice deep red over the white, instead of burgundy over the grey, then thick paint to get back to red 😂😂😂 Link to comment Share on other sites More sharing options...
pau10wen Posted July 20, 2020 Author Share Posted July 20, 2020 On 18/07/2020 at 18:27, Windy37 said: It's an awful feeling seeing that happen before your eyes and not being able to do anything to stop it . Gary . Thanks Gary, I'm sure we've all had something similar, lol I think a combo of thickness of paint chasing the bright red from a burgundy starting point after using grey primer, and the length of time under a plastic greenhouse both caused it. I've learned something at least, lol 1 Link to comment Share on other sites More sharing options...
Spiny Posted July 20, 2020 Share Posted July 20, 2020 5 hours ago, pau10wen said: I was more likely to try the pale ale option Friday 😂😂😂 Humidity could be a cause, I am in a garage in the UK though so it hadn't been my first thought, lol. Almost fully back to primer stage with some scraping, but thanks for the excellent advice 👍👍 That pretty much describes my set-up too, which is why I spend the summer frantically trying to get bodies prepped and sprayed ready for winter. With the two months of furlough I got a bit of a head start (good job as the SSR looks like it will take quite a bit of painting) but also got about a kit and a half ahead in terms of building compared to where I was expecting. As mentioned earlier, I got a cheap humidity meter for the garage and generally spraying when the humidity gets over 70% or outside the 10-25C temperature range. I have sprayed up to 75% humidity in extremis, but have felt then that the clear coat was just starting to show a few very minor blemishes so wouldn't want to go much higher. 1 Link to comment Share on other sites More sharing options...
Anteater Posted July 20, 2020 Share Posted July 20, 2020 Gosh, that would have tipped me over the edge. I don't know whether it's helpful or not, but I spray either in the garage or outside, and just use Halfords plastic primers and rattle cans, or Holts colour. I have used Autotek lacquer a couple of times but usually get a good enough scale shine from the Holts or Halfords paints with a lot of cutting and polishing. Maybe I've been lucky but I haven't had any problems with humidity etc. Seem to be pretty idiot-proof paints (I can comment as a qualified idiot). 1 Link to comment Share on other sites More sharing options...
pau10wen Posted July 20, 2020 Author Share Posted July 20, 2020 Thanks spiny, thanks anteater All good to know, and thanks for the moral support too 👍👍👍 Link to comment Share on other sites More sharing options...
klubman01 Posted July 21, 2020 Share Posted July 21, 2020 17 hours ago, pau10wen said: I left then to dry covered in an upside down plastic box (I use the lid as a base and the box as a dust cover/preventative. I did leave them under there longer than usual due to work commitments (and forgetting to let them breathe once they weren't tacky) I'm thinking this will have caused too much humidity/moisture in their little personal greenhouse I use a similar arrangement for my 1/43 models, except that I prop up one side of a Tupperware box with a length of timber that's just under 3/4 inch thick. The prop is in place all the time, including straight after airbrushing has been completed. The box protects the models, and the air gap allows a degree of circulation. I usually leave them like that for a week before doing anything with them. Trevor 1 Link to comment Share on other sites More sharing options...
pau10wen Posted July 21, 2020 Author Share Posted July 21, 2020 1 hour ago, klubman01 said: I use a similar arrangement for my 1/43 models, except that I prop up one side of a Tupperware box with a length of timber that's just under 3/4 inch thick. The prop is in place all the time, including straight after airbrushing has been completed. The box protects the models, and the air gap allows a degree of circulation. I usually leave them like that for a week before doing anything with them. Trevor Thanks Trevor, much appreciated I was wondering only last night whether to drill some small holes in the boxes to allow more airflow. You have the more versatile and simple solution there! I'll spray, then cover between coats, then prop to dry once less tacky. And dry for a good while too. Thanks again 👍 Link to comment Share on other sites More sharing options...
Andy J Posted July 21, 2020 Share Posted July 21, 2020 Hi Paul, sorry to see your problems mate every modellers worst nightmare but I'm sure you'll put this right no problem. I see your using zero paint for your basecoat a word of advice if you don't mind. Whatever you do make sure you don't apply the zero to heavy or you'll end up with the paint biting deep into the plastic and leaving you with another problem to sort out. Light multiple coats is the way to go mate as many as it takes and be sure to leave for at least 10 minutes between coats. I've applied as many as 12 coats in the past to achieve the desired colour but the norm is usually 3-4 patience is the key mate something you seem to have plenty of 🙂 Hope this helps 👍 1 Link to comment Share on other sites More sharing options...
pau10wen Posted July 21, 2020 Author Share Posted July 21, 2020 1 hour ago, Andy J said: Hi Paul, sorry to see your problems mate every modellers worst nightmare but I'm sure you'll put this right no problem. I see your using zero paint for your basecoat a word of advice if you don't mind. Whatever you do make sure you don't apply the zero to heavy or you'll end up with the paint biting deep into the plastic and leaving you with another problem to sort out. Light multiple coats is the way to go mate as many as it takes and be sure to leave for at least 10 minutes between coats. I've applied as many as 12 coats in the past to achieve the desired colour but the norm is usually 3-4 patience is the key mate something you seem to have plenty of 🙂 Hope this helps 👍 Thanks Andy, much appreciated thanks. It's a question I've been asking myself too, whether to use a white primer and tamiya matt red (which I was happy with colour wise) or introduce another unknown quantity on the zero paint red. It was a zero paint clear lacquer that really messed me up last time, I think as you said, I went for wet coats too quickly with it over an already damaged paint job. Desperate times to be fair, but still a daft choice, lol I bought the red zero paint as an option, but tamiya acrylics are a known quantity to me and my setup, so still deciding what to go for. Maybe even tamiya clear rather than zero or microscale, it hasn't failed me before. I tried something new on the wrong project. But thank you for letting me know your experiences before I jump in again and the invaluable advice mate 👍 Link to comment Share on other sites More sharing options...
Andy J Posted July 21, 2020 Share Posted July 21, 2020 5 minutes ago, pau10wen said: Thanks Andy, much appreciated thanks. It's a question I've been asking myself too, whether to use a white primer and tamiya matt red (which I was happy with colour wise) or introduce another unknown quantity on the zero paint red. It was a zero paint clear lacquer that really messed me up last time, I think as you said, I went for wet coats too quickly with it over an already damaged paint job. Desperate times to be fair, but still a daft choice, lol I bought the red zero paint as an option, but tamiya acrylics are a known quantity to me and my setup, so still deciding what to go for. Maybe even tamiya clear rather than zero or microscale, it hasn't failed me before. I tried something new on the wrong project. But thank you for letting me know your experiences before I jump in again and the invaluable advice mate 👍 Paul use what you feel comfortable with I've had great success with the tamiya paint mixed 50/50 with mr colour leveling thinner it is one of the best paints on the market imo. How about Tamiya white primer, Tamiya matt red and Tamiya clear, all from the same manufacturer no risk of reaction but a need to be careful with the Tamiya clear over decals mist coats required to begin with methinks. Once you have a light coat or two over your decals you can go a little heavier as the earlier coats will give you a layer of protection. Just my thoughts mate 🙂 1 Link to comment Share on other sites More sharing options...
pau10wen Posted July 21, 2020 Author Share Posted July 21, 2020 Yup, i think it's my feeling on that too. And the Cossack red can be sold on to someone who needs it I'm sure. My white primer is vallejo, would be the only non tamiya product. But their primers are great for as much as I've used them. I may well stick to the formula that has worked for me before, and test new producta on something less valuable to me 😂😂😂 1 1 Link to comment Share on other sites More sharing options...
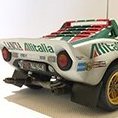
pau10wen Posted July 28, 2020 Author Share Posted July 28, 2020 (edited) Hi all, It feels like its been too long since last update, so here are a few bits Freshly scraped bodywork, it was therapeutic and calming, honest 😂😂😂 My delivery within a day of ordering, you can't beat hiroboy for speed We've been away for a few days, and work is pretty full on now (and I accidentally picked up a guitar) all of which have stolen my time recently. Not going to lie, the paintwork setback has had a bit to do with it, but I'm getting the motivation back, lol Freshly re-primed and filled Almost ready to turn red again after a bit more sanding on the rear. Still unsure which red to use just yet, I'll have a test spray with the zero paints red and see how it goes before jumping in I think Hope everyone is keeping well and sane Thanks for looking as always 👍 Edited July 28, 2020 by pau10wen 8 Link to comment Share on other sites More sharing options...
JeroenS Posted July 28, 2020 Share Posted July 28, 2020 Looks like a good cleanup job Paul. Once you have it back in colour everything will be forgotten, you'll see 🙂 1 1 Link to comment Share on other sites More sharing options...
Steve Noble Posted July 28, 2020 Share Posted July 28, 2020 The Zero red would be my choice, but I've never used Vallejo primer, I'm not sure if Zero will eat into it, as it's quite a 'hot' paint? I always use Tamiya aerosol primer or Halfords primer under Zero paints with no issues. 1 Link to comment Share on other sites More sharing options...

Recommended Posts
Create an account or sign in to comment
You need to be a member in order to leave a comment
Create an account
Sign up for a new account in our community. It's easy!
Register a new accountSign in
Already have an account? Sign in here.
Sign In Now