

Giorgio N
-
Posts
17,018 -
Joined
-
Last visited
-
Days Won
2


_5.56mm_Rifle_MOD_45162138.thumb.jpg.053e4f85b299efc3857bfa5c1911dc3c.jpg)


Recent Profile Visitors
24,366 profile views


Giorgio N's Achievements
")
Blabber Mouth (7/9)
17k
Reputation
-
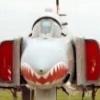
Yes, this subject would require quite a few modifications: it was originally the 12th pre-production aircraft and as such had the early boat-tail (visible in the picture). To this NASA added a fairing for a spin-recovery parachute. As a pre-production aircraft, the strakes on the upper surfaces were the original large ones and the shape of the area on which these were located differed from the production aircraft. Originally the gun fairing was also different but by the time the picture above was taken a production fairing had been mounted. The gas purge grilles were however the early type. Last but not least, this aircraft had two folding "canard" surfaces ahead of the windscreen, that are the black areas well visible in the picture. These would be easy enough to reproduce in their folded configuration, thin plasticard would do the job.
-
Really it's not easy to define which are the best companies because different modellers may seek different things in a kit. The matter is also made more complicated by the fact that some companies have been making kits for decades and their current catalogue today may comprise kits from 1 or 10 or 50 years ago, where clearly the older kits may have been great in their days but are not comparable to the state of the art today Said that, is however possible to ssay that certain companies generally show a higher level of mould quality than others and that some are capable of adding more detail than others. Of course even among those with those capabilities some modellers may prefer one over the other for some reason but I think nobody can deny that a few names are today at the top. Now I mainly build 1/72 scale aircraft models so the names I can mention are those that offer this kind of kits, I may well miss some that are even better. The names here are the ones that everybody is thinking of: Eduard: love them or hate them, they may have had some bad days but in general their current kits are great, they may offer 20 parts for a WW2 fighter cockpit but their kits fit well, are well moulded and very nicely detailed. And they are actually not particularly expensive! IBG: they seem to have taken Eduard's approach even farther, with even more detail and an extreme attention to accuracy. They have only recently started to move into well known aircraft types but if their Spitfires are an indication of what they will offer we're in for some real gems Arma Hobby: similar to IBG, they may sometime need a bit more attention when building but detail and mould quality are impressive. Fine Molds: all their recent aircraft kits are very nice. Even more important, each new kit is improving on the previous. Tamiya: it's Tamiya, you know it will fit perfectly and be the easiest to build. Where others have to use 10 parts for a 100% accurate representation of a detail, Tamiya gets a 95% accurate representation with a single part, something that tells a lot about their design skills. Then a couple of honorable mentions... Hasegawa: a company that used to be at the top but really they haven't done new aircraft kits for a while. Their mould quality is superb but it's a company that has often preferred to skip on internal details and this IMHO puts them behind others. Still, whenever I want a relaxing build I grab one of their kits since I know that it will be very pleasant (with a few exceptions) Academy: maybe not on par with the very best but IMHO they offer a great compromise between mould quality, detail, fit and price.
-
George, your words here should be printed and read in many places! They should be read in schools to tell girls and boys what war is really like for those who fight. And they should be read in assemblies, senates and houses to tell to those who decide wars what they are really condemning their citizens to. These words are even more important today when war is more and more often described as a videogame, when even defence departments are showing combat as something cool, with thumping rock music and AI generated superhero-style cartoonish images, Maybe if people knew more about what war is really like from the inside, they would try more options to solve matters in a peaceful way... maybe
-
The BBC tendering process would not be something really accessible to a group of fans with good PC skills, These kind of tenders are aimed at professional production companies so we should expect a series with real actors made by people who have experience in making TV programs.
-

57th FG P-40K over the desert (Special Hobby 1/72)
Giorgio N replied to Giorgio N's topic in Curtiss P-36/40 Hawk STGB
Now some progress; assembly of the main parts is completed so it's time to prime. All clear parts have been masked, using the ASK set for the canopy and a circle cut from tape for the underwing light Since the kit comes with two moving sections, I used one to cover the cockpit while the other is painted separately. In this way I've managed to avoid small gaps between masked areas. The plan is now to first spray the frames with Gunze's Interior Green, that is actually very yellow, and then cover everything with Mr. Surfacer Aqueous -
57th FG P-40K over the desert (Special Hobby 1/72)
Giorgio N replied to Giorgio N's topic in Curtiss P-36/40 Hawk STGB
Yes, that are very well reproduced in this set: https://aeroscale.net/news/p-40e-gunsight-antenna-mounts Now the product reviewed here is in 1/48 scale and there's nothing similar in 1/72 but I thought adding a couple of plates would be a good way to lock the antenna wire in place. On this model I will probably just trap them under the plates, on the other P-40K I've drilled a hole in each plate with the idea of gluing the wire there. I'll see which of the two solutions offers the best compromise between realism and ease of assembly -
Thanks to all for the welcome! Hope the model will be up to the expectations. While there are a few days to wait before starting, the content of the box is so rich that it's worth selecting all the sprues in advance. IBG here offer the possibility of building two different aircraft in a number of possible configurations. This means that there is a lot of plastic inside, including 4 fuselages (2 with externally armoured and 2 with internally armoured windscreen) and 3 different upper wings (2 plain and one with external stiffeners). The possibility of confusing the parts is high so I decided to take all the sprues I need from the box and put them in a separate container. Here's what I got: Even if these sprues will be used for one model only, there will still be a lot of unused parts, great for the spare box.. and I've not showed the 3D printed parts here! These include the exhausts, wheels and 3 cockpits! I have also not taken a picture of the decal sheets yet... a huge number of options with two sets of stencils for both Supermarine and Castle Bromwich built aircraft, meaning 2 sets will go into the spare decals box. A thought on IBG Black Boxes: they are not cheap, I paid €50 for this one and it came from one of the cheapest shops around, the normal cost is more in the €60-65 range in Europe. At the same time the quantity of good included is incredible and the quality of all parts is very, very high, making it more than makes up for the cost. At least for a Spitfire enthusiast, others may prefer cheaper and simpler options on the market. Should be said that the same IBG also offers these kits in a much cheaper box, with plastic parts only and this sells for much less, IIRC around a Euro tenner. I may get me one of these soon to use some of the decal options in the box
-
Depends on location: being in the EU I know of a few EU shops that carry FM kits at decent prices. I've bought some of their Phantoms for €37-38 that is pretty much the same I'd have paid for a delivery from Japan once postage and the various taxes/commissions are added. Even easier for Hasegawa kits, they are now widely available in many shops and even my local one has a decent selection at very acceptable prices. Aoshima and Platz are a different story, particularly the latter. Of course since each country has its own set of added costs, other modellers here may find it cheaper to buy from Japan. To me it used to be but it's not anymore
-
Misterkit has always been among the most expensive shops, no surprise the kit was overpriced. The shop is on the South side of my city, so not too far from me and even so I rarely buy there. Their stock is huge though so it's hard not to find something. The founder sadly passed away recently, we'll see if they'll change their policies
-
Don't know how I had forgotten this... a title that nicely fits the GB 😁
-
Even if FM had not improved on the shapes of the Hasegawa kit, to me a higher cost would be justified by the inclusion of better surface detail as the older kit is a bit lacking here, with panels of the wrong shape and several features missing, most important the gun cooling slots. Now of course one thing is a higher cost and one thing is having to pay 3 times as much, that is what buying the kits from Japan would cost me compared to what the Hasegawa kits can be found for at the moment... I'm still waiting for the Fine Molds Starfighters to arrive at my usual European shops, some of them have pretty good prices but no F-104 seems to have been received yet by them
-
57th FG P-40K over the desert (Special Hobby 1/72)
Giorgio N replied to Giorgio N's topic in Curtiss P-36/40 Hawk STGB
Forgot to mention a detail: how can I now tell one model from the other? Well, the second one I started has the K specific sprue in a slightly different colour! The first one had all sprues in the same colour...Not that it's important but I found it curious -
57th FG P-40K over the desert (Special Hobby 1/72)
Giorgio N replied to Giorgio N's topic in Curtiss P-36/40 Hawk STGB
Let's now show some progress: the model has had the windscreen and rear clear panels glued in place. The latter did not fit very well and they protrude slightly at the bottom. I've tried to blend them in using clear UV curing resin, I'll find out if this worked after having primed the area. The windscreen went on withh less problems but I feel it may be a tad too narrow. Again, I'll see better after having primed the joint. Most other joints seem to have been decent enough. In some areas I used a touch of filler, for example the wing roots. Here I used something that is likely well known to most here but I had never used before, Perfect Plastic Putty. I found this my local shop and bought it immediately. It's not cheap here, being quite more expensive than the competition, but I have to say I'm very impressed with it! Also, you may notice a couple of plasticard bits on the wings... guess what they are for? -
57th FG P-40K over the desert (Special Hobby 1/72)
Giorgio N replied to Giorgio N's topic in Curtiss P-36/40 Hawk STGB
The plan for the colour scheme is to start from Vallejo's 71.140. This is said to be a good match for the later ANA 616 and I have to say it's already quite pink. However I also have Vallejo's 71.400 "UK desert pink" and this is very pink! My usual process is to start with a lightened coat of the base colour and then add darker areas where required, I will probably start from a lightened 71.140, then add shadows in straight 71.140 and finish with a light overcoat of 71.400 to make the result more pink. Or I may not add the final pink coat: this aircraft was theh subject of a number of colour pictures taken for Life magazine and these seem to show a finish very close to Vallejo 71.140. Now of course with 70+ year old pictures it's never easy to understand if the colour were properly reproduced but they don't look too bad so I may just follow them. Of course I will also have to paint a coat of Olive Drab under the sand/pink, so to make this appear in areas where the final finish is worn. A few pictures can be seen on the website of the 57th FG association, a website that is a true goldmine of pictures on the aircraft of this unit: http://www.57thfightergroup.org/pictures/life/index.html -
57th FG P-40K over the desert (Special Hobby 1/72)
Giorgio N replied to Giorgio N's topic in Curtiss P-36/40 Hawk STGB
So I'm not the only one who has had fit issues, guess that SH has had troubles with quality control on these kits. Thanks for the tips about the canopy! I do have a Hasegawa kit and the Falcon vacuform parts, I have a couple Squadron parts that are made by Falcon, I should check if these fit well.


