Search the Community
Showing results for tags '1/48'.
Found 3,583 results
-
Hey All, Thought this was the best place to post this. It's a pretty straight forward conversion. Added few outer spars, reshaped the nose and the "pedestal" for the rocket. A few other small bits, and Voila! a Loon. I was after this; Zero weathering, as I don't think these things survived multiple launches. One and done. Critiques are always welcome. Mark
- 10 replies
-
- 20
-

-

-
- 1/48
- Scratchbuilt Conversion
-
(and 1 more)
Tagged with:
-
ICM have more great model kits to add to their exciting & varied range, including a 1/48 US B-26B-50 Invader Korean War Era Bomber Kit, a 1/24 Scale 4 Figure SWAT Team Set and many more.
-
I have taken this Eduard weekend edition kit as far as I wish. The purpose of the build was to try an idea I had to emulate the uneven surfaces seen on stressed skin aircraft, and chose this particular aircraft as I'd already built an Eduard Hellcat and knew how it went together, but this overall Glossy Sea Blue aircraft would particularly benefit from something to add visual appeal to an otherwise featureless finish. If interested in the experiment itself, here is the Work in Progress thread: The kit is close to being Out-Of-the-Box, but did receive Airscale cockpit instrument decals to improve the panel, and substantial improvements to the cockpit purely from adding an Ultracast resin seat with seatbelts, new wheels and Ultracast's much improved Hamilton Standard propeller. In addition, Master brass barrels were added. All paints are Colourcoats enamels, and the antenna is Infini Model 40 denier (0.068mm) lycra rigging line. The base is Eduard's injection moulded Essex class aircraft carrier deck section, although strictly speaking the aircraft was from USS Enterprise CV-6, a Yorktown class. If anyone made it this far and is remotely curious to see how ACUS34 - ANA623 Glossy Sea Blue compares to our parallel paints ACUS07 - ANA606 Semi-Gloss Sea Blue and ACUS33 - ANA607 Non-Specular Sea Blue, often all claiming to be matched simultaneously and/or referenced to FSx5042 which matches none of them, here's the GSB Hellcat and my earlier "by the book" tricolor F6F-3 together: Thanks for looking in!
- 21 replies
-
- 52
-

-
I bought another Eduard F6F-5 from @Duncan B a while ago. I didn't bother with any PE this time, so just used an Ultracast seat in the cockpit and tried to do a passable paint job. Due to lack of skill in painting instruments, I did buy @airscale's 1/48 US Navy instrument decals As with the last Eduard F6F I built, I sawed out and thinned down the cowl flaps for what is, in my opinion, a much enhanced appearance for very little effort and no cost. The kit parts have the cowl flaps the full thickness of the cowl piece so even closed they don't look like cowl flaps. It was bought with the intention of making a very ubiquitous ANA623 Glossy Sea Blue US Navy example as seen pretty much everywhere in the Pacific from 1944 to 1945. The trouble is that ANA623 was pretty good paint and therefore most of the stuff modellers do to models such as pre or post shading, panel line washes etc is wholly inappropriate for such an aircraft. Then again, we can't be having a solid, featureless finish because the real aircraft didn't look like that either. I decided to try mimicking the stressed skin appearance of a real aircraft to try to get similar light reflections from a glossy finish. Out with the paint mule! I cut narrow strips of masking tape. The Infini cutting mats made short work of that and got all strips consistent. I gave it two light coats with Halfords grey aerosol primer The tape was removed and I gave it a go over with an Infini 1500grit sanding sponge, the aim being to knock all the corners off and smooth the humps a bit. I then gave it a fairly heavy coat (in many very thin passes) of Colourcoats ACUS34 ANA623 Glossy Sea Blue this morning. This has had a polish with Infini 2500 and 4000 grit sponges and looks like this: Overall, and with more work with the 1500 grit prior to top coat, I feel somewhat positive about it and have decided to go for it. This may take some time! All comments / feedback welcome!
-
My first entry (with possibly 1 or 2 F-4J(UK) to follow) is the 1/48 Hasegawa / Revell kit. This is part of a job lot of three Phantoms parts purchased a few years back in one plain box. Some of the sprues are marked Hasegawa and some have no branding: It will be built as XV590 "001/R" of 892 NAS from HMS Ark Royal. In 1978 whilst exercising with USS Saratoga it received the "Colonial Navy" zap on the fuselage together with a modified roundel sporting a white star as per Xtradecal sheet X48186. Also pictured are brass pitots and the Wolfpack "flaps down" set: I have the Hobbydecal livery decals and rub-down stencil set produced as a special edition for 2008 IPMS Scale Modelworld: Have also got an Eduard cockpit etch, so might make a start this afternoon Regards Mike
- 29 replies
-
- 8
-

-
- 1/48
- Colonial Navy Zap
-
(and 1 more)
Tagged with:
-
A colleague who runs our local post office has asked me to build a 1/48 Meteor for him. A commission build at last! Problem is, he has the Airfix 1/48 kit (a gift from a relative) and he want's it made as an 85 Squadron Airframe. He has an Uncle who served in that unit, working with Meteors. No problem so far ............ except he just dropped the bombshell and mentioned the night fighter version! I need to get more details from him, in the meantime, any suggestions of the best way to achieve that from the Airfix kit if it is indeed the Night Fighter version he wants....................? Terry
-
Hi there! Just finished this nice Tamiya kit. Everything OOB and the only real flaw was one of the decals sheet, the smaller one, most stencils. Without exception, all of them cracked as soon as I tried to move them. I used warm water, cold water, decal solution, you name it, with no success. In some cases I was able to join the pieces and have them in place. But, as I said, a very nice kit. Hope you’ll like it. Cheers! George
-
Here's my 1/48 F-105G, which I was building in the Sharkmouths GB. Build thread is here. It's the Hobby Boss kit, which I thought was pretty good but unnecessarily fiddly in a few places. Decals are from Caracal and were excellent, cockpit is Aires, and I used MPR paints. thanks for looking Julian
- 18 replies
-
- 43
-

-
Hello Everybody! I recently finished the 1/48 Hellcat Fighter in the rarely seen scheme which is the British Fleet Air Arm version. OOB build but some scratch details like seat belts, gun barrels and engine wiring are added.
- 7 replies
-
- 24
-

-
- Hobby Boss
- 1/48
-
(and 1 more)
Tagged with:
-
Hi all. Quack's back....... This is my second build on BM. I had initially hoped to work through a WIP and started it here.. Unfortunately my brain self destructed and I forgot how to post pics (or summat changed in the land of Flickr) and I found I couldn't continue. Having redicovered the means to post pics again it is clearly time once more to inflict damage on everybody's precious retinas...... The source is a Revell repop of the Airfix 1/48 Jaguar and the plan was to finish it as a Granby kite This was my second build and I used the opportunity to try some new (to me) tricks. This was my first time applying surgery to a kit to install a resin cockpit. Resin intakes were also used - another first for me. I also tried modifying the rather unconvincing fuel dump pipe with a bit of carving and brass rod, and tried also to scratch build in a minor / beginners way (FOD covers). The large Naca intake on the spine was carved out and floored with plastic card. minor stuff really just to have a go. Finished with Xtracrylix and pinwash/ oil / pastels to muddy things up. Aaaaaaand here's the result - second kit in errr....40 or so years. 100.jpg by Niall Robertson, on Flickr 80.jpg by Niall Robertson, on Flickr 94.jpg by Niall Robertson, on Flickr 82.jpg by Niall Robertson, on Flickr 82.jpg by Niall Robertson, on Flickr 88.jpg by Niall Robertson, on Flickr 86.jpg by Niall Robertson, on Flickr 96.jpg by Niall Robertson, on Flickr 98.jpg by Niall Robertson, on Flickr I'm broadly happy with the construction side of things. I've definitely improved since my last build. I'm really not happy with the finish however. I think the Desert Sand (Xtracrylix) is a bit dark - I should have lightened it up a bit. I also tried using the Hairspray method to wear away the top layer to reveal cammo green / grey underneath but the top layer simply would not budge - hopefully somebody will tell me the correct way to do this. I'm also a bit disappointed with the Pink Spitfire figure (Xtradecals) which seems to have no facial colour resulting in a bit of a washed out white appearance and lacks definition. I'm already thinking of totally re-doing the finish on this one. So Questions as follows. 1/ do I need to take the finish back to plastic? 2/ could I just remove the decals (how best?) and spray on top? 3/ any tips for successful hairspray weathering? 4/ anybody got an old set of 1/48 decals for The (avid) Guardian Reader???? Cheers all. Q
- 10 replies
-
- 20
-

-
XX242, delivered to the Red Arrows on 2 November 1978. This is her 2014 livery. DSC_0001 by Richard Linnell, on Flickr DSC_0003 by Richard Linnell, on Flickr DSC_0002 by Richard Linnell, on Flickr DSC_0004 by Richard Linnell, on Flickr DSC_0005 by Richard Linnell, on Flickr DSC_0006 by Richard Linnell, on Flickr DSC_0008 by Richard Linnell, on Flickr DSC_0009 by Richard Linnell, on Flickr
- 11 replies
-
- 16
-

-
An older build that finally made it out to the airport. This is the 1/48 Monogram Panther, painted with ModelMaster gloss dark blue. I would’ve liked to take more pics but I was afraid the gusty wind might take her airborne any minute. 😉 (there's that wind again!😁) This kit has a lot of nice detail, especially the cockpit. The framing on the windscreen was way too big so I sanded it all off and masked it with tape to get the more correct size frame. I read about the canopy frame issue in FSM years ago. I was really hesitant to sand them off but I jumped in and gave it a try. Believe me, I was worried that it would never look right again. But my ol’ dad used to say, “Even a blind hog finds an acorn now and then.” And I did find that acorn! Whew, a lot of polishing saved the day! It’s been a long time since the kit was built, but I don’t recall any particular fit issues. I approached the canopy frame issue with great trepidation, but it turned out okay. As I said earlier, the cockpit has some nice detail and features, but one does find that in many Monogram kits of this vintage. I am going to replace the cannon barrels with hypodermic tubing as one of the kit barrels has fallen back into the fuselage since these pics were made. 🤦♂️ The metal parts will look better anyway. The decals are a mix of aftermarket and kit markings. Please excuse the crooked canopy in one of the overhead shots. I left it unattached so I could pose it either opened or closed and I didn’t notice that it was askew before I took the pic. Thanks for checking out my old Panther and thanks for the likes and comments!😀
- 37 replies
-
- 39
-

-
Hi, This is the very pleasant to build (and underrated) Italeri kit. Everything comes from the box except for the very efficient dual barrel MG81Z specific to the A-5 version, handmade seat belts and other details. The top RLM73 comes from the Real Color range. Quite a good range but it stinks and I find it maybe more fragile than the Gunze range. Thanks heaps for looking ! Antoine
- 14 replies
-
- 35
-

-
Hello all; I present here my recently completed GWH P-61. The short version is that I really enjoyed this one and think it came out quite well. The only missing is the drop tanks; inexplicably they are missing from the kit (or at least missing from mine) and one day I'll add some. All comments welcome! The long version of the story, with more pics, can be found on my website, making-history.ca Cheers; Mark.
-
G'day All, Another one done to hang from the ceiling. Had this one in the stash since about 2004, 1/48 Italeri kit #2634. (Shock, horror, raised panel lines) I lost the cockpit somewhere over the years, hence the black canopy treatment. Its all OOB (except the pitot, I busted that, so a sewing needle was used). All hairy sticked using Humbrol paints. The pictures I took are a bit ordinary.....but you get that. Regards, Devo
-
XR992, 16 December 1969. DSC_0002 by Richard Linnell, on Flickr DSC_0006 by Richard Linnell, on Flickr DSC_0003 by Richard Linnell, on Flickr DSC_0007 by Richard Linnell, on Flickr DSC_0004 by Richard Linnell, on Flickr DSC_0008 by Richard Linnell, on Flickr DSC_0005 by Richard Linnell, on Flickr https://aviation-safety.net/wikibase/137419
-
Hello everyone... I will be using this Hasegawa kit re-boxed from monogram for my build. I will be using the instructions and decals from this kit. Here are the obligatory sprue shots In this photo ⬇️ you can see the only thing thats been done is the cockpit was glued together. This is a 2nd hand kit that came like this. Im pretty sure that falls below the 25% mark ? I actually have 3 complete canopy sets the kits and two from spares. I will be building either 87-8407 from the 306th Fighter Squadron in this scheme from 1982. Or my alternative will be 87-8411 from the 302nd Fighter Squadron in 1980. Please feel free to ask questions, make comments, or give your thoughts ? Dennis
- 70 replies
-
- 10
-

-
Hello, Thought I'd start building something a bit more relaxing after the Flanker, so at the Moson show in Hungary I've bought this beautiful eduard's kit - with all the extras. I am planning to build it as opened as possible - engine, cockpit, radio, gunbays, misc. panels and so on. So, starting with the cutting, cleaning and thinning all the resin bits and pieces and dryfitting them over and over again. So, this is my Moson show loot, most of the parts here are for Spit. Too much of them really... So, brassin radio compartment with Aires cockpit test fitted... brassin parts just slot into the position, they fit the eduard kit perfectly. And Aires gunbays (just dryfitted, not glued yet) I think I will thin the plastic a bit more...
- 19 replies
-
- 11
-

-
This is my public return to aircraft modelling, after some unhappy experiences I gave it up for a while and concentrated on 1/35 armour. I saw this particular scheme on an aircraft on Flickr a while ago and it got me thinking...... Knowing i had a couple of weeks off this past Easter with not a lot planned & browsing some well known websites i happened upon Tamiya's 1/48 F16CJ. I've seen a few of these built up into quite spectacular models with good reviews of the kits and one or two built into this particular scheme. It is out of the box with some Eduard RBF tags and a Eduard Sniper pod with some masking tape seat belts. The decals are from Caracal and they were superb. It's brush painted with Humbrol enamels, the final colour is a 80/20 mix of gunmetal & gloss black, the weathering is very light, in fact almost non existent as I decided in the end that I didn't want to spoil it with my usual cack handedness at weathering. Considering I started it at Easter it is only just really finished. It was an enjoyable build and went together without any issues at all, good Tamiya all the way, the couple of small problems were my fault and I managed to fix them to a point where I am quite happy with it. It's not your eyes, some of the photos are black & white. Those of you who are F16 experts or rivet counters may want to look away. F16CJ 1 by phil da greek, on Flickr F16CJ 2 by phil da greek, on Flickr F16CJ 11 by phil da greek, on Flickr F16CJ 10 by phil da greek, on Flickr F16CJ 9 by phil da greek, on Flickr F16CJ 7 by phil da greek, on Flickr F16CJ 6 by phil da greek, on Flickr F16CJ 3 by phil da greek, on Flickr F16CJ 1 by phil da greek, on Flickr F16CJ 2 by phil da greek, on Flickr Be gentle now. Phil.
- 17 replies
-
- 48
-

-
My last finish is this Tamiya 1/48 He219A-7. Only AM set used is the excellent Fug 220 radar antenna from Master Models. Cheers! Nanond
- 31 replies
-
- 81
-

-

-
Hello all, Finished bits and pieces yesterday and had a good play with my camera. Comments and suggestions are very welcome: BANANA FOR SCALE: Many thanks!!!
- 24 replies
-
- 43
-

-
Hi all, The latest aircraft to roll off the production line is a Trumpeter 1/48 J-7B built as an F-7MB of the Bangladeshi Air Force. This was one of the most trouble free builds I have done and that is down to trumpeter's engineering as they have done a great job (I know they don't always) as I hardly used any filler and comes with a nicely detailed cockpit OOTB. I have built this as part of the ongoing 80's Front Line Asia GB which has some excellent work being done in it and still has 8 weeks to go so if you feel like joining in there is plenty of time left to get a build done. Enough waffle, here are the pics; For those of you interested here is a link to my build thread; Thanks for looking in and as usual all comments and criticisms are gratefully received. Craig.
-
Time to make a start on my shark mouth GB entry - the F-105G from Trumpeter in 1/48. I have a Caracal sheet which includes a few shark mouth options - not decided which one yet but that can come later - I'm torn between one with a bigger shark mouth in standard SEA camo, or one with wraparound camo (which I think looks great on the Thud) and a smaller shark mouth. Here's the box shot: I'll be putting an Aires cockpit in it, so I've started today by playing around with the cockpit and thinking about how I'll fit it, and how much plastic I'll need to remove from the fuselage. I'll make a proper start tomorrow. cheers Julian
-
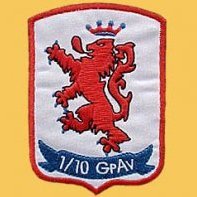
Italeri / Accurate miniatures Douglas SBD-5 Dauntless. Built As a A24B of Groupe de combat 1/18 "Vendee" France 1944 lovely kit, went together well, used some of a eduard zoom kit painted with my usual mix of acrylics, and using mission model paints for a first time, very impressed with them. Airbrushed with my new airbrush, first time i have used a double action one for over 20 years, happy with the result. thanks for looking.
-
I had meant to join in a bit earlier but things haven't quite gone to plan. I couldn't decide which Phantom to build so I'm going to have a go at a double build - this might be a bit ambitious as I'm joining half way through, but I'll have a crack at it. As both kits will have a lot in common it might be pretty efficient - I should be able to get parts from both kits painted at the same time for example. So hopefully I'm not overstretching my modelling time here! First up, Hasegawa 1/48 RF-4E: This is going to be in Iranian colours, probably the recent blue/grey scheme they've also been using on their Tomcats, using decals from Hi-Decal. Then the Hasegawa 1/48 F-4G (not sure why, but this has always been my favourite Phantom variant - it might just be from seeing one at my first IAT in 1985): This will be in Euro 1 colours using a Milspec decal sheet. Hopefully I'll get time to get started tomorrow. cheers Julian





.thumb.jpg.185722f59f1fa4bdb30ac86c07b06d0d.jpg)


