Search the Community
Showing results for tags '1/72'.
-
Even though my success rate for completing models in a Blitbuild is very low I thought that I would have a go at another with this Airfix Gladiator Mk.1. Some of the parts have been removed from the sprues but apart from that the kit is unstarted and it will be finished as the Shuttleworth Collection's K7985. Here are the box and sprue shots. by John L, on Flickr by John L, on Flickr Having completed this Spitfire entered for Blitzbuild 2022 - Part 2 on the 31st July this year, I should expect to have this done by mid-2024. by John L, on Flickr by John L, on Flickr John.
-
Hi all Been work on this lovely Kit, this is the Airfix 72nd TF.X built as a 144 Squadron machine, NE832. It was part if an informal GB but only a couple of us were in it. The scheme was chosen from the wonderful Aviaeology Decal set of the type. Although I don't have the 72nd Decal set so I used the stencilling from the kit and used code letters of the right type from Model Decal and Kits World although did not have black letters so had to paint them and serials from Xtradecal sheets. The cockpit has been enhanced using the Eduard PE set which really does take it to the next level and the undercarriage legs have been embellished with lead wire, fixed and flexible brake lines and hydraulic balance pipes and bump strips. The undercarriage doors are resin replacements for the Hasegawa kit and had to be extended a bit to fit. The Rocket rail bottoms were thinned and 0.45mm brass rods were used to make the twin round parts of the rails. The exhausts are a mixture of Quickboost and kit cut and glued together to get the best option. Paint is my go to Humbrol enamels and some Colourcoats brushpainted on . This one has had lots of post shading, drybrushing and oil washes to try and achieve the weathered appearance of this machine including the still visible ID stripes from D-day on the spine of the fuselage. The overall upper colour is very faded EDSG. Weathing after paint was with oil washes and weathering powders . This is what I was aiming for The above taken from the Aviaeology decal set sheet, for illustration purposes and can remove if required. Here's a link to the WIP This is what I ended up with Rudder actuators and rods added ang with trim tab ones too Edited as I have added the three aerials to the fuselage I would like to thank those who followed along offering support and encouragement and to Roger @Dunny for proposing the Informal GB too. Thanks for looking in Chris
- 29 replies
-
- 52
-

-

-
Hello everyone! This is my first foray into the Group Build area for a good while - I particularly enjoyed the OG Frog GB. I will not be able to be as prolific in this GB, but I am keen to say that I have sourced this beauty for the princely sum of £5! My dad even dug out a sky base for me! Albeit broken, the plastic has embrittled over the years, but easily fixed! My dad recalls that they never used to be particularly poseable, having nicked some oil to ensure smooth movement of the ball and socket joint! Box contents are pristine: Even more pleasantly surprising is that the 50 year old decals look very much usable: Can’t wait to get started! But will have to wait until my model club D-Day build has been complete. cheers Ash
-
As I’ve been getting bored waiting for filler to dry on the Wellington, I’ve started another build. This time it’s Airfix’s Spitfire Vc, which I got for £9 thanks to a 25% voucher from Hobbycraft: I think most of us have seen the sprues before, but have a photo anyway: I thought I’d open up the slot in the headrest armour for the harness, along with deepening the lightening hole indents (I didn’t see the point in going all the way through in this scale): A bit of detail painting and dry brushing later, and the tub was assembled: That’s all OOB, including the kit IP decal. I did use a set of Eduard generic RAF seatbelts, which annoyingly wouldn’t go through the slot I opened up! So I’ve tucked them down the back of the seat, which I know is inaccurate: I’ve not decided which aircraft to build just yet, but I’ve narrowed it down to two USAAF aircraft (but not the kit one as I’m not a fan of the style of the sharkmouth). I’ve got the decals on the way from Hannants and I’ll make my mind up when they arrive, but both machines have sky blue undersides. James
- 75 replies
-
- 12
-

-
Hi all, I started this build in August 2022, started losing interest, got distracted by some other kits and left it aside. You know the story... One reason why I lost interest was that the build proved more difficult than I had anticipated for what I wanted a quick and relaxing build. It is not a bad kit but the mould dates back to the MPM age and is not on par with more recent SH productions. It definitely is a short run mould and implies a lot of dry fitting, filling, sanding, priming, filling, sanding... Anyway, I got a KUTA at the beginning of the year and made some progress. Box art: Chosen Scheme: The SyAAF scheme was the reason why I got this kit: I found it was a nice alternative to the more classic RAF and IAF schemes. Build: I started the build with the ejection seat to which I added harnesses and details: It would have been easier to buy an aftermarket item but I enjoyed spending some hours on this... Once painted: Then, I turned my attention to the cockpit. The level of detail is sufficient as the canopy will be closed and this cockpit is rather narrow anyway. I only added the throttle handle. As for painting, well, black is black... The shape of the back of the cockpit and the rear plate are inaccurate. The Airfix cockpit is way better. I used the decal for the instrument panel. As little will be seen under the cockpit coaming, it was not worth spending time painting the dials. The whole thing looks OK once inside the fuselage: Assembling the wings was not really a walk in the park: The trailing edges are on the thick side but I could not be bored to thin them. The adjustment of the top and bottom of the engine nacelles is poor. In spite of a lot of sanding and dry fitting, I still had to use a respectable amount of filler. The instructions call for a small modification of the flaps. Nothing that a blade, a file, a needle and a ruler cannot do: The engine heads are not as nice as on the Airfix F.8 and the SH NF.14 but they are barely visible: More visible is the junction between the top and bottom halves of the nacelles: The Airfix F.8 and the SH NF.14 are much better. Then I glued the fuselage halves and fitted the wings. As there were no locating pins, I had glued some plasticard tabs inside one of the fuselage halves but it did not really help. I tried to have a flush fit on the top and, as a result, there were steps on the belly which I corrected using stretched sprue dipped in glue. The fit of the wings was not ideal either at the junction between the wings and the fuselage and on the underside. I had to force the fit during the drying time, file, sand file and sand a lot and restore the lost panel lines: The landing gear on the other side is really good and even better than Airfix's: Still, it looks OK at the end: Painting: I primed the model using Ammo One Shot sand colour. Of course, it revealed some defects that I had to fill, sand and fill and sand. Then, I painted the underside: I used Mr Hobby Aqueous H332 as per instructions, made some highlights and mottling using highly thinned H311 and shadows using a self-made smoke mix. A thin highly thinned coat of the base colour was sprayed to tone down the effects a little. Looking at the period pictures, it lacks a bluish hue but that'll do. I applied the camouflage starting with the sand. I used a 90-10 mix of H71 middle stone and H11 white. I made some highlights by adding more white to mix and shadows with pure H71. It was masked using panzer putty. The base colour for the green is H330, highlights made with H303 and shadows with H77 tyre black. I tried to keep the effects subtle as the aircraft on the period pictures are really clean: Decals: I never gloss before decals. It often kills the effects and I find it unnecessary for good decal adherence. Having said that, I always buff the paintjob to give it a smoother satin finish. I applied the decals and a myriad of stencils using Daco Strong. They are printed by Eduard and are of the "peelable" type. Though they are really thin and though I hate doing that, I prefer to peel the carrier film off: 1. to avoid silvering / lifting at later stages 2. because they really look painted on once the film is removed It took hours but the result was worth it and there was not too much damage. The sharp eyes will notice a blunder...😳 I faded the decals by airbrushing a highly thinned medium grey and applied a thin coat of VMS satin varnish to protect them. One big advantage of VMS varnishes is that you do not lose the effects, unless you pile up the coats. Their Matt varnish is fantastic. It took me some time to get used to their Satin as you absolutely must wet the surfaces and I do not like that. But now that I have got used to it, I find it really good. Next step will be the washes and it should be this weekend!
- 8 replies
-
- 12
-

-
- SpecialHobby
- 1/72
-
(and 1 more)
Tagged with:
-
The Hellcat seems to be my "go to" subject for when my modelling is a bit distracted. I'm deep in a BPK P-8A at the moment (fuselage complete, wings built about to be painted, engines being built), but progress is fairly slow, so I'm doing other things in the sidelines. This is the 1/72 Academy kit, using Freightdog decals for an aircraft of 808 Sqn immediately after WW2, at Trincomalee in Ceylon (Sri Lanka). 808 were part of the British East Indies Fleet, operating from escort carriers HMS KHEDIVE and HMS EMPEROR. The chequered cowling is a bit out of the ordinary for an RN aircraft, which adds a bit of interest for me ! FredT
-
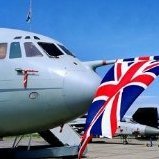
Caravelle. Swedish Air Force. ELINT
Pete in a shed posted a topic in Ready for Inspection - Aircraft
Hello from the shed. I'm still Chinook building so here is something a bit different I made in a fit of madness some time ago. I don't need to tell you what Mach 2 kits are like but they do make subjects that you don't usually see so that's one plus anyway. The canopy needed hours of polishing to get it remotely transparent and the rest of the kit needed carving to get it together. Nuff said! The aerials were scratch built as the kit items were unusable. It was painted with Xtra Colour enamels , the blue being sprayed, its not a decal. The windows were made using micro crystal clear solution. To be fair I've made a few Mach 2 kits (Super Frelon, King Air, Alize) and with a lot of work a reasonable facsimile can be hewn from the box. Anyway, here it is, hope it gives you hope if you have one in your stash😄 Pete Hope you like it. Thanks for looking Pete- 15 replies
-
- 50
-

-

-
I have only been back to modeling as an adult since 2020, and I'm fairly good (so far) at finishing what I start, but I had begun this 1/72 Tamiya Il-2 back in late 2020, so pretty much three years ago, and eventually it got shelved. Honestly, I think I was a bit overwhelmed with how good the kit was! At the time I had never encountered such high quality! Anyway, I got into other kits and especially some of my projects modeling a/c in the markings of lesser seen air forces (i.e., Hawker Hurricanes around the World, Last Legs Ponies, Minor Gustavs, Sexy American Singles in South American Service, and Spitfires-by-the-Seas). Continuing that interest, some time ago I decided instead of building the IL-2 into one of the Soviet box versions I would try to obtain Mongolian air force markings, which I was successful in doing eventually by finding one of the lousy Airfix kits that includes the Mongolian decals. Here are the main pieces, most of which have already been partially painted prior to assembly (don't ask). Time to get this one done!
- 33 replies
-
- 10
-

-
I’m getting back into this group build with a Hasegawa Ki-45 Toryu (Dragon Slayer), Allied reporting name Nick. I had this kit lined up for the Asia GB later in the year so will have to find something else that when the time comes. Started by putting the cockpit together and prepping some of the smaller components for painting. I added a little detail to the side walls for interest: The ejector pins wont be visible once the cockpit is in place. I forgot to rake a photo of the sprues before I started, here they are: Nice crisp moulding. Thanks for looking. AW
- 37 replies
-
- 17
-

-
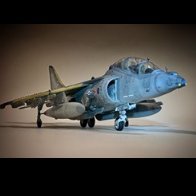
Here's Italeri's 1/72 Sea Harrier FRS1, which I built a little while ago - I didn't post it at the time but have recently printed a new diorama backdrop image, and wanted something different to park in front of it. It's been sitting in the loft for quite some time and is a bit dusty... didn't see that at the time but those close-up photos are brutal! I think it was mostly built OOB although that pitot probe is aftermarket (Mastercasters IIRC), as are the Sidewinders and RBF tags. I think the decals were aftermarket but can't remember which ones, sorry. Scratch built FOD covers, pinched from my recent T.4 build. Paint was Xtracylics and I seem to have been far too subtle with the weathering - not sure why, as most Harriers were somewhat dirtier than this example. Not the tidiest build ever but I'm still impressed at the sharpness, and lack of paint bleed, on the fuselage masking line between the DSG and the white!!! As usual with these diorama shoots of such small models, the above three shots are focus stacked from about 10 shots each (this creates the illusion that your eye is looking at something which is larger than it really is) and, coupled with a large photo print in the background, gives an effect which I love, especially as it's just a 6" long model after all. Thanks for looking.
- 12 replies
-
- 59
-

-
- 1/72
- sea harrier
-
(and 1 more)
Tagged with:
-
This one is the Airfix Starter Set, the kit itself needs no introduction. I started the model while I was on an Airfix Vampire kick in my Shackleton WIP, but was discouraged by some Humbrol Clear mistakes I made with the other two. I’m not really in a position to airbrush for a few days, and have the Twins GB yet to start. I’m also holding off a bigger project until the Shackleton is complete. I was going to turn this into a 14 Sqn. build alongside the Sword Strikemaster, but decided it was time to wrap up the Vampire quickly instead. Here’s the progress so far. I was raised with a bit of a Protestant work ethic, so my six-months-ago self did all the boring parts first. Great! I learnt a few little idiosyncrasies in the last few which are still fresh (make sure the fuselage doesn’t set twisted, listen to Airfix and install the main gear legs early), so this should theoretically be a nice simple build. I’ve had a good experience with the Stynylrez black primer recently, so I’ll try that again along with their metal primer as it looks like a good approximation of the high speed silver dope.
- 23 replies
-
- 7
-

-
Hasegawa F-104S ASA-M. Wolfpak decals AMI 9th Stormo 2004 Hasegawa AIM-9, weapon set V Master pitot Humbrol and some Xtracolor enamels brush panted Humbrol wash W&N matt varnish Finished in KUTA 2023 as link. Shown with: This month's other completion, Phantom FG.1, 1986 Another, Norwegian, F-104, mid-70s Closest in date, near contemporary, JASDF F-4EJ, 2007 Thanks for looking. Chris
-
I already have two projects (Hawker Hurricanes around the World and Last Legs Ponies) underway, both of which are providing plenty of modelling fun, but here I am initiating another one! This project involves modelling BF 109Gs (or their derivative versions, such as Spain's HA-1112 and Czechoslovakia's S-199) in service with the "smaller" air forces (i.e., not Germany or Italy). Some of these will be minor Axis (e.g., Hungary) and others are post-war or neutral operators (e.g., Switzerland). Partly why I am introducing this now even as I have other models as WIPs is that BF 109Gs are more complicated than I would have expected! I'm going to need some help in understanding all the nuances of canopies, tail heights, wheels, antennas, etc. I don't always mind being inaccurate, but I like to at least understand what would be accurate--then I can decide how to proceed. Here are the ones I think I have more-or-less nailed down (although even with these I'm not always sure which tail wheel or antenna to use) and the kits I intend to build from. in no particular order: Finland Slovakia Spain Czechoslovakia Croatia (with decals from Lift Here) Hungary (with decals from Lift Here as well) Israel (this kit is so old [1977!] I'm not sure it's buildable, but we'll try! (with decals from Tally Ho!) That leaves Switzerland, Yugoslavia, Bulgaria, and Romania. I have kits and decals to do these, but I need some Britmodeller help on questions around these...more to come!
- 181 replies
-
- 16
-

-
- Bf 109G
- Minor Gustavs
-
(and 1 more)
Tagged with:
-
Does anyone have operational pictures of VF-1 wolf pack F14A Tomcat? I trawled the net and can only find pictures of the F14A new and clean.
-
After moving home it’s time to refurbish the casualties of the move, there is nothing major just little bits and pieces that have gone astray, luckily I have a ton of spare parts to fix things. this early BMPT only has a few bits missing, nothing too drastic. the T 80s from trumpeter haven’t fared too badly, but they are quite robust models. The T 14 and T 15 apart from a couple of antennas are ok, they were never completely assembled anyway, the protective green is from Mig Ammo, doesn’t look too bad in the photos but is quite dark in real life, not sure whether it needs lightening or not. these have been painted in the new AK protective green, again it the photos it looks not too bad, a slightly different shade but still looks darker in real life and probably need a thin lighter coat? This T 14 probably fared the worst, antenna’s broken or missing, mg broken, slat armour dropped off, it was done as a bit of fun based on a photoshopped picture, the only Syrian flag I could find was in the SModels decal set in their Russian vehicles, however they are really thick and look more like stickers than decals no matter how much decal solution you put on them! i will just update this thread as I get round to finishing something!
- 24 replies
-
- 11
-

-
AZ Model is to release several limited editions from its 1/72nd de Havilland DH.82 Tiger Moth kit. Source: http://modelweb.modelforum.cz/2014/03/13/novinky-az-model-brezen-podruhe/?lang=CS - ref. AZ7472 - de Havilland DH.82 Tiger Moth Mk.II "International" - ref. AZ7473 - de Havilland DH.82 Tiger Moth Mk.II "Other users" - ref. AZ7474 - de Havilland DH.82 Tiger Moth Mk.II "Royal Navy" - ref. AZ7470 - de Havilland DH.82 Tiger Moth Mk.II "RAF" V.P.
- 18 replies
-
- Tiger Moth
- DH.82
-
(and 1 more)
Tagged with:
-
Happy New Year; could be a bit of a mistake, but while waiting for weathering to dry on Phantom I started decals on the F-104S which was the reason the FG.1 ended up on the SOD. These Wolkpak Decals go on very well, even the 2 part roundel, and nice density, never used them before. There are a lot of stencils for the tanks and upper side roundels and the only instruction is one side view. Chris
-
Here is one that has been languishing on the SOD for about 4 years and started back in 2019. Here is the original build thread I managed some paining of fuel tanks and the leading edge slats that have now been installed. In one of my recent moves the nose gear leg broke so and I could not find the missing section so I dove into the spares and found an Italeri nose gear leg that has been installed
- 7 replies
-
- 5
-

-
- 1/72
- conversion
-
(and 1 more)
Tagged with:
-
Hi All. Here is my representation of the Wedell - Williams Model 44 from 1931 using the 1/72 Dekno kit. A problem from the start was some major distortion with one of the resin fuselage halves that wasn't going to get sorted by hot water and a replacement fuselage was obtain from Dekno. As it was an open cockpit, some extra detail was added. The rest of the resin parts were assembled with no problems. Painted with Mr Hobby red and AK 3G gold. Kit decals. I lost the windscreen but again Dekno came to the rescue. Build Log here: Thanks for looking. Stuart
-
As one that doesn't normally build wingy things, after Santa had been to the Grandsons house, I had no choice but to venture into the aviation world and was ably helped and 'supervised' by him to build this. Straight out the box, painted with the supplied paints, although thinned with water and no weathering ...... Personally, I found this enjoyable, albeit fiddly as I'm not used too working at such a small scale and the Grandson seems happy with it ...... phew! Keith 😁
-
Hi all, as my Curtiss Seahawk nears decaling, I thought I'd take a look at a racer. So here is my next build, a Wedell-Williams Model 44 Racer by Dekno in 1/72, I have never built anything by Dekno, a producer resin kits of racers, Golden Age aircraft and subjects from the Spanish Civil War> I have a couple of resin kits under my belt and thought I'd give this little guy a go. The box. The resin. The decals and instructions. The instructions are one sheet, smaller than A4, one side for the build process and the other for decal placement. I don't think the build will give me any grief (that's done it) but I foresee problems with the painting and decals. The problem is the gold in that, I have to paint some parts gold and they've got to match the decal gold . Hopefully start this soon. Stuart
- 58 replies
-
- 16
-

-
I really should not be doing this as it is totally insane, but as my Stirling build has gone quite quickly I may have a go at this. It is certainly big for its day and not small even by modern standards! Whether or not I complete it probably depends on the other kits I have to build and whether or not we get granted an extension to this GB but I will give it a go, The kit was first released in 1967 and I must have bought it straight away as I can remember getting it from the old Frizinghall model shop, later Frizinghall Model Railways, which was just round the corner from my school, which I left that year to go to Uni! The shop closed quite a while ago after the business moved to a warehouse. The model survived 2 house moves but was then knocked off a shelf and broken beyond repair though I still have quite a few of the bits, and this is a 2012 replacement boxing. The nice thing about this kit is that the various main wing sections are split into upper and lower halves and unusually for the time Airfix have provided holes and instructions for some rigging, however basic. As you can see from the box art there were either 2 or 3 wires in most cases but I will stick to just a single one for simplicity and speed - not accurate I know but at least it gives an impression of the real thing. There were originally 2 paint schemes - an PC-10 over natural linen one and a Post War Nivo ("Night Invisible Varnish-Orfordness" which was the result of testing at that establishment to find the best colour for night bombers) overall version though the reboxing has two in overall Hu155 pretending to be PC-10. Two types of roundel and fin flashes are provided but just the one set of aircraft ID markings for both which seems a bit strange, and there is also an optional big single 1650lb bomb to be carried externally if preferred, though I will probably go with the normal internal load. I have very little info on this machine so it will be OOB with rigging and maybe some replacement Aeroclub white metal Lewis Guns. Liked I said, it may not happen and I doubt it will be finished by the current deadline but what the heck! I like a challenge sometimes, particularly after the odd glass of "Scottish Wine".😄 I had hoped to build at least one of my "V Bombers" in this GB but I just don't have time. Pete
-
Having completed my builds for the P-47 STGB, I am now down to two ongoing projects! I have not had so few ongoing projects since I returned to the hobby twenty years ago!!! To keep me amused for the next couple of weeks before the 2024 GB madness kicks off, I really fancy building this: the brand new Trumpeter 1/72 Grumman A-6A Intruder. It's really quite exciting. I have never built an A-6 before but have always wanted to. As you will see, the kit provides the options of building it with wings folded or wings extended with everything dropped: flaps, slats, spoilers - you name it. If it sticks out of the wing, this kit lets you build it deployed! I think I will build it as ready for a mission: lots of ordnance, flaps, slats, airbrakes and boarding ladders deployed but spoilers retracted. I have commented on this kit in the relevant Rumourmonger thread, so I will repeat what I said here. There is a lot of plastic in the box, which was smaller than I expected. This means that the sprues are packed very tightly. Some of them are wrapped with extra protection. Sometimes that doesn't help because everythng is so tightly packed. An example is the Trumpeter Mig-29, where the canopy was broken despite being carefully packed. . The A-6 canopy seems intact however. There are some odd choices with the ordnance. There are two MERs (despite four being shown on the box art). There are enough bombs to fill one with MK 82s and the other with MK 81s. Very odd. There are eight MK 20 CBUs and two M177s. There are also two GBU-8s but the less said about them, the better. They are vastly underscale. In 1/72 they should be 50mm long. They are actually 33mm long making them about 1/90 scale. The disappointing ordnance seems to be a recurring motif with Trumpyboss kits but it's not the end of the world. Extra MERs and MK 82s aren't exactly difficult to find. The ordnance issues notwithstanding, the actual aicraft parts look very good indeed with the notable exception of the fin cap. This is the same incorrect shape as that of the 1/32 kit. However.... a couple of minutes with a file or a sanding stick should rectify the situation.
- 40 replies
-
- 10
-

-
- 1/72
- Grumman A-6 Intruder
-
(and 1 more)
Tagged with:
-
UC-64 Noorduyn Norseman 44-70290, of the 20th Fighter Group, RAF Kingscliffe. From July 1944 this was the Group’s general communications hack. It was based at King’s Cliffe until 11th October 1945.
-
Greetings, dear modelling community! Some time ago, we finished the first test assembly of the Mig-23ML from the Ukrainian manufacturer Clear Prop Models. You can see the results here. The first assembly was aimed at checking the convergence of all elements, identifying flaws, and seeing what and where can be improved. The first test model was not painted. Now we are starting the second test assembly of this model, this time a full-fledged one. It is planned to assemble a modification of the MiG-23MLA, Czechoslovakia, serial number 0390324850. On the banner this board is shown as of May 1983, but I will assemble this board as of February 1983 - when it still had a completely standard factory color. The first test assembly confirmed all the expectations built into the model at the design stage. However, as a result, it was decided to make a number of improvements. One such improvement was the development of more detailed out-of-the-box photo-etching: The number of photo-etched parts has been increased by more than one and a half times compared to the original version, the detailing of each element has been revised and, if possible, finalized. This build of the model will also feature an additional Clear Prop Models resin accessories. Details are under development. At the moment, we can demonstrate the resin nozzle: A distinctive feature of this accessories (in addition to surface detailing) is the implementation of the peculiarity of the nozzle sag in the parking position. In out-of-the-box plastic, the nozzle is strictly symmetrical along the axis. This is entirely true for the flight configuration, but not for the parking one. During the assembly process, I plan on my own all kinds of improvements by hand. The model does not need any recutting, but I plan to improve and supplement the detailing of individual elements. Assembly begins with the cockpit. The first thing I can show is the cabin floor with all the elements: I made a new throttle so that this part of the cabin looked more voluminous. Native throttle has already been removed. In fact, this is the start. As updates become available, I will post them.
- 143 replies
-
- 28
-

-

-
- 1/72
- Clearprop Models
-
(and 1 more)
Tagged with:





Wedge-TailedEaglePortraitRaptorDomains.thumb.jpg.41a306d3445a68f0f2df773e01776ea6.jpg)
