

Stickframe
-
Posts
649 -
Joined
-
Last visited
Content Type
Events
Profiles
Forums
Media Demo
Posts posted by Stickframe
-
-
Hello gents,
I had some time this week so worked on the front body work of the truck. The basic idea was to use some parts from the RG31 kit, and modify them as needed, which I did. But, the modifications became pretty substantial. I started with the fenders:

As you can see above, I started with two fender wells, and spliced them together, as shown by the red arrows. Then, as shown in the upper left, I went about cutting them up to match the real truck. This was a complex project - and it took time and lots of styrene to make work. I thought about cutting out the area behind the louvers on the sides, but obviously didn't pursue that. While doing the rest of the reconstruction I added several brackets within to support the upper parts - in the end, not worth cutting into it.
Next up, the basic hood/bonnet assembly, which was another handful, as it slopes, tapers, and has two big vents:
So, just like the fenders, this piece is not flat, so I added a few ribs which I could hang sheet material on. Leading us to the hood/bonnet itself:
This is a monster - it's big! and complicated, but I went about it methodically. The silver material is from the top of a San Peligrino soda can, and is very close to the non-slip surface on the real truck.
Now, on to the really tedious part...the grill:
Unhappily, I didn't take photos along the way. But, how hard could it be to set 15 or pieces of photo etch material, set at a slope, in to a styrene frame? Well, it was not easy. It worked out, but took a long time, a lot of patience, and no coffee!
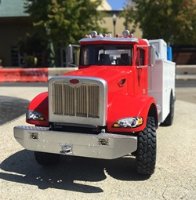
And where this beast sits today:
It's funny, in this picture, all of this looks pretty simple. As of now it is still square, sits level, wheels are centered in the fenders, and it looks like it's supposed to.
On we go!
Cheers
Nick
-
 7
7
-
-
The scary times - where to cut, make sure the cuts are square and measure more than twice! I was bit confused - thought maybe you were going to make the truck on the Titan cover, with the wrap around body, but, now understanding what "artic" means, a tractor it is! Looking good -
Cheers
Nick
-
1
-
-
What a great build! very nice!
I just looked at your work process link - very interesting to see how you built the roof over the cab. That is a good idea, which, I will try not to forget! 😄
Cheers
Nick
-
1
-
-
Hi Jeroen,
Thanks. I must say, that simple jig turned out to be very helpful and easy - some styrene sheet, four holes, and tape! I've kept working on the rear suspension:
There is a lot going on under there. I used the shock absorbers to mount the axles to the hull. I needed to extend each, and decided to run metal pins out both ends, which I could then plug into the axle and hull, to get reasonably strong connections. The torque arms are from the M1083 kit - I used metal pins for the connections, but didn't glue them until after the central bracket was glued to the hull. This allowed me to swing the arms easily onto their resting points on the diffs. The bump stop towers were a challenge. They have a sloping base, and taper to the top!
The base for the suspension are two big brackets, one on each side. These have a lot going on, and at this scale....well - they tested my patience!
This process was a bit draining - in terms of making the parts and then installing them. But here you have it - this still needs to be cleaned up, and I need to add bolt heads, but the toughest part of this suspension is done. Also, if you look carefully at the last picture, you'll see I added back the "V" shaped hull, over the area I removed it before. The hull needed to be cut to allow clearance for the differential, which is fine - but, once done, I just didn't like seeing the gap. Funny thing about this, and much of what we as model builders do all the time - much of this will never be seen!! 😁 But, I feel better knowing it's been addressed!
As to where we are right now:
Happily, the time spent dealing with the high tech jig was worth it - all six sitting flush - no space between the tires and the ground! Oh - and if you look at the hull in the last picture, you can see where I filled in the "V" - again - not that anyone would ever notice!
I think I'll take on the front body work next. It and the cab are both daunting in terms of the amount of cutting and pondering involved, so neither is really easier per se -
Thanks for having a look
Cheers
Nick
-
8
-
-
Hi model builders,
As part of said head scratching, it became apparent that the task at hand was to begin building the rear suspension. It looks eerily similar to a Hendrickson walking beam, which as luck would have it, I recently scratch built one of. From this two questions emerged - first, exactly what is under the real kit and what could I cobble together to at least represent it, and then, how would I set the correct ride height. It turns out, the answers come simultaneously, in that neither the RG31 or M1083 base kits have the correct parts, so time to mix and match and make something that is close. This process led to the realization that as the parts I have at hand are not the same as the real truck, the hull would need to be cut to allow for credible clearance - so, out came the knife:
By this time I had already glued two hulls together to get the correct vehicle length, which happily is a strong bind - because the cutting was hardly gentle! The hull material is thick. I filled the gap with evergreen.
With this resolved, I made up a jig to hold the rear axles at the desired height:
This little jig works to both set axle height and to keep things square. Believe it or not, I measured and made the walking beams while the axles were installed in the jig. While not exactly easy, it went well enough, and remained square - which would have been hard to say otherwise. Next was to add some brackets and tabs that aside from below, is hard to believe anyone will ever see again:
This was not a pleasant task- the tabs, all 8 of them are tiny, and the brackets are small and oddly shaped - ideal. You can also see in the pic above how I mixed the RG and M1083 axle and diff parts, and why I needed to cut into the hull.
Finally - the big test:
Not exactly high tech - but, you can see the ruler sits level spanning the front spindles to the rear axles, so a small victory!
On we go
Cheers
Nick
-
6
-
-
Well guys, we have started. Unhappily for me, I am still waiting for some materials, but I have enough here to at least get moving - including some construction and some studies - first up, the reality of what Jeroen @JeroenS mentioned:
After gracefully yanking my first attempt at this building from its comfortable resting place, and then repairing it, I went ahead and identified some of the highs and lows:
Right - the good and the less good (bad). This was a pretty helpful exercise - and in conclusion, yes, still think the basic concept is good to use, but as you can see above, a variety of elements need adjustment, including proportions, omissions, and details - ha - I guess that includes about everything - lol. A different comparison:
Right....(again). In this case though, the first build is correct, in that the cab from the donor kit is indeed too narrow - and, as such, the new model will also get widened and shortened and so on.
I have made some progress:
As you have likely gathered, most of the base kit will get cut up or modified to make this build work. First to go under the knife is the hull. The lower portion of the door frames are attached to the hull - but, as the cab will be widened, and the hull won't be, I needed to cut them off the hull, and then glue them directly to the cab. You can see the area removed in the lower right (shaded blue), and you can see the hull with this area removed on the lower left, though it's not that obvious in the pic. Also went ahead and built most of the front end. I went ahead and made the steering posable. The kit suggests that it should be posable, but once you attach the pitman arm and draglink - well - it's not. So a guy went ahead and cut up and drilled out all the heim joints, and added thin bits of wire CA'd in place, and now, it's posable!
As to that giant photo of PE. A distinctive attribute of this truck are the vents/louvers on the front fenders - last time, well, I tried....this time, if, nothing else works, I want those to look better, and I think this material will help. Speaking of those majestic front fenders:
So, in order to get these proportions right this time, I've been looking carefully at how this works in real life, and how I might translate the materials I have to get close to the real thing with the build. Above, you can see I superimposed, an inverted and elongated line drawing of the kit's right rear fender, over the real truck's left front fender. You can also see I couldn't help but add an image of the PE louvers - which I like!
An important part of this figure is the vertical dashed red line, showing where the cab lines up relative to the rear shackle of the front leaf spring pack. And below, I superimposed the parts I have over the same base truck drawing:
This includes the front end shown above (with a tire and wheel used on the first try of the build) and the cab. For reference points you can see where the dual shocks, shackle mount, and driveline align, and how the fender might work. And below, a stripped down version of the same:
Please note, the red vertical line, showing the cab and shackle mount, and how far back the cab will need to go. You can also see where I need to cut the cab to add another door, and the area inside the red dashed oval, where those projections will be cut off and sanded flush.
So, thanks for having a look - as materials arrive, I'll keep going -
Cheers
Nick
-
7
-
-
Hello gents,
Well....hoping it works! and yes, this will include lots of head scratching, and plenty to worry about 🤪
Last night I went back to look at the version I built about ten years ago. I "wisely" glued the model to the dio base - that was a good idea....well, not really. Thinking in the present, I pulled the kit off the base, managing to successfully pull apart most of the front axle and whatnot (not in just one piece), some body parts, and about half of the rear suspension. So, task number one was to rebuild the previous version. The rebuild was probably a good step as it forced me to carefully look at what I built. While my construction quality leaves a bit/lot to be desired, the overall concept for the build seems reasonable. Unhappily I have practically no recollection of the nuance of the build, or why I did what I did along the way. I also concluded that I was a brave model builder back then - relying more on enthusiasm than ability. When the materials I ordered arrive, I'll begin this project.
I also took a look at the sprues in the RG31 kit, and was surprised to see how many extra parts came with the kit including a hull, two axles, and all sort of various bits - as to the grill, which it turns out I won't use anyway, came with the end snapped off, and the remnant part was not in the wrapping - weird? must have broken in the factory - which would be annoying if I was planning to build the kit OOB.
So, hoping to start posting some construction in the next week or so -
Cheers
Nick
-
3
-
-
Hello model builders,
A few years ago, I built a model of this truck - I really like its looks, am a bit of a truck nut, and appreciate that it's a big tough 6x6! My attempt at building this came out reasonably well, but I think I'm a better model builder now, and want to try again.
This GB seems like a good place to do so!
Unhappily, no unboxing of instructions and parts to share, so instead I came up with this snappy graphic to illustrate what we'll be getting after:
The image on the bottom is the RG33 SOCOM AUV (armored utility vehicle), which is a big - - 8.8+ m long, 2.7 m wide, six wheel drive, a four door crew cabin, flat bed, and rolling in at a heavy-weight of 74,000 lbs! (33,500kg!).
I'll start with parts from an RG-31 for the fundamental elements of the cab. As you can see though, the RG-31 is a much smaller truck than what I'm building, so the cab will get widened, and surprisingly shortened. Meanwhile the chassis (which is a blast resistant hull rather than conventional two rail frame) will get longer. I'll also use some parts from the M1083 kit, which is a 6x6 cargo truck. I don't know exactly what of this kit I'll use, but my sense is, it will be good to have handy. While the M1083 is also a 6x6, I don't know if the rear suspension is right for this truck, which uses something that looks very similar to a Hendrickson walking beam, but will know soon enough. I'm hoping the axles will be fine for what I want to build - fingers crossed 🤞 😁 ! And, this project will require plenty of styrene and my (mercifully) deep model building junk box!
I am waiting for some supplies to arrive, so can't start just yet, but when I do, I'll start posting.
Cheers,
Nick
-
9
-
-
Hi Jeroen,
As is much of the time with your builds....excellent quality - and you don't seem to know the meaning of a slow build and your mojo seems to be back 😄 Looking good!
Cheers
Nick
-
1
-
-
Hi @Robert Stuart, thanks for the "OK" - I hope to start the kit in the next few days, and will open a build thread soon.
Cheers
Nick
-
2
-
-
@Robert Stuart, as I noted in my inquiry, "As I understand it, the RG-33 (AUV) is intended to carry troops and gear, and is not an assault vehicle", but as you underlined in your reply, the key qualification to participate in this build, is that the "primary role is transporting, loading, or carrying". So a guy went ahead and looked up the mission of the vehicle and found this:
I don't know, beyond what is noted above, what SOCOM might consider the role of an armored utility vehicle (AUV) which "enhance(s) SOCOM operations" to be, as it includes a remote weapon system (CROWS), which I suppose could be used offensively or defensively.
As this is ambiguous, I guess I'll sit this one out, and go ahead with the project separately.
Cheers
Nick
-
Hello model builders,
This looks like a fun project - with all sorts of interesting models being built. I'm just about to start a vehicle called an RG-33 SOCOM AUV. It is a modern 6x6 truck, which includes a 4 person cab and a flatbed. The idea is to start with a model of an RG-31 MK5, which is a 4x4, and do a fairly major conversion, making it into the 6x6 variant. This is the desired vehicle:
And this is what I'll start with:
Both units are shown with a rooftop weapons system, the RG-33 is shown with a remote weapon station, and the RG 31 with a gunner's position, but I certainly don't need to add either. As I understand it, the RG-33 is intended to carry troops and gear, and is not an assault vehicle.
I built one of these before, but I think my model building skills have since improved, so I want to do a better job. In addition to the RG-31 donor kit, I will use an M1083, which is a 6x6 for some of the suspension and bed parts. I've located my old research, and realize, this: a) might not work, and b), will be a handful to try! But, I am going to go for it anyway.
Is this project ok for this group build? Please let me know.
Cheers
Nick
-
4
-
-
This looks great! glad to see it all buttoned and looking sharp - well worth all the hard work!
Cheers
Nick
-
 1
1
-
-
@Toftdale, hi Andy, well, yes! glad you made your way to see the dios! There is lots of interesting work going on - and, as you have found, quite a variety of subjects! Thanks very much for the enthusiastic reply to this project. It's admittedly a bit/lot odd, but, it was equally interesting to try and develop and build. Cheers!
@Homer, thanks very much - thank you for having a look, and leaving your thoughts -
Cheers
Nick
-
1
-
-
Mr B McM,
Something seems to be going around. I know a few folks, including to some degree myself, that are stepping back a bit - for as many reasons as the day is long.
Take care
Nick
-
HI Ken, of all your builds, I think I really like this one the most!
Cheers
Nick
-
@Challenger77, you certainly seem to be cooking right through lots of builds!! and the buildings are looking good - you also seem to have used lots of different kit suppliers, which is fun to see. I used to like the old Campbell, Scale Structures, FOS kits and so on. It looks like you've gotten pretty close to the the old "Weather-it" solution for your base stain - I could never get something I Iiked, or that was nearly as nice as the Weather-it results. It's a bummer that stuff is gone!! I will be trying some Hunterline colors on an upcoming project or two. OK, looking forward to seeing what you build next - and how you lay all of this out!
Cheers
Nick
-
1
-
-
@Model Mate, thanks very much, and glad you like the project and photos. I've come to enjoy making the final presentation of a project. As this is an odd build, getting the images to look "right" was important to me to help with telling the story. Unhappily for me, I don't know how to use Photoshop - so, I take a different approach. I take the pictures of the project outdoors. On that day, there was ambient bright light, as there was almost uniform white fog - unusual for here, but good for this!
Next - I reduced and then made cut-outs of the images that I wanted to use, with...."Photoscape" it's a free online graphic packages. Next, and don't laugh if you are good with graphics 😄 I import the cutouts into Powerpoint and drag them over whatever backdrop seems right., Tedious????? yes, very! The images are then made using the "snipping tool"...as small jpegs....yes, very analog of me! 😄 and, there are no filters - just pictures over backdrops.
@Celestialsphere thank you! I have built a couple of "out there" projects before, but most have been more realistic - and intended to reflect something that did, or could have happened. This was a pretty big leap for me, and I was frequently tempted to build something as it would look "normally" - but like the Turtle, looked for ways to do something believable, but maybe not what you'd see otherwise.
@Toryu, thanks very much - you might laugh at this, but I usually do what you describe too! trying to achieve of accuracy. I think that actually helped with this project. I've learned plenty about how things work and look doing various detail-up projects, and think that helped with establishing the credibility of this - who knows? it was fun to build!
@Zoran Srb, hello, and thank you for sharing your thoughts on this. For what it's worth, I usually build modern armor subjects and various automobile/truck projects. so agree, this is intentionally weird! This idea just kept floating into my head, so decided why not? Like any other project, do some research, collect some images, sketch out an idea and get started. And, it allowed me to thin out my collection of unbuilt kits!
@Bertie McBoatface, well Mr McBoatface, thank you! and, well, you raise some good, and interesting questions, which I appreciate! I am indeed pleased with the end result, but don't think I'd use the word "accurate" as I made this up, using the work of McQue and other for inspiration - but for some reasons that are relatively subtle.
First though, I went back to the folder on the project - and made up some images - first, some example of Ian McQue's work:
I have read his work described as conceptual art - I like that phrase, so am sticking with it! You can see industrial and nautical influence. I can't discern a cause for any of this, nor do I see it as being violent/zombie/post apocalyptic, but, clearly whatever is going on, is not the same as what we see today as "normal' - and I like that combination of elements.
Next was to consider, how might these images translate into something or someplace closer to what we know, see, or could see today:
I collected lots of images before really getting going on this build - to help develop and refine a concept.
I liked the idea of merging industrial and abandoned places and objects. As I had the two little WASP models (which are designed by McQue) I decided up front that this project would somehow incorporate them.
Regarding the aircraft carrier - I also considered off-shore oil rigs - purpose built and distinctive (which aircraft can land on), but both are at a weird, uncommon, industrial scale - we've all seen pictures of these, but until you walk on one, don't get what they feel like. And images of abandoned places, with faded paint, overrun look, a bit creepy but not terrifying, added to the overall look I was after.
The Chevrolet pick-up above made me think of adapting the Skoda kit into something else - the sweeping curves, headlights, smiling grill, and 4x4! The halfcab reminded me of McQue vehicles in general, so perfect - funny story, those trucks were 6x6s used in agriculture, and were built about a mile from where I live! Those inspired my little 6x6 Wasp recovery rig.
The overall idea was to focus on life and activities surrounding a remote, mobile control launch station, and a tall, abandoned building. This took a while to get dialed in - below is a concept image:
Above - I had the HET M1070 tractor and trailer in the stash - and had it for a long time. It seemed to be right as the mobile part of the project - but, as projects/places? like this favor tracked vehicles - the M1070 was converted into a half track:
Back to the overarching question, I think the project does portray a reasonable interpretation of the character of McQues work, and maybe more importantly, in a non-violent context. I raise the latter, because it would have been pretty easy to up armor/Mad-Maxify the overall look - and that is not what I did. The project includes two armed sentries, but they are relatively low key - I interpret them as being more of a commonly found or expected attribute of a place like this, than anything focal or unnecessarily dramatic.
OK, this shouldn't become a dissertation! I enjoyed building the project, and appreciate each of your comments - like Ron @silver911 and Pete @Pete in Lincs in the beginning, thanks to you all for contributing to this project!
Cheers
Nick
-
3
-
2
-
-
@Pete Robin, thanks, and glad you like it - I'm glad you noticed the layers. That is what was becoming a real headache to finish! just more and more!
@silver911, Hi Ron, thank - -again, thank you for sharing your thoughts and critique along the way! It was too easy to slip out of the desired world back into the real world during the build - your input helped to keep me on course!
@MRMRL, hello MRMRL, and thanks. I appreciate your comment about this not falling into the Max Max apocalyptic scene - while there are lots of interesting projects that involve those ideas, I wanted this to be seen as something else - your comment is nice to read - thanks!
@Gordon J, appreciated - thanks. If not for getting a bit burned out on this, it was for the most part an enjoyable project too!
Cheers
Nick
-
2
-
-
@Pete in Lincs, Hi Pete, thanks - I appreciate what you have to say. You're right - there are a number of layers built into this - likely why it became so hard to finish! It was never done! 😁 Well - it's done now and I'm glad to hear you like it. Thanks for sharing your thoughts on the project -
Cheers
Nick
-
1
-
-
Hello, and happy Monday gents,
Thanks for the words, and glad to hear that you like the project! Despite my ebb and flow of enthusiasm about finishing, I'm pleased that it is done! I'd been pondering McQue's work for some time and couldn't settle on how I could go about representing it. As those of you who watched the build thread might recall, this was a bit of a wild ride, or at least as much of a wild ride one can have have while building a model! 😄
@roginoz. hi Rog, and thanks! no, you didn't miss postings, I did! For a while I was on a bit of a roll and making headway - then off the proverbial cliff of enthusiasm I went! strange eh? Going from having a pretty clear picture of what this "should be" and acting to make that happen, to "meh, I think I might have something/anything else to do today..." 😄 I'm not even sure of why I eventually concluded that I needed to take the last few steps to wrap this up and take some photos! Maybe even related to your comments, (thanks for!) this project required an almost tedious level of continuity to work! which, in the end was worth it 🤪
@Pete in Lincs, and Pete - thanks! I began to wonder if I could pull this one off, or moreover, if I had it in me to do so! The pictures worked out as well as I could have hoped. Turns out I finished the project on (last) sunny Friday - and concluded that the predicted, equally sunny Saturday, would be be ideal for photos. Except, of course, sunny it was-not! Instead, we were fully cloaked in fluffy, white fog.....well shoot. Not to be dissuaded at this point, into the fluff we went to a nearby picnic bench, where I took the obligatory numerous photos. Turned out the fluffy white fog provided some pretty interesting lighting - on one hand bright, but essentially ambient, so cast relatively subdued shadows. I mention this because I think the lighting is what allowed the pics to be cut into the backdrops with said surreal results - ok - enough rambling - glad you like it! Regarding getting this into an exhibit of some sort, I might just be able to do that. The City I live in has a summer arts/crafts show, open to local folks - I might just go for it!
@Tim R-T-C, well Tim, I appreciate all of that! This project required a leap of faith, both to build, and for you and others to take a look at and follow along! I've got to say, one of the bigger challenges for this was remembering not to do/build/paint what we would naturally expect to see - which seems easy enough, but it gave me a run for my money!
@Muchmirth you raise a good point on one of the more tedious attributes of this project - sustaining continuity!!! Maybe that's why I got tired out at some point 😁 That said.....it would have been a bust without all those weathered bolt heads! 🤪
@stevehnz Hi Steve and thanks very much! It's funny you'd say that. I spent a lot time thinking about what remote places I have been to looked like - and trying not to think about what I imagine they might look like. And if I could do that, somebody might be able to look at all of this, and follow what's going on without narration!
Thanks again -
Nick
-
2
-
-
Hi dio builders,
I started this project in mid 2021, a Covid lockdown was being enforced where I live, and work was fairly slow. What better time to build an admittedly weird project? I glued the last figures down last night and took pictures this morning!
I have long been a fan of Ian McQue's conceptual art - it brings nautical/industrial imagery to an alternative future - I don't know why this future is, or if there is any intended message to go along. My sense is that it is not violent or apocalyptic (and this project is not a Mad Max zombie, fallout or violent scenario) - but it's clearly not what is going on today. Many of the craft are anti-gravity - that is, they float in air! All of this is conveyed with a distinctive graphic style that I like - it brings a professional tightness - with a whimsical attitude, but not cartoon like - there you go - perfect.
As I am more of land based guy, I decided my McQue inspired project would be largely land based, but, not completely - South Station would be the home to 2 McQue designed Wasps - small anti gravity aircraft. The place would be populated with some pilots, mechanics, deck and recovery crews, and a group of others who manage the vast area the Wasps patrol. I'm guessing they would all live nearby, and the station essentially a home base - with communications and shops. It includes a mobile station and a remanent build from whoever was there beofre.
I kept a few self imposed rules in place, first being not to let my thinking get too uptight and keep in mind the "spirit" of McQue's work, and - no new kits - all from the stash, or whatever I might have salvaged from other dios before I tossed them. I did allow myself to buy lots of evergreen. Ok, here we go:
South Station was pretty remote - there was a mobile base - and long abandoned elevator tower. We took it over because it was in the shadow of the highest ridge in our sector, there was a spring and well, and it was pretty easy to get to.
The tracked M1070 could pull anything anywhere! We brought solar panels for the powerpacks, and our microgrid, but it ran mostly on net zero hydrogen fuel cells. We had more power than common sense - this place was remote!
The old man ran the place - which was pretty interesting and funny - he was a bit of a nut. Guess he had to be - kept us busy on missions, we had fun out there - lol - odd crew too all sorts on our team -
We were always repairing the Wasps - and fixing other rides - and building all sort of stuff - it was non-stop which was pretty funny - this was a small post in the middle of nowhere with a big crew with plenty to do!
The Wasps were almost completely silent - which was weird - never knew if they were coming or going - and that flight deck! I know - anti gravity is no big deal blah blah - but man watching the pilots drop them into those bays! Just weird - And the guy with the gun - Chet - we had two sentries. Him and Carol - She was perched on the tower with a .308. I don't recall either of them ever shooting at anything other than to pass the time!
There's Carol - with that .308 -
That's Val, on the perch - haha - he'd stand up there yelling at the recovery crew - he was always barking off orders! lol
And there you have it -
A special tip-o-the-Xacto to @Pete in Lincs and @silver911 - Pete and Ron, thanks for sticking with this project! Your keeping the ideas fresh is appreciated!
Cheers
Nick
-
38
-
3
-
-
Your process is very interesting to follow. I'm looking forward to seeing how you handle body form/shape in the areas to be filled. Another part of our ongoing discussion on how you form flat pieces of styrene into what look like some challenging shapes! Keep at it, and please keep us up to date on your progress!
Cheers
Nick
-
1
-
-
I like the look of that car! looks very convincing as an early gasser 😀
cheers
Nick
-
1
-


RG33 SOCOM AUV
in TLC - Transports, Loaders and Carriers
Posted
@JeroenS and @dnl42,
Hello gents, and thanks for having a look. Ha -I appreciate both of your observations, as this is indeed turning out to be a beast of a model. I'm using quite a bit of sheet styrene (well, actually a lot of styrene in general! 😁) as thin as .010" and thick as .040". I'm using the thicker material to prevent sag and twisting, like on the cab which is well underway, and also big and boxy.
Making this at least somewhat precise, I was able to obtain some key dimensions, and while not comprehensive, many of the measurements are included, like wheel base, axle spacing, width (s) and height (s) which have been very helpful. So as big as this looks, so does the real thing.
I'll post an update in a few days,
Cheers
Nick