Search the Community
Showing results for tags '1/35'.
-
Hi All, Latest project started few days ago, not a massive WIP, build is simple ish, just adding a few aftermarket bits, Aber cleaning rods, Panzerart barrel when it arrived, R model tracks, have 3d tools but the brackets I have for shovel and axe head are not good enough, tools and clamps by mig. Will be Richard Freiherr Von-Rosen machine nr 300 Paderborn Sept 44. Read his book - very interesting read finished a General in 1982. hoping the rest comes up as good as the wheels, just cannot see if sprocket and idler were cam from the video clip. Cheers All Mark
- 61 replies
-
- 20
-

-
For some reason, I have found myself building two SdKfz 234/2 "Puma" Armored Cars in tandem. I just got the RFM version and have had the Dragon kit in the stash for almost 20 years. Time to build. The kits are VERY similar in construction breakdown. Both kits are excellent with the RFM kit being molded a little bit more precisely and finely perhaps.
- 64 replies
-
- 11
-
-
- Rye Field Model
- Dragon.
- (and 1 more)
-
Here is my contribution to the group build, the Nahuel DL 43 was an Argentinean medium tank produced in 1943 and heavily inspired by the American Sherman. Only 12 were built in total, for several years they were used for training and the occasional parade. In 1947 they were given an upgrade with new crew hatches, radios, machine guns and tool storage. Soon after Argentina acquired several hundred Sherman tanks tho making the Nahuel redundant so they were put into storage until 1959 when they were all scraped. Most of the Nahuel's documentation was also destroyed, meaning that some of the details of this tank remain a mystery, even the basic dimensions are unknown and historians have had to take their best guess based on the available photographs. Your choices for building the Nahuel are limited to either a resin kit from Aconcagua Resin Models (out of production and extremely rare) or a 3D printed kit by FC Model. Why buy an expensive 3D printed kit tho when I can just design and print my own one... Thus far I've made the basic shape of the hull and turret, I'll make the running gear next and then add all the smaller detail to the hull and turret later.
-
The last radio message sent by the survivors of Col John Frost's paras at the north end of Arnhem Bridge, just before they surrendered on 20th September 1944. This small diorama consists of a mixture of Miniart, Dragon and Tamiya figures. The Miniart ones were disappointingly poor and softly moulded, only saved by being supplied with resin heads(although still not as good as Hornet). The guy being searched had to have a hand transplant as the originals were like spades! Luckily I had a couple of Alpine ones in the spares box. The seated figure is an amalgam of bits from the box with a green stuff putty blanket. Road is made from individually cast and laid plaster cobbles, which took a while but I think looks better than moulded roads. Zen modelling at its best. Discarded webbing is made from masking tape and spares from the Miniart box. All comments welcome as usual
-
Having been hanging around in the group build section far too much lately, it’s time to get back to the armour building section. My next build is going to be this armoured bulldozer for my D Day sword beach project and part of some D Day group builds elsewhere. Kit is by mirror models and on first inspection is pretty good, mostly plastic with resin parts for the dozer blade assembly. The instructions would have you build the engine first which is quite detailed but give armoured sides you’re not going to see a lot of it. I skipped it initially and built the chassis first. The plastic is quite soft, detail Is good but a little on the soft side. Very few parts have positive fit locators and most joins are butt joints so it pays to take the time. The chassis arms in particular are quite flexible and I slowly worked my way along fitting and gluing. Tamiya extra thin works very well on this plastic so very few parts needed clamping, glue and hold for a few seconds and it stays solid. Despite the lack of locating tabs, the fit is surprisingly good. One part that didn’t fit well was the end plate for the drive box. It has bevelled edges but didn’t slide into the gap nicely so I had to shave ~0.5mm off each side to get the fit. With the chassis built I then built the superstructure so I could see how much of the engine would be visible. Again, despite all the plates being butt joints, it went together very well with only a couple of very minor gaps. I need to check my references to see where I need to add weld lines. Next I started work on the engine. With the superstructure and chassis dry fitted there is very little to see other than through the drivers area and a gap at the top above the radiator. Unfortunately, a fair amount of it is needed as it supports the exhaust stacks etc that poke up through the top of the armour. Part way through the build and there’s actually a few bits added that in hindsight aren’t needed but it’s hard to tell from the instructions. I’ve also picked up a few of Gecko’s new beach obstacles and an accurate armour driver to turn into a little diorama.
- 75 replies
-
- 20
-
-
- 1/35
- mirror models
- (and 1 more)
-
 Mes amis, as seems to be the general custom with Group Builds, I've allowed this one out of it's tub in the loft with no guarantee of getting finished. I present to you Tamiyas Mid Production with an Eduard 'Big Ed' photoetch set .... I'll be building this as (another) tank 131 of Panzer Abteilung 101 deployed in Normandy 1944 .... how timely! So, without further delay, let the shenanigans begin! 😬 Keith 😁
- 93 replies
-
- 11
-
-
Just finished this trumpeter 1/35 Challenger 2, and it was nothing if not challenging! Maybe because I have recently been on a diet of Tamiya AFV's, but this one was a challenge. Poor mould quality and poor fit seemed to beset most of the parts on this one so glad to at least get it over the line and finished. Figures are from Miniart. Airbrushed with Tamiya acrylics
-
 I thought I’d put a placeholder thread up ( lead by example and all that) I shall be building four ( possibly five) Tiger variants. My four definites. The possible fifth, which if I build it will be a combination of resin copies from the four kits and scratch built bits….
 -
Here is my contribution to the group build, HobbyBoss's VK 45.02(P) "Vorne". The VK 45.02(P) was an improved version of Porsche's earlier VK 45.01(P) updating the hull with a new sloped armour layout and a new turret equipped with the larger 8.8cm L/71 gun. Development of the VK 45.02(P) didn't leave the drawing board and it was canceled in favor of Henschel's VK 45.03(H) design which went on to become the Tiger II. I had originally planed to 3D print a VK 45.02(H) for the group build but due to some technical problems I was unable design the 3D model in time. For now I'll build its brother/rival the VK 45.02(P) and the VK 45.02(H) can join it in the future. Here are the obligatory sprue shots The hull is made from two upper and lower parts and not much more... Four sprues for the running gear, along with the few tools and handles for the hull. Most of the plastic in the box is for the turret which comes with a fully detailed interior. The tracks are individual links with each sprue containing four tracks with six connection points each. They should keep me busy for a few days... The kit comes with some photo-etch for the engine grills and also includes a generic set of number decals. Curiously they suggest painting the tank in Dunkelgrau even tho it had been replaced with Dunkelgelb by the time development of the VK 45.02(P) had started. Looking at the kit there are a few issues that stand out. The weld seams are very messy and misaligned, the ones on the side of the hull are ridiculously over sized too so I'll need to fill and re-scribe them all. The tank is also missing fenders over the tracks, I'll try to scratch build some from metal but I might also design and 3D print them instead.
-
I've been looking forward to this GB as I have a great love for the weird and wonderful world of concepts and prototypes and have lots of options in my stash, but due to circumstances I wont be able to access my workbench for the up coming 4-5 weeks. I dont want to have to wait that long to join in the fun though so I'm going to use the time to instead design a 3D printed model on my computer, I can then print the parts and build it once I can get back to my workbench. I have list of ideas for 3D print projects a mile long but I've whittled it down to these options for the GB... American Holt 150t Field Monitor This was an early American tank design from 1915 that was intended to protect the southern US boarder against raids from Mexico. The US Army wasn't interested tho and it didn't leave the drawing board. I was inspired by Gorby's 1/48 scale scratch build of this beast and have wanted to try building one myself in 1/35. French FCM F1 A French heavy tank design from 1939, production was planed to start in late 1940 and it would then have spearheaded the planed French invasion of Germany in early 1941. The Germans invaded France before production could start though and none were built. One of my favorite French tank designs, its a big box on tracks with a big gun that could have blasted its way through any German tank it would have encountered in 1941. Polish Czolg Pancernik (Battleship Tank) The Czolg Pancernik was one of several tank designs by famed Polish sci-fi author Stanislaw Lem. In 1944 he submitted his designs to the Soviet State Defense Committee who wasn't interested and filed them away in an archive were they remained until rediscover about 10 years ago. A 220 ton quad tracked tank with 6 turrets that looks like something out of a 1960's sci-fi film, what's not to like! German Großkampfwagen/K-Wagen German heavy tank design from 1917, two prototypes were under construction when WW1 ended, the treaty of versailles restricted Germany from owning tanks so they were scraped. I made a 3D model of the K-wagen 5 years ago but never got around to printing it, which was somewhat fortunate as since then some new drawings have been found that show the shape of the hull and suspension in better detail. So I want to rework my 3D model to make it more accurate. Russian Tsar Tank The "Tsar tank" was Russia's first attempt at making a tank, a single prototype was built in 1915, during its first trial the rear wheel got stuck in a ditch and it was unable to pull itself out, putting an end to the trail and its development. It remained in the ditch until 1923 when it was dismantled for scrap. The complexity of the Tsar Tank both scares and excites me... I'm still thinking about which one I want to make and probably wont make a decision until the last minute, feel free suggest which one you'd like to see me build tho.
-
Hi all! I have the Tamiya 1/35 Pink Panther Landrover and was wondering if I could use a Firing Line British Soldier w/Wollen Pullover as crew? The instructions says it was in use from the Korea War up to the mid 90'es. Would a SAS soldier use it? Cheers Hans J
-
Here's a "quick build" project that I was able to start and finish in a few weeks. This is the 1997-tooled "new" Tamiya Kubelwagen which is an excellent kit. It's been in my stash since it was released 27 (ulp) years ago and I'm now wondering why I haven't built several by now. Figure is Tamiya with a Hornet head and the signs are scratch built.
- 12 replies
-
- 27
-
-

-
 Hello folks, After finishing my vintage Italeri Crusader I (which I enjoyed a lot) I couldn't resist building another Crusader. This time, it is again an Italeri kit, Crusader Mk. II is a bit newer edition, but the only addition compared to Italeri's old kits is some new parts, mostly figures. The model is based on a tank on a reference photo captioned 'Officers reviewing artillery positions on escarpment south of Mersa', 3rd County of London Yeomanry (Sharpshooters), Egypt, 1942' so it should represent a 3CLY Crusader, according to the reference photo, close support version. The tank didn't have any markings (which was quite common for the Crusaders in this period), but being a CS tank, I guess that it probably belonged to the headquarters. At this time, the 3rd CLY was part of the 22nd Armoured Brigade, famous for its creative camouflage. This one is no exception and the reason I wanted to build this particular tank. The photo was taken in June 1942, at the time when Mersa Matruh was taken by Germans after the Gazala Battle and 3rd CLY was relocated to the escarpment south of town. Not long before this, the 3rd CLY was involved in the intense fighting around the Cauldron and the Knightsbridge Box during the Gazala battle. The only AM additions are the Panzer Art mantlet, Aber BESA and CS barrel (originally the kit included 2pdr), Eureka tow cables, and Panzer Art ammo crates. The tracks are original vinyl ones 😱. Again, I enjoyed this build a lot. The base color was airbrushed with MRP light stone, while the disruptive color was brush painted with Hataka blue line, specialized for brush painting. Disruptive paint applied on these tanks was (probably) locally produced dark brownish camcolor used for other purposes (construction industry etc.). It was applied by hand using whatever was available (brushes, cloth, etc.) and the result was not very neat, which I tried to reproduce. Weathering is just some pigments, first sprayed with an airbrush and then rubbed here and there to make it look irregular. And here's the reference photo taken by Major Wilfred Herbert James Sale. So now I finally have all three of them Had to take some photos of them together for comparison. I apologize for too many photos. Thanks for watching and as always, I appreciate your feedback. Cheers, Nenad
 -
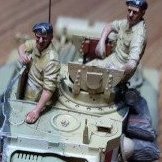
At the risk of spreading myself a little thin, Im going to present another entry. The historical significance of this GB is just too much for me to pass up. So since I already have a plane entered, I decided to do an AFV. Looking through my stash, I wanted to do something different from a Sherman or tank destroyer (which is what most of my armored stash is), and since the GB encompasses the ensuing Battle for Normandy, I decided to take advantage of the extended date range and do an M8 armored car. I did some research and found that while the M8 did not make much of an impact in the month following the invasion, it did play an important role once the allies were able to break through the bocage. Tamiya’s 1/35 kit includes decals for the vehicle pictured below which was part of the 82nd Armored Reconnaissance Battalion. The 82nd came ashore at Omaha Beach on D-Day Plus Four and was held mostly in reserve for the next month. But when US commanders became frustrated with the slow advance through the hedgerow ridden terrain, fast recon units like the 82nd became a valuable asset when commanders came up with the idea of Operation Cobra. Using concentrated bombing to try and breakthrough German lines, while also hoping the German lines were unbalanced having to deal with British and Canadian offensives, the fast M8s sped through the gap to scout the enemy and relay valuable information while also helping to escort heavier armored vehicles like the Sherman. Along with coordinated infantry movement and air support, Operation Cobra was a success and led to a much more rapid advance through Normandy and beyond for the allied forces.
-
Not been doing much on Britmodeller for a long time, but it's nice to be back after a long overdue break. I decided to have a crack at this as I have fond memories of the Airfix 1/32nd plastic one which I used to push around with my soldiers when I was about 8. It's also a classic tank and considered in some quarters to be the finest MBT ever produced - and its British. I've got the RAAC Mk5/2 and the Amusing Hobby ARVE Cent to do at some point but god knows when. The Mk5, which is this kit rolled off the production lines in about 1955. The Mk 5/1 quickly followed and by 1959, we had the MK5/2 which had the first L7 gun. I'm modelling a MK5/2. I've not seen many of these modelled, which is surprising given its been out for a little while. I guess it's been superseded by the arrival of the new AFV Club Cents. On the subject of that AFV Club Cent, the Amusing Hobby Cent is a complete rip off of the AFV Club kit. The only difference is the fenders which have the tool boxes moulded in. I've gone for a bit of after market, so there is quite a bit of work to do on this build Bit of Eduard etch, and A set of skirts from InAccurate Armour and a set of resin wheels from Sovereign Models as the kit wheels and PanzerArt wheels are incorrect, without the reenforced rims.
- 265 replies
-
- 11
-
-
- centurion
- amusing hobby
- (and 1 more)
-
 Placeholder: Time to get my big boy pants on and pretend I’m a proper grown up…it’s my first dragon kit: Theirs so much…. Stuff in the box and the part count terrifies me. The detailing is awesome and why I chose it is because David Bryden advised dragon on its design. I’d say it looks to be a seriously accurate early from a fair bit of research. Despite the upgrade of magic tracks I’m not not going to wait for the “Paul Daniel’s moment” to occur and got some early production metal tracks from sanxin. I’ll be going with the scheme for gd in Kharkov (turret number 7). I like the panzer grey turret bin and gun. Looks a bit mismatched. I’ll be using, the guided, mr hobby aqueous for its colours and pose with hatches open. I’ll be trying hard to keep the weathering more light than my usual style of nearly at the knackers yard. I’m thinking that maybe this will be the first of two builds for this gb, my second, on the other hand, will be an almost destroyed kt. No dio or figures for this one… not yet anyway as want to try concentrate on the build itself. Paul
- 71 replies
-
- 15
-
-
 I promised this back in the chat, finally I cleared some space on the workbench to make a start. Cheers
 -
Now I've finally put the McLaren MP4/4 to bed, time to devote my attention to this GB. Throwing my hat in the ring with my LGOC-B type lorry. During WW1 a lot of London General Omnibus Company (LGOC) buses and chassis were converted into lorries and sent to move supplies and troops to the front After the war a lot of them ended up in civilian hands. Rugged and reliable, around 14,000 were produced and utilised. Top speed was a heady 14mph with the power provided by a 5.3 litre 4 cyl engine producing 30 to 40 BHP in it's various forms at 5 to 6 miles per gallon. 1/35 is not my usual scale, but I just thought it was an interesting looking kit and bought it on a whim a couple of years ago, and it is well suited for this GB. There are 3 different colour schemes to choose from, not decided on which one yet though. Just a preview pic and I'll hopefully start sticking bits together tonight
- 28 replies
-
- 15
-
-
 In December my son was away for the weekend, so I used his bedroom for a bit of a stash stocktake. I came to the conclusion that I've perhaps bought a few too many and should try building a few of them: But where to start? Too much choice! Oh, buy something new instead! - NO! Then, when I finished a 1/16 Renault FT for the "Go Large or Go Home GB" I hit upon the idea of continuing through my stash in the chronological order that the tanks went into production. This will put a much-needed structure around what I'm doing, and force me to tackle a few kits that are a bit daunting and would just never get built. I'm hoping to get through six kits in 2024, which sounds a bit unambitious, but 2/3 of them will have full interiors that grind me to a halt. Six kits will get me from 1927 to the end of 1933. 1934 can be a thread all of its own in 2025. Who knows, I might even make it to 1939 one day! Look at all those Panzer III's, I'll get to them eventually. They'll all be OOTB, and done to my usual no-prize-winning "looks OK from 6 feet away" standard, and I've gone off weathering completely because I just seem to end up with models that look the same when I've finished. Maybe building more will give me the chance to improve my skills, who knows? So - as long as the admins are ok with me having one thread for more than one build - off we go.
 -
I’m currently fiddling around with a few projects at the same time – not like me, but it’s all in the name of procrastination regarding my 1/16 Italian tank crew which I’m STILL putting off. I’ve got an ancient SMER Alfa Romeo Racing car underway over in the vehicle section, and as a foil to that very old and basic kit, I thought I’d make a start on another birthday pressie – this one a HobbyBoss Beutepanzer oddity from my girlfriend. It’s a beauty – fantastic interior detail, crisp mouldings, a good PE fret and nice, hard plastic. My recent armour builds have all been vintage Tamiya; great kits, but not up to the level of detail included in a lot of more current offerings and I’d forgotten just how good many newer products are. That said, the cover art is a travesty, and doesn’t look much like the actual vehicle at all. As with the Alfa Romeo, I made a start with the engine. Both kits seem to devote around half their parts count to the engine, but where the Alfa engine comprises 12 parts, this one is at least 50! Actually, before I did tuck into this miniature feast, I concluded that it would be a crying shame to end up hiding it all, so I plan to have as many hatches open as possible. There are a few provided as separate hatches, but not the main engine cover, so the first job was to carefully cut it out, taking care to save the upper moulded louvre for later. The inside louvre was unsalvageable unfortunately, so there’ll be a bit of scratchbuilding to come for that. I found some good interior photos of the parent Renault R35 online and as a result added a line of bolt heads and strip to the internal “shelves”, whilst shaving off the moulded cables/wires etc. I should really have done this before fixing the tub together, but it wasn’t too tricky with a curved No. 10 blade. On reflection, the bolt heads are too big, so I’ll shave them off and redo with smaller versions. I’m not too sure about interior colours – the instructions indicate that the interior should mostly be Panzer grey, but whilst It’s sort-of open topped, there wouldn’t be much to see from outside, and I can’t see the German army bothering to repaint everything inside, though I could be wrong of course. Either way, I’m happy to go with the rather more colourful interior scheme that the original French tank carried. I glued together the gear lever and drive shaft construction and added a sprue “foot” that should be hidden to support it – I’m not confident that the PE legs will stand up to it otherwise. I annealed them to assist in bending and they’re pretty floppy as a result. Putting the engine together was great fun; good fit and amazing detail – it even comes with individual spark plugs, and this is a little engine; no V12 Tiger beast here, but more like a Renault 5 4 pot. I left a couple of parts off for now until the painting is done, but it’s mostly there. I painted the engine and other sub-assemblies with a highly thinned mix of Revell red-brown and silver rub’n buff. It’s a bit light for slightly corroded steel, but the subsequent oil washes etc. will darken it down and it’s only the lowest of undercoats – the engine will be painted green/black/steel and so on over a hairspray coat, so only a few glimpses of this base colour will eventually be visible.
-
Why not another entry? I wanted to do another vehicle and this golden oldie seems like a simple enough project. This is the 2014 boxing of Tamiya’s Ford GPA which was first released in 1974. A DUKW probably would’ve been a more appropriate build but would also be more involved and since I have several builds planned for multiple GBs, I’m trying to pick simple projects. The “seep” (sea-faring jeep) was the amphibious version of the Jeep and while a novel idea, was not nearly as successful as its larger cousin, the DUKW. Production vehicles came in nearly half a ton heavier than the intended design which left little freeboard while in water in even calms seas and wasn’t well regarded on land either. Only 12,700 were produced before the Army cancelled the contract and a good chunk of them were then sent to the allies via lend lease with the Soviets receiving the most. They saw limited action with US forces starting in Tunisia and did make it to France in small numbers, too. Like the M8 I plan to build, the GPAs did not play much of a role in the beginning stages of the invasion (the GPAs really didn’t play much of a role at all), but were present. I haven’t decided on markings yet since I have to do some more research, but even if in small numbers and a limited role, US, British and Canadian vehicles would’ve been present in France in the days and weeks following D-Day, so it does fit the parameters of the group build and is something different.
-
I fancied doing a bit of scenery this year and with the 80th anniversary of D-Day I thought I’d do a scene from the band of brothers TV series. when I started researching the scene initially I was pausing the TV, then I thought I’d look for the actual tunnel. It was at this point I realised that HBO had used a little artist license. I really enjoyed the build and learnt lots of new skills. The finish Build. Where the Ambush actually happened. the build.
-
Well, here's my choice .... the Airfix 1/35 Tiger 1 early .... nothing complicated and something I have half a chance of finishing! Ill fitting parts, inaccurate and vynil tracks .... what could possibly go wrong? 😟 Keith 😁
- 96 replies
-
- 13
-
-
Not a tank, but a thing for carting tanks, is that OK? Anyway here's the T-model Flatcar, which I thought would be a nice easy, quick thing to build. Not so much it turns out. Really nice kit though in fairness. See what you think anyway. Im going to use if for various German tanks If I can figure out a way doing the tie down cables. could do with some slightly elastic steel-cable-looking-stuff to allow different sized vehicles. Nick
- 15 replies
-
- 32
-
-
 As my grandpa on my father's side fought as an artilleryman in North Africa, WW2 British AFVs, especially the early types, have been my primary interest since returning to the hobby in 2022. In that time I've completed 16 1/35 AFV kits (see some of them on my scalemates wall https://www.scalemates.com/profiles/mate.php?id=123123&p=albums) but only one has actually been artillery, the Dragon 25-pdr and limber. As an expat in the US it's a bit prohibitive to get accurate armour resin kits shipped over, so I was glad to see Thunder Model re-released their 7.2" Howitzer alongside the Scammell Pioneer R100. After a careful watch of Nigel's Modelling Bench build of the howitzer (https://www.youtube.com/watch?v=4QsmMZuON6Y), I've started on it in earnest. So far I've run into much the same issues as he did. The instructions are mediocre at best. The parts are generally okay, but some of the locating pins do not fit their supposed locating holes. There is indeed a seam between the rivets of the gun mount, but frankly I do not have the patience to tackle that, so I will just try to avoid it when it comes to weathering. The chassis doesn't have a great fit. The photoetch is quite thick in parts and honestly if I had not recently bought a bender, I would not have bothered with the parts that have plastic alternates. The wheels are good enough for my purposes. The barrel also cleaned up reasonably well. Currently the kit is in reality in 5 parts (limber, gun mount, gun, 2x wheels) for painting. I expect some filler will be needed on the chassis after priming shows gaps. Thanks to Nigel's video I managed to get the gunsight mounted without fouling the left wheel (I hope). Planned paint scheme is desert, so Light Stone overall. I may add some black, olive or slate colours that were often used in a ripple effect on barrels. I don't have any photographic reference for a 7.2" in Africa though, so it will mostly be artistic license. If anybody does have such a reference, it would be most welcome.