Search the Community
Showing results for tags 'decals'.
-
I'm after a bit of help please...... I have ALWAYS been a huge fan of the Silk Cut Jaguar XJRs the quite magnificent (unless you lent him money) Tom Wilkinshaw built. I have very vague memories of the 1988 Le Mans win and especially the 1990, I visited the motor show at the NEC with my dad and was lucky enough to see the 90 winner there. I have various books acquired in recent years and various die cast models of these wonderful machines but always fancied building a detailed kit. A couple of years ago I found the 1:24 kit from Tamiya BUT was over £60 and I was fearful I couldnt do such a well detailed kit justice, step in Hasegawa I managed to get the complete kit including proper Silk Cut decals for a mere £15, I thought it was going to be great and as such I bought the Spot Model PE kit for the Tamiya model in my plan to detail it a bit more. A few days later the kit arrived and the anticipation of opening it turned to disappointment as soon as the lid came off. Next to no detail, no ENGINE, no nice detailed interior and about 50 pieces to put it together, I was very unhappy, but it was £15!!! It sat in the box for a while but I decided that I should build it just to do it and then get the tamiya kit when I felt confident I could build one that detailed. I white glossed the shell and painted the interior as detailed as I could so this morning I thought I'd put the decals on it, complete it and stick it at the very back of the shelf as it isnt worthy of being close to the front. My problem is the decals were in a film wrapper and the decals over time have curled up and stuck to the film bag, I opened it up and left them to dry up a bit, all the edges have furred out and a horrible glazing all over them, I hoped they might lift and stick just not look very flat. WRONG They literally just disintegrated as soon as they hit the water and curled up cracking into about 40 pieces 🤬 So in a long winded way........ Does anyone know where I can buy a complete set of Hasegawa Silk Cut decals for my XJR-8 ?????
-
Hello everyone looking for decals in 1/72. Specifically for this aircraft B-26 Marauder “Gunga Din”. https://www.asisbiz.com/il2/B-26-Marauder/B-26/images/41-18283-B-26B-Marauder-12AF-320BG442BS-45-Dina-Mite-over-Florence-Italy-FRE11334.jpg https://i.imgur.com/q0a02zV.jpeg If anyone knows of a source or somebody willing to make these please contact me. Dennis
-
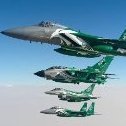
 War for the Malvinas / Falklands Part 1 Decals Aztec Models - 1:48 & 1:72 Following a long standing dispute over the sovereignty of the Malvinas / Falkland Islands, war officially broke out 30 years ago on 2nd April 1982 when Argentine forces invaded the Islands. In response the British sent a task force to counter the invasion and fight to recapture the territory. The battle that followed was a challenge for both sides. For the British, the challenge was deploying a force so far from home with limited land platforms to supply the effort. For the Argentineans, despite occupying the Islands, only one airfield out of the three (Stanley) was paved but it still wasn't long enough to operate the fast jets from, so they had to carry out their attacks from the Argentine mainland. The British only had 42 Harriers to counter the attacking aircraft which comprised approximately 50 air superiority fighters and 70 attack aircraft. Initial attacks on Stanley were carried out by Vulcan bombers in the historic Black Buck raids successfully completing 8000 mile round trip missions from the British airfield at Ascension. The war caught the world by surprise and indeed created some challenging political situations where some nations officially backed Britain's interests, but were none the less committed to supporting the Argentineans with the technology that they had supplied to them. Initial attacks on British ships were carried out by A-4 Skyhawks, Mirage III's, Canberra's as well is Israeli supplied Daggers. The initial Daggers fared well boosting pilot confidence in the aircrafts ability to survive modern combat but later a Canberra and a Dagger were lost to defending Sea Harriers. On a subsequent combat between Harriers and Mirage III's one Mirage was shot down and another was damaged. Short of fuel, it tried to land at the Argentinian occupied Stanley airfield but was shot down by friendly fire. Although night combat air patrols were performed by the Harriers, they were deemed too valuable during the day role to make a major commitment during the dark hours. Following the initial Canberra loss, subsequent missions for this type of aircraft were only performed by night. The A-4's and Daggers continued in the Strike Role where as the Mirage was used as decoys to lure the Harriers away from the attack aircraft. Lack of A-A missiles and refuelling capabilities limited it's potential other than in this role. After a successful recapture of South Georgia by British forces, the full effort was turned to the Falklands. 74 days after the invasion by Argentinian forces, the islands were recaptured and the Argentinian forces surrendered. The conflict cost the lives of 649 Argentineans military personnel, 255 British and 3 civilian islanders. The pack Aztec have provided these decals in two scales, 1:72 (set D72-048) and 1:48 (set D48-048). The decals come on three sheets with two colour and two B&W sheets of instructions. I'm really impressed with the amount of individual aircraft that are catered for in this set. If you enjoy building your models with themes and have been looking to do a Falklands one, then you'll be very happy with this set. The aircraft you can build are: British Sea Harrier FRS.1 800 Sqn - XZ457, ZA193 Sea Harrier FRS.1 801 Sqn - XZ451, ZA175, ZA190 Sea Harrier FRS.1 809 Sqn - ZA177, ZA192 Sea King HAS.2, 825 Sqn RN - No. 97 Lynx HAS.2, 815 Sqn - XZ247, XZ691, XZ720, XZ728 Wasp HAS.1 - XT429, XS539 Argentinian A-4Q 1 ANAS Argentine Navy - 3-A-301, 3-A-304, 3-A-305, 3-A-307, 3-A-309, 3-A-312 (with selection of pre & wartime colours) A-4P Grupo 5 de Caza, Argentine Airforce - C0207, C-222, C-228, C-236, C-242 Canberra 2BS, Argentine Airforce - B-108 (Not included in 1:48 set) Mirage IIIEA Argentine Airforce - I-018, I-019, ? MB339, Argentine Navy - 4-A-115 Pucara, Grupo de Ataque 3, Argentine Airforce - A-506, A-528, A-537 Sea King SH-3, Argentine Navy - 2-H-233, 2-H-235 Lynx, Argentine Navy - 3-H-142 The Reference Material The instructions have lots of good and a few bad points. There is a wealth of information about colour schemes with plenty of side profiles and painting tips, for example explaining the variation in colour that can be found on the camouflaged Skyhawks. There are also photographs of the real aircraft and information about who flew the aircraft which makes for an interesting read. The slight downside is that the profiles are quite small and there is a lack of 3 view profiles, so you will probably need some support reference material to assist applying some of the decals. How readily available this support information is to come by, I don't know, so some replies from experts with good reference links would be most welcome. One of the things I really like is a paint chart for the aircraft contained that shows the paint numbers for the different paint manufacturers in comparison to the BS number - Humbrol, Model Master, Tamiya & Revell. Clearly a lot of research has gone into creating this set by Aztec and they've really tried to squeeze as much value into the set as possible reflected by the fact that you can build up to 38 aircraft from the set ! The Decals The decal sheets are jammed with detail, and very fine detail it is. There are three sheets that contain not only the aircraft markings, but a wealth of stencils. On the whole, the register is very good and the colours sharp. The British high vis roundels suffer a slight overlap of the blue and red colours which is visible if you look closely. There are some small British low vis roundels where the pink part is very slightly off centre to the surrounding blue. How noticeable this will be when on the kit I don't know. I'm trying to be objective and critical here as is the responsibility of a reviewer, these really are minor issues in the overall excellent quality of the pack. In Aztecs intent to get as many decals onto a sheet as possible, care will need to be taken cutting the decals from the sheet as they are quite close together. I normally use a pair of scissors, but for these I would use a sharp scalpel knife. Conclusion With the 30th Anniversary of the Falklands war and the recent release of the Airfix 1:72 Skyhawk, this is a timely and exciting release by Aztec. There's a few minor issues as I've mentioned above, namely the aircraft profiles and the British roundels, but you don't get much more value crammed into a pack of decals than this. Clearly there are some key aircraft missing from the pack, Wessex, Argentine Hercules and Vulcan stand out, so I suspect Part 2 will be just as welcome as this. As mentioned in the review, the Canberra isn't included in the 1/48 set. If you have the remotest interest in the Falklands conflict and build in either 1/72 or 1/48th, you really need a pack of these in your collection ! Review sample courtesy of Available direct or from most large Model Retailers
 -
I'm painting a saunders roe sr.a/1 in vallejo duraluminium and am not sure how to clear coat it to put decals on, what clear coat should be used? Does it need a special one for metal colour or will tamiya gloss clear work? And then what coat should be used over the top of the decals?
-
I'm looking for decals to produce a 1/72 Typhoon of 2 Squadron RAF. Does anyone know of any decals I can use?
-
I recently purchased this kit second hand. Unfortunately on opening the box, there were no instructions or decals. However, I managed to download the instructions from Scalemates. I then contacted Airfix to see if they could provide me with the decals. After a couple of days, I received a reply asking for my address and telephone number "to help speed up the enquiry". That was on 9th February. To date, I have had no further communication from them (I emailed them a couple of days ago, but nothing). If, for some reason, they cannot provide the decals, does anyone know where I can purchase decals for the kit? I do have a load of spare decals from other kits, so could probably find a few basic decals, but would prefer to have the whole set. Thanks in advance.
-
I'm pondering doing a vehicle in - for the vehicle - unusual livery, either RAC or AA. I've done a search of the interweb and Hannats, and come up decal less. Does anyone know of anyone that does decals for these fine institutions? At the moment I'm not too worried about scale, though clearly if they were in one of or all of 1/35, 1/48, 1/24/, 1/20 would be a better fit with my ponderings ! Thanks in advance for any help.
-
Please could anyone tell me the following information? 1). What size were mid-80s RAF Tornado serials under the tailplane? 2). What size were underwing RAF Buccaneer serials in the 70s and 80s? Finally, please does anyone know of any decal sheets available in 1/48 that would be suitable for these? Ideally ZA5.. range Tornado and XN, XT and XV range Buccaneers?
-
 Begemot has released a new set of decals in 1/72 for the Ka-52 Alligator. They include helicopters of Russian units wearing the "Z" and V" markings used over Ukraine in the "Special Military Operation zone" 2022 and onwards as well as with Egyptian desert camo. http://www.begemotdecals.ru/showpos.php?&lang=2&pic=2&id=216 http://www.begemotdecals.ru/doc/72-069 Ka-52 ins1.pdf http://www.begemotdecals.ru/doc/72-069 Ka-52 ins2.pdf http://www.begemotdecals.ru/catalog/pic216b.jpg http://www.begemotdecals.ru/catalog/pic216b_1.jpg
 -
Hi looking for book title not sure if this is the right area, but in the 70's i remember i read a book with an article on how to make decals, basically, paint the object then coat in varnish, old school way i can't remember the exact procedure, hence i am trying to remember which book had the info, as i want to do a one off small decal cheers jerry
-
Has anyone used decals by the manufacturer Le Mans. Any idea if they are any good?
-
There's an Italian seller on Ebay , prontomodel, that has a lot of Tauro Model decals. If I'm not mistaken the company is not operating and especially the camouflage decals are hard to find. There are still some sheet available. Eduard has now sheets for smoke rings, or amoebas like the Italians say, but Tauro has other types of amoebas, which would be extremely difficult to airbrush, as the 'tentacles' are very narrow. I have no previous experience of Tauro decals. Does someone know who printed them, there's nothing written on the sheets. Based on photos of built models they look quite good and no carrier film is visible. I tried to use Printscale's smoke rings, the experience was awful, every single one wants to fold, even sliding them off the backing paper was impossible, as they just slid on the underside of it. In hindsight I should have used a sponge. That's what Printscale's owner says, not to dip them in water. In any case the silvering was so bad that the model is in a box with other wrecks.
-
 Yep, you read that correctly, the Airfix 48th Tornado. Why? Because I have it around 80% complete and the Revell jobby will take me an age to throw together. Intentions are to have it in flight, low level over a blured desert backdrop with magnets for JP233, LGBs and wing tanks so they can be changed around. But I have few questions, if I may, that I think you lovely lot can help me with rather efficiently: 1: Decals. I see the Printscale 48040 set that is very comprehensive with white stencils included and the Kitsworld KW148126 set that is half the price but without white stencils. Any thoughts on these or any others with particular thought re the shark mouth fitting the Airfix kit properly and stencil requirements? 2a: Cockpit.... Is there any aftermarket or did noone see the point for this kit? 2b: Seats with crew. The best way of going about this? Kit seats and crew with tape belts? Is aftermarket really worth it here? 3: Fuel tanks. Am I right in thinking that in the early days of the conflict they flew with the smaller tanks with the JP233 and later with the LGBs they switched to the larger F3 tanks? 4: Magnets. 1x1mm will do the job? I was thinking 2 magnets per bomb and per tank, 4 for the 233s? Any links would be great. 5: Mounting the thing. Steady now... I was thinking predrilled perspex rod up the exhausts with some fairly heavy Tig welding wire down the centre, bent down to a predrilled picture frame base. Sensible? Or are there better/easier ways bearing in mind the kit is about 80% complete? This is for a 17th birthday, in 4 weeks time, so any help (or abuse) is welcome, as always
 -
 A6M2-N Rufe SPACE Cockpit Set (3DL48114) 1:48 Eduard The Eduard SPACE sets use 3D printing techniques that lay down successive layers of different colour resin on decal paper, creating highly realistic almost fully complete panels that are supplied on a decal sheet. They can depict metallic shades, plus glossy, satin and matt colours too, which really ups the detail on everything they print. In addition, a small sheet of nickel-plated and pre-painted PE is included for the aspects of the set that lend themselves better to this medium, such as seatbelts and rudder pedals. This set contains both a sheet of 3D printed decals and a small fret of nickel-plated Photo-Etch (PE) for the seatbelts, two straps to adapt the rudder pedals into a rudder bar, plus a ring sight that is installed at the front of the standard gunsight. The decal sheet includes fronts for the cockpit sidewall, the side consoles and equipment in the lower wall area, which extends to several boxes. The instrument panel and additional binnacles that surround it are also included on the sheet, and as with the rest of them, the raised details should be removed beforehand. It’s a couple of months since we’ve had a SPACE set in for review, and I’d quite forgotten how good they look. Very highly recommended. Review sample courtesy of
 -
Has anyone tried to spray Microscale Liquid Decal Film through an airbrush? I've used it often to save older or fragile decals and applied it with a soft brush, but would like to try spraying it. So a second question is - what did you thin it with, if at all? And a third question - what did you use to clean your airbrush? I have a good selection of cheap airbrushes that I wouldn't be too worried about ruining, so it's not critical! Thanks in advance S
-
F4F-3 Early SPACE Interior Set (3DL48080 for Eduard) 1:48 Eduard The Eduard SPACE sets use new 3D printing techniques that lay down successive layers of different colour resin, creating highly realistic almost full complete panels that are supplied on a decal sheet. They can depict metallic shades, plus glossy, satin and matt colours too, which really ups the detail on everything they print. In addition, a small sheet of nickel-plated and pre-painted PE is included for the aspects of the set that lend themselves better to this medium, such as seatbelts and rudder pedals. This set includes a full set of 3D printed instrument panel sections, plus additional parts that are applied to the side consoles to replace many of the raised portions of the styrene parts, with some slight differences from the later set we reviewed a while ago. There is also a pair of printed document cases for the sidewalls, and while the PE sheet is almost totally made up of seatbelt parts, there is also a handle for the side consoles and a backing plate for the larger of the two document folders. Highly recommended. Currently out of stock at Eduard, but check back later Review sample courtesy of
-
Hi All If anyone is thinking of getting this kit, there are a few parts misprint in the instructions. Also, in my kit anyway, there were no painting masks, even though they were shown in the instructions (I've contacted the supplier and ICM). So the wrongly numbered parts are in sections 31-33, the parts are supposed to be H8, H12, H3 & H2; and in Section 42 part D19 (attaches to D12) should be D17. Also, although the final paint versions show which decals are to be used, decals #1 and #2 are not shown where to be placed. As it turns out decal #1 is the instrument panel and goes on E27, but I cannot see where decal #2 is supposed to go. It's a bit late if it goes inside the cockpit as I've completed that. Finally, I would suggest that you place H8 and C3 on the front of fuselage (section 10) and before leaving it to dry, loosely place G12 in place so as to ensure proper fitting once Section 10 has completely cured. Finally, before placing G12, cement section 28 in place. I found it did not fit as shown in the instructions. Eventually got it more-or-less in position. There is no color call out for the internal parts, so assumed the cockpit and where the paratrooper sit, the floor is painted steel, and the controls painted steel with the handles in matt black and the base of parts E9 and E30 in khaki. Trust this is all as clear as mud and makes sense. Thank you.
-
Hi all, Relative newbie, coming VERY slowly up to speed. Having discovered the delights of Micro Set and Micro Sol, I wondered if there's any consensus among experienced members as to how to use Micro Set, between: Adding a little Micro Set to the area the decal is going to be placed on vs Adding Micro Set to the water to be used for lifting the decal Every other article/posting I read seems to alternate between one technique or the other. Anyone got any thoughts or advice? Apologies if this has been asked before. Thanks, Smudger
-
I'm using the Bandau decals on their Boba Fett figure, yes I know they are not great but I'm trying to make it a quick and easy build. Does anything soften them enough to conform to compound curves? The cheek panels on the helmet are particularly troublesome. I've tried Micro Sol/Set, Mr Decal Softener and Tamiya MarkFit without any effect. The latter two I bought specifically for Japanese kit decals though neither has ever seemed to have done much.
-
Mosquito B Mk.IV Updates (for Tamiya) 1:48 Eduard The Tamiya Mosquito is an iconic kit in 1:48, and although it was initially released in 1998 and this version was tooled the following year, it’s still a great build and accurate apart from the height of the tail fin if you believe the purists. It’s readily available again, and although the price has inevitably crept up, it’s still a fabulous kit of a superb aircraft. Eduard's new range of sets are here to improve on the kit detail in the usual modular manner, including some of the newer technologies they’ve taken to using. Get what you want for the areas you want to be more of a focal point. As usual with Eduard's Photo-Etch (PE) and Mask sets, they arrive in a flat resealable package, with a white backing card protecting the contents and the instructions that are sandwiched between. SPACE 3D Printed Cockpit Decals (3DL48097) The Eduard SPACE sets use new 3D printing techniques that lay down successive layers of different colour resin, creating highly realistic almost full complete panels that are supplied on a decal sheet. They can depict metallic shades, plus glossy, satin, and matt colours too, which really ups the detail on everything they print. In addition, a small sheet of nickel-plated and pre-painted PE is included for the aspects of the set that lend themselves better to this medium, such as seatbelts and rudder pedals. The instrument panel is completely replaced after removing the moulded-in details with a two-part decal plus a trio of levers, then the send/receive radio boxes have their fronts removed to be replaced by colourful new decals. The compass in front of the throttle quadrant is replaced by a new decal, then another six equipment boxes are replaced or added on both sidewalls. The rest of the PE parts are seatbelts for both crew members, requiring a small raised lump to be removed from the pilot’s headrest and a hole drilled in its location so that the shoulder belts can pass through. The navigator has an identical set of belts that drape over his smaller, more cramped seat slightly behind the pilot. Stencils (D48108 for Tamiya/Revell) Eduard’s stencil range has been growing steadily of late, providing sharp, detailed stencilling for numerous types, some of which are lacking from the originating manufacturer’s box. The latter can come in handy for your average modeller, as sometimes the kit doesn’t include a complete set of stencils for expediency or whatever reason. Some folks, myself included, think that the inclusion of a full suite of stencils adds extra realism to a model, although there is of course the time element and the extra carrier film edges to hide. Eduard have been busy of late and have released this comprehensive set we have to review. It arrives in a clear foil re-sealable envelope with a card stiffener, a cover page with instructions, plus the decals with wax paper protecting the delicate printed surface. This set arrives on one sheet, and is patterned for almost any 1:48 Mosquito kit due to the generic nature and placement of the stencils. Over the course of four profiles from overhead, underneath, and the sides, plus a diagram of the engine nacelles from the side, the locations of all the stencils are shown clearly on greyscale line drawings that use coloured arrows and numbers to differentiate from the background. Link to PDF of instructions. The decals are printed in-house by Eduard and have good register, sharpness and colour density, with a glossy carrier film printed close to the edges of the printed areas. Don’t forget that as of 2021, the carrier film from Eduard decals can be coaxed away from the printed part of the decal after they have been applied, effectively rendering them carrier-free, making the decals much thinner and more realistic, and obviating the need to apply successive coats of clear varnish to hide the edges of the film. It’s a great step further in realism from my point of view, and those large red boxes with crosses running over them will be substantially improved once the carrier film has been removed, with no chance of silvering. Masks (EX028) Supplied on a sheet of yellow kabuki tape, these pre-cut masks supply you with a full set of masks for the canopy, with compound curved handled by using frame hugging masks, while the highly curved gaps are in-filled with either liquid mask or offcuts from the background tape. In addition, you get a set of hub/tyre masks for all the wheels (including the out-riggers), allowing you to cut the demarcation perfectly with little effort. Masks Tface (EX913) Supplied on a larger sheet of yellow kabuki tape, these pre-cut masks supply you with everything above, but also give you another set of canopy masks tailored to fit the interior of the glazing so that you can paint the interior and give your model that extra bit of realism. If you missed the review of the Löök set for this kit that we did a few weeks ago, you can find it here. Review sample courtesy of
-
 Hi all Print Scale do attractive decals for Mig-17 without mentioning the exact variant they are destined for. https://www.hannants.co.uk/product/PSL72008 Please any recommendations for a Mig-17 kit in 1/72 scale? In particular the Egyptian version? Are there any pics on the internet that will assist? Thanks in anticipation. M.M.
 -
I put a Tamiya gloss coat over my model before decals and all was fine. I then airbrushed Tamiya XF-86 over the model to give a matt finish but my decals in particular have faded significantly and the black decals for example appear more grey than black. I have overlayed the rest of the decal sheet to show how bad the fading is. This hasn't happened to me before and I'm not too happy with the finish and would even be happier with it back in gloss than its current state so I'm wondering would giving it a new clear coat undo this? Thanks in advance for any help!
-
I have the old Airfix Canberra B.2 and their newer B(I)6 in the stash in 1/48, I would like to build one from Wyton circa 1987. Ideally the TT18 with black and yellow stripes would look good in such a large scale, but I can't find the target pods in aftermarket, nor, perhaps surprisingly any 100 sqn tailfin markings. Are there any available, or is it relatively easy to scratch build the Rushton pods? Which of the Airfix Canberra kits would be best to convert to a TT18? If the pods/conversion prove difficult perhaps I could just do a 100 Sqn B2 instead, I believe they operated some in the 80s, albeit grey underneath not yellow & black. Perhaps a question for @canberra kid?
-
I’m hoping to build a Normandy Demag Panther A early based on the “Biouze” vehicle of 2.PzD being restored by the Wheatcroft Collection (Fgst.Nr.158134). For reference, I’ve got the Research Squad books detailing the restoration, but I’m looking for some advice on decals. I need to depict the original turret number I02 (which I think is in black numbers and a white outline) overpainted with 231 (in tall white numbers). Does anyone know of any decal sets that might be suitable? I’ve looked at Archer and Star but can’t seem to find a match. I’ve resigned myself to having to hand paint the ink-pot and quill turret emblem. Thanks in advance Rog
-
Afternoon folks Had a curiosity. Having watched the new Top Gun I went ahead and put in an order for a 1/48 F/A-18F from Meng. Now this two-seater variant comes with Maverick's well known instructor markings (black spine and fins with the blue stripes) much like the single seat kit, though it would be inaccurate to paint up this variant in those markings. My curiosity is, is anybody aware of any upcoming aftermarket decals for the F models used by the other pilots in the main action? I had a look around and most searches refer you to the instructor markings (which the kit already has). The in movie unit (based on a screenshot) seems to be VF-51, which appears to have been disbanded. I believe it was the unit from the original movie as well. Ultimately no real biggie, but if they were in the pipe, I'd like to get my hands on them. Tiny name decals for the pilot helmets would be a great addition as well, hah. Thanks for your time, guys Gaz