Search the Community
Showing results for tags 'Revell'.
-
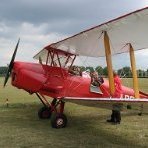
I don't usually do WIPs, but decided for some reason that I'd make the effort with this one, as it's an unusual subject, not least that it's a helicopter in a proper aviation scale. I bought the Revell kit at a show last year for a good price. The kit is in Revell's new box and style, and it was only later I discovered that it was first issued in 1996. This is not a problem, it will just need some work. The box has some colourful options, but I settled on going off-piste and doing a British one. The Army Air Corps bought 16 or thereabouts in the late 1950s/early 1960s to fill a capability gap until the Westland Scout was available. I'll be doing XR385 (c/n 1645) as it appeared at the Middle Wallop Army Air Day in 1975. So on with the show. First the box, illustrating how I deal with those end-opening boxes: cut the top out and tape up the ends. It's a simple kit. Three grey sprues, one clear sprue, instructions, decals, and safety info slip At the moment I can't find any aftermarket for it, any suggestions welcome. (Edit: just found some Eduard Etch - we'll see.) I'll add a set of generic seat belts and some home-cut masks for the markings, otherwise it's from the box all the way. Back later with (hopefully) some actual work accomplished.
- 28 replies
-
- 6
-

-
- Army Air Corps
- 1/32
- (and 1 more)
-
This kit needed quite long to complete. After so many years of modeling, although with long breaks, this was the first time I tried myself in plastic surgery. And I had to pause the construction for months, since - also for the first time - the decals of this kit, stored in the basement for twenty+ years, broke apart on application and were thus unusable. Thankfully, my favourite online hobbyshop (Hannants) came to rescue, since I found that Caracal had released a shett with early US Starfighters, including nearly the same scheme that was present in the kit. So, finally, I completed this nice little kit, now showing open panels with the battery and flight computer compartments behind the cockpit, a nice resin C2 seat (CMK) and the decals. I love decals, and especially stencils. The more better - I thought. So I was delighted to find a decal sheet dedicated only to F-104 stencisl, around 300 individual microscopic decals. Needless to say, I found my master and gave up after having applied some 150 of them. And I was annoyed to find that even after two days of drying, these tiny decals would not stick firmly to the model, so that a few of them were displaced just by the blow of the airbrush when sealing them. Marcus
- 12 replies
-
- 54
-
-

-

-

-
- F-104
- Starfighter
- (and 1 more)
-
I've been looking for a Ferrari 308 kit for some time but they don't seem to come up very often, scouring 2nd hand & new kits, online model shops & that auction site I'd found nothing other than one ridiculously overpriced example in more than a year. Come the end of Feb, this appeared on fleabay for £20 & I jumped straight on it. Un-started, it's in very good condition, a little yellowing evident on the decals & a small crease in the box It arrived & was duly added to the stash, but after a week I couldn't resist making a start. After all I only have 4 WIP builds going on concurrently 😛 I freed most of the parts from the sprues in preparation for paint, cleaned & matted with a soft toothbrush & some Cif as I always do. Since the kit is a rebox of the old Monogram 308, the quality & fit could possibly be somewhat variable, however, upon inspection the parts are all cleanly moulded with very little flash & good dry fit alignment. I cleaned up the parting lines & seams, then shot a coat of Mr.Surfacer 1200 over them. Those who've seen my other WIP know I just can't leave well alone. I really wanted a GTS because that's what Tom Selleck drove in the Magnum PI tv show (for those of a certain age range) so I started looking at prototype photos, spare parts etc & concluded a couple of angled but straight cuts would let me remove the roof quite easily, leading to this; By this stage it was obvious that opening the doors was going to leave the front & back halves only connected by the sills & that was pretty much a recipe for disaster. Tamiya XF1 for the underpan Tamiya XF59 Desert Yellow for the seats, door cards & other interior leather. Switches & fittings touched with Molotow chrome plus Tamiya X18 semi gloss black for the dash, door handles etc. Next step on the shell was to make the gap look more like it was supposed to be there. The weather stripping is round rubber or neoprene gaskets on the 1:1 so a length of 0.5mm styrene rod glued on was going to be a passable representation in this scale. The other obvious difference between the Berlinetta & Spider is the rear quarter window being fully louvred on the Spider. Initially I tried to replicate this with individual strips of styrene, but the chances of getting it to look even weren't good & being only glued by the ends they tended to flap about too. Measuring the GTB louvres revealed they were conveniently 1mm spacing so I began scribing some black styrene with angled grooves & elected to leave the whole panel closed. If I can find another 308 kit I may try scribing them out fully but for now this is "good enough" for me. The sections were cut roughly to shape with scissors, then filed & sanded until the fit was good in the recess. Hindsight being what it is, I should have removed the original kit louvre & replaced the whole panel, but I've been making it up as I go along all the way through the build, ah well, it's all experience. Another shot of Mr.Surfacer followed by four light coats of Tamiya X3 & we have this; Looks like a Ferrari to me ? The louvres aren't perfect but will be all but invisible from normal viewing distances once painted black.
- 36 replies
-
- 16
-
-
-
- Revell
- Ferrari 308
- (and 1 more)
-
This is not a completely new thread. Rob started it back in May and let me tag along adding what I could to help with the conversion. I won’t be reposting all those build photos I posted but will pick up where we left off when the build(s) stalled somewhat when we encountered a problem and hadn’t decided on what to, or whether to, do about it. The thread is here if the subject interests you and you weren’t following to begin with. Quite a bit of scratch building experimentation and Rob’s handy work with aluminium sticky tape. This is the donor kit, Revell’s really very nice Lockheed Ventura. This is the look we were aiming for, or at least what hoped our build would resemble. And This was the problem we encountered. The belly of the Ventura was fairly flat. Rob recons it eas squared off to accommodate the bomb load and no doubt he is correct. He’s leaving his model as is since it is closed up and foiled. Perhaps a modelling nightmare to de-foil and reshape the belly. The belly should look something like this: not completely a semi circle but not too flat either. And this is how, after much mulling over, I’ve decided to deal with the problem. TL: To get the shape I thought I needed a made a template of the top of the nose piece and tacked it to the bottom. Note the “corners” which will be eliminated. TR: that piece was removed and a block of balsa carved to match the shape of the template. BL: male and female moulds were fashioned. BR: a new forward piece as plunged out of .040 styrene. The rest of the belly, right back to the end of the bomb bay opening will be done this way. So, that’s it so far. I welcome any comments, suggestions or criticism. I will no doubt have do a little editing but just wanted to get this posted. Thanks for lookin in. Dennis
-
 It's that time of year again when I find all sorts of new projects making their way towards the workbench...! I know I have plenty on the go already, but most of these are awaiting paint which requires better weather - I spray outdoors and need warmer, drier conditions. As @Paulaero will understand, these other models are generally at least 95% built, which qualifies me to start on something new in the meantime! 😁 This build is partly a new challenge and a bit of repetition too. The new bit is refurbishing one of my older models and this will form the bulk of this thread. The repetition part is concurrently building two untouched Revell 767-300 kits, which I did here a couple of years ago and I don't see any point in documenting it here again! However, these kits will throw up a few challenges along the way (more on this when I get to those parts!), hence their inclusion into this thread. Let's start with the model to be refurbished. I would guess that I built it around 20 years ago, when my modelling skill set was rather more limited than it is now. It is the Revell 767-300, with RR engines and built to depict G-BNWA which I flew regularly at back in 2003. The model has been in the attic for years and I think it must have been dropped at some point too - luckily I still have most of the pieces: It's certainly been neglected and the attic did it no favours - it's covered in grime: The refurbishment will consist of the following tasks- 1. Open the fuselage up and fill the windows with Milliput 2. Removal of the damaged undercarriage and rebuild the model with the gear doors closed 3. Replacement of the missing windscreen (the only piece that I cannot find!) 4. Removal of the old paint and re-spraying with an accurate demarcation line and correct shade of blue 5. Production of custom decals to give the model a new identity To complete this introduction, the other two models in this build were purchased cheaply but with a few pieces missing. More importantly though, they both have the sprues for the RR engine option, so these will be built as BA aircraft. Here are the sprues: And another shot, showing the first task completed - Milliput is applied: It is well past its 'use by' date and quite dry and crumbly, but perfectly good enough for this job!
 -
 I'll be jumping in with the Revell 1/144 kit to start with and some decals made by a local. I'll be out of the country on the start date but will dive in when I return!
 -
Revell's boxing of Dragon's kit, not the easiest build due to the instructions being a bit ambiguous in some places. Engines are meant to be posed either cowled or uncowled, but I don't think they are detailed enough to be shown off without a lot of additional work and the cowls don't fit properly over them (might have been builder error to be fair). Easier to leave the engines off and blank off the cowl openings before fixing in place. Only other major issue was the multi-piece canopy which required a bit of minor surgery to fit (again, could have been my fault). Still, it builds into a quite imposing model which sits nicely alongside my Tamiya Mosquito: Thanks for looking, J.A.
-
I started this about a month ago (well after the GB started) and though I would share it here. Hope it is OK with the mods to run a thread on this build here? I am building the Revell kit and using 26 Decals for the BAWC scheme The kit has some warping issues which was sorted with tape and cutting mat It goes together fairly quickly when you have the time Major assemblies in the first of many test fits
-
As part of my effort to clear my backlog of started kits I have dug out my Matchbox Spitfire. I started this literaly decades ago, but didn’t get far. I have looked at it occasionally, but no action. Then I bought some Xtradecal decals for it, SAC MkIX undercarriage legs, MasterCasters interior, Master gun barrels. Finally I found out about the Grey Matter correction set for the nose, which of course I immediately ordered on a wim. Having now spent about ten times what the original kit cost, guilt has led me to this, my first WIP. It will not be a tutorial, I am not that good, it will not be a guide to the ultimate accurate Matchbox Spitfire, but posting about it will serve to prod me to get it built. With a little luck, at about the halfway point, somebody will announce a new accurate Mk 22/24 for you guys waiting for one. We will start with the nose, the Grey Matter nose is one seriously large accurate lump of resin. I may scratchbuild the u/c legs out of brass because even the SAC legs might fold under the weight! It also might be the first Spitfire build to need weight in the tail to prevent it becoming a nose sitter. You can see the difference with the kit item. The panel lines look much more to scale than the Matchbox lines-lol.
- 124 replies
-
- 11
-
-
 This is my second plane attempt, I only usually focus on AFVs but now I am broadening my fields a bit. While the model release is new, the mold is an old one so the fit was horrendous in some places...... The front part of the jet and the fuel tank were very complicated to fit and keep in place. The decals were massive and I don't think I did a great job with them but at the same time I don't think they look all that bad. All in all I like the way it looks and I am happy with the result. One thing though, how would you recommend fixing decals? I use microset and microsol but it seems there is a bit of silvering lately when using them, should I just fix the decal without any medium then just soften it with Microsol and opt out of Microset completely? And how would you recommend gluing parts to an already painted model? like the missiles, landing gears and other pieces? I just do the weapons separate now but I want to go further, I only used super glue for them, any other methods you would recommend? Hope you enjoy this build, and if you have any criticisms or recommendation please let me know Thank you
 -
Even though I mainly make things with propellers, I actually signed-up to this Group Build because I have more Starfighters than I ought to have. Anyway, I'm going to assemble this one: It's the Revell kit and i believe is has an issue with the front canopy shape (which I am going to ignore). I'm going to do it as one of the 435th TFS planes based at Udorn, Thailand from June 1966. As they were used for CAS missions (as well as CAP), I'll dig some M117s out of the 'things that go bang' box and hang them under the wings. I'll probably start this after finishing the F-16B I'm currently making a mess of in that Group Build. In the meantime, here's an interesting piece about the F-104s use in South East Asia: https://www.i-f-s.nl/vietnam/
-
Revell 1:72 F-105D : Started in Sept '24 but came to a halt when the thirty-seven year old kit decals and forty-five year old Microscale decals both turned into molecule sized fragments the moment they hit the water. Now here is Memphis Belle II in all her pigeon-toed, knock-kneed glory - there's just no fixing the stance without investing in a brass, white metal or rigid resin replacement set. Other than the loadout and new AM decals from Kits-at-War, this is straight from the (1988) box. Mr Color lacquers for the camo, didn't even try to add a wash or weathering as it's only ever going to live in the cabinet. 'Owt much else to say. great nostalgia build. Cheers from NZ.
- 14 replies
-
- 45
-
-
-
-
Just realised I've failed to post my build from 2020 of the old Revell 1:32 He 111 P-1. There's no build doc unfortunately but thanks for looking. I've painted it in the kit given KG54 Totenkopf-Geschwader and imagined it having just landed from a bombing raid over England in 1940 and waiting for a reload and a refuel. Not much time for cleaning down so it's a tad mucky. I've used the Eduard interior and exterior PE kits and HGW seatbelts as well as the Profimodeller oxygen system (never again!) Many thanks for having a peek.
- 25 replies
-
- 69
-
-

-
-
-
 Hi everyone, This build has been a long, long, time coming but what better time to start it than after a first COVID vaccination! To cut a long story short, over the years I've often seen the helicopters of the Midlands Air Ambulance charity flying over- whether it's coming into the QE Hospital in Birmingham, flying over our home now and again, returning to Cosford, or even while out and about. They do remarkable work and it's only right that I have a go at modelling such a fantastic machine. My previous foray into a 1:72 G-OMAA can be found here, but this time I will have to make my own decals and have a much better go at the interior. Here's the base kit: Colour scheme-wise, there are a few variations when it comes to decals. Although the 2 photos (from Cosford 2019) shown below would be good to use, I also have other reference material with the "Babcock" logo replaced by the "Bond" logo- it's a minor point, but I think the white lettering makes for a slightly more aesthetically interesting model. As you can see from the above, there are a lot of decals to try and replicate. Let's get cracking! All the best, Sam
- 59 replies
-
- 13
-
-
 Living in Birmingham I see the West Midlands Air Ambulances frequently and have a huge amount of respect for the work they do. This is the Revell EC135 with the Whirlybirds resin Air Ambulance interior and decals for G-OMAA, one of the three helicopters currently in use and normally based at the Strensham motorway services on the M5 but often seen across the entire Midlands region. https://www.midlandsairambulance.com Thanks for looking. Steve
- 10 replies
-
- 26
-
-
Good evening all, I've been given the go ahead to release images of my most recent completion which is Revell's new 32nd Sea Hurricane Mk.IIC! The kit is comprised mostly of the existing tooling of the standard Hurricane Mk.IIB, however, it now utilises a new set of wings to add the canon armament! The scheme shown is one of three choices in the box, with the other two (really nice schemes!!!) to be announced soon. It was a privilege to build this for Revell again and is now in Luke's safe hands to be photographed for the back of the box! I kept the build clean with a small amount of exhaust and gun stains to roughly simulate a few sorties, she was finished in Hataka Orange Line paints. Sea Hurricane Mk.IIC, NF699, "Libby". More to come soon here --> https://www.facebook.com/jamesbuildsandmore
- 31 replies
-
- 72
-
-
-
-
 This is the newish revell boxing of their Eurocopter in 1/72. My club was doing a competition where we all built models from James Bond films as Revell bought out the whole range again and as Goldeneye is my favourite Bond movie and one of the best FPS shooter games ever made on N64 (ahhh the times we sat around as teenagers with pizza and coke playing 4 player), I had to build it. The kit itself is not bad, the detail is pretty good but I did have some issues fitting the instrument panels in the cockpit and the exhaust inserts on the back. I solved the cockpit by leaving out the offending parts that you can't see anyway and good amount of sanding on the back. I do like the fact that Revell have designed the canopy so you don't have to install it half way into the build, the section that covers it is separate and can be glued on later. They also give you separate windscreen wipers, a nice little detail that allows easier masking of the canopy and painting of the parts. Decals are very good, they only have decals for the movie helo, but you do get all the other parts to make a later model helo with gun, radar and different weapons. This prototype did not carry a nose gun, even in the movie.
- 4 replies
-
- 26
-
-
-
- Eurocopter
- Revell
- (and 1 more)
-
 Hello Britmodellers, Revell released several He 70s, so here is their ICM rebox with the decals from their Matchbox reissue. A little extra detail was added to the rear cockpit as well as a replacement machine gun from the spares box, plus a new pitot tube from brass tube. Thanks for watching! Luka
- 10 replies
-
- 44
-
-
-
Now that the Tamiya jeep is nearly done - just have to spray a matte coat and add the windshields - I'm turning my attention to the Revell 1/48 P-51D. This is a release of the old Monogram kit that was originally released in 1977 and that I built in the early 80s. I'm pretty sure there was limited paint involved - just build it and decal it! I picked this kit up at a local hardware store that actually has a small stock of Revell kits and Testors paints. I'm planning on doing the Robert Welch scheme which I find more interesting than BBD - plus the checker cowling decals are a bit beyond my skillset right now. All interior parts were primed with Mr. Surfacer 1000 and then given a coat of green chromate (4:1 ratio of Tamiya XF4:XF5). I was going to airbrush the instrument panel today but it's too cold in my garage where I do my airbrushing - even with a space heater on the bench the paint wasn't flowing well through my Paasche H.
-
I've just finished building this in the 'Give Peace a Chance' group build, so I thought I'd chuck an RFI up. The backstory for this is a young guy who got out of East Berlin in 1989 with his girlfriend, a suitcase and his Trabant. They spent the winter in Southern Europe and, in the spring of 1990, made their way up to Belgium, where they settled. Over the years, life happened, but he never got rid of the Trabant. Eventually, he started making budget modifications and here we are! Here are a couple of interior shots and one of the boot assembly Thanks for looking! Martin
- 37 replies
-
- 35
-
-
-
This is my rendition of the old Revell Starfighter in 1/32 scale. I liked this c/s with the dayglo tiptanks. This was in 1964, accordeon to the decalset by Dutch Decal. Kind regards, Gerben
-
This is one of my latest builds. The Revell rebox of Monograms F-105G. Very nice kit with raised panellines but good detail. This was painted with mostly Vallejo acrylics and the Revell decals.. There is a great decalset, but it is very prone to silvering. Kind regards, Gerben
- 15 replies
-
- 56
-
-
-
-
With the 206 build hitting a problem with the decals I decided I'd try crack on with something else. All the parts seem to come neatly inside one big plastic bag, containing sub-bags... Instructions are usual modern Revell affair, lots of decal choices, 66, 67, 68, or 69... I maybe nearly 50 but I'm still childish so you can probably guess which variant I'll do! Interestingly the body is formed of 2 parts, luckily that does make painting easier (the rear part is red, the front section white and blue, though has a couple of small red bits to mask and paint. Also the windows come with pre-painted surrounds (I'm not sure I've ever seen that before) and there are some clear red parts for the tail lights. The lower shell is a fairly flat single piece for the underbody aero - the vertical strakes on the rear diffuser look a bit out of scale. Overall the kit seems nicely moulded (not much if any flash) though the detail does look rather soft. I decided to cut out the air intakes on the front, though I didn't do the neatest of jobs. I also drilled out the side exit exhausts ports. After a days work I had separated and build whatever sub-assemblies I could to aid painting and mounted lots of parts on temporary sprue handles to aid airbrushing. The wheels and tyres look pretty similar but there are separate front and rears (I think the rears are marginally wider) so the wheels I marked with sharpie and added some masking tape over the marks so I can later see which are which if I remove them from the sprue. Ready for primer. The instructions call for lots of mixes of black, grey and silver for the internal parts in various ratios. For now I'm going to prime the shell in white and everything else in black/dark grey (will just add the black to the airbrush without flushing it fully).
- 11 replies
-
- 11
-
-
Slave 1 – Boba Fett’s Ship (05678) 1:88 Revell WARNING: If you've been trapped behind a wardrobe since the 1980s, there may be some spoilers ahead. You have been warned! We were introduced to Boba Fett the bounty hunter and his ride, Slave 1 in Star Wars Empire Strikes Back in 1980, when he was tasked by the Empire to hunt down and capture Han Solo, and to bring Luke Skywalker to an ambush, in order to tempt him to the Dark Side of the Force. We saw the ship for the first time when the Millennium Falcon detached from a Star Destroyer when they dumped their garbage before their jump to light-speed, although it was only a brief glimpse at that point. Later we saw it parked at Cloud City on the gas giant Bespin, when a frozen Han was trundled aboard his ship and it took off in a flamboyant style while Princess Leia and Chewbacca fired upon it in a desperate attempt to prevent his departure, setting up the beginning of the final part of the original trilogy. Slave 1 showed its age when it appeared in the Prequel trilogy under the command of Boba’s father, Jango Fett, with a substantially cleaner and better-kept exterior, although the older blue and yellow parts of the scheme was a bit off-putting to my eyes. It was originally made by Kuat Systems as the Firespray-31-class patrol and attack craft, and somehow came into Jango’s possession, then with Boba at the controls after his father’s decapitation during a fight with a young and oddly Scottish Obi-Wan Kenobi. The Kit This is a re-release of Revell’s own Snap-Together kit from the previous decade, but without the crude factory-applied painting and with decals to complete the package. The kit is a celebration of the 40th anniversary of the release of Star Wars The Empire Strikes back, which to folks of my age is a sobering thought, and comes together with an A3 poster from the movie to celebrate that. It arrives in an end-opening box, and inside can be found seven sprues and two hull parts in grey styrene, a clear canopy, a vinyl Boba Fett figure to sit within the very visible control tub, which rotates with the craft’s take-off to fly in the “elephant’s head” position, rather than engines downward in “flat iron” mode. Thanks to the recent nature of the kit, the panel lines are engraved and detail is good right out of the box – only the scale is unusual at 1:88. This is a gift set edition too, so there’s a bag containing six pots of Revell acrylic paint, a small bottle of Contacta Professional glue, and a #2 brush. Construction begins with the aforementioned engines, which have a ribbed cylindrical form made up from two halves, with a domed internal structure that looks a little like an umbrella. The skirt on the lower hull is shown painted in the next step, with the strikingly gross patchwork of colours evidencing very poor maintenance over the years. The exhausts are clipped into the lower section of this part, which is then put to one side while the “elephant ears” are made up. The fins are comprised of two halves, and they are linked together with an axle that goes through the body to synchronise their movement when installed. The diagonal bracing struts are clipped around a pivot-point, and these are slotted into the hull underside detail panel, which is also painted up in the same haphazard style. Boba gets a detailed coat of paint, with lots of colour call-outs and a pair of decals adding small markings to his helmet. As the figure is vinyl, you might want to do a little research on how best to paint vinyl figures, so the paint doesn’t fall off later. I recall something about adding PVA to the paint, but don’t take my word for it. His control tub is also painted, given a seat and five instrument decals to add a little realism to the area, after which Boba’s large butt-plug is inserted into a matching slot in the floor to hold him in place. Anyone sniggering at this point should go to the back of the class. The cockpit is painted up, then receives the tub and Boba, with a choice of positions between flying and landing modes. The two fuselage halves are next, with detailed painting guide shown inline, with the same feature for the underside of the “trunk” area. The halves are brought together with a crystal-clear hinging canopy, which is most definitely not canon, and the axle that later holds the ship’s main armament, which should be fitted in position without glue to remain mobile. The cockpit and underside panel are both installed, then the weapons are glued to the tips of the axle so that someone much[/] more childish than you can go “pew pew pew!”. The two hull sub-assemblies are then brought together, and the detail insert is placed within the skirt of the lower hull, along with a saucer-shaped gun platform under the nose, with two blasters in grooves on opposite sides. Markings Slave 1’s paintjob is a mish-mash of colours that implies the craft has had a very demanding life since Boba took over ownership after his dad lost his head, so the painting guide is long, covering five pages in total, but you will still want to check your references to get the correct patina that reflects its grubby screen persona. There are a number of decals supplied that will ease painting of grilles and vents, plus a number of curved stripes that will save some masking. From the box you can build Boba Fett’s ship, but there’s nothing stopping you from portraying Jango’s scheme if you’re so minded, using your references and different paints to assist you. Decals are by Cartograf, which is a guarantee of good registration, sharpness and colour density, with a thin matt carrier film cut close to the printed areas. Conclusion Considering the origins of this kit as a more toylike offering, detail is good and only the strange choice of scale is a head-scratcher. If you’re not glued to a scale however, it will build up to a nice replica that will look great with a sympathetic painting and weathering scheme. Highly recommended. Revell model kits are available from all good toy and model retailers. For further information visit or
-
 Well, this is me popping my GB cherry! The title of this GB immediately took me to the late 80s and the fall of the Berlin Wall: giving my 18 year old self hope for a brighter future. If I remember correctly, it was a classic car show at the Oulton Park Circuit - I'm guessing in 1990 - where I first saw a Trabant and, to be honest, I haven't seen many more since. The kit I've chosen is the 1:24 scale Revell offering in 'Builders' Choice' guise but, ironically, I'll be ditching all the doves, peace signs and related text This is actually a pretty comprehensive kit, straight out of the box, with opening bonnet and boot and even seat belts! Even so, I can't just build it straight. So I'm going for a car whose owner made it past the wall and to either Spain or Belgium (not sure which yet: I like the Belgian reg plate better, but Spain makes more sense because I'll be ditching all the cold start/heating guff in the engine bay) and was inducted into the local modding scene. Initially, I'd considered doing a Mazda 13B rotary swap because, from what I understand, the 601 was supposed to be a rotary when it was launched but the engine development stalled. On closer inspection, this would be a massive undertaking, so I decided to tune what I have! I'll warn you now, it's going to be obnoxious! My plan is to lower it 4-5 inches with, maybe, -3º front and -5º rear camber on banded original wheels with a very stretched tyre, and the wheels will be wider front than rear, 'cos the rears don't really do anything. It's also going to get a turbo! This will sit where all the heater gubbins currently lives and my plan is an induction trumpet poking out of the leading edge of the bonnet and the exhaust exiting through a 'hater pipe' about two thirds of the way up. Basically straight into the driver's line of sight. I'm thinking I'll cut the grille out and use mesh, so you can see the intercooler sat behind it. Here's a photo of what's in the box along with a spare Sparco seat and steering wheel (left over from my MX5 build), a ZoomOn harness in black for the driver and the paint scheme: ProScale Dodge Ivory with a blue roof - like the estate that was in IWM North (and may still be?) The Ford Engine Blue is way too dark, but it was a by product of trying to find a suitable representation of Mazda Mariner Blue for the MX5, so I'll lighten it with a bit of the Ivory or some such. First thing I need to do is fire up Fusion360 and start modelling a turbo, induction trumpet, exhaust manifold, hater pipe, intercooler and plumbing and some blanking plates to fill holes in the engine cooling shroud left by the removal of the original induction and exhaust. Also some wheels and tyres and a lowering/camber system (design to be confirmed). Looking at that photo, I hope that seat will fit! Excited for my first GB! Thanks for looking Martin