Search the Community
Showing results for tags 'Minicraft'.
-
 Here is the Minicraft MD-80 finished as I-SMEN, an ex-Aero Lloyd MD-83 which flew with Meridiana from 1999 until retirement in 2017. I hadn’t built a Minicraft MD-80 for many years but when @Eric B. posted his gorgeous ALM model last year it inspired me to liberate one from my stash. This is the result. The build is pretty much OOB although I added various vents, sorted the fin intake (within limits), boxed in the main wheel wells and slightly extended the main undercarriage to improve the sit of the model. Pitots, RDF fairings, replacement strakes, landing lights, FOD guards and other small details were made from plastic sheet and strip. CRM anti-collision beacons completed the ensemble. White paint is Halfords and grey is Holts HL Grey01. Metallics are mainly by Tamiya. Decals are by V1 with Authentic Airliners windows and odds and ends from the spares box. The V1 decals fit well with one disappointing exception - there is no provision whatever for the cheatlines to fit around the engine pylons. In fairness V1 do provide spare rear sections but even so it was a fraught job involving messing around with photocopies and a fair bit of touching up with paint. (The improbably named Evil Sunz Scarlet from Citadel is a near perfect match for the red and Revell Aqua 54 with a spot of black is pretty close to the dark blue). The result is just about acceptable from a distance but doesn’t really withstand close inspection. Thanks for looking and constructive criticism is always welcome. Dave G
 -
 Minicraft is to release 1/144th Boeing KC-135A Stratotanker - ref.14707 - & EC-135C "Looking Glass" - ref.14709 Source: http://www.1999.co.jp/eng/blog/1509254 V.P.
 -
At the iHobbyExpo 2013 in the US, Minicraft displayed the box art from a future 1/48th new tool Beechcraft T-34A/B Mentor kit - ref. 11671. Release is expected in 2014. Sources: http://www.cybermodeler.com/special/ihe13.shtml https://minicraftmodels.com/products/11671-1-48-beechcraft-t-34-mentor V.P.
-
Hello, Here is my just finished Academy/Minicraft Beechcraft T-34A Mentor at 1/48 scale. A very nice and detailled kit, I have loved building this model. My T-34A is in USAF colors in the 50's with Caracal decals (I love these decals!!) Metal paint is LP11 silver laquer Tamiya paint followed a thin coat of Alclaad polished aluminium. Then, MRP 002 International Red. I hope you will like my Mentor. Lolo
- 16 replies
-
- 39
-

-

-
- Caracal Decals.
- Minicraft
- (and 1 more)
-
I've had this kitting sitting around for about 5 years, picked up from an hourly raffle at a local IPMS show. The aircraft includes decals for an aircraft taking part of the Berlin Airlift. Kit is pretty basic, hoping for no crazy challenges Lets make things a bit more difficult There is superstition I came across from other modelers on twitter about starting a new kit on January 1st brings good luck on your builds for the rest of the year. So I decided to skip building today (31st) and will start the kit after midnight tonight.
-
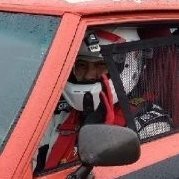
With my Meteor only needing a few decals and Bf-110 waiting for a masking set, I thought it'd be a good time to start another twin. A quick search through the stash revealed a few suitable candidates but this is one I've been meaning to build for a while. A few photos of what we're dealing with. The boxtop (as if you couldn't guess) The sprues (to show it's unstarted)... I know the kit has its problems with cowlings, wheelwells, and the turret but I'm going to ignore them and just make the thing. Started by painting the insides Interior Green (although I've read, on here, that it may have been an equivalent to RAF Grey-green). Wings assembled Cockpit (although I think early British ones only had one pilot). Fuselage joined-up Thanks for looking.
-
Hello everyone! Here is my latest kit. It's Minicraft's 1:144 Boeing B-17G Flying Fortress representing 44-8007/JD-Z "Screaming Eagle", with the 545th BS, 384th BG, USAAF, based at Grafton Underwood, UK, from August 1944 to May 1945 when it was transferred to the 305th BG at Chelveston. It was assigned to 69 missions and received combat credit for 50. This kit was the old Crown moulds from the 1970s repackaged (several times) by Minicraft and this time with a small upgrade in the main canopy area, making the upper windows available as clear plastic. The kit OOB is very basic but the general shape is there although some features ruin it. The improved main canopy was a poor fit by the way. I decided to make a series of improvements which I'll list in no particular order: - I opened up all of the solid windows and some that weren't even marked. The kit supplied them as silver decals but they would have looked bad on the metal finish anyhow. Most were filled with Kristal Klear and some were made from clear flat sprue. I realized too late that I didn't make the waist guns in the staggered position. - I managed to sand the nose glazing to practically the right shape. This is one of the worst features of the kit but the plastic is thick enough to allow all the sanding. - The same applied to the chin and top turrets which are too tall and needed some reshaping. - All guns were replaced by new ones made from stretched sprue. - The wheels were replaced by lovely resin ones by Armory. - The straight turbocharger pipes just behind the wheel bays were removed and replaced by new ones curved outwards from Evergreen half-round strips. All four exhaust holes were opened up. - The missing pipes on the outer sides of the inner nacelles were added from the same material after opening the corresponding trenches. - All of the intakes along or just below the main wing leading edges were made. - The cut outs for the main wing landing lights were also opened up and filled with clear sprue sanded to blend with the wing leading edge. - The cowlings were opened up and 3D-printed engines added. The files for these are available at the Kampfgruppe144 forum. - The awful propeller blades were reshaped to just about the right shape. - Wingtip lights were made from drops of Kristal Klear. - All of the missing antennae and wires were made from stretched sprue. The bullet-shaped D/F loop antenna was fashioned from one of the 'in-flight' propellers in the kit with CA glue and sanded to shape. No cockpit detail was added as I surmised correctly that none could be seen! The kit was fully painted (freehand), weathered and varnished with brush. I may have overdone the weathering but it looks good. The decals were all from the kit and performed well. For more details and WIP build, check out my posts on the Kampfgruppe144 site: http://www.kampfgruppe144.com/phpBB3/viewtopic.php?f=84&t=10115 This gave me more work that I expected but I had fun improving this old basic kit and the end result, although not perfect, was really worth it and I am very pleased with what I have achieved. Looking at it, I can hardly believe it's the old Crown kit!! Thanks for looking and all comments are welcome. Miguel
- 12 replies
-
- 29
-
-

-

-
-

-
The Minicraft 757 kit was always subject to severe bashing with its somewhat crude execution and simplistic parts and quite bad fit. The release of the new Zvezda 757 kit,which beats Minicrafts offering into oblivion further lowered the interest in that kit. As I had bought this one together with some other kits as a set and the fact that it came with the NASA markings,I decided to build it anyway. Last year I built already 2 of them,with some changes and lots of TLC,it can be built up to a presentable 757. The biggest issue on the Minicraft kit are the engines,the kit offers both engine types operated on the 757.The RR ( crap) and the PW version ( complete and utter crap) On my other builds,I tried to enhance the look of the RR engines and the sit of them on the wings. If glued on as they come from the box,they point upwards, similar to the 737MAX engines... Here I chose to bin the kits engines and use the RR engines from the Zvezda kit. They fit perfectly and improve the look significantly. The rest of the build is pretty much oob,just the front end received a light sanding to improve somewhat the appearance.The cockpit decal does the rest. The decals are very nicely printed and worked well. Painting is straight forward as well,white upper fuselage ,engine and wings,light grey belly,black nose. All done with Gunze paints. The NASA 757 is still active to this day and is probably the oldest 757 in service. She initially started her long carreer with Eastern Airlines. Cheers, Alex
- 8 replies
-
- 21
-
-
-
-
- Boeing 757
- Minicraft
- (and 1 more)
-
After a prolonged absence I'm back at my makeshift workbench. I've managed to collect several kits of my favorite British sports cars including the postwar (1948) MG TC. I've started on one of them which is the re-issued kit by Minicraft in the 2000's. I also have two of 1970's issue Entex kits in my stash. The kit itself is a very nice with much of the mouldings still crisp with minimal flash and a few sink marks here and there. Anyway, I started with the engine. I've added a few bits based on my reference photos. I separated the various pulleys from the moulded fan belt and filed the V grooves as I will scratch build the belt at a later stage. I also made the adjustment bracket for the generator. I will modify the generator to add the drive unit in the rear. Here's the stock kit's firewall. A lot of modifications will have to be made to match my reference photos. I scribed the edges of the lids and the "X" on front of the battery box to add further definition. Scratch built one of the latches. With a bit of primer to check things. Now I just have three more to do. I turned my attention to the kit's steering wheel. I was not happy with the "toy like" appearance. I decided to try and convert it to a Brooklands style four spoke wheel. I started by stretching some sprue from the kit. I started by cutting one of the spokes, reshaping the hub and the spoke stub and added one of the wires. It's a bit nerve wracking. Finished one of the spokes. It was a constant struggle to try and keep the spacing even. I'll set this aside and allow the cement to cure. Hopefully, it will be firm enough to allow me to handle cutting the other spoke in sequence and add the next spoke. Thanks for looking.
-
1/72nd Martin PBM-5/-5A Mariner kit by Minicraft - ref. 11669. Release is reported as imminent. The kit was presented at the Shizuoka Hobby Show 2013 Source: http://happy.ap.teacup.com/applet/runchickens/20130516/archive We need now a 1/48th injected kit of this beauty to replace the old POMK resin kit. V.P.
-
Minicraft is to release a 1/144th Lockheed C-130J-30 Hercules kit - ref. 14700 Source: http://www.1999.co.jp/eng/blog/1509254 V.P.
-
A build I recently finished as part of a Minicraft RIP Group Build over on KG144. This is the first boxing of this kit that Minicraft released, no less, from 1998. I reckon the second half of the 1990s was the golden age for Minicraft, being when they were producing their own new moulds with the DC-3, DC-4 and Catalina also dating from this period. The kit is quite basic in many respects, but Cobra company came along with a very good resin update set that included props, radar domes and jet engines. I've used one of the Blackbird Models re-issues of this set. I also used the sublime Caracal Decals set for the C-97, which includes decals for this rather unusual HC-97G from the 305th Aerospace Rescue and Recovery Squadron based at Selfridge AFB in Michigan. The 305th operated the HC-97G for seven years from 1965 in first aluminium and latterly overall gray schemes with yellow bands. During this time it undertook Air Sea Rescue missions across the upper and mid-western US but also around the globe in support of both NASA and US military operations, including in Southeast Asia. You may well wonder what use a lumbering great transport like this could possibly have in an air rescue mission, where at least some emergencies would not have taken place adjacent to a convenient 3000yrd runway. Well, the HC-97Gs were converted to both drop parachute rescue teams but also serve as airborne command posts for managing large-scale rescues (serving as a comms relay, directing in helicopters etc., classic pre-satellite era stuff). Only ever a temporary fix, they served to bridge the gap between the ageing HC-54s (Cargomasters) and the HC-130 (Hercules), which filled a similar role until the 1990s ushered in a new era and approach to air rescue. Source - Global Aviation Resource The USAF contracted Fairchild-Stratos to convert 29 KC-97G tankers, then low-hours airframes being phased out of service for the KC-135. My research suggests that for my 1:144 scale purposes the conversion consisted of omitting the flying boom, adding some bonus aerials and ensuring that the rear cargo doors were scribed on. Most of the other changes being internal relating to plumbing the HC-97 for extra-long endurance flights. I've built 5 of these kits before and they go together well. So there were no great surprises. The canopy needed some fairing in to avoid a gap at the rear. This was my first time using the resin engines but they worked fine and are a big improvement on the blank engine faces and toylike props in the kit. Overall a nice kit - but the Cobra/Blackbird engines and props make a big difference I think. Here she is on some remote dusty station assisting in a rescue effort. Not the most exciting scheme but unusual and interesting nonetheless I think. I confined my weathering to the engines as that's all I could see in photos - otherwise these were kept really very clean. There's something very impressive about the C-97 I think. And finally with a fellow rescue aircraft that has spent far too long on the bench...longer than it spent in service actually. Thanks very much for looking. Angus
- 18 replies
-
- 62
-
-
-
Joining you with this kit. To build as RAAF version, with these Frog decals. Here are the parts, some painting, but no construction. Some of you may recognise that light blue from my recent PB J Mitchell. Well this will also be re-airbrushed, similar colours to my Avenger. This kit cost me £5 from Chelt Model Centre in 1999, and has remained untouched ever since. With me wondering - why did I buy that?
-
This is the Hasegawa/Minicraft 1/72 P2V-7 Neptune boxing from 1972 or 1973. I bought this second hand along with the Eduard PE and Mask set for it. Other than adding the PE, this will be an OOB build of the generic post WWII U. S. version in Navy Blue. I am hoping this to be an easy build as I need one after a couple of trying ones. Here is the box art and collection of sprues loose in the box It appears the fuselage halves have been taken off of the sprues and for some reason the locating pins have been sanded flush. I wonder if original owner didn’t realize what they were and thought they were sanding off sprue attachments? So, the prior owner has turned this into a short run kit without locating tabs, wonderful. So work begins with the cockpit. The kit is very basic with 2 seats, a floor and 2 bulkheads. There are also the pilot figures to help jazz it up, but I am totally rubbish at figure painting. So, I am hoping the Eduard PE set will help jazz this area up. I am not sure how much can be seen once the canopies are on, but looks to be very barren inside. First step is to locate the minimal floor console instrument panel and sand the detail down so the Eduard PE part can be attached. Next looking at the seats, there are some quite lovely and large injection marks that need to be dealt with. Next up the base coat of grey for the interior parts including the nose gear bay housing. I tried to come close to the colour on the PE and think it will blend in nice once a weather finish has been applied. A little bit of dirtying up and scuffing . . . Now to work on the PE stuff. There is a little box that sets at the rear of the seats on the rear bulkhead that has to be painted and bent into place. That fuzzy thing above it is the tip of a microbrush to give a sense of scale of this huge item. Why at my advanced age am I doing PE work on a 1/72 plane? I need magnifiers for my magnifier. Onto constructing the two control columns out of the PE. It consists of two pieces, the control column that has to be folded and the circular yoke. I have completed one and you can tell the size by the tweezer tip in the picture. Next up are the rudder pedals. Here is the PE part after painting, but prior to being folded. And here it is all folded up; only 3 more to go, yippee!! And all four looking somewhat uniform Now this is what the kit cockpit would look like if built straight out of the box. (Please ignore the center control PE part and imagine a really crappy, raised, blobby, plastic detail area.) No wonder there were figures to put in here. Otherwise, there would be nothing to see. I put the PE control panel in the starboard fuselage half and it fit quite nicely and jazzes the area up a bit. Now here is where I ran into problems. There are two PE side instrument columns that run between the fuselage wall and the cockpit seats. When I dry fit them, there is not enough room between the seats and the fuselage wall for them to fit. My choices are to cut down the instrument panel and lose some of its detail, or sand down the chunky seats to allow more room for the side control column. I decided on the latter. Did I dry fit prior to installing the seats and begin work on the seat belt placement; of course not. I didn’t get the prudent idea of checking the fit until the seats were firmly in place. So, I pried off the port seat and sanded both sides of it down, trying to not mess up the seat belts. I then placed the seat back and you can compare the size of the sanded seat to the original kit seat. The seat appearance is improved I think. The side console will now fit. I just have to pry up the other side and do that seat too. But, it is time to go to work to pay for my plastic addiction, so I must stop. All comments always welcome.
-
 Another recent project just completed. I bought the Braz Carvair conversion a few years ago together with the Minicraft C-54 to do. It laid in the 'pile' for a few years, and then Roden obliged with a full Carvair kit. I then thought why not still do it the hard way, So, I managed to get some Sand/Light Blue BAF markings from S&M decals and the project begun. Basically the fuselage of the C-54 is disposed of and the Braz one utilised with the rest of the kit. Braz have a cockpit floor and fuselage compartment but were little more than shapes, so I added ribbing to the interior of the loading bay, nose cone, and a basic cockpit and instrument panels. Most of this cannot be seen, but hey ho, I know its there. The main undercarriage bays had a bit of sprue detailing to busy them up. All went together reasonably okay, but some filling was needed to make the wings blend in tidily. Model was painted in Halfords Acrylic White, Tamiya AS-12 Silver, Alclad II Duralaminum, and various Tamiya colours. The decals went on like a dream, but the paintwork needed careful masking to match the cheatline and stylised 'BAF' logo. I created representation of a 'Hylo Vehicle Lift' from plastic card and Balsa, though I did guestimate some of it as I have not yet found any scale drawings but I keep looking. I have posed the Carvair on a temporary base with some Preiser figures, and some cars awaiting loading. Hope you like my interpretation of the 'Carvair'. Any comments, suggestions most welcome. Thanks, Kevin
- 15 replies
-
- 30
-
-
-
Minicraft Model Kits closing down ? To be confirmed. Source: https://www.aviationmegastore.com/en/modelling/lockheed-c130j-30-hercules-last-stocks-mincraft-has-ended-activities-minicraft-14700-134122.html Minicraft Model Kits official links: Homepage: https://minicraftmodels.com/ Facebook: https://www.facebook.com/profile.php?id=100054426042044 Twitter: https://twitter.com/MinicraftModels V.P.
-
Just 2 in fact! So continuing on with the airliner SOD* clearance here are my next projects. Both are Minicraft kits, maligned by some, I have built a couple and find them OK. First is Singapore Airlines jet which made it tot eh decaling stage when the decal setting solution discoloured the gold in the cheatline. Here is is before my blunder After sanding most of the decal away and after repainting the fuselage Second is a BA jet, G-YMMM, the one that had a fuel starvation problem on approach to Heathrow and landed short of the runway. It's at the priming stage at the moment. I'll be using Xtradecal sheet for this one. * Shelf of Doom (or should I say Tub of Doom)
-
 Since Zvezda released their superb Boeing 757 kit,Minicrafts effort sank even more in the favour of airliner modellers. As I had 2 of those in my stash,I thought if they cant be sold I might build them as well so I started work on both simultaneously. On both I chose to use the kits decals as they seemed nicely printed and I liked the respective liveries. The Eastern 757 was planned to build factory fresh as I found some pictures on the internet showing the 757 highly polished. First thing I did on the kit was correcting somehow the tail fin. It should be straight at the top and not raising from front to end. I sawed off a piece of it to get it levelled. The interlocking mechanism of the wings were cut off as well,it makes the alignment much easier. The most work was spent on the engines; As they come,they look terrible and if built and glued to the wings oob,the face upwards like on the 737MAX ,but more steep. First thing I did was sanding out the inlets on both halves,then inserting a piece of plasic tube to create a new seamless inlet. The nacelle also has a enhightened top were the engine mounts will be glued on to. Those were sanded off and that area flattened,so that the engine mounts will sit flush on the nacelles. Then the rear of the mounts were pressed down to sit on the hot section,glued on with CA glue. The mounts were cut down a bit to have a pointy end and straightened out.So if the engines are glued on the wing they will sit straight. The engine inlet and outlet rings were recreated by using evergreen 0.5mm plastic sheet,glued to the front,resp. end of the engines. Once hardened for about 2 days,the plastic sheet can be drilled open and then sanded to shape. This way no seam will be seen at the end. A lot of work but it improves the appearance of the engines tremendously,if you dont want to spend money on replacement parts. Some slight correction work was also done on the nose section to get it more 757 like. Here some putty and sanding did the job. The rest of the build is more or less by the book. For the metallic finish,I used Gunze chrome with some aluminium areas,with a gloss black base. The grey for the wings and tailplanes is Gunze grey 315 and the coroguard my own mix of Tamyia metallic grey and light grey. The windows are from Authentic Airliners and some metallic decal stripes were added to the fuselage to give a bit more detail to the metallic finish. Sealed with a thin layer of Gunze Premium gloss on the fuselage and semi-gloss on the wings. Cheers Alex With the AA 757,which can be seen in the other RFI...
- 16 replies
-
- 21
-
-
-
- Boeing 757
- Minicraft
- (and 1 more)
-
As mentioned in the RFI for my Eastern Airlines 757,I worked on both kits simultaneously. The mods I did are explained in the Eastern 757 thread,for the AA version I added the winglets,which come from a Eastern Express kit. They needed a fair amount of work to fit on the Minicraft wings...I always assumed the EE kits are simply copies of the Mincraft 757,but it seems not entirely. For the AA 757 I chose a more weathered look as pictures I found showed a quite worn and tired looking 757. The metallic look was created with Tamyia aluminium with a thin overspray Tamyia Mica silver from a spray can. Some silver decal stripes were added for more detail.The decals are from the kitwith the exception of the cockpit window being from Authentic Airliners. The cabin windows were printed on the stripes,so I could not use AA cabin windows. The coroguard panes are from a Flying Colors detail set,that I found in my spares box as well as some other details. The "AA.COM" logos on the winglets come from a Hasegawa 737-800 kit.They are a bit smaller than they should be but it was all I had in my stash.Most important that the logos are there at all... 😉 I sealed the fuselage with a light coat of Tamyia semi-gloss to tone down the metal and Tamyia matte varnish for the wings and engines. Weathering was done by using Humbrol graphite powder. Cheers Alex
- 9 replies
-
- 19
-
-
- Boeing 757
- Minicraft
- (and 1 more)
-
(510x640)-Copy(95x120).thumb.jpg.33073138e01aa81779639a845926753e.jpg) Claiming a spot. I'll be doing the classic/ancient/old (you decide) Minicraft Ventura Mk.II, with help from the DK Decal Ventura sheet. And the subject as the title says: Leonard Trent's AJ209 on the ill-fated Ramrod 16 raid.
Claiming a spot. I'll be doing the classic/ancient/old (you decide) Minicraft Ventura Mk.II, with help from the DK Decal Ventura sheet. And the subject as the title says: Leonard Trent's AJ209 on the ill-fated Ramrod 16 raid. -
Hi all, I enjoyed so much the first GB that I joined the list for this one immediately after it was proposed! Again I have too many fitting kits to start, this time I made a decision to enter first an airliner, maybe this will be easier to finish and give me additional time for a second entry. So, my plan is to build the much cursed Minicraft B757 (not Zvezda, I still have to buy it) because I have it in my stash and this is a good excuse. Perhaps I will do some shape improvements, but we'll see. For sure the livery will be this: I made a return trip on it in 2006 for a holiday in Minorca. I have very good memories and the plane was quite comfortable compared to the run of the mill Airbuses and B737s. Cheers Fabio
- 31 replies
-
- 13
-
-
This is my DC-8-51 of the Finnish airline Kar-Air. The company bought the plane from Eastern Airlines and it was taken into use in November, 1971. The plane was used in chartered flights to southern holiday resorts and the flights at that time were quite moist to say the least. So the pilots gave the plane the nickname "Drunken Mike" after its call sign OH-KDM. The plane was also called "Viirupyrstö" or "stripe tail" because of its elegant livery. I modified the plane from the 1/144 scale Minicraft DC-8-71 kit. The fuselage of the DC-8-51 series was 11 metres shorter than the -71 so the kit's fuselage had to be shortened correspondingly about 7,8 cm. Luckily enough Minicraft had marked the cutting lines inside the fuselage for the different sub types of the DC-8. Before joining the fuselage halves together I had to add quite lot of weight to the nose in order to avoid the plane being a tail sitter. Another major modification was to install the right types of engines i.e. Pratt&Whitney JT3D-3 to the wings. In the aftermarket I found three alternatives, the Contrail, the Braz-models and the Authentic Airlines' resin powerplants. I chose the AA engines which were of high quality. To be installed they required slots to be cut in the wings of the kit. As to the front landing gear of the kit I had to cut it to the right length of the DC-8-51. I also added lots of scratch built details to the model. The decals for the DC-8-51 of Kar-Air are from 26Decals. I ordered cabin and cockpit window decals from Authentic Airliners. To paint the white areas of the fuselage I used Revell's 04 white enamel. The underside of the fuselage was painted with Xtracolor X139 and the coroguard with Xtracolor x150 (Canadian Voodoo Grey). For the the metal areas I used AK Xtreme's metal-aluminium.
-
When I was a plane spotter in my teens some 50 years ago TWA and Pan Am were just about the only international US airlines I knew of. Unfortunately these nostalgic liveries have long ago disappeared from the skies. The story of Trans World Airlines ended in the 1990's when it went bankrupt and was purchased by American Airlines in 2001. As far as Boeing 727 is concerned, its maiden flight took place in 1963 and the production of the plane ended in 1984. In total 1832 planes were made. For me as a classic airliner modeller it was a must to have on my shelf models representing the both iconic airlines. For TWA's part I decided to build their Boeing 727-200 in the elegant delivery scheme. This three holer was quite an old kit by Minicraft in 1/144 scale, from somewhere in the late 90's. Detailwise it wasn't nearly the quality of Minicraft's current airliner kits. I had to do some puttying and sanding of seams but in all the model went quite well together. I also had to add some weight to the front so that the plane wouldn't be a tail sitter. I bought a Skyline Details' photoetch set for antennas, wipers, pitot tubes, etc. I also had to scratch build and correct several details. The decals I used were 26Decals for the livery, Authentic Airliners for the windows and Nazca decals for the stencils and coroguards. I painted the fuselage with white Tamiya Fine surface primer which I then sprayed with Tamiya clear gloss TS-13. The metal areas I primed with Humbrol gloss black and sprayed them with AK Extreme metal-aluminium. I finished the model by sealing the details with Humbrol Clear acrylic varnish and also used Vallejo and Humbrol colours for smaller details.
- 10 replies
-
- 23
-
-
-
My entry will be Minicrafts 1/144 Legend of Aviation, The Douglas DC-3. The kit comes with 3 decal options, I have gone for the all over orange KLM version. I have some concerns over the decals, as they are quite old, did test one and it seemed to behave itself so fingers crossed. Plan is to build this wheels up, as a desk display model. Build wise I am going with the Bruce Wayne Option, Planning to start about 3ish this afternoon, means I should complete it before the Indy 500 starts,
-
 Here's my 1/144 L-100-20 Hercules in TAAG Angola Airlines colours, just finished in the Africa GB. It's the Minicraft kit with a Welsh Models vacform fuselage, resin wheels and engine intakes (can't remember which brand - maybe Brengun or Reskit), and custom decals. The build was a bit of a challenge - there are probably easier ways to get to an L-100-20 (like starting with a C-130H-30 and shortening it). Build thread is here thanks for looking Julian
- 6 replies
-
- 28
-
-
- 1/144 C-130
- Minicraft
- (and 1 more)


.thumb.jpg.d3635a7ef6507d35f372dd09671fe96f.jpg)
