-
Posts
1,821 -
Joined
-
Last visited
About CarLos

Profile Information
-
Gender
Male
-
Location
Torres Vedras, Portugal
Recent Profile Visitors
7,441 profile views
CarLos's Achievements

Very Obsessed Member (5/9)
1.1k
Reputation
-
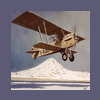
249 - Polikarpov I-153, 1/72 *** FINISHED ***
CarLos replied to hakkikt's topic in Heller Classic GB
What a beauty! Congratulations! Carlos -
I'm having some trouble finding a real bad kit in my stash, but I'll keep looking. Please add me to the list. Carlos
-
From scale drawings, the top of the wings is flat.
-

Lockheed model 9 Orion - the Merlin kit
CarLos replied to CarLos's topic in Lesser Known Manufacturers Classic GB
Wings time! Those in the kit were too thin and far from the correct airfoil, so I began by gluing 1mm plastic card to each half. After that, I traced in cad the wing contour using Paul Matt's plans and superimposed a photo to trace the correct location and contour of the wells. The result was scored in 0.75mm plastic card, using my 1st generation Silhouette. I think the photos are self explanatory about the process that conducted to a more correct wing (lots of detail work still to do...). I felt the need to prime the fuselage (after protecting the place for the windows with tape, outside and inside). Now I will concentrate in designing 3d parts not only for the Orion but also for the Handley Page(s). More progress asap. Carlos -
We are all waiting for a PZL-26!
-
CarLos started following Lockheed model 9 Orion - the Merlin kit and Some cheap tools from Temu
-
I would like to share with you a few tools I get recently. The chisel set is good enough to carve some brittle plastic. Quality is clearly not good as my precious Mission Models, but for the price you get a set of 7 ranging from 0.1 to 2 mm. Find it here --> Chisels from Temu The saw blades are a little thicker than the ones I usually buy (0.2 vs 0,15 mm) but I think they are less prone to breaking. A set (without the handle) costs a little more than 2 euro. Here --> Saw blades from Temu Probably you can find those at Amazon, Aliexpress or Ebay.
-
Thank you, Michal! Yes, that blue aircraft is very interesting!
-
It's good to know that there are some civilian liveries. I have the very nice Broplan vac with some uninteresting (to me) ambulance colours.
-

Lockheed model 9 Orion - the Merlin kit
CarLos replied to CarLos's topic in Lesser Known Manufacturers Classic GB
The fuselage had indeed panel lines and the windows moulded in (or it had before sanded). In the real airplane with fuselage was smooth, without panels. The windows had raised frames. Lockheed Model 9D Special Orion by SDASM Archives, no Flickr My plan is to draw the windows in cad and make a template in the Silhouette to score the contour in the kit, like I did with the W.8. Then sand, polish and replicate the frames with stretched sprue. -

Lockheed model 9 Orion - the Merlin kit
CarLos replied to CarLos's topic in Lesser Known Manufacturers Classic GB
It will be civilian for sure, but I still don't know which one. I thought about Laura Ingalls' "Auto-da-Fé" but then I read about her biography... May be the Detroit News plane, with that camera. Lockheed : 9D2 : Orion by SDASM Archives, no Flickr -

Opel RAK-1 -12 Squared 1/72
CarLos replied to CarLos's topic in Lesser Known Manufacturers Classic GB
Small update: sanded the underside of the wing and glued plastic card to correct the airfoil. I divided the plastic in 4 parts to minimize the chance of bowing later, but only time will tell if I succeed. Here it is, ready for primer. I am also thinning the fuselage, as the plastic is very thick. Boring... I will replace the tail booms because they are too thin. Fortunately I have a good stock of rod in various dimensions. Brass or steel? That is, "easy" soldering or silver soldering (a first to me)? I am almost sure that the RAK-1 flew in varnished plywood but need to read more on the subject. 'Till next! -
Every now and then I get the idea to build something straight out of the box. Of course, it never ends well, and this is another one of those cases. It all started with the Special Hobby kit. Nice kit, not tamigawa but definitely doable. I started trimming the resin wheel wells to fit inside the wings - and then I decided to take a look at Paul Matt drawings and noticed that something was wrong. In fact those wells are complete bogus! With the help of my friends of the Wings of Peace group I gathered more much more information - I am especially indebted to Tim Kalina who pointed me to the San Diego Aerospace Museum's Flicker Photostream - and, after having a look at the Merlin kit I decided that I could deal with it to make an acceptable model. This was about 3 years ago. I started the work on the kit - namely extending the fuselage to go with the plans and cutting the centre section from the fuselage to make the wing as an unit (like the real thing). Then disaster happened! The hard disk where I kept the photos from this and other builds broke and the latest complete backup was from years ago! So I felt discouraged about this and the other undocumented builds and put them aside. This GB is an opportunity go return to this past. Here is the tiny box together with some history and text instructions. De decals are not bad, but I don't think I'll use them. Scale drawings, clearly based on Matt ones: The main parts in low pressure injected plastic, being the fuselage made of a very brittle transparent material. As with other kits I have, namely vacforms, I don't think it is a good idea. If not for other reasons, a canopy with a seam at the middle will never look good (it was already cut from the fuselage). I hope to be able to show some progress very soon! Carlos
-

Lesser Known Classic GB Chat
CarLos replied to JOCKNEY's topic in Lesser Known Manufacturers Classic GB
Thanks guys! For this one I have a plan, contrary to the Dragon Rapide. I'll open the thread in a moment. Carlos -

1/32 scratch build: Short Wright Flyer
CarLos replied to pheonix's topic in Work in Progress - Aircraft
Just noticed this. Beautiful work!


