Search the Community
Showing results for tags 'chinook'.
Found 24 results
-
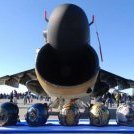
 Expected in Spring (May ?) 2024 - ref. A06023 - Boeing Chinook HC.1 Source: https://uk.airfix.com/products/boeing-chinook-hc1-a06023 V.P.
- 156 replies
-
- 24
-

-

-
New boxing/variant from the Trumpeter Chinook expected in 2023-2024 - ref. 05113 - Boeing ACH-47A Armored Chinook Source: https://tieba.baidu.com/p/8249037080 V.P.
-
The following images illustrate some of the work undertaken in my most recent build of a 1/48th Revell Chinook… so a departure from my normal subjects in three ways (scale, kit manufacturer and spinney-wing thing). ZA675 #5 by Jonathan Hughes, on Flickr I’d love to say that the kit went together beautifully without much effort at all…. But I prefer to be honest. Some of the fit difficulties will have been due to my cack-handed approach to this model.. my first dual skinned kit (interior and exterior skins), but I won’t excuse the kit completely and I feel that the warped and poorly aligning parts, lack of positivity in locking pins and a little ambiguity in the instructions (and parts) probably didn’t help. The whole build was covered by my Work In Progress thread so I’ll not repeat much here. The interior was built and painted much as the instructions dictated, once I’d checked the colour of the interior walls and seats against several references; it is quite basic but given how much will be visible, it’s probably sufficient. The cockpit could do with improvements including instrument panel details (not just a flat decal) along with better seats and forward panels but the glazing was so thick that not much more would have been seen; the dark interior colouring (shades of black) didn’t help pic out any details. Interior assembly stage by Jonathan Hughes, on Flickr The rear ramp attachments didn’t work either way they were installed, leaving too big a step between the ramp and the cabin floor, so I made some forks to slot into the rear fuselage later in the build. If nothing else, this allowed a better sit of the ramp and meant it didn’t need to be there earlier in the build. I don’t think I’ve ever used quite so much tape to hold a kit body together whilst glue dries, but it did the job eventually. The cockpit nose/glazing piece eventually fitted ok, once the foul with the forward coaming was identified and dressed-back. Additional antennas were added to the top of and under the nose, based on photographs of ZA675… these were made from plasticard and stretched sprue where needed. Probably the only aftermarket item was a set of Eduard masks, which saved a lot of time masking the cockpit and cabin windows, and wheels. I applied several primer coats.. HR Hobbies black around the glazing; Ammo One shot grey all over to check fit and fill any gaps where needed… re-prime, check, fill, sand, repeat, and finally some more HR hobbies black, after which a mottle coat was applied. Camo was applied using a lightened shade of Mission Models Extra Dark Sea Grey (colour should be Dark Sea Grey), which I lightened then darkened and mottled as I went; the green was similarly lightened Mission Models RAF green. Both colours had highlights applied on the horizontal upper-facing surfaces, darker shades to the vertical and shaded areas. The green camo wasn’t masked, I just applied the paint using by 0.2mm Sparmax airbrush at a good 12-5psi painting in freehand patterns, then filling in. I think it worked ok. I used blutack worms for the black demarcation and applied a few light mottled coats of a light black. In fact I had several blacks which I described in the WIP thread. Summarised – darkest to lightest: Rotor hubs, wheels and undercarriage legs Tamiya X1; Undersides, undercarriage bays and rotor blades Tamiya XF1/Neutral Grey XF53 (50:50); Anti-glare panel on nose – lighter mix of underside black (about 40:60), and; Tyre black for the tyres. The decals were a mix of those from the kit (where I could use them) and some produced by my mate Brian for ZA675, which included the serial, squadron code, squadron crest and Royal Air Force lettering (which were much finer than those in the kit). Most of the kit ones went down ok eventually although they’re quire thick; the ant-slip panels on the upper surfaces were very glossy so were treated to weathering with oil brusher shades (starship filth and white) afterwards to a finish similar to the forward anti-glare panel. Some 0.2mm wire that I’d blackened (and then painted black) served for the fine verticals in the nose antennas, shirring elastic with the outer cotton sheaths removed served as the wire antenna along the masts on the port side. So… here are a few more photos which hopefully illustrate the completed model well enough. Final assembly #2 by Jonathan Hughes, on Flickr Final assembly #3 by Jonathan Hughes, on Flickr Final assembly #4 by Jonathan Hughes, on Flickr ZA675 #6 by Jonathan Hughes, on Flickr ZA675 #4 by Jonathan Hughes, on Flickr ZA675 #3 by Jonathan Hughes, on Flickr ZA675 #2 by Jonathan Hughes, on Flickr ZA675 #1 by Jonathan Hughes, on Flickr Looking inside the rear by Jonathan Hughes, on Flickr Looking inside the front by Jonathan Hughes, on Flickr A view underside by Jonathan Hughes, on Flickr Down the middle by Jonathan Hughes, on Flickr Starboard side overview by Jonathan Hughes, on Flickr Nose section, in close by Jonathan Hughes, on Flickr Time to get it to its owner. Chinook boxed by Jonathan Hughes, on Flickr Jonathan
- 22 replies
-
- 62
-
-
-
Revell Chinook HC.Mk.1 1/48 Model kit by Jonathan Hughes, on Flickr Something of a departure from my normal builds, but one I’ve been promising to get done for a year or two for a friend who had the model sat under his desk in the office for about ten years and wondered if he’d ever find the courage (as a non-modeler) to tackle it; we’ve worked together for about twenty years, so I offered to build it for him. It will essentially be an out of the box build but with a few changes to decals to represent the first aircraft he worked on (so many) years ago. I was quite surprised to see that there were very few articles on the build of the Revell kit (a few of the Italeri version – which I think is the same kit) and hadn’t realised that the kit had become a little scarce. As I said, it’s a bit of a departure for me, as I usually build aeroplanes and in 1/72… so to tackle a 1/48 Helicopter (pronounced heli-co-peter) 😊 is putting me somewhat outside my comfort zone, but we’ll give it a go. I started with some kit familiarisation of the sprues and the instructions, and looking at where all the painting instructions were hidden. Ok, confession… I’m not much of a fan of Revell instructions, which seem a bit random and basic. I spent quite some time marking up the sheets with colour annotations, but realised that using the instructions alone was never going to tell me everything I needed to know. More of that to come. Anyway… the sprues A first look at sprues by Jonathan Hughes, on Flickr An article on the Italeri kit that I’d read about in Phoenix Aviation Modelling suggested the need to “droop” the rotor blades. I took a close look at the rotor blades on the sprue and noticed that these ones are least are pre-drooped. Poor photo but shows blade curvature (droop) by Jonathan Hughes, on Flickr I appreciate that when parked, the blades (or some of them at least) can look even more drooped that this. The day before IPMS SMW at Telford I meet up with some good mates at RAF Museum Cosford for a wander around (well… what else would you do?) and I took a good look at their HC.Mk.1 that they have (Bravo November)… including some studying of the rotor blades, and whilst the blades on the front rotor do exhibit more of a droop, they’re drooped at the root and not along the blade length. I’m no Chinook expert so I presume this is something to do with Parking of the blades… I’ll need to look at the photos I took when I get to this stage… but I was left with the impression of not needing to bend the blades at least. Another aspect that the article I’d read had left me with the impression of was that the overall fit of the model was less than ideal. To be honest, this is the first model I’ve made with both an inner and outer fuselage, so I was interested in doing a little test-fitting to see how all the parts went together, to see what I’d need to face later on. To be honest… “false alarm”… as having taped the inner sections together, I cocooned it in the outer shell and, despite some slight warping or the under-side, it seemed to go together “ok”…. Yes, a little disobedient along the top section, but some strong tape as glue dries will sort that (I hope). One impression I was left with was the “heft” that this model had. I’m not used to such large models or ones that are dual skinned… it was quite impressive. Inner and outer fuselage components taped together for fit check by Jonathan Hughes, on Flickr I was interested to see how much would be visible inside… always good to know; this test assembly helped the understanding. Looking to see what will be visible inside by Jonathan Hughes, on Flickr The glazing and nose cover were added and despite a few gaps, I hope these will be treatable with a little persuasion of the parts when them need to be glued. The glazing did have a few scratches, possibly due to having broken loose of its sprue when in the bag/box… so I spent an evening polishing these out. There are still a few imperfections, but these look to be in the material, so we’ll need to live with these. A little clamping and filler will hopefully sort these gaps by Jonathan Hughes, on Flickr This is the interior all taped up for the just-described test-fit. Interior fuselage components test fit by Jonathan Hughes, on Flickr So… getting back to the dearth of detail in the instructions, I’d spent some time searching for a useful book to refer to for this build. There really are not many books on the chinook. I found WWP Chinook In Detail and thought that it might help (yes it will) It’s a bit like the Danny Coremans “Daco” books that I use for reference in other builds, but getting a copy took some doing, what with it being out of print. Yes, a Japanese site said they had several copies… but that copies would be dispatched once in stock (suspicious!) so I eventually paid a little more from a UK second-hand book supplier and it arrived a few days later. This has interior and exterior details of US and UK examples, so has proven very useful. Useful reference by Jonathan Hughes, on Flickr With the photographic reference book in hand, I could start painting with a little more confidence. I started with the interior as this needed doing first (of course). I used Halfords primer on everything, then applied a few light coats of a light grey (matched to photos – noting that floor, panels and padded walls and roof are not all quite the same shade). I mixed some Tamiya grey shades with white to get the colour I sought… adding more white where it was needed. Once good and dry, I masked off the grey sections so that I could apply a dirty-black (a very dark grey) Floor painted and masked for "black" areas by Jonathan Hughes, on Flickr Once airbrushed some variations in tone, the floor was unmasked looking ok. Once hard, I applied a few light coats of Aqua Gloss to seal everything for weathering. Floor section black areas applied by Jonathan Hughes, on Flickr A similar approach was taken for the walls and ceiling, albeit with rear sections given a few coats of “interior green”, which I mixed using about 10 to 12 drops of yellow to 1 drop of black.. which with some experimentation seemed about right… mission models paints being used here. The seats had also been primed, and then given a light coat of Tamiya white… followed by a few light layers of Mission Models Insignia red. Once dry, I added a couple of coats of aqua gloss to seal it in, then painted the silver/grey sections by hand using Mig Ammo Bare Metal Matt Aluminium which went on with a small brush excellently. Finally, I made a few variations of light grey or hemp colour (using mission models paints) to brush-on the seat belts. Photos show these to be a bit of a mix of colours on any particular aircraft, so that’s what I did. The end result was sealed with some more aqua gloss and looked a bit “bright” but would tone-back a little with some weathering. Seats, painted by Jonathan Hughes, on Flickr On to that weathering I mentioned; I took an easy route of using Tamiya panel liner brushed on liberally and then wiped off… which worked ok. Weathering interior sections by Jonathan Hughes, on Flickr The bulkheads and cockpit panels that lacked transfers (overhead panel and cockpit entry sides) were all painted up (using photographic references). There are a few issues here as the kit parts are a bit “hybrid” in some areas – or rather nothing like any photos I could see… so some artistic licence was needed in places, but I think they look ok… given how much will be visible afterwards. Interior painted by Jonathan Hughes, on Flickr Cockpit and bulkhead sections by Jonathan Hughes, on Flickr Although not shown, I later painted in the details in the rear fuselage "green" sections, and transfers were added to the fuselage sides (prior to weathering) I assembled the cockpit and test-fitted the seats to just take a look. It was only after the cockpit panel transfers had been added and sealed with a matt coat that I noticed that the HSI colours are upside down… at least, I presume the aircraft isn’t flying through a brown sky over water… hmmm. But it was too late to rectify that. Thanks, Revell. Before everything was assembled, I applied a unifying flat coat to everything. I don’t usually do anything flatter than semi-gloss (or satin) coats for exteriors, but for interiors, especially where there’s lots of soft coverings such as the insulation on the walls and seats) a flat coat seemed to be better. This tones everything back a bit and worked quite well for the interior floor, walls and ceiling. I’d do the same for the ramp later in the build. Cockpit assembled and seats test-fit by Jonathan Hughes, on Flickr Front section fwd-view by Jonathan Hughes, on Flickr Realising that before I could close the interior and exterior fuselage, I’d need to assemble the rear ramp… and thus paint it too. The kit provides for this to be fitted early in build, and has two brackets to attach it to the rear of the floor section. So, I assembled the rear ramp sections as shown. Now… here I have a bit of a gripe with the kit as the attachment brackets are angled and you need to take care which way they’re attached. Here’s where I feel-down a bit. Following the instructions, I added them one way… and when doing a test fit with the fuselage, found that the whole ramp sat a bit low… with a big step-up to the cabin floor level (which could not have been right). I looked at the instructions again … no, that’ the way the brackets are shown attaching… look at a later step in the instructions and it shows them the other way up. It’s not the part flipped… the brackets are reversed. So. I opened the ramp up and managed to remove the brackets and added them the other way up... packing them out a bit with plasticard to strengthen the whole thing. Initial ramp assembly by Jonathan Hughes, on Flickr When I then tried to fit these, I found that it would not close-up properly at all, I was a bit peeved! Having slept on it, I decided to go for a different approach and make some forks that could slot into the rear fuselage once complete... and thus not need to be fitted until final assembly (much easier) I disassembled the rear ramp.. which took a little doing Ramp disassembly and bracket removal by Jonathan Hughes, on Flickr I then made the two forks from four laminates of plasticard, and cut a wedge from each end so that the fork would be angled forward of the ramp, to allow a dropped angle for the ramp at the end. The reinforcing just beefed up the structure given that it would now be a separate part. Shown on test fit (for test fitting to the fuselage) and after gluing Revised fitting for ramp... test fit by Jonathan Hughes, on Flickr Fettling the ramp to work with attachment "forks" by Jonathan Hughes, on Flickr In the latter photo above, the two chamfers are evident in the outer shell, allowing the forks to sit close to the outer skin once assembled. The ramp was assembled, some details added with a pin-vice and Rosie-Rivetter and primed. A shade of grey similar to the interior was added (as close as I could get it) and then this was masked for the back sections. Masked and black areas applied to ramps by Jonathan Hughes, on Flickr Notable in the above shot are the two ramp sections that sit atop (or down from) the main ramp. To sit these parts flush on the main ramp, they were sanded flat on their undersides. Once finished, these will just sit on top of the main ramp... ready for use if needed. Once finished and weathered, the ramp looked ok. The upper clamshell section for the rear fuselage opening sits inside the ramp when open; it is visible sticking-out of the main ramp here. Ramp completed, with weathering by Jonathan Hughes, on Flickr That was 2023… it’s now 2024… so back to it. Happy New Year all. The seats were glued in place and I set about taping up the fuselage interior sections for gluing. Interior assembly stage by Jonathan Hughes, on Flickr I used plenty of masking tape to hold it all together then glued everything using Tamiya thin. Once dry, I beefed this up with my sprue-goo mix (Tamiya thin and sprues) along the seams. Interior taped up whilst glue dries #1 by Jonathan Hughes, on Flickr Interior taped up whilst glue dries #2 by Jonathan Hughes, on Flickr One thing that may be noticeable from that last photo is that there’s a gap between the rear undercarriage bay plate and the fuselage walls… I therefore cut out a couple of sections of plasticard and glued these into the gap, using tape again to hold it all together. Added "packing" to rear undercarriage bay assembly by Jonathan Hughes, on Flickr Whilst all of the glue was drying overnight, I wrapped the outer fuselage sections around the outside, to keep everything true or square whilst it set hard. That gap by the rear undercarriage part being very evident here (prior to fixing) Outer fuselage added to keep interior "square" by Jonathan Hughes, on Flickr And finally…. after a good 24 hours, all tape was removed and some final check made. I re-clamped the rear section and added some more glue, along with some more sprue-goo to bolster the grip, and then used this on all slightly open seams (although they’ll all be covered by the outer skin once added. Final clamping and glue and some sprue goo. by Jonathan Hughes, on Flickr So that’s it for now. Not my normal type of build but another case of learning as I go. Thanks for reading… Jonathan.
- 32 replies
-
- 27
-
-
A couple of months ago I was driving across Bodmin Moor on the A30 when I noticed a Wildcat sitting in a field next to a layby on the opposite carriageway. With no alternative but to carry on to the next junction I returned to the layby but the Wildcat had departed. There were a couple of Military vehicles parked in the layby and they didn't move so I decided to stay for a bit. During the next half hour the Wildcat retuned 3 more times to collect troops. Later that afternoon I was on the return leg of my original journey and the trucks were still there so I parked up and waited a bit. I was just about to give up and go home when without any warning (no distant wokka sound) a Chinook suddenly appeared from a valley, it can't have been more than 50 feet high when it appeared from the gap , even the troops in the trucks were caught by surprise and had to do some running. I hadn't noticed the squad of troops scattered around the gorse waiting to be picked up by the Chinook which returned for a couple more pick ups. By now a bit of an audience had turned up with a few drivers pulling in to have a look, including one unhappy woman who screeched to a halt and started moaning at me about the horses on her farm being spooked by the helicopter, not sure what she expected me to do about it🙄.
-
In 2021 Hobby Boss is to release 1/48th CH-47 Chinook kits. - ref. 81772 - Boeing CH-47A Chinook - ref. 81773 - Boeing CH-47D Chinook More variants to follow? Most probably. To be followed. Source: http://www.moxingfans.com/m/view.php?aid=7201&pageno=1 V.P.
-
Heyy! I show you my completed Chinook. This models ona of the four examples converted into an ACH-47 variants. All of them were tested in Vietnam, untill three of them were lost and the only remaining were withdrewn from duty. You can see the boulding here: I used the Eduard etchted fret dedicated to this kit. To be honest, the only worthy part of this detail set is the bunch of ammo boxes, however these dont seems to be correct either. Also I got a CMK cockpit that I used and it stopped the build for long-long times, as it does not fits to the fusalage halves and does not fit to the windshield. Looking the kit itself, its a bit out of date and the holes in the cargo bay's ceilig is a huge negligence. All in all, If anyone wants to bould an ACH-47 I recommend to have the Trumpeter CH-47A kit and use the specific parts from this kit.
- 6 replies
-
- 34
-
-
-
- Guns-a-go-go
- Gunship
- (and 1 more)
-
 Hi Everyone, just thought I would show you my first build: https://photos.app.goo.gl/1wvTMHi36P8NeQTHA https://photos.app.goo.gl/iKMNh5YPZn9y7ZoH8 It's not brilliant I know, I'm very new to this, I built it, painted it, gave it a coat of gloss varnish, put decals on, then matt varnish. Is that how your supposed to it? I used vallejo paints and varnish throughout. Jerry.
- 18 replies
-
- 14
-
-
-
Hi! I just realised a few hours ago that I've been bamboozled by Italeri. I am finishing a long build of a Gunship Chinook and at the antennas. Here you can see Italeri suggest it the way on the step nr. 7 : https://www.scalemates.com/products/img/5/6/6/103566-77-instructions.pdf Well, I am unsure about the place of either the parts nr 42 and 43. Either there is shuld be an other aerial with a fork-like ending, thats not even in the kit. See here at page nr 6: https://www.scalemates.com/products/img/8/9/5/138895-30-instructions.pdf First I thought the Italeri is missed the wire aerials place and it should be on the port side insted of the starboard side, but fter watching some shots I am unsure about it too. So, pictures: https://www.facebook.com/theboeingch47chinook/photos/a.1538484396411802/2544655629128002/ Note: the following is mirrored So now I am realy confused by this. Can you help me pls?
-
 My second build(of recent times) is a MH47E SOA chinook in 1/72 scale and made by Italeri. I got this from my folks for Christmas(beats socks any day of the week) and after completing the Merkava i immediately got straight onto this. Finally after 14 days of hands on work, i had the chinook completed! Its not been the most enjoyable build i have done due to parts not lining up and parts easily broken or lost, but worst of all was cutting out a whole bottom section to replace with another, when the manufacturer could have just had it in the first place! It nearly kind of broke me, but i am happy with seeing it through to the end. I hope my pictures are okay as i have noticed that some folks on here have absolute amazing backgrounds and stands to present theres.....and my pictures kinda look like they were taken with a potatoe! I was going for a more middle eastern look for this aircraft, and one that was in an old airfield setting, so I’ve went heavy with the weathering and sand. Experience whilst in the Army and also abroad showed me that these aircraft are work horses and are usually dirty and dust inside. [In this picture, you can see where i messed up with the rear window by cutting in to deep when removing the bottom section off, i tried to repair it the best i could but it still looks off.] [The inside is fully weathered and has that “dirty” look and the cockpit i really went to town with but, after closing it up i feel that i didn’t really need to bother.....you cant even see it!🙁] [The Decal on this side is a bit off, nearly lost it moving it into position! Learned from this learning experience to use Micro Sol and Micro set in future.] [Finished product, placed into a picture frame then poured in plaster of paris and weatherd the whole thing...] With my first aircraft now done, i have definitely learned a lot of things......by making a lot of mistakes! but i have really noticed an increase in my own personal skill in model building in such a short time that I'm really happy with. My hope is to keep the skills building along with more models!
 -
MH-47E Chinook (03876) 1:72 Revell The CH-47 Chinook is a tandem rotor heavy lift helicopter, developed by Vertol and manufactured by Boeing Vertol since 1962. Its incredible longevity is testament to the quality, flexibility and robustness of the design. Over 1,200 examples have been produced and the type has seen frontline service in conflicts such as the Vietnam War, the Falklands Conflict, both Gulf Wars and Afghanistan. In its capacious loading area, the Chinook can lift a 24,000lb payload or carry anywhere between 33 and 55 troops. The MH-47E is a dedicated special operations variant and a development of the earlie MH-47D. It is equiped with in-flight refuelling, fast rope-rappelling system, terrain following radar and increased fuel capacity. The UK ordered eight CH-47Es (known as the HC3) but the type famously never entered service due to bungled procurement arrangements that were subsequently highlighted in a National Audit Office report. The airframes eventually entered service with avionics reverted to Mk2 specification at great and uneccesary cost. Keen-eyed modellers will realise that Revell's Chinook is actually Italeri's Chinook (the same kit has previously been released by Airfix too). No matter however, as the Italeri kit is really rather good and pretty much the only modern-ish kit other than the Trumpeter effort. It is broadly comparable to Revell's own kits of the same era. Inside the large boxvelope are three large frames of grey plastic and a smaller frame of clear plastic, as well as decals and full colour instructions. Assembly begins with the interior - more specifically the flight deck. As well as the instrument panel and centre console, there are two seats, pedals, cyclic and collective controls. Decals are provided for the instrument panel and centre console, even though these parts actually have rather nice detail moulded in place. Aft of the cockpit the rest of the interior is fairly plain, but you can finish the model with the loading ramp open if you wish to do so and dedicated parts are provided for this purpose. If building the US Army version, you will need to cut away both of the fuselage side fairings and replace them with the alternative parts supplied with the kit. It's a little surprising to see such major surgery is required in order to build what is, after all, a very mainstream kit. Thankfully the British version requires no such work. Once the interior sub-assembly has been sandwiched between the fuselage halves, the engine pods can be assembled. These are each composed of six parts and are reasonably detailed. Athough the interior isn't overly detailed, the loading ramp is pretty nice. Optional parts are provided to finish it with the ramp down and it looks as though it could be moveable once fixed in place. The undercarriage is pretty good for the scale, while there are dozens of antennae blades, lumps and bumps included and these naturally differ between the US and British versions. Both versions make use of a rather nicely detailed minigun and of course the prominent in-flight refuelling probe is included too. The rotor heads are pretty nicely detailed and the blades are nicely represented too. The clear parts are nicely rendered and of course the nose of the aircraft is also moulded with the cockpit windows. Two different options are provides for on the decal sheet. The first is and MH-47E of the 160th Special Operations Aviation Regiment "Night Stalkers", Fort Campbell, Kentucky, USA, 1998. The second option is for Chinook HC Mk.3 ZH903, Royal Air Force, 2004. The decal sheet is nicely printed and a decent amount of stencils are included. Conclusion Although starting to show its age, this is still a pretty decent model. Perhaps the fact that it has endured for over twenty years with only Trumpeter producing a Chinook in this scale in the meantime is testament to its merits. Detail is solid without being stellar, while panel lines are good enough to stand up to comparison with more modern kits. Overall this is a nice model and a good replica of a Chinook can be built from what you get in the box. Revell model kits are also available from all good toy and model retailers. For further information visit or
-
Part of the reason I bought and built the Lynx (RFI coming soon, honest) was to get my head in to the right space for building helicopters and hopefully do a better job of the Chinook as a result. I have the Italeri HC.2 / CH-47F kit which is a bit of a weird thing even before the get go, because (if I understand it) the HC.2 was the UK version of the D. Except for the Netherlands D, they had the analogue cockpit instruments. The CH-47F in contrast was the basis for the HC mk 6, which had the glass cockpit. I guess you could build either ( but not both!) from this kit, although it only comes with decals for the analogue cockpit so... Anyway The plan is to build ZA-712 ER of 7 squadron during its green HC2 phase. It features in the superb model alliance decals as an HC1 in 1991 / op Granby, but I want to make an HC-2 and I don't think I could pull off the black "scribbling" over desert pink camouflage. So I'm going to model the same aircraft, but from a later date when it was painted green, which means that I'll be using a combination of kit and Model Alliance decals. The reason I picked this aircraft is because 7 squadron is part of JSFAW which supports the UK special forces, meaning that I can include the beautiful miniguns that I bought from Live Resin. So, onwards. Cockpit first. The rear wall of the cockpit needs some detail removing and slightly bulking out the area where the PE goes as it doesn't quite look big enough. You can see it here. I added some PE to the cabin bulkhead, but I've read / seen that mostly the LHS is covered by soundproofing and often the RHS is too. I've ordered some clay "stuff" to make the sound proofing. In some of the pictures I saw the heater is partially exposed on the right, so I might go for something like that. More PE. It looks quite smart before it's painted black However, after painting it loses some of the detail. I tried to help by picking some of it out in a semi-gloss... Also, being all black makes it double-hard to photograph. Apparently. The PE instrument panel came out ok though Lastly it was on to the cargo floor which I did with the usual 2 shades of grey and a dirt wash. I'm hoping the wash will settle down a bit when I give it a coat of clear matt because I think I went a little bit over the top. Anyway, that's everything for now. Thanks for looking.
-
Hello, A place holder for now. This has been shouting at me from the stash and although I have quite a lot on the bench and not enough time as it is, and I thought why not add another. I've been wanting to build a civvie chinook for a while and this GB is perfect. I can always build it out with the GB; but I quite enjoy taking part in GB's and I've got until November which should hopefully be enough time. I'll be attempting to build a civvie chinook (Boeing Vertol model 234LR in British Airway livery). I'm pretty sure this type of aircraft would be allowed? They where used to transport rig workers to the further reaches of the North Sea way before my time. A few guys I work with remember flying to the Brent field in these. Incidentally, I'm building an AB212 Bristows chopper that was based around the Brent field... Kit will be the italeri 1/72 MH-47E kit with the whirlybirds conversion set. Also, some Eduard PE and CMK cockpit set. The photo below includes the whirlybirds interior set as well but I think I will give this a miss for the GB as I know what I'm like and I'll get bogged down on the details. So, this one will be built with the airstair door closed but I plan to build another, in time, which will include the interior. photo of the bits Whirlybirds decal placement / instructions and a photo of the real thing. Hope to start soon. May get a chance to start the cockpit in the near future. cheers Aaron
-
I have the Italeri CHinook HC.2 kit on the shelf and as the Lynx WIP is ticking along nicely, I've started thinking about what I want to do with the Chinook. I'm thinking of ZA707, which in HC2 form seems to be all over green rather than the black/sand mottled pattern that would be "interesting" to paint (phew). So I have a question about the cargo space. The rear seats in the kit seem to be moulded with support legs at the front of the seat, connected to or resting on the cargo floor. Presumably the RAF seats were capable of folding to make room for, oh I don't know maybe the Landy that came with a certain Lynx? In the case that they were folded up out of the way, what happens to these legs? I can find pictures of the seats folded, but I can't match them with what's in the box. Where do the legs go? Have Italeri got it wrong, or am I looking at the wrong pics?
-
Hi, I'm building the Italeri 1/48 Chinook at the moment and was wondering if anyone has the dimensions for the later type rotor blades so i can have a go at modifying the kit ones, a drawing would be nice as well. All the best Dave.
-
 Many of you may have seen coverage of the transfer of Concorde 216 G-BOAF, across Filton's now disused runway, from its resting place since 2003 to the new Aerospace Bristol collection. Last Wednesday a smaller member of the collection arrived to take up permanent residence. After missing out on capturing the Concorde moving in, one of my colleagues was given a heads up that on the 8th a Sea Harrier was going to be moved by Chinook from temporary storage in the Brabazon Hangar to the new Museum. Taking advantage of this bit of intel we waited at the end of the runway to capture the last flight of Sea Harrier FA2 ZD610. Just after 09:30 the remaining spots of morning rain started to clear and Chinook ZD575 arrived, made a quick circuit, landed behind the Brabazon Hangar then collected the Harrier and transported it down the runway to a spot near the new Concorde building. Here's a few samples of the pictures I took during the transfer: Arrival in the drizzly morning: Lift-off: Travelling down the runway: In its natural element for the final time: We're going thataway: Touchdown for the very last time: Heading back to the Brabazon Hangar: Off to the next task after a good job done: Thanks for looking. Hope you enjoyed the photos. Jonathan
 -
 Hi Folks, I've finally completed this. It's for my nephew for Christmas so I have to work out how I'm going to wrap it!! Anyhow, WIP is HERE if anyone is interested. Cheers Nigel
- 24 replies
-
- 44
-
-
 Hi Everyone, Here are some of my photos from the Eastbourne airshow, I've tried to pick my favourites out of the almost 1,000 photos I took, but still this is going to be very photo heavy. If you want to view the full 135 photos, they are in an album on my facebook, linked here : https://www.facebook.com/media/set/?set=a.488656594634727.1073741851.100004711722357&type=1&l=0724244a56 Anyway lets kick off the photos, I hope you like them. I'm trying to persuade my missus to let me go to either Bournemouth or Shoreham airshow (preferably Bournemouth) this weekend. Chinook Jet Provost Breitling Wingwalkers Typhoon Spitfire MiG-15 Grob Tutor Bulldog Sea King Eastbourne's Tamar class Lifeboat (At High Speed) Hawk T.2 Blenheim Norwegian Vampires P-51 Mustang "Ferocious Frankie" Vulcan XH558 Dakota Patrouille Reva The Blades Red Arrows Anyway, thats all of the photos I'm going to post. You can view the rest on the facebook link at the top. These photos were all taken with a Canon EOS 20D DSLR body with a 100 - 400 mm canon lens stuck on the front of it. Boy was that heavy without a tripod, but made life easier when tracking the planes. They have all been edited to improve colour balance etc. Please let me know what you think. All the best, Rick
 -
Am having a go at my own WI, its going to be is a Royal Navy Chinook, my thinking is with the new carrier's there will be plenty room for these big beasts, but in another we twist I wasnt to do it in junglie white camouflage! would also like to thank a fellow member "skids" for gifting me a few royal navy decals ! like this,
-
The first week of November has seen some interesting movements at Newquay Airport. Unfortunately I missed the Italian Army Do.228 and Avanti which along with the Czech C-295 visited in connection with 'Exercise Arrcade Fusion' which is being held at RAF St Mawgan. Chinook HC2, ZA679 came in on the 30th Oct and stayed the night after developing a problem. ZH899 arrived on Saturday 1st Nov with crew and equipment to repair ZA679. ZA679 ZH899 Czech AF C-295M, 0455 Cobham Falcon 20s, G-FRAL, G-FRAF and G-FRAJ
-

Italeri 1/72 CH-47J Chinook JASDF
modelling minion posted a topic in Ready for Inspection - Aircraft
Hi all, This is my first post of a completed model on Britmodeller so please be gentle with me! It is also my first time using photobucket so I apologise in advance if you get lots of copies of the same picture. This is Italeri's CH-47 built and painted as a CH-47J of the JASDF. I think the camouflage makes it look completely different, which is what attracted me to it in the first place. I hope you all like the end result.- 18 replies
-
- 12
-
-
RAF Chinook, pics from Graham James
-
Hi Everyone, I just thought I would share some of my photos from today's visit to the Eastbourne Airshow. These photos were taken on a pocket digital camera, a Nikon Coolpix L25, so unfortunately the quality of the photos is not as good as if I was using a larger digital camera. I intend to purchase a better quality digital SLR with a variety of lenses etc, if anyone has any recommendations for me, please feel free to comment. Anyway, onto the photos. The photos of the Battle of Britain Memorial Flight and Red Arrows are my favourites out of the photos I got. Battle Of Britain Memorial Flight - All 3 aircraft BBMF - Lancaster Chinook :- The Red Arrows :- The Red Arrows :- The Red Arrows :- The Red Arrows :- I didn't get any photos of the Typhoon unfortunately and the Sea King and Lynx AH-7 cancelled their displays and didn't show, which annoyed me no end. Several of the other displays were only watched by me rather than photographed as I was walking around the trade stalls etc at the time they were on. Full album is available on Facebook : https://www.facebook.com/media/set/?set=a.199430156890707.1073741836.100004711722357&type=1&l=3d34ba4505 Thanks for looking, I hope you like the photos even though they are not of the quality most photos on here are. Cheers, Rick