Lennyb72 Posted June 9, 2011 Author Share Posted June 9, 2011 Lenny,I was looking through an old issue of a magazine which had a review of the Hobby Boss 1/48th Tornado and, after the little bit of realism I passed on to you I though it would be nice to rectify errors on this model. Where do I begin? Flight Controls: On the wing it shows the Spoilers 'out', and the Flaps and Slats 'out' (which, IIRC, should have the Kreuger Flaps deployed as well). Spoilers operate only as part of Roll Control, and work with the Differential Tailplanes, as per my previous note to you. Engines: The Auxiliary Intake Doors are deployed - these are 'suction' doors and would only open to allow a maximum flow of air to the engines - whilst they are running! The Thrust Reverse Buckets are shown deployed - these only deploy on touch-down (or during a Test of their operation). Rear Fuselage: The Air Brakes are shown deployed - these would automatically retract if the Thrust Reverse operates, as a obvious safety measure. Apart from these points, the kit does make up to a fair representation of the Tornado, (we never called the Tonkas in my day!), in fact this model shows one of the more obscure points that only (probably) a ex-Tornado guy, (like I am), would pick up on - he does show the green band on the in-flight refuelling probe! For those not into Tornado operations, the Nozzle of the probe is attached to the probe by a 'Weak Link' - a row of rivets, which allows the probe to shear-off if there is an issue during in-flight refuelling. (There is a Non-Return Valve, to prevent fuel leakage!). We wrapped green adhesive tape around these rivets, to allow an eye-ball check to be done on a turn around/after flight if there had been an excessive load during in-flight refuelling - which would be shown by movement of the tape! There, I've got that off my chest! Cheers, Brian Brian, Thanks alot fella in taking time out to give me that info. I'm really a modeller of 1939/45 types but I do venture out of my zone now and again and I'm always up for learning something new. I'm from the dark side (Army) but my Dad was RAF 25 years so I've always had my heart on aviation. The models coming on now so fingers crossed I will do it some justice. Thanks again Brian. Lenny Link to comment Share on other sites More sharing options...
Lennyb72 Posted June 9, 2011 Author Share Posted June 9, 2011 Air intakes mmmmm air intakes on the Italeri 1/48 scale Tornado F3. At first I saw this Then I test fitted them. I test fitted them again. Then again and again and then I saw this Tomorrows another day Night all Lenny Link to comment Share on other sites More sharing options...
Ingo Degenhardt Posted June 11, 2011 Share Posted June 11, 2011 Hi, am I wrong or is the Italeri kit missing the engravings for the Refuelling probe door on the left front fuselage? Ingo Link to comment Share on other sites More sharing options...
Lennyb72 Posted June 11, 2011 Author Share Posted June 11, 2011 Hi,am I wrong or is the Italeri kit missing the engravings for the Refuelling probe door on the left front fuselage? Ingo Your not wrong fella. It's well missing. Link to comment Share on other sites More sharing options...
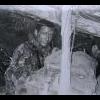
Lennyb72 Posted June 11, 2011 Author Share Posted June 11, 2011 Hello all, Well the air intakes are on and other bits and bobs. Out of the whole kit so far the intakes are the biggest problem and the biggest dissapointment. I had to jiggle them around so much and even had to shave the locating knob off so I could move them around just so I could at least minamise the gaps around them and using a pot of glue to do it as well.......................oh well all good fun in the end. I love this hobby So here you go. Some more photos of my progress. Also I've glued on the bits that bring the intakes to the main fuselage (whatever they're called????) Also I've glued the back end bit, told you I don't know much about modern aircraft never mind!!!! Again, all feedback is very welcome. All the best Lenny Link to comment Share on other sites More sharing options...
phat trev Posted June 11, 2011 Share Posted June 11, 2011 Looking good, this (well the IDS version) was one of the first BIG kits I ever made so I will be watching your build as it is looking neat! keep up the good work. Link to comment Share on other sites More sharing options...
jacksdad Posted June 11, 2011 Share Posted June 11, 2011 Good on you for your perceverance. Looks like this is going to be a really nice job when done. Steve Link to comment Share on other sites More sharing options...
Lennyb72 Posted June 16, 2011 Author Share Posted June 16, 2011 Hello all, Well I was at the end of my tether with these bloody intakes but I think I may have cracked it. Before I used glue for the gaps then Humbrol filler and was still getting holes. Now I resorted to something I've never used and that's talcom powder and super glue and fingers crossed it will work. If not I down at B&Q for some more cement. All the best Lenny Link to comment Share on other sites More sharing options...
jimbuna Posted June 17, 2011 Share Posted June 17, 2011 Coming along nicely. Link to comment Share on other sites More sharing options...
Lennyb72 Posted June 27, 2011 Author Share Posted June 27, 2011 Hi all, just me with an update. I've managed at last to sort out the intakes, its not perfect but I think its as good as I'm going to get them. I ended up using talc and superglue to fill the gaps. It worked really well so I think I'll try that method again but the only thing I've got to watch for is the glue slightly melting the plastic. Anyway here's some photos of what I've managed to get up to. From what I can see the intakes look ok, the first undercote will I'm sure pick out some faults so I'll go over it with some wet and dry if need be. It was a right Royal pain in the backside. I know I don't know all the tech tearms for jets but the engine exhaust things on the back fit ok with no filler needed. THANK GOD FOR THAT!!!!!!!!! The airbrakes (think I got that right) at the rear are not a good fit and to be honest I really can't be bothered having another filling and sanding session so I'm going to pose them open. I also made some wing gap thingy things as per one of my reference photos out of Tamiya tape which I will put a thin border of plastic strip to give it a bit more depth. I really wished I knew more tech tearms. Last thing that I've sorted is some of the ordenance. Skyflash and AIM-9's will be the order of the day. I haven't made my mind up yet to include the external fuel tanks. I'll have to wait and see. That's all for the moment. Fingers crossed I'll be able to put a lick of paint on it soon, then you can really take the mick!!!!! I'll do me best. All comments and pointers very welcome. All the best Lenny Link to comment Share on other sites More sharing options...
pte1643 Posted June 27, 2011 Share Posted June 27, 2011 (edited) I've managed at last to sort out the intakes, its not perfect but I think its as good as I'm going to get them. You've made such a nice job of the joins on the intakes I almost don't like to point out that the top edge should actually stick up a little. See here. Some kind of "By-Pass" vent maybe??? Edited June 27, 2011 by pte1643 Link to comment Share on other sites More sharing options...
Brian G Posted June 27, 2011 Share Posted June 27, 2011 Yes, there should be a opening at the rear face of the upper intake - it allows air that by-passes the ramps, in the intake, to escape. The ramps articulate to form a shock wave in the intake so that, as the aircraft goes supersonic, the ram air, (in the intake), is slowed to allow it to be used successfully by the engine. Here endeth today's Technical Brief! Cheers, Brian Link to comment Share on other sites More sharing options...
jimbuna Posted June 28, 2011 Share Posted June 28, 2011 Great stuff. Link to comment Share on other sites More sharing options...
Lennyb72 Posted June 28, 2011 Author Share Posted June 28, 2011 Oh well I'll know for next time. Thanks for pointing it out fella. Always good to learn. All the best Lenny Link to comment Share on other sites More sharing options...
trpsarge Posted July 10, 2011 Share Posted July 10, 2011 I'm Through the IDS version of the Tornado by Italeri and I've just come across the problem with the fuselage versus the front of same..They just don't go together.Clamps tape cement superflue pastic card plastic rod...nothing lines them up without having a gaping cavern to fill! I've had Vacforms that went together better. I'm on the verge of tears and that ain't pretty for a 44 year old man over a lump of mis shapen plastic. This is an absolute night mare....I take it you know the feeling. Link to comment Share on other sites More sharing options...
Lennyb72 Posted July 10, 2011 Author Share Posted July 10, 2011 I'm Through the IDS version of the Tornado by Italeri and I've just come across the problem with the fuselage versus the front of same..They just don't go together.Clamps tape cement superflue pastic card plastic rod...nothing lines them up without having a gaping cavern to fill!I've had Vacforms that went together better. I'm on the verge of tears and that ain't pretty for a 44 year old man over a lump of mis shapen plastic. This is an absolute night mare....I take it you know the feeling. Yep I know that feeling very well. Mine nearly took flight through the patio window a few weeks back. Keep with it fella. It all comes out in the wash. Lenny Link to comment Share on other sites More sharing options...
Lennyb72 Posted July 11, 2011 Author Share Posted July 11, 2011 Hi all, me again to give you an update on the work I did over the weekend. I've prepped all the ordenance, undercarrage and doors and other bits and bobs ready for the final paint and assembly. I did a bit of pre-shading on these to give a bit of shadow and depth when finished. I haven't got the full scheme yet on colours for the AIM-9's and Skyflash missiles and different marking so I'll be looking into those shortly. As you can see on the thired shot I've pre-shaded the model. Not everyones cup of tea but I thought it might help break up the grey paint scheme. I've tryed post shading before but cocked it up big style so I'm a bit reluctant to do it but I might give it another bash if the gods of airbrush are on my side. After the pre-shading I painted the wheel wells and the airbrake panels an off white which is matt for the time being but will be gloss when I get round to it. I did think my luck was in and thought to go for the main paint for the model but my compressor and airbrush sneezed all over the model so I thought it better to pack up for the day and tackle it in a couple of days. As always any pointers and comments are welcome to someone who knows nothing about jets. All the best Lenny Link to comment Share on other sites More sharing options...
Lennyb72 Posted July 24, 2011 Author Share Posted July 24, 2011 Hello all, Just an update on some of my progress over the past couple of weeks. After the preshading and everything else preshaded I went on and started to airbrush the Tornado with what I think is a decent match which is Tamiya Sky Grey. What I didn't forsee is my airbrush and compressor through a wobbly which resulted in Sky Grey paint being sneezed all over the model, not once but a few times. I tryed everything, thining, thickerning, higher pressure, lower pressure the whole lot and nothing worked. So with I took a deep breath and put it all down and packed up. Id rather do that than give the Tornado it's first flight. Anyway. What I've done up to now is as follows. The preshading has worked I think which does give it a bit of depth and shadow. With the rear of the Tornado where all the hot and flamy stuff comes out of I brush painted it Gun Bolt Metal from citadel which has also come up trumps. I think. If you haven't noticed I know bugger all about jets!!!! As above. The starboard side gun plate and I scratchbuilt muzzle from a bit of styrene rod. Cockpit shots. Port and Starboard The other following shots are various after multiple coats of Klear. Now the Tornado is ready for decals. Fingers crossed and if I pull the thumb from my backside I should have the AIM9's and the Skyflash done by the end of the week. As always comments and pointers are very welcome. All the best Lenny Link to comment Share on other sites More sharing options...
Muzz Posted July 25, 2011 Share Posted July 25, 2011 (edited) Lenny My experience of building their IDS kit tells me I know that this is looking good. For all your problems with the airbrush it's a great looking finish and the pre shading works well, keep it up!! Muzz Edited July 25, 2011 by Muzz Link to comment Share on other sites More sharing options...
AirfixAndy Posted July 26, 2011 Share Posted July 26, 2011 Looks great !! Tempted to get one out the stash now...as if I need an excuse to build a Tonka Andy Link to comment Share on other sites More sharing options...
HOUSTON Posted July 26, 2011 Share Posted July 26, 2011 WOW !! I just read your thraed , and you are doing a fabulous job on it.. Good work amd lookign very neat indeed and I cannot wait for the end... Keep up the good work. HOUSTON Link to comment Share on other sites More sharing options...
jimbuna Posted July 26, 2011 Share Posted July 26, 2011 Coming along nicely. Link to comment Share on other sites More sharing options...
Lennyb72 Posted July 27, 2011 Author Share Posted July 27, 2011 Hi fellas, Thank you for your comments, they are very welcome indeed. I'm about half way through the decals and should have it finished tonight all being good. as I'm not used to doing jets I was a bit overwelmed with the ammount of stencils. No Step, No Step, No Step and on and on and on!!! Never mind she's looking ok. I should have some more photos up tomorrow. All the best Lenny WOW !! I just read your thraed , and you are doing a fabulous job on it..Good work amd lookign very neat indeed and I cannot wait for the end... Keep up the good work. HOUSTON Thanks fella Link to comment Share on other sites More sharing options...
Tim T Posted July 27, 2011 Share Posted July 27, 2011 That is looking particularly fine. I have one in the stash but too much on the bench at the moment! Gone up the list considerably though. Link to comment Share on other sites More sharing options...
Lennyb72 Posted July 29, 2011 Author Share Posted July 29, 2011 Hi all. Just a quick update on me progress before I go off on me holidays. It will be a couple of weeks until I can get back to it so here goes. Decalling and Wash..................There you go. Cheers fellas. Will be back in a couple of weeks. Enjoy. All the best Lenny Link to comment Share on other sites More sharing options...

Recommended Posts
Create an account or sign in to comment
You need to be a member in order to leave a comment
Create an account
Sign up for a new account in our community. It's easy!
Register a new accountSign in
Already have an account? Sign in here.
Sign In Now