Search the Community
Showing results for tags 'boeing'.
-
 Why I'm letting myself in for more ancient BOAC transfers to be put on and punched for windows before closing up the fuselage, I'll never know! However, this was a favourite airliner of mine when a lad so might be wheels up and on the big stand! Looking forward to it and I'll open the box once the starting gun is fired.
- 24 replies
-
- 20
-

-
North American B-25C/D Mitchell (A06015A) 1:72 Airfix The Mitchell was a twin-engined medium bomber that served with distinction during WWII, with over 10,000 being produced by war's end. Named after General Billy Mitchell, the type reached prominence early on in America's entry to the war, as it was used in the famous carrier launched Doolittle raid on mainland Japan, leaving USS Hornet to bomb Japan, and attempting to land on fields in East China after the mission. It was a good aircraft to fly, and was well-liked by its crews, as well as being able to soak up a tremendous amount of punishment from the enemy and still remain flyable thanks to its rugged construction. These traits led to the Mitchell being used in almost every theatre of war, and in addition to bombing duties it was also converted to a "gun-truck" for ground attack, and was fitted with various armaments, including cheek mounted machine guns in fairings, and sometimes the 75mm cannon from a Sherman tank in a solid nose cone, as well as four .50cal brownings in the nose (B-25G) that was named ‘Strafer’, plus the turret guns that could be aimed forwards to add to the hail of munitions. The J-model was the last production variant in a long line of upgrades and improvements, and although many were built with glass noses, they were often converted in the field to a solid nose for ground attack duties. The Kit This kit was first released in 2018, and this boxing adds new decals to the existing tooling and new box art to match, depicting a gaggle of Mitchells flying low over desert terrain. Inside the box are five sprues of different sizes in dark grey styrene, two clear sprues, decals, and the instruction booklet, which is printed in colour with decal option profiles on the rear pages, accompanied by a separate page of profiles for the common stencils applied to the aircraft. Detail is good, and this 1:48 modeller was quite surprised by the small size of the Mitchell at this scale, probably because I’ve been handling a 1:48 B-25 kit recently for another review. It includes a detailed cockpit, bomb bay, turrets, and gun position details, with options for dropped or retracted flaps plus poseable tail surfaces, and raised or lowered wheels to add some personalisation to your model. Construction begins with the cockpit, based on a stepped floor, to which the twin control columns with integral centre console is added, with the instrument panel in front, applying a decal to depict the dials. A bulkhead is fixed to the front of the floor, and two crew seats are slotted into sockets in the floor behind the controls. Another bulkhead is slotted in from the side behind the crew, and an additional lower floor part it fixed to the bottom of the assembly after drilling out two flashed-over holes in one side. At the rear of the assembly, a further bulkhead with moulded-in spar is mounted, then the nose compartment is detailed with a small seat and a bicycle-like seat in the very front of the floor. The bomb bay is just behind the cockpit, and the fuselage halves are thinned here to accept the bay wall inserts, which also have the bay doors moulded-in to give it a strong join, and is detailed with the bomb ladders down the sides of the walls. A note in this step tells you to skip ahead if you plan to leave the bay doors closed, which I missed initially, so make sure you don’t. The cockpit assembly is installed on the port fuselage after detail painting, sliding it into position by feeding the spar through a hole in the side of the fuselage. Another spar is prepared with an extra layer to the bulkhead, located on circular pads, then it too is slipped into the port fuselage, adding 25 grammes of nose weight under the cockpit, making use of the box-like structure there. The bomb bay roof is fitted between the two bulkheads, and an insert is added to the belly behind the bomb bay with the socket for the belly turret and its pivot point moulded-in. The bombs are provided in this boxing, making four of them from three parts each, and gluing two on each side of the bay, adding retraction jacks and their mounts to the front of the bay opening. With both sides of the bay built and painted, the fuselage halves can be closed, and the seams dealt with in your preferred manner. If you elected to leave the bay doors closed, a separate part is included with a panel line down the centre to represent the two doors closed against each other. The wings are built on the spars projecting from the sides of the fuselage, adding the upper surface first, and installing the clear landing light lenses in the leading edge, drilling out some flashed-over holes, which are used to locate the aerodynamic fairings over the exhaust ports on the trailing edges of the wings. The lower surface is then glued in place, two clear inserts are fitted into holes in the fuselage sides behind the wings, which cater for various window arrangements through the different variants, and should be test-fitted carefully so that they are level with the rest of the skin of the model. The elevators are built from top and bottom halves with separate flying surfaces trapped during gluing, which can be deflected according to details given as the assembly is glued onto the rear of the fuselage ready for the rudder panels to be built. Again, the panels are made from two halves with separate rudders, one per side, and these too can be deflected according to the numbers given on the diagrams, plus another diagram that confirms that the rudder panels should be posed at 90° to the elevators. The next choice is whether to pose the gear up or down, with gear down the first choice to be described, starting with positioning the main gear legs, using the outer nacelle half as a jig to locate the strut, but not applying any glue to the nacelle part at this time. It can be left in situ while the glue on the gear leg cures, and in the meantime the engines and their cowlings can be made, which are common to gear up or down options. The front row of pistons has a central axle trapped between it and the reduction bell-housing at the front, then it is glued to the combined bulkhead/rear bank of pistons, providing detail that will be dimly seen through the spaces between the front bank of pistons, and via the cooling gills at the rear if you have sharp eyes. The cowling is prepared by adding seven small raised fairings around the main part, sliding the completed motor into the back of the assembly before fitting the cowling gills using the tabs and slots that are shown in the diagrams. The nacelle halves are joined together, assuming the glue has cured on the main gear legs, and these two parts are augmented by a short forward section on the outer half, then mounting a bulkhead and intake to the front, repeating this for the other side in mirror image. The completed nacelles are then lowered over the main gear legs and glued onto the underside of the wings. For the gear-up option, the legs are omitted, and the small curved bay door covers the opening before gluing the nacelles to the wings, removing the two hinges from one end first, which is done again in mirror image for the opposite engine. The engine cowlings are then glued to the front of the nacelles, regardless of the gear option chosen, then the two flap sections per wing can be glued in place lowered, or retracted by using different parts, doing the same on the opposite wing. Both wheel position options have the curved bump-stop at the very rear of the tail, then for the gear down option, separate scissor-links are glued to the legs, adding the doors and a retraction jack near the front of the bay. The wheels are each in two halves, and have a diamond tread pattern moulded into them, so take care aligning the halves once you have applied glue to minimise clean-up. The attachment points on the struts are specially designed to prevent mistakes, so check that the inner peg is aligned with the hole in the bottom of the tyre cut-out before you leave the glue to set. The Mitchell was unusual for a WWII bomber because of its tricycle undercarriage, and for gear-up the bay is covered by a small door that has been reduced in width prior to fitting. The gear down option has the strut inserted into the slot, a translucent scrap diagram showing how it should locate, then the uncut door is fitted to the edge of the bay, adding the wheel with separate outer hub to the bottom of the leg. The belly turret could be retracted so that it was almost flush with the airflow to increase speed and reduce fuel consumption whilst on the way to and from enemy territory and for landing. You have the option to pose it in either position, gluing the two machine guns into a different centre mount, depending on your choice. Both options are then inserted into the clear upper section of the turret, installing both in the cut-out under the belly, the mount holding each option at the correct attitude. The deployed turret clips into position without glue thanks to an expanding spring clip on the mount, but it is a one-time use clip, so make sure you’re ready to install it, and don’t be tempted to put it in early to see how it looks. The retracted turret has its guns aligned with two long recesses, so can be glued into position as there is only one possible position for them. Behind the turret is a crew hatch, which has four tabs around the lip that can support the door if you intend to leave it closed. To open it, the tabs should be cut away, fitting the combined door and ladder to the front of the cut-out, with the same process carried out on the door to the front of the bomb bay. The upper turret is next, fitting the twin machine guns to the central mechanism, and trapping them in position with another part of the assembly. The two ammo cannisters with a twin feed of link is glued to the front of the assembly, then the completed assembly is inserted carefully into the glazing, a scrap diagram showing how it will look from below. The completed top turret is then fitted into its cut-out, locating in a socket in the floor inside. The nose is open at this stage, allowing you to install a rack of ammo cans, plus the gun that is offset to one side of the bomb sight, which is another part fitted to the front lip of the floor. Under the nose is a small window that is inserted from below, then the top glazing is added, followed by the nose glazing, which has a flexible mounted machine gun pushed through the central hole, slotting the fixed gun through the other offset hole in the clear part as you install it. There are two styles of canopy included on the sprues, one for each of the decal options, and at this stage you can choose to seat the two pilot figures that are supplied or not. An astrodome is added to a hole in the fuselage behind the cockpit, fitting two landing light covers in the leading edges of the wings, installing some windows in the sides, and the glass dome in the tail. The final few parts dotted around the airframe include pitot probe in the port wingtip, two antenna masts on the spine, plus a D/F loop in an aerodynamic fairing, and the twin three-bladed props, one in each engine nacelle. Markings There are two decal options on the sheet, one in US service in a desert scheme, the other a lend/lease aircraft in Soviet service, each with a full page of profiles to help you complete the task. An additional page of profiles shows where the stencils are applied to both decal options, using line drawings to simplify the process. From the box you can build one of the following: B-25C Mitchell ‘OH-7’, 41-13207, 445th BS, French Morocco, 1943 B-25D Mitchel ‘09’ 42-87594, 1st Sqn., Uman Airfield, 1944 Decals are by Cartograf, which is a guarantee of good registration, sharpness and colour density, with a thin gloss carrier film cut close to the printed areas. Conclusion A nicely detailed B-25 in this scale with plenty of personalisation options that belies the scale, with a couple of interesting and more unusual decal options, which combines to make for a welcome re-release. Highly recommended. Review sample courtesy of
-
My next build is Revell's 1/48th scale Flying Fortress. My plan for this model is the El Lobo II paint scheme, with the landing gear up and bomb doors open. Since this model will probably be hung from the ceiling (I don't have a lot of room left on my shelf 😬), I'm going to use string to create bombs coming down from the bomb bay. It'll be a little tricky since this model doesn't have an option for putting the landing gear up and I'll have to cut out the bomb bay doors. But I'm excited to see the results! Below is some photos of the model out of the box, except for a few pieces I've removed to begin the model. I've been working on the interior first, however I'm reading quite a few posts that say the interior is not a shade of green and instead bare. If you have any thoughts, let me now. Until next time, Joanna
- 22 replies
-
- 13
-
-
Hi all, It's been a while, Happy New Year! Here is a 1/72 Authentic Airlines resin kit of a B727-200 that I built. I made flaps and slats from scratch styrene. Decal livery by Vintage Flyer Decals. Thanks, Brad Shinn
-
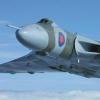
 Greetings! Perhaps one more for our US fraternity but I know Britmodeller has a lot of readers from over the water! In looking at the stash recently my eye alighted on the old 1/144 Airfix Boeing Clipper kit, which can be completed either as Pan American's 'Dixie Clipper' or BOAC's 'Berwick'. From review of web literature the former is one of the 6 '314' production model and 'Berwick' is one of the latter 6 '314A' production model. I understand there are few differences externally between the two - the 314A featured more powerful Wright Cyclone engines driving bigger propellors (14'9" v the earlier 14'). There was also an intriguing mention in one source of the step being moved in the 314A to reduce porpoising, although I've not been able to see any change in the photos I've looked at. I assume the step is where the hull bottom has a break in shape and curvature below the sponsons. I also read somewhere that the earlier 314 versions were updated later on to the 314A enhancements, presumably during the wartime period of service. Happy to be corrected if I have misunderstood anything! 1. Is the Airfix kit a 314 or 314A (I guess the only judge is the location of the step - but see 2 below! - and the propellor blades)? 2. The porpoising was noticed early on, so was the step moved in time for production of the 314 variant? Alternatively, if a 314A change, what changed and where? 3. Looking for the Minicraft Clipper decals as they look more complete, any likely sources (have tried eBay!)? Fascinating aircraft - only 12 built, and really only a decade of service, but what an impact they must have had when appearing at the various shore installations they used across the world. Any info re the above appreciated!
 -
 This was one of the kits that took a long time to build, but it's finally ready. I started it in May 2021, during the COVID crisis. At the time I thought I would have a lot of free time, but with the happy relief of the health situation, life returned little by little and confinement projects had to be postponed and brought forward when the schedule allowed. Today, I finally managed to finish my Boeing 767 with Varig titles. My 3rd model in my collection, after 2 Boeing 747s (1 -200 and another -400). It was my first interaction with Zvezda, which I can confirm that as a manufacturer it surprised me a lot, since the mold was quite perfect and there were almost no flaws to point out. I can also say that this was the model where my transition to something more rigorous began. In this 767 I have already decided to apply some different techniques that I had applied in the 747s, however there are still many errors that I hope to develop and overcome in the next kits that I will make, but which are still on the waiting list due to daily appointments. I can say here that for a while I will leave the 1/144 scale and will start working a lot with the 1/1 scale, since I received the good news that I will start my Boeing 737 Type Rating this November Overall, the kit is acceptable and worthy of being displayed in my showcase. Unfortunately, the layers of paint that were applied caused the surface to be very thick, filling the lines, preventing the panel liner that I tried to apply from running. So the weathering work was very basic, having only made the shape of the jet bridge at L1 door. I only used makeup powder, which made the plane slightly dirty, and a little panel liner to simulate the dirt trails with the movement. I'll leave the photos below. If you want to see the topic of the plane's development you can see it here: Thanks see you soon!
 -
 AeroModL (https://www.aeromodl.com/) is to release a family of 1/72 Boeing B737 resin kits. Source: https://www.aeromodl.com/our-kits - B737-200 - https://www.aeromodl.com/our-kits/b732 - B737-300 - https://www.aeromodl.com/our-kits/mjqqfo6l2467lywyb9fqnr18vwc8d3-hyj3x - B737-400 - https://www.aeromodl.com/our-kits/mjqqfo6l2467lywyb9fqnr18vwc8d3 - B737-500 - https://www.aeromodl.com/our-kits/mjqqfo6l2467lywyb9fqnr18vwc8d3-hyj3x-h9ddw V.P.
 -
While I'm still trying to solve the problem with the Lufthansa DC-10 cockpit windows, I decided to start with my other kit that I had in my queue. In order to complete the complete line of Boeing passenger planes, I chose the Boeing 767 in the colors of the magnificent Brazilian airline Varig. The choice of VARIG started through a very strong link that I have with the airline and with Brazil itself: My grandparents emigrated from Portugal to Brazil in the 50's. They met there, got married and had children telling Portugal again already in the 1980's. On the trips they made from Rio de Janeiro to Oporto they chose Varig most of the times and even today, they always tell me how big, splendid and good the airline was in terms of service, quality and planes. Thanks to that and also thanks to my mother, my house is full of things from Varig. Cutlery, trays, blankets and more. Like TAP and Swissair, Varig is an airline that is in my heart, due to my connection with Brazil. An airline that unfortunately shouldn't have had the outcome it did. But turning now to the kit itself! I bought this kit on sale on eBay and with free shipping! I was quite satisfied however, a little suspicious that the kit is from Zvezda. Since I was a kid, I've been used to seeing Revell kits. That's why I always try to give preference to Revell, even knowing that most of the time the mold is not the best. The box is a normal Zvezda box, with the lid and the illustrations drawn, along with the classic box where the kit comes from, which is quite good and resistant and useful for storing things in the future! When I started assembling the kit I put the two main parts together and I was very surprised by the quality of the kit. The two pieces fit perfectly and at first glance everything looked in place. All the pieces have incredible lines and details that honestly left me with an excellent impression of Zvezda! For all kits to be so perfect, I started to have a favorite brand! The next step was to apply putty to all the windows as well as to make the necessary changes to the main fuselage. This Boeing 767 comes with the Aeroflot layout which consists of four doors at the front and four doors at the rear. It turns out that the Boeing 767 that I'm going to make, the PP-VPV has a different configuration: It has two doors at the front, four windows on the wings and two doors at the rear. I confess that I was very close to changing the plane to the -200 version. The 767-200 is an airplane that manages to have a very peculiar beauty. But after comparing the 767-200 and the 767-300 with the same painting (yes because Varig operated with both versions), I opted for the -300 version. Maybe one day I won't make a 767-200 with the colors of American or United Airlines The kit had such a good fitting, that the windows fit perfectly into the holes. Obviously, I putty and sanded everything and in the final result the entire surface was polished. I have to stress this one more time. The kit had such a good fitting, that I didn’t apply putty in the top and bottom. I just sanded it and then with the help of a scalpel I redid the lines I had erased with the sandpaper. It was a 1st time, not applying putty to cover bad fittings, which saved me a lot of time and patience! Zvezda you rock! After sanding and applying the wings (and those had to take a little plastic putty from Vallejo), I turned to the engines while the putty was not drying so I could sand again to apply the primer. I decided to follow the instructions and started with the low pressure turbine and nozzle area of the engines. After assembling (just to check the fit and shape of the engine), I noticed that this interior part would not be very visible. Anyway, I decided to apply a smoky color in order to simulate a little the metallic alloy already marked by the high temperatures there. Varig's 767 used to have General Electric CF6-80C2 engines. After that I decided to apply a primary white to reveal some imperfections as well as for the paint to adhere better when applying the final color. This afternoon I did it and left it to rest. Next time I will probably sand the imperfections a little and then start with the painting process!
-
Revell's 747-100/-200 kit had been around almost as long as the original. The first kit came out in 1974 and was since the constantly on offer by Revell in many markings. The last one came out in 2019 in demonstrator markings,celebrating the 50th anniversary of the queen of the skies. The moulds were really worn out and it was probably a good decision to take the 747-100 out of their program. My build of the first KLM 747 is a earlier release,which is very nice to build. The decals are from a much later reissue and so their quality was very good as well. Paints are Revell blue 52 with a few drops white 04 for the fuselage top. Wing grey is Gunze 315 which is a close match for Boeing grey. Corogard is Tamiya metallic grey mixed with Tamiya neutral grey. Some weathering was done as well with Humbrol graphite powder as pictures showed the KLM Jumbos quite dirty at times. Another 747 for my ever growing fleet of Jumbo Jets. Thanks for looking Alex
- 17 replies
-
- 42
-
-

-
 In the past years I had built some of the Airfix 727 kits.The early -100 as well as their 1982 offering of the -200. Not too bad kits but not without some problems. One of the most annoying issues,that seems only to plague the 727 for unknown reasons,is that the left wing tends to bend with time downwards. For these builds I tried out someting new. Before glueing the wing halves together,I smeared liquid plastic on the insides of each halves and added thin wire to further strengthen it. Then I left the wings for a few weeks to fully cure and harden. After that,all raised lines on the wings were engraved,the fences installed at the correct places and the build completed. The wings are now rock solid. For the cockpit I used a replacement DACO windshield canopy to correct the look. On the engines I created new in/ and outlets with evergreen plastic to have seamless and round openings. The front wheel doors were replaced with new ones made from evergreen plastic. For the Tunis Air version I used a Runway 30 decal set.It was very old but still usable.It had a bit yellowd around the edges but nothing too distracting. The Nigeria Airways decals come from Classic Airliners by Nick Webb and are nicely printed. The Air Canada livery is from the Airfix kit and is also superb. All in all,a lot of work on those 727 but well worth the efforts. All paints are by Gunze,Revell and Tamyia. Thanks for looking Alex
- 14 replies
-
- 27
-
-
The very old Airfix 707 kit has lots of problems being it the more or less terrible fit or the too pointy nose and the rather simple engines. I tried to adress these problem zones as good as possible. - replacing the cockpit section with a DACO canopy - creating new inlet rings with Evergreen plastic - sanding the engines a bit thinner. After all these corrections had been done and half a tube of fille used to have everything in place and shape,one of the most tedious and time consuming masking marathons started. The Air India livery is striking but getting there when the whole kit has to be assambled to look right, before one drop of paint can be spent is a nerve shredding task. Thats why this kit sat on the shelf unfinished for a long time. Well...now here we are,the Airfix 707 is finished ( 2 more on the go...) The most striking part of this issue is the superb decal sheet which provides full Air India and the classic BOAC markings. Paints are all Gunze and Testors. Metallics are from the Gunze Super Metallics range. Thanks for looking Alex
- 13 replies
-
- 39
-
-
-
The ancient Revell 727,first issued back in 1964 is in my opinion a pretty nice kit. Its a bit on the heavy side with all its rivets but I like it more than the Airfix offering. I replaced the cockpit section with a DACO canopy.Its actually designed for their 737 kits but it can be used on Revells 707,727,Airfix 707,727,737 and on Minicrafts 707 with little to no adjustments. The rather simple wheels from the Revell kit were replaced by resin wheels from Brengun, the decals for the JAL delivery scheme comes from 8A decals Mexico and are very well made. Paints are my usual mix of Gunze and Revell. Metallics are all Gunze. The 60s JAL livery is amongst my favourite liveries and suits the 727 very well. Thanks for looking Alex The Brengun wheels make a huge difference
-
This was one of the first releases by Revell of their 737-800 kit. It had no winglets added back then. The provided KLM markings are very nice and provide almost everything necessary. Painted with Revell enamels,sky blue 52 with a few drops white 04 for the upper fuselage,grey 374 for the rest. The corogard panels are decals provided with the kit. The usual conversions were made to the engines.Otherwise straight from the box. Thanks for looking Alex
-
These 2 kits are the Revell offerings of the Boeing 737-800. Revell were the first to offer the -800 Series,first release in 1999. Its a nice kit that goes together easily but suffers from some errors. Too low cabin windows,wrong shaped engines ( more of the -300 to -500 types) and on later releases,completely off shaped winglets. I tried to adress these issues on my Revell 737s as good as possible. What was not possible to be corrected on those 2 were the cabin windows,because of the design of the decals.Otherwise they wouldnt fit.But its not so noticeable,so i oversee that matter. What I spent the most work on were the engines. I found a very helpful guide here on BM regarding the Revell 737s flaws. So the engines were mostly corrected by the ways described in that BM thread. The winglets were cut and sanded to shape. TUI FLY is well known for their many different Logo Jets and the Haribo liveries are among the most popular. Revell issued both of those liveries in 2010 with superb decal sets by NAZCA. I planned to go with the open window option but as no silver frames were included in those sets,the windows tended to disappear,esp. on the blue one. So in the end I used the provided cabin window decals. All painted with Revell enamels. The blue one with Revell blue 54 and the golden one with Revell copper as the gold paint was way too bright. Thanks for looking Alex
-
These are 2 of the great DACO 737 kits. Beside the -300 also the -400/-500 series were offered,but sadly they are now sold out. I found those for a bargain at a aviaition fair,one without markings,the other included the TEA decal set from Liveries Unlimited I guess. As I wanted to do a TEA 737,this came in handy. Back in 1990,when I went to Kenya with my grand parents,I saw a TEA 737-300 landing as well in Mombasa. I was surprised to see them there with that kind of aircraft. Later I found out that TEA Switzerland not only flew from Zurich via Luxor to Mombasa,they also offered flights to Malindi as the only international airline. TEA Switzerland ordered factory fresh 737-300s from Boeing in 1989,fitted with additional fueltanks to be able to use them on long haul routes. As a reminder of those childhood memories,this 737 has a special place in my collection. TEA Switzerland was incorporated in Easy Jet and flies nowadays as Easy Jet Switzerland using a fleet of A320CEOs and A320NEOs The other one comes in the beautiful livery of Air New Zealand in their all green "Holliday," livery. As a base coat for the green,I used Gunze white primer 1500,then 3 thin layers of Tamyia mustard yellow. The decal set comes from PAS decal and is nice to work with. The build of the kits was mostly straight forward,just the wing to fuselage fit proved a bit problematic. Otherwise really beautifully designed kits. Thanks for looking Alex
-
Hi i am looking for a B-17 model kit in 1/48 scale i have seen this one Revell memphis belle at wonderland models is this a good kit are there any other Boeing B-17 kits in 1/48 ???
-
Titan Model Kits (TMK) is to release a 1/72nd Boeing B757-200 vacuform kit with 3D printed details Sources: https://www.facebook.com/TitanModelKits/posts/pfbid02sGdSgTdscPZWkAt3z6tpMFcxtUf2XjJ4KiziaqnHSbFAqYER7ycJ7PaPNTefSW7Nl https://www.facebook.com/TitanModelKits/posts/pfbid0V77pbKC13T1TAG5eUDk4iwGCt1GbJEw1p5edSeqq7Ds6ZRkPp6PwyvnAdYKw4favl V.P.
-
 EA-18G Growler Exhaust Nozzles (648804 for MENG) 1:48 Eduard Brassin Meng have broadened their F/A-18 range with their new EA-18G Growler in 1:48 recently, and you can find our review of the kit here. The detail on the kit is excellent, but you can always improve on the pinnacle of styrene engineering with resin. As is now usual with Eduard's smaller resin sets, they arrive in the new shallow Brassin cardboard box, with the resin parts safely cocooned in bags, and the instructions folded around acting as padding. Inside the box are six 3D printed parts on separate print bases, two of each part of the exhausts. The trunk is printed in darker resin, and has fluted outsides and ribbed interiors, one end slightly wider than the other in order to receive the combined engine rear and afterburner ring, which slides inside once everything is painted up. The final part to each exhaust is the nozzle, which the rear of the trunk slides into. The nozzle has extreme detail on the inside surfaces, and delicate layers on the tips, as well as the fine lines separating each petal from the other. Each exhaust is then slipped inside the rear of the kit as a drop-in replacement for the kit assemblies, beating them by a substantial margin in terms of detail. Highly recommended. Review sample courtesy of
 -
In 2021 Zvezda is to release a 1/144th Boeing B-757-200 kit - ref. 7032 Source: https://vk.com/zvezdamodels?z=photo-29859496_457589701%2Fwall-29859496_2617107 V.P.
-
F/A-18F & EA-18G Blocks 25+ (QD48243 for Meng) 1:48 Quinta Studios When Quinta’s innovative products first came to our attention, they caused quite a stir, as well they should. The replacement Instrument Panels and internal details are mind-boggling to look at, because we’re used to seeing simplified styrene instrument panels, or Photo-Etch Brass panels with either two layers of etch, or laminated parts that can be tricky to glue together, even though they are pre-painted for your ease. But decals? These aren’t your run-of-the-mill decals though, they’re 3D printed in many layers and colours on a flat carrier film, having as much in the way of elevation as is needed to complete a realistic panel printed in the correct colours, complete with shiny dial faces and metallic-effect hardware, and often including cushions and seat belts in the set. Each set arrives in a Ziploc bag with a folded instruction booklet protecting the decals, which are also separately bagged, so they should reach you in good condition. The pictorial instructions are printed on glossy paper, and are shown in full colour as befits the awesomeness of the sets, showing exactly where each part should go on the actual model, so there’s no confusion due to the “pictures speak a thousand words” maxim. Additional hints and instructions are also included, marking out parts needing bases, kit parts that are used or replaced and other useful tips. The technical instructions in the text-based, giving additional tips to the new user about maximising adhesion and preventing lift at the edges by wicking in super glue. Although you are advised to use Super Glue (CA) to attach the decals to the surface permanently, preparation is much the same as your standard decal, but you will need to remove any raised detail that would be underneath the location depicted in the instructions, and some new parts will need small backing panels or bases on which to apply the decal. A slim piece of sheet styrene would perform that task, and painting the edges a matching colour should minimise its appearance or turn it completely invisible. This set is patterned for the Meng kits of the type later than block 26, which you’ll need to look into yourself, as I’m clueless on that matter. The set comprises four sheets of decals, containing two beautifully detailed instrument panels with glossy MFD screens, side consoles with plenty of relief, sidewall inserts with cushioned black panels and document bags that have organic-looking creases printed-in, plus two full sets of seatbelts and an actuator loop between the pilot’s knees to get him out of there in an emergency. Conclusion The detail on the parts is incredible, even down to the infinitesimal switches, relief of the consoles, deep gloss in the MFDs and overall impressive crispness of the set. Any cockpit with a Quinta set installed really needs a crystal-clear or opened canopy to show off the details, which the Meng kits are able to provide straight from the box. Very highly recommended. Review sample courtesy of
-
CH-47D Chinook (81773) 1:48 Hobby Boss via Creative Models Ltd The CH-47 Chinook is a tandem rotor heavy lift helicopter, developed by Vertol and manufactured by Boeing Vertol since 1962. Its incredible longevity is testament to the quality, flexibility and robustness of the original design. Over 1,200 examples have been produced, and the type has seen frontline service in conflicts such as the Vietnam War, the Falklands Conflict in British service, both Gulf Wars and Afghanistan where its utility was so much in evidence that many airframes became worn out as a result. In its capacious loading area, the Chinook could lift a 24,000lb payload or carry anywhere between 33 and 55 troops. The CH-47D was fitted with more powerful engines than its predecessors, adding an additional 2,000lbs to its internal or external carriage capacity. It is often used to carry 105mm howitzers, associated equipment and crew, as well as the usual troop transport role, with improved avionics leading to a production run of just over 20 years, with moderate overseas sales, and served alongside the comparable MH-47D that was used primarily by Special Forces with in-flight refuelling capability amongst other alterations to suit its cloak-and-dagger role. The Kit This is a re-boxing of their 2021 tooling of the CH-47A with new parts to represent the improvements made to the airframe between initial variant and the late 70s upgrade. It arrives in their standard top-opening box with a painting of the aircraft on the front, plus some profiles and 3D CAD renderings on the sides. Inside the box are nine sprues in grey styrene, three clear sprues, a fret of Photo-Etch (PE) brass, decal sheet, instruction booklet in black and white, plus a colour painting guide printed on both sides of a glossy sheet of paper. Detail is good throughout, and if you have seen the original release, you’ll recognise many of the parts in the box. Construction begins weirdly with the fire extinguisher from the rear of the cockpit, which is mounted on an L-shaped base, then fixed in the rear of the cockpit floor on a pair of pegs, along with twin rudders, cyclic and collective sticks, then the main instrument panel with integrated centre console, all of which have white dial decals applied after painting. The seats have cushions added, a grab-handle on the top and a frame at the back, then they too are joined to the cab area of the interior floor, which is a very nicely detailed single part. There is a tunnel between the cockpit and load compartment, which is made up from a number of parts, the visible areas of which have diamond quilting engraved into the surface, plus equipment boxes on some of them. The completed sub-assembly is then joined to the floor aft of the raised crew area, and a door in the floor is also added from underneath. More racks of avionics are added in the tunnel between the two areas that will be visible from the load area, but notionally sectioned off by a pair of C-shaped rails. The fuselage halves both have quilting moulded into the insides, and the rear part also has raised ribbing, all of which is painted aircraft grey, and after they are joined together the circular side windows are installed from inside, with the choice of domed viewing ports for the rear two on each side. Two small PE grilles are also fitted inside the rear rotor tower, and some holes are cut out before the two halves are joined later. Another of those fire extinguishers is made up and glued into the rear of the port fuselage half, an L-shaped ribbed hose is inserted into the starboard cockpit, and another ribbed assembly is inserted into the rear rotor tower, then the fuselage is closed up around the interior, whilst adding the quilted roof as you close up. There are two powerful turbine engines turning the blades of the Chinook, and these are both made up with a pleasing amount of detail, including some PE grilles inserted from inside of the cowlings and forward filters along the way, which increases realism over the usual plastic rendition. The completed assemblies are fixed to the fuselage sides in recesses, and the additional fuel tanks are detailed with internal bulkheads and inserts before being glued to the side of the fuselage along with a long high-frequency rail antenna that runs down much of the length of the fuselage. The starboard side door at the front of the fuselage is also added, with the step and optional window panel fixed to the aperture by two hinges. The rear of the fuselage is open at the moment, until the rear tail is glued into position after detailing it with some small parts in preparation for the rear access ramp later. While the fuselage is inverted the underside is dotted with aerials, a tear-drop shaped fairing or front shackle, plus two more shackles further back, the optional floor hatch cover and a beacon just forward of the hatch. The front wheels are each two parts, applied to a T-shaped strut made from three parts each, and inserted into the cut-outs in the fuel tank sponsons, which have two covers with clear lights inserted. The rear wheels hang out of the back of the sponsons, and are suspended on horizontal struts with braces and a pivot to allow the wheels to swivel. More aerials are fixed to the underside, a small PE grille and two clear lights are attached to the rear of the rotor tower, and the load ramp is made up with a choice of two slightly different options. They share many of the same parts, but have a different lip to accommodate the two styles of fold-up sections, of which there are three in each option. With the detailed floor added to the top, it is joined to the fuselage and secured at the correct angle by adding a pair of stuts to the sides. To finish off the fuselage, the windscreen has a pair of holes drilled into it (carefully) to accept a pair of probes and two other small parts before it is glued onto the front of the cab. A long avionics tunnel stretches between the front and rear rotor towers on the D, locked in place by a series of pins and holes in the top of the fuselage, with a clear curved window in the front of the rear rotor tower. For a helicopter with twin rotors, the blades are a big part of its appeal, both from an aerodynamics point of view because it cancels out the torque of the single-rotor design that necessitates a tail-rotor, but also because they’re massive, broad and highly visible on the finished model, making the distinctive rotor-slap that garnered the Chinook the nickname ‘Wokka’ in some quarters. The two rotor sets are identical, starting with a tapered drive shaft onto which the various layers of the rotor-head lower are slid, with the three-blade boss laid onto the circular head to be joined by the blades, followed by the rotor-top that locks them in place. Each blade has the prototypical droop moulded-in, an insert under its root to thicken the area to scale, and has a small actuator for the pitch-control trapped between the two halves. The two blade units are dropped into the holes in the top of the rotor turrets and should be able to rotate unless you’ve made a mess with the glue. You may elect to leave them completely loose to ease transport if you take it to shows on occasion. The last two parts are the windscreen wipers, with a small inset diagram showing their correct location on the two sides of the front screen. Markings There are two decal options on the sheet, and in Hobby Boss’s usual style there’s little information about them, other than which decals goes where, and colours in Gunze codes. From the box you can build one of the following: The decals are well-enough printed to carry out the task, and consist mostly of stencils and walkway markings for the top of the fuselage, with a couple of US Army markings and the serials. The main differences are the yellow rotor tips and the tail codes. Conclusion Chinooks are great, and this is a well-detailed modern tooling of the type in my favourite scale. Highly recommended. Review sample courtesy of
-
 Hi fellow modelers, Again a topic about a big 1:72 model from me, as you are used to This time it's not about a normal kit from my stash, but a 3D printing experiment with some scratchbuilding. I'm building 2 scale 1:72 NASA Boeing 747SP 'SOFIA' models. Yes, 2 models. And, very important, this is an experiment. These are not going to be award winning contest models, o no. I'm aware of that. This is not the quality of resin printed smooth models, so be warned. I'll tell you how it started. Part 1: SOFIA 1 A colleague and friend of mine, Erwin, has a PLA filament 3D printer at home and is experimenting with it. Toys for his kids, design lamps etc. So in 2020 I asked him to print a knob for my flight simulator. Perfect! The next day it was finished, and I began to think in scale modeling possibilities... He said there are a lot of freeware models on the internet, like planes and cars etc. He sent me this link and asked if I would like this model: https://www.nasa.gov/image-feature/print-your-own-3-d-sofia-model A 1:200 scale NASA B747SP SOFIA. I said well you can give it a try.. if it's not too much trouble to print. The next day he gave me just the printed nose section, to see if it was worth it. Not really.. I said: I would only like such a model in 1:72 scale, that would fit in my collection. Would that be possible? Erwin said no problem, I will enlarge the file for you and print just a part of the nose section. First see the result before printing a whole 1:72 model. In the meantime at home I took my 1:72 Skyland KLM Boeing 747-100 to compare the nose shape of this 1:200 747. Quite correct.. mm. What about converting this Skyland 747-100 into a 747SP..? I contacted a fellow Dutch modeler, VJ, who once succesfully converted a 1:144 747-200 into a 1:144 747SP for information about how to convert this. The fuselage of a 747SP is not just a shorter version of a 747 fuselage; especially the tail section and position of the wing root is different. (for those who are interested: https://modelbrouwers.nl/phpBB3/viewtopic.php?f=46&t=48324) These are some of his pictures he sent me: (credits VJ) Mm.. I will wait for the result of the printed 747 nose from Erwin. If I start to cut into the quite rare Skyland 747, and it would become too difficult, that would be an expensive mishap. Also, the NASA SOFIA has a distinguished tail shape compared to a normal 747SP: https://travelforaircraft.wordpress.com ... fia-write/ Due to the massive telescope and massive hatch it's not an easy job to scratchbuild something like that. No, I will wait patiently. In the meantime some information about the NASA SOFIA 747SP: (Source Wikipedia): The SOFIA aircraft is a modified Boeing 747SP widebody (serial number 21441, line number 306; registration N747NA; callsign NASA747). Boeing developed the SP or "Special Performance" version of the 747 for ultra long range flights, modifying the design of the 747-100 by removing sections of the fuselage and heavily modifying others to reduce weight, thus allowing the 747SP to fly higher, faster and farther non-stop than any other 747 model of the time. Boeing assigned serial number 21441 (line number 306) to the airframe that would eventually become SOFIA. The first flight of this aircraft was on April 25, 1977, and Boeing delivered the aircraft to Pan American World Airways on May 6, 1977. United Airlines purchased the plane on February 13, 1986, and the aircraft received a new aircraft registration, N145UA. The aircraft remained in service until December, 1995, when United Airlines placed the aircraft in storage near Las Vegas. On April 30, 1997, the Universities Space Research Association (USRA) purchased the aircraft for use as an airborne observatory. On October 27, 1997, NASA purchased the aircraft from USRA. Commencing work in 1998, Raytheon designed and installed a 5.5 m (18 ft) tall (arc length) by 4.1 m (13.5 ft) wide door in the aft left side of the aircraft's fuselage that can be opened in-flight to give the telescope access to the sky. The telescope is mounted in the aft end of the fuselage behind a pressurized bulkhead. The telescope's focal point is located at a science instruments suite in the pressurized, center section of the fuselage, requiring part of the telescope to pass through the pressure bulkhead. In the center of the aircraft is the mission control and science operations section, while the forward section hosts the education and public outreach area. The open fuselage has no significant influence on the aerodynamics and flight qualities of the airplane. https://airwaysmag.com/nasa-conclude-b747sp-sofia/ A few days later Erwin gave me the first enlarged 1:72 SOFIA parts, the nose + upper deck section. He took spare filament rolls for this experiment, in this case transparent filament. He showed me pictures of the printing process: I was happily surprised about the result! Looks quite nice. I asked him to print some more parts, so next part was the lower nose section with the interior: I say let's give it a go! He said the costs were negligible, so he started to divide the 1;200 model into enlarged printable parts. Again with spare filament in 'happy' colors the next parts arrived: Wow... As you can see not so perfect as I thought.. The engines are straight from Minecraft, a lot of angled and out of shape forms on these parts.. mm. -The tail has a nice layer structure on the outside -The upper nose section has a sharp angle under the windows -The engines and pylons are way out of shape and way too big, these need to be reshaped. Ok, I will start collecting sanding paper, filler and super glue again. Let's give this project a try. I first removed all the excess material from the parts and after that a dry fit, to see how a 1:72 747SP looks like: Quite impressive! I started sanding. With sanding paper P60 (real rough). What do you think... almost no result! This PLA is like titanium or something. And the harder I sand, heat comes through the sanding paper so it becomes irritating to my fingertips. And the PLA starts to smell and becomes soft with hard sanding, so this is a problem.. Also you keep seeing the angled structure on the parts. Mm. Meanwhile I contacted Ben Sweezey from V1 Decals, who enlarged his Iron Maiden Ed Force One 1:144 decal sheet for me when I was building my 1:72 Ed Force One. I asked him the same question to do this for his 1:144 NASA SOFIA decal sheet, and yes, 3 weeks later I had the 1:72 decal sheet for SOFIA. Looks good, nice work and thanks Ben ! On Flightradar I saw that SOFIA was conducting observer flights from Germany, where she was at that time for an earlier overhaul. Some extra information: (source: dsi.uni-stuttgart.de): "SOFIA is a joint project of the German Aerospace Center (DLR) and the National Aeronautics and Space Administration (NASA). The Deutsches SOFIA Institut (DSI) at the University of Stuttgart coordinates the scientific operations on the German side. The American scientific operations are planned by the NASA Ames Research Center (ARC) and the Universities Space Research Association (USRA). Flight tests and flight operations are led by the NASA Armstrong Flight Research Center (AFRC) to the north of Los Angeles. The NASA Ames Research Center (ARC) to the south of San Francisco conducts the scientific research flights. To facilitate smooth telescope operations, the majority of DSI employees are continuously posted on site in California." Hence the American / German flag on the fuselage of SOFIA. I also asked Erwin if he could find a printable 1:72 Boeing 747 landing gear; it would be nice to put her on wheels as I have no stand for this big model. He found something, and after a few days he came up with these: After removing the excess material very carefully: The wheels were very mashed up somehow, so he printed a better set: Looks great. Hopefully this quite fragile gear will hold the massive PLA SOFIA model.. Next the Minecraft engines, I just don't want these blobs under the wings. Look at this: Out of the question. I need other better looking JTD9D's. Erwin and I searched the internet and finally found a perfectly detailed drawing, which he converted to a printable file: Perfect! So he printed the first engine: With separate inner cowling and fanblades: Look the blob on the left and the almost real JTD9D on the right: After that he printed the other 3 engines, in a again another color: Great, this will make SOFIA look much better! Back to the fuselage parts. After hours of sanding it looks like the angled surface has mostly disappeared. I took spray filler and applied some first layers: Too bad, still visible. Also the sharp angle in the nose under the cockpit windows needs attention. I decided to glue the main parts of the lower body as they need to be sanded and smoothed in 1 shape finally. I took the industrial superglue and bonded the parts: The model is getting quite heavy, all these parts are massive! Now the interior is in 1 piece, I added some 1:72 figures to see how this will look when I make a detachable upper fuselage: Nice! I would like to add a detailed interior to the SOFIA. I will give that a try. I copied the decals for a dry fit, as these decals are originally made to fit the 1:144 Eastern Express Boeing 747SP kit and not a 'home-made' enlarged 1:72 747SP: I filled the window gaps in the model as the decals will replace these faulty placed holes with correct shaped and placed windows: First the cockpit windows: And the fuselage decals: It will fit, no problem. I filled the massive gaps between the fuselage parts and added extra filler to the angled wing roots, ready for sanding a smooth shape With all these projects of big kits my days of little and fine sanding are over.. Time to fill up that angle in the nose section also: After the sanding I applied several layers of white primer spray.. ..but still visible angled surfaces. Time to add more fille, and do some more sanding. The Minecraft-like tail needed special filler attention too. I applied a thick layer of filler. A lot of sanding in this project, but I'm getting used to it! But looking at this model, with it's rough structure and incorrect shapes it will not be a real beauty... So I told Erwin this, and this was the start of my second project: Part 2: SOFIA 2 During building SOFIA 1 I began to like the 'little' 747SP with it's distinguished appearance. The 747 was and is my favorite airliner, and I realized that if I wanted an easier to build and better looking 747SP model, I had to search for another printable model. So Erwin started searching the internet, and behold, there was another freeware printable 747SP file: Again in 1:200 scale, but this looked already better and smoother than the NASA freeware version. Erwin started to enlarge this version in 1:72 scale, and divided it in printable parts, 19 in total. This time he used black PET filament, no PLA. And so project SOFIA 2 began to take shape: He sent me the first fuselage pictures: This 747SP looks much better!! He gave me the fuselage parts, and the rest of the parts were in the making. I taped the fuselage parts together: And compared her with SOFIA 1: Then I started sanding the nose section, this went better: After the rough sanding, I used some finer sanding paper: Better quality this PET filament, with filler applied it will look smoother. During this sanding process I started thinking what version to make of this normal 747SP. I wanted something matching with SOFIA 1, as this is a duo build. I started searching the Internet on the history of SOFIA, and found this picture: https://www.flickr.com/photos/steelhead2010/50922079036 This was SOFIA before her convertion into the NASA version. She was a written off United Airlines SP, and NASA bought her from the scrapyard to start taking test flights to see if it was possible to convert her into a flying space observatory. As you can see, a normal looking 747SP with extra NASA decals on her original UA outfit. So, if this is possible, this will be a unique duo build of 2 SOFIA versions. Hence the name SOFIA 2 for this second project. Back to SOFIA 1. I cut of the Minecraft engines, but the wings are kind of hollow so that left some nasty looking gaps in the wings. I filled the gaps with pieces of Plasticard and applied filler, and sanded the wings as smooth as possible. The wingparts of the fuselage have an angle in it, very hard to sand that smooth... Meanwhile Erwin gave me the rest of the SOFIA 2 printed parts. The wings: and the tail parts: The engines from the SOFIA 2 look very much like the self designed JTD9D's from SOFIA 1: And SOFIA 2 comes with a stand: I compared both the engine sets in size: Mm. The engines from SOFIA 2 are equal in length to a Skyland 747-400 engines: And the self designed JT9D's are smaller compared to the Skyland 747-400: But the 747-400 has CFM65 engines, so it's ok with me. The tails of both SOFIA models: Very different. SOFIA 2 has a shift in the wing surface: Erwin says this happened during the printing process. Well ok, it is what it is. If there comes a reprint of this model this can be corrected. SOFIA 2 also needs a lot of sanding, here the main wing surfaces: And finally the smoother sanding: Also the engines: I glued the tail parts together and added filler in the gaps: SOFIA 2 is a real tail sitter, because she has a hollow fuselage but the tail parts all together is too much weight in the rear. Even on the stand, so she kept tipping over backwards. I added noseweight just the way I did to my 2 Antonov models: I made a Plasticard rib with M10 bolts and nuts: I glued the rib into the nose section: No more tipping over, problem fixed. I started to glue the fuselage parts together: a 1:72 figure for scale: I applied filler and sanded smooth: Next some layers of spray filler: And also on SOFIA 2, the print structure keeps being visible.. But, SOFIA 2 gets more layers of primer and gloss paint so I think this problem will be solved. It's already a huge difference in shape and quality compared to SOFIA 1: SOFIA 2 comes with a stand, which is great as I don't want 2 gearless 747 models which are resting on their engines. SOFIA 1 doesn't have this opening in the fuselage so I added that myself: It fits. So I asked Erwin to print a second stand for SOFIA 1. The wings of SOFIA 2 are detachable, and hollow which makes the connection between fuselage and wings very weak. I added balsa supports in the wings to make them sturdy: That's better. Here a duo picture of both fuselages, SOFIA 2 has her first layer of grey primer which already makes her smoother: The wings of SOFIA 1 can't be made detachable; too less surface for connecting pins or something, so time to glue the wing parts together: You can also see that neon orange and fluor-green base colors are bad choices for painting.. After several layers of grey and white it still green and orange. Here with the detachable upper surface parts on the stand: Again, a clearly visible difference in quality and shape. I looked at the interior of SOFIA 1 after applying several layers of spray filler and primer, and came to the conclusion that the interior is very rough and out of scale also. As this is a unique opportunity to add a detailed interior to a special 747 in 1:72 scale, I decided to start a new scratchbuilt interior. So time to remove the Minecraft block-seats and interior: After that, I made a floor of Plasticard: I ordered 1:72 resin airliner seats from HaHen, a very friendly person who added spare seats for free (Cheers HaHen!): After close inspection these seats are a little too small in 1:72 scale.. But never mind, always better than the Minecraft block seats! I searched the spare box with PE parts from a friend of mine, Perry (who made the An-225 flag) and sorted these PE parts for use in the interior and for the telescope. The telescope will be difficult to scratchbuild, as it's a complicated 'mess' of all kinds of parts and wiring etc. But we will see. So I started building the interior. First the seats, which are too small and too low. So I made chair legs from Plasticard rod: I removed the cylinder inside the back of the fuselage, which supposed to represent the telescope: Nice.. a project in a project. As I decided to remove the interior, I also need to remove the rough wrong shaped windows on the inside: And some old support PLA walls: I applied Plasticard sheet for a smooth interior: I rebuilt the kitchen module: And the removable computer desk units: And the room beneath the telescope (for making rotating movements during observatory flights): So, this last picture was taken in April 2022. After that I decided to participate in the WME2022 contest with my 1:72 Antonov An-225, so I needed my spare time to finish that project. Now I have time to pick up this duo build project again, so I think I will go on with these builds after the summer. I will finish these 2 SOFIA's! To be continued..
 -
Hi, I just finished my TUI Germany 737-8 Max. Was definitely one of my quickest builds ever as I think I did the whole plane within 4 weeks from start to finish. Upon holidays in beautiful Madeira where we actually took Tuifly on our way towards there I saw a TUI 737-8 Max there and realised how cool it actually looks in that livery, IMO the livery is rather underrated. So I spontaneously had the idea of building one for the time after the holidays with a Max that was previously destined to be an Icelandair in my collection. Also had the beautiful TUI 757 of Ian Woodard as an inspiration that I once saw here. The decals are from DRAW decals for the livery and they are excellent, really opaque and the carrier film basically disappears once they are dried. Windows and details are from Authentic Airliners. All blues are painted. The light blue was kind of tricky, as all light blue I could find were rather too cyan, so I ended up mixing Mr. Hobby 45 with quite some red (to make it less cyan) and also some white. For the tail colour and winglets the same mix + even more white. The dark blue is Tamiya X-3. There's acutally a decal for the dark blue part, but it would be against my personal modelling values to not paint it and I guess it would never look really good as the area is too large and complex for a decal. I imagined the painting tricky with its curves and getting both sides look the same, but with a small "trick" (that others used before) it was much easier than I thought. I took a real photo that was mroe or less exactly side on. I then resized the shot to the same size as the model on Photoshop and printed it twice (mirrored it for the other side). I cut the light blue part out on paper and put it on the plane with masking tape. I used certain reference points above or under the doors and then drew lines with a pencil on both sides upon the white plane and then its about using flexible masking tape. For the dark blue part one already has this as a reference so this isnt hard anymore. Overall I am really satisfied. The kit is excellent and easy to build. The only downpoint is that a Max has 4 distinctive features compared to a normal 737NG. The larger engines, the different winglets, the APU-section that is 787 style AND the much higher front gear. Yet the Zvezda only has the normal front gear of 737 NG, where I feel that already on the rregula -700 or -800 kit it sits a bit too low (or likely the nose door gears are just too large). Personally I felt the front didnt look like a proper Max anymore. So I used some spares that I had to make it 2mm higher. But yeah with knowing that (I wasnt aware) one can easily make it higher, in the end some polysterene would also do the trick. For the pitots on front I used some Microdisin photoetched parts. Generally these sets arent really worth buying for me as I always end up only using veeery few parts of it, but I thought it was a cool feature. The finish was done done with Tamyia X-22 and then a pass of Mr Hobby's GX-112 to protect it from UV light (although of course other than for those photos it wont see the sun) and some Tamyia polishing compound. Enough said (likely even too much ;-), here are the photos. Thanks for looking, appreciate any comments. Julien
-
This will be my entry, though I am unsure at this stage whether it will be an A, B or C model. I depends on what sort of photos I can find for reference. The box Contents, yes 2 kits! There is also an Airfix boxed Sentry (minus the E-3D specific parts) in there in the lighter plastic Kit decal sheet Aftermarket decals for the build, the VM Decals sheet allows any serial inthe USAF fleet to be built. The Wolfpak sheet has the correct colour tilting, so I will use those and cherry pick from the other sheet for other markings. And finally the aftermarket, soe is for KC-135s but usable on the 707/E-3 If I go a wheels up build ( which I an contemplating) them half the extras won't be used.
- 71 replies
-
- 14
-
-
 This is the Matchbox 747 kit in 1/390 scale. I’ve built this kit in the Revell boxing / Air Canada scene in the past and it makes for a surprisingly good looking model despite the small scale. The only thing that lets it down is the undercarriage. So, this one will be ‘in flight’ on a makeshift stand made from an acrylic rod and one of the always useful and cheap shadow box frames from Jobbycraft. Going for the BA livery of course although I’ll pick up one of the Revell kits and do the Air Canada version in the future… … Providing the decals hold up! I think they will. Yellowing a bit but otherwise seem ok. And this is the Revell version I did and sadly destroyed moving it upstairs. Hopefully this one avoids such an unfortunate demise. Good luck with your builds everyone!
- 54 replies
-
- 16
-