Search the Community
Showing results for tags 'Diorama'.
-
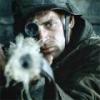
 Several years ago while airfix had enterd their discount to oblivion price war with them selfs i managed to bag their 1/24 Mosquito for around £40.00 and a few of their Bf 109e-4/e-1 kits for a little over £3.00 each from Airfixes own online shop. I probably got 4 of them to get to a free postage point but not sure . Rather than just building one of these kits with a whole lot of after market stuff to make it something different and have the remaining 3 kits sit on the shelf forever more ,i have decided to do a production line and build all four together and set them in a diorama . inspiration for the diorama comes from this picture I hope to get the 4 aircraft in various stages of take off . The first will have its main wheels still on the ground like this the second aircraft will have just left the ground The 3rd and 4th aircraft will be starting their climb 3rd aircraft with wheels starting to retract The 4th will have the wheels fully retracted . I have made a mock up to experiment with Obligatory pictures of unstarted lkits and contents . Only photographed one box content as they are all the same .(promise) Nice to find that Airfix have provided reasonable moulded pilots so that will keep costs down . I have orderd some decals With 4 schemes i will do them all . Thanks for looking Alastair
 -
 Hi all, here are the final pictures for my Fantastic Voyage Proteus Diorama build. I wanted to depict the part of the movie where the sub had entered into the inner ear and the intake vents had got blocked up with as Donald Pleasence called them "particular fibres". This meant scratch building the 3 leg supports that were shown in the movie and I attached a diver to the front intake, who is attempting to remove the fibres. The guy with the laser rifle is a bit of artistic licence as that scene came later in the movie. The base was an old plastic sweet box [Quality Street or Candy for our US folks], which I sprayed black and added a 12v power socket and various coloured flashing LED lights. I covered that with some bubble wrap to give the impression of cell structures, bearing in mind that the sub has been miniaturised to the size of an atom. For the fibres I used a Tack cloth washed in lacquer thinners to remove the wax impregnated in it. Then I attached the shredded cloth to the sub with UV clear resin which I airbrushed clear blue, red and black smoke Tamiya paints over them. Many thanks to everyone for all the great comments and feedback for this build thread. I would like to build another Proteus kit in the future, but to keep it clean looking and sitting on the miniaturisation table. I hope you enjoy the 60's psychedelic dive into the human body!
- 14 replies
-
- 27
-

-

-
Hi all, calling this done, I added some scratch built high voltage capacitors with some colour changing SMD lighting. Maybe this will bring a bit of a spark to the monster's bride! Happy modelling! Just for fun I've uploaded a cheesy video!
- 7 replies
-
- 15
-
-
- Diorama
- bride of frankenstein
- (and 1 more)
-
 Hello all. This is the work in progress towards part 2 of my 'Grand old duke of York' diorama in 1/72 scale. I welcome all comments and feedback, please bear in mind this is my second dio. The idea for this piece is that its connected to the first diorama, of the same name, as a sort of before and after project. The Part 1 is in the RFI section: Part 1 is set during early autumn 1944 and the battle along the Tannenburg line ,in Estonia, is raging. The 3rd Germanic Panzer Corp, consisting of the 11th Nordland division and 11th infantry division, amongst others is fighting to defend against an entire soviet army. In reality the battle was at its height at the end of July and ended with German withdrawal in September. Part 2- is set on the same battlefield but the battle is now over, its early winter and the 2nd soviet shock army is clearing out the area, including engineers sweeping for mines, removing barbed wire, tanks pulling out obstacles and used almost as tractors hauling the wreckage away. Their are dead, wounded and surrendering troops scattered across the scene. The remaining Estonian SS are a hand full of stragglers, fighting more for their own country than for the Nazis. This is the idea where the title came from as Estonia was occupied first by the soviets and then by the nazis and then retaken by the soviets. On to the build itself: I have some left over parts from my first diorama which I will be using in this-First to start with is the large block of kingspan insulation, I savaged from a bit of waste land I was running past: Sorry for the blur! Then I drew out the outlines with a sharpie. I carved the block up into the shape I wanted. I then plastered the whole thing in my ground soloution: Polyfiller/pva/sand and paint: I used sandpaper for the road and rocks from the garden for guess what...Rocks! I have a bit of a mission on for this one as I have to try and replicate the original size and shape. After the initial covering I sanded it down and applied more of the same. I then made some of the items to go into the dio- the blue tac sand bags. I shape them, paint black, then a nasty yellow colour, This is a sort of shading. I then apply middlestone with a touch of brown. At this stage the colours don't really matter as all will be covered with snow. Below is are the cured vegetation from my garden, I wanted a alpine tree so used some of a shrub and hairspray to lacquer, for three days, hoping to keep some of it bright green colour. Next I started to paint, on mass, the tooth picks, carved pencils, skewers and cut up lollipop sticks which form my trench walls/fire step and anti tank obstacles: This is the result: I broke some of the trees on purpose and stuck them into place. I also crushed up brick and masonry from my yard to look like the remains of the farm house from the original which was burning down. I enjoyed busting out the trench wall and placing broken trench boards in places where it had been hit by a shell. Basically to be lazy and save time I put shell rounds into the areas I didn't want to have to replicate in their totality.... it is a battlefield after all. I chose the left over tufts of grass which were too garishly bright for the autumn scene to use in this one because it'll all be covered in snow and I still would like some colour to peek through from the foliage below. An IS-2 tank with riders and a Russian flag will run over the rubble section and a T34/85 will be burnt out and abandoned in the massive icy shell hole in the centre of the battlefield. From the opposite side another t34/85 will have a chain attached to pull out one of the anti tank obstacles. You'll see I used brown, grey and black on the ground for some harsh contrast of colour with the shell holes and recessesd areas. I have also added graves to this scene to tell part of the story, I will cover these up during the 'snow' process as want them to look freshly dug and not buried by snow flurry's. I have also got some left over airfix infantry from the original scene and will cut the helmets off them and place on top of the wooden match sticks to mark the graves. I may have some soviet solders standing/sitting on top of a grave, to show their contempt and hatred of the enemy. I'll see when I get that far. In the pic below you'll see the crater which I will try to portray as a denotation which the Germans left to blow up the road to slow the progress of the advance. They have left a few futile sand bags in this area, I will place a replica of the original half track burnt out and on its side in front of this crater as a barricade. From this area the 'stragglers' will be trying to protect their surrendering comrades (will make more sense once finished I hope).
 -
Hi, I've seen some really spot on title plinths/plaques (call them what you will) on here and was hoping some of you guys might have places of recommend for these? Many thanks, Paul
-
Hi all, in 1966 this was the most expensive Sci-Fi film ever produced, costing 6 million dollars. The special effects cost 3 million dollars and were incredibly difficult to produce, but they looked amazing in the day when you consider they used no computer aided effects, it was all photo chemical film, every set had to be built and filmed through a camera. Today's CGI would give the director total control over the images, which makes it all the more remarkable how this film got made, a true 60's Sci-Fi classic. For this build I will be adding some lighting and all of the crew figures, which will be added into the diorama later in the build.
- 12 replies
-
- 10
-
-
- Fantastic Voyage
- Proteus
- (and 1 more)
-

MiniArt Small Carts Collection (35621) 1:35
Mike posted a topic in Diorama, Accessories & Themed Figures
Small Carts Collection (35621) 1:35 MiniArt via Creative Models MiniArt’s range of diorama accessories in 1:35 are legion, and it keeps getting more legion-y by the month. This set contains a variety of wheeled carts, and arrives in a shrink-wrapped figure box with five sprues in grey styrene, one for each of the items shown on the box top. The instructions on the back give a brief run-down of construction, and are accompanied by painting suggestions that relate to a table that gives small swatches, paint codes from Vallejo, Mr.Color, AK Real Color, Mission Models, AMMO, Tamiya, and the colour names in English. As these are just guides, the world is your oyster, and if you want to paint your cart in different colours then no-one* is going to stop you. * I do however advise you that someone is bound to be an expert on carts, so if they’re not well-adjusted socially and you’re unlucky enough to come across them, at least I warned you. From the box you can build what I refer to as a sack truck, often seen on the railways in the 50s and earlier being pushed around by Porters, with two small wheels and a metal bracket to take the weight of the object. A traditional open-sided wooden wheel-barrow with single wheel, wooden frame and load bed, plus another with a sloping, pressed steel load area are also included. A four-wheeled wooden trolley with an open framework load area and long pull-handle is really the first true cart, and the last is another wooden cart with large carriage-style wheels and two legs to enable the user to keep the load-bed flat, and two handles for the barrow-man to lift and push/pull his load. This one is typically used by street vendors to sell groceries, flowers and the like. Conclusion Detail is excellent throughout as we’ve come to expect from MiniArt, and moulding is crisp and clean, showing off the wooden texture where appropriate, plus the slight irregularity that is inherent with ageing wooden equipment and lends itself perfectly to some paint weathering and chipping, as shown on the box art. Highly recommended. Review sample courtesy of -
Hi guys, I've finally finished my LOTR diorama and it's ready for inspection :) Also this time I've made a video tutorial on yt how to build such diorama. You can check it here. Also if you like this video and want to see more like these, please consider to support my new channel by subscribing to it, thank you. Finally here is one of the photos if someone won't see the full video ;)
-
 Whilst waiting on paints to arrive for my Chinook build, i started on the Hobby Boss Land Rover, which due to how easy it was to put together, it didn’t take long! Which meant i could get on with the diorama setting. Having seen these vehicles in Afghanistan for myself (though not with ATGM’s) i really wanted a patrol meeting scene. Also in this build was a 1/35 scale Modern UK Infantrymen, present day by Masterbox, and they make up all the figures of the scene. Even though i have finished this build, having a bit more experiance with paints ect. I will go over the vehicle and figures in a Matt Varnish to take off the shine from them. So this one being my 3rd build, i am extremely happy with how it turned out. Though thinking back on it, it would have looked a bit better with fabric rolled up on the front light grills(for blackout) and some kind of lash down for the spare Milan Rocket.....maybe ill look into it in the future.
- 14 replies
-
- 30
-
-
- Landrover
- WMIK Land Rover Snatch & Jack
- (and 1 more)
-
Hi guys, at long last my 1/144 resin Imperial Shuttle has a home in this converted freezer tray. This is my first attempt at a forced perspective diorama. In the opening scene from the Return of the Jedi, Vader's shuttle is seen leaving the Star Destroyer and flying to the hanger bay on the 2nd Death Star, although the Star Destroyer was not seen from the Death Star's hanger bay in the movie; I thought it would be a cool feature to add into my diorama. Keeping to the true spirit of Industrial Light and Magic's [ILM] model construction techniques, I kit bashed all of the details from old kit parts and bits and bobs hanging around the home. Cable zip ties, disposable shaving blades, pen tops, 1/25 car engine parts, 1/32 and 1/35 helicopter parts, tank tracks, etc all went into the build. I really enjoyed this build and plan on doing another Star Wars diorama in the future. Thank you for following along and enjoy the pictures. "The Force will be with you always". ttfn. Lee.
- 23 replies
-
- 34
-
-
- Diorama
- Imperial Shuttle
- (and 1 more)
-
Hi Folks, Verlinden had some "nice" Skulls and Bomes in their catalogue. Well suitable for large scale Dioramas (around 1/15 to 1/20). Unfortunately they seem to have stopped business and Verlinden Article 1473 is no longer available on the market. Does anybody have an idea, were to get a suitable replacement? Easy to find small scale Resin Skeletons on ebay but i could not find anything for 1/20 and larger....
-
Medium Coarse Brass Chain (H1016) 1:35 & 1:48 CMK by Special Hobby Lots of vehicles have short chains hanging from them, and there are a myriad uses for it in dioramas, as well as on boats and ships. Getting chains in scale isn’t always that easy, so having ready access to a series of sizes in a handy pack is pretty useful. This set contains 30cm of brass chain with links that are 2mm wide and 2.5mm long, although you actually get a shade more than 30cm, which is nice. It comes in a flat CMK package with the chain held inside a ziplok bag to reduce tarnishing, so my sample came out of the bag nice and shiny. In use you can cut it to length with a pair of nippers, paint it and even use some patinating fluid to age the chain and make it blend in with your model. There’s not much more to say, other than it’s a useful tool to have in stock, as you never know when you’ll need it, even for something as simple as replacing moulded chain on your latest AFV model because the original isn’t very convincing. There are a few other sizes available and you can see them all below. Very highly recommended. Coarse 1:35 (H1013) Medium Coarse 1:35 & 1:48 (H1016) Medium 1:48 (H1014) Fine 1:72 (H1014) Review sample courtesy of
-
 Hello everyone, and a happy New Year to all fellow plastic-botherer's. Here's my Tamiya 1/48 P-38 for inspection. Lovely kit which is beautifully engineered and goes together without any drama. I added a basic Eduard set (cockpit details mostly) and seatbelts. I have to say I don't think it needs the internal extras - what's in the kit is pretty good, and the instrument panel can't be seen without an endoscope anyway. I also added a Brassin gunbay and ammo belt for a bit of extra interest/challenge. The kit comes with decals for the gun barrels which is novel, but I wasn't convinced and decided I needed to change the barrels at least. I know the wheels are wrong by the way; I foolishly used a (well recognised) restored aircraft for reference until I realised it was actually a different variant - Doh! Unfortunately Tamiya only give you three halves of the wheels, so I couldn't make up the correct ones as well as these spoked versions. I prefer the look of the spokes over the flat panels though so I'm happy. I painted it with Humbrol enamel on the underside and Tamiya Olive drab (lightened a bit) on the top, over hairspray and rub n' buff silver wax paste. Weathering is oils and pastels. Tamiya also provided the oil barrels and jerry cans (not in the P-38 kit - from their separate accessories set). Figures are from ICM's ground crew (including virtualliy free P-51!) and the Jeep is by 4D models from China - a bit basic and needed a bit of improvement, but for £2.65 unbeatable value! The diorama base is plaster filler and tile grout with 2mm static grass and a few bits of coffee stirrer and tea bag fabric soaked in PVA for the assorted junk. WIP can be found here.... Thanks for looking.
- 26 replies
-
- 75
-
-
-

* Aprons & Pans - Egg Banjo anyone? * DIORAMA INFO NEEDED
JockMcPlock posted a topic in Diorama Chat
Dioramas! Never made one but I've seen a couple of short videos on YouTube about them, and the seem quite involved to say the least. I'm going to be looking for a few, and specifically a circular RAF dispersal pan from WW2 for a Heavy Bomber in 1/72 and 1/48 scales. I was wondering, what is available out there, made and ready to go? I have seen the sort of flat rectangular cardboard types (not really a fan of these), but what do people know about others with texture, foliage and a little bit of undulation etc? I was also wondering if there are companies, or people on here that will commission and create dioramas to a clients request? What experience do people here have with either of these avenues and the cost implications? Would be great to see some images from anyone that has made or bought some of these dioramas! -
D-Day Operation Overlord Gift Set (A50162A) 1:72/1:76 Airfix Operation Overlord was over a year in planning, and resulted in the largest amphibious invasion ever staged, originally intended to take place earlier in June 1944, but was delayed until a brief lull in the bad weather permitted the gamble to be taken. Over 150,000 men and tanks were landed on the first day on five beaches in Normandy, France named Gold, Sword, Juno, Utah and Omaha, with varying levels of resistance encountered from light to extreme, the latter experienced by the Americans on Omaha. Despite heavy casualties all the beachheads held, and once sufficient armour had been landed, the slow progress inland began, taking almost a year to reach Berlin and end the war in Europe. Many hard battles had to be won during that progress, and the destruction of men, materials and civilians was severe. As is only correct, we still remember this day each year and the men and women that fought bravely, some making the ultimate sacrifice, in the hope that we never repeat such destructive behaviour. The Kit This is a huge gift set both in size and of many individual kits and play sets, brought together to remember the 6th June 1944, and it includes classic and more modern component parts as follows: 1:76 Sherman M4A2 Tank (1961) 1:76 Cromwell IV Tank (2011) 1:76 Bedford QLD Truck (2010) 1:72 Willys MB Jeep, Trailer and Howitzer (2004) 1:76 LCM Landing Craft (1966) 1:72 Higgins LCVP (2014) 1:72 WWII British Infantry – vinyl (2011) 1:72 WWII German Infantry – vinyl (1968) 1:72 Coastal Defence Fort (1971) 1:72 D-Day Diorama Base That’s quite a pile of plastic, and although they’re mixed between 1:72 and 1:76 scales, there’s so little difference between them that the two scales are often put on the same baseboard with no issues for the most part. While some of the kits are a little old, they are balanced out by some fairly recent toolings with the benefits that bestows upon them. A few of the older tools have been re-released so many times over the last 50-60 years that a little mould wear is evident, as can be seen on the Coastal Defence Fort, which I had as a kid with the working guns that fired pointed little shells. Some flash is also visible, most prominent on the German Infantry, so a little scalpel work will be required to make those go away. Flash is still preferable to short shot parts, though. As this is a gift set, it also includes a set of acrylic paints in small thumb-pots, plus two tubes of cement, and two brushes of size 0 and 4, both with protective tubes over their ferules and bristles. Some of the pots in my sample had weeped slight at some point during or after production, but as they were heat-sealed in a separate bag, just take care that there isn't wet paint in your pack before you empty them out on your best dining table or suede sofa. 1:76 Sherman M4A2 Tank (1961) This kit of the much-loved Sherman has been around since 1961. Although basic it captures the look of the tank quite well. Decals are supplied for one US Army Tank. 1:76 Cromwell IV Tank (2011) This one is quite recent, and captures the look of the flawed Cromwell, with plenty of parts, and tracks moulded as complete runs on each side. 1:72 Willys MB Jeep, Trailer and Howitzer (2004) This little kit is well-detailed with a number of high part count, plus a stubby howitzer in addition, with moulded tilt and clear parts for the windscreen. 1:76 LCM Landing Craft (1966) For its day, it was well-detailed, and has worn well with a little flash around the three figures who now have "snow-shoes" that can easily be removed, but in good shape otherwise. 1:72 Higgins LCVP (2014) Another landing craft, but of modern heritage that shows in good detail and crisp parts moulding. 1:72 WWII British Infantry – vinyl (2011) A rather recent set of vinyl figures with more modern sculpting and naturalistic poses. Plus, who doesn’t like a PIAT, with its silly but effective short-range spring-loaded projectiles! 1:72 WWII German Infantry – vinyl (1968)[/b] An old staple of the Airfix play figures range, and here the moulds have suffered a little, with plenty of flash to scrape or slice off. The classic poses will have many of you smiling to yourselves as you relive your youth. 1:72 Coastal Defence Fort (1971) As already mentioned, I had this set in my youth, and loved the working guns, shooting matchsticks at the "baddies" after I’d lost all those shells under the sofa. With modern concerns for kids losing eyes though, these have been omitted, although the shells are still there. Some of the paired holes used to clip the parts together are flashed over due to old age, and there is a fair amount of flash to be dealt with. I bought one last year as a trip down memory lane, and it’s doable. 1:72 D-Day Diorama Base (vacform) I couldn’t find much out about this one, but I’ll admit to not trying too hard. It’s a big 60cm x 32cm sheet with a little selvedge round the edges expanding it further. It is vacformed in grey styrene, and to modern eyes the texture of the sea isn’t all that realistic, but the rest looks good. It has a flat recess ready for the fort, and some decent shell-holes on the beach, so with some extra work, some flock for grass and adjustment of the sea texture, it could look great. Markings The various kits that have markings are detailed within the instructions by colour profiles, and the decal sheet is sectioned up into six segments, one for each of the vehicles. As is usual for Airfix, the decals are by Cartograf, which is a guarantee of good registration, sharpness and colour density, with a thin gloss carrier film cut close to the printed areas. Conclusion There’s a lot in the box, and a greater proportion than you’d originally think are of recent vintage. Whether it’s a boxing for us modellers, or more aimed at the younger folks is down for each individual to decide, but if you fancy it just for the kits, to play with, or for a trip down memory lane, no-one will judge you. Recommended. Review sample courtesy of
-
- 4
-
-
-
I am currently working on a diorama of a Phantom F4-C in SE Asia, I just need to know which start cart was used by USAF, if at all. Or did they use a cartridge starter? Any help would be appreciated.
-
MiniArt Cobblestone Section (36043) 1:35
Mike posted a topic in Diorama, Accessories & Themed Figures
Cobblestone Section (36043) 1:35 MiniArt via Creative Models Ltd Cobblestone roads have been around since before the Romans, and were prominent in Europe until after WWII because they have ease of maintenance and simple extraction and re-laying thanks to their modular nature. The downside is that they’re slippery when wet and modern vehicles with pneumatic rubber tyres struggle for grip under some circumstances. I first encountered MiniArt when I bought one of their vacformed diorama bases, before I became aware of their wider product range. This set is one of those diorama kits, and arrives in a smallish top-opening box, with two sheets of vacformed cobblestone section measuring 252mm x 173mm per sheet with a depth or "plinth height" of 5mm. Also included are two sprues of injection moulded grey plastic that provides a heap of street furniture, including bench seats, bollards, wrought iron fencing, manhole covers and grids. Construction is simple, consisting mostly of prepping the vacformed sheets, which are produced on female moulds so are dotted with small raised “pips” where the air has been drawn through the negative mould to ensure a faithful copy. These will need slicing or sanding away and any gaps filled, which shouldn’t take long. The bases are quite flexible, so will need some bracing from behind, and I have backed mine with sheet balsa wood glued in with epoxy in the past, but other materials would be similarly useful. If you intend to use the street furniture, most of it can be planted on top, and stiffened with pegs if you desire, but the manhole cover and grid will need sections cutting out of the base before they can be used. Careful marking and cutting will be the watchword, and I hope don't need to warn you not to do this on your lap. Markings After a priming, you can paint the cobbles in shades of grey or brown, accenting them with other shades, and using pigments in dry or liquid form to fill the interstices, wiping the excess off the faces of the cobbles to obtain a realistic finish as illustrated below. Conclusion Diorama bases can be a dark art if you’re unaware as to how they’re created, but these sets are able to short-cut some of the production process, having excellent detail and grounding your model in the real world rather than just floating on a shelf. Highly recommended. Review sample courtesy of -
Newbie question here. Couldn't find an answer by searching. I'm wanting to start making dioramas and scenery. Where can I get extruded polystyrene foam in decent thicknesses, eg 50mm to 100mm? I have found 6mm and 20mm sheets online. Is Kingspan or Celotex insulation foam the same thing if you remove the foil? Thanks.
-
Afghan Civilians (38034) 1:35 MiniArt via Creative Models Ltd Since well before the 80s, a lot of conflict has gone on in the Middle East, with the recent focus having been Afghanistan and Iraq, where there have been huge Western presences during the last few decades. The Afghan civilians have been there throughout all of this, and many have lost their lives, which is immensely saddening. This boxing depicts a group of Afghanis in their typical day-to-day wear, with a broad spread of age ranges often seen in their multi-generational families, where the elders are afforded more respect and their input is valued. It arrives in a shrink-wrapped figure-sized box, with the instructions/painting guide on the rear in full colour. Inside are five sprues, three on one runner that I cut up to make photography easier. There are 4.5 figures on the sprues, the 0.5 being a small child in the arms of the mother, who is wearing a full chadaree as is their custom when out in public in Afghanistan, even though it is no longer an official requirement by the democratic regime in power. She is stood with the little girl on her hip, while a young teenage boy is stood with his hands by his side, book in hand, and (presumably) his father stands with his arms folded. An elder gentleman is sitting with his feet together in front of him on top of a tied sack, a feat that I can’t manage even now! He wears a Perahan Tunban, while the father wears a flat-topped Pakul hat, and the son wears a brimless kufi cap. Finally, the little girl has a scarf loosely draped over her head. The sculpting is first rate as you would expect from MiniArt, and parts breakdown has been carefully considered due to the presence of draped clothing on all of the figures, with additional overflow sprue tabs on some parts to prevent short-shot parts, with intelligent placement of sprue gates and seamlines to minimise clean-up. The painting suggestions are just that, with regional variations in colours used, such as the chadaree with the light blue example seen in the Kabul area, brown and green in Kandahar in the south, and white in the north in Mazar-i-Sharif. Conclusion The background to any diorama or vignette is key, so having a group of bystanders to add to your model will bring additional authenticity to the finished product. Very useful. Highly recommended. Review sample courtesy of
-
Already posted in the vehicle section, but the diorama aspect posted here too... Revell 1949 Mercury rust rod, posed against a scrcatchbuilt street and wall. The base is a Hobbycraft frame, cut to size. The wall is made from foam board with the outer card layer taken off then marked up. The road surface is 1200 grade wet and dry paper. Phone booth from Doozy in resin is superb, and the LED lights are from smallscalelights.co.uk, who I highly recommend. Street light is scracth built from brass & plastic tube, with a 'bag stud' used s the shade and LED light from the same source as the car lights (Controlled by a 3 x AAA battery box on the rear of the wall). All the posters are from 1972 and were downloaded from the net. Photos were taken using a smart phone and a Esddi photo box mini studio (recommended! - basically a large black box with 156 LED lights at the top with adjustable brightness). Thoroughly enjoyed the build and look forward to starting the next one.
-
 The Battlle of Britain was, when I was a kid, already something mythological. These brave men, with the magnificent Spitfires and Hurricanes, who defended the last free place in Europe against the Nazi war machine. Growing older, I realised how much human effort went in to this battle. Reading more about the men, you come to understand that with this great victory and the magnificent machines, the toll on them was immense. I want to honour those men (in my own humble way) by building an Airfix Spitfire, but as a part of a diorama. I am fascinated by the photos of waiting pilots, ready to scramble. So, to complement the Spit, I'll try to build a small vignette of airmen waiting for the scramble to sound. I might fail in this, but I hope it will be a small reminder of the Few, of which so many ow so much. Next post I hope to add some pictures, still working out that since the Photobucket-disaster...
 -
So this has been my big lockdown endeavour, the 1/35 Meng 505th King Tiger with full interior. A real labour of love and a solid project to work on. I would recommend to all, but be careful with the fit of the hull as the 'scale thickness' armour means that it is very tight to secure over all of the innards. As I was working I decided I wanted a little base to display it on, which then morphed into a few figures to denote scale, which then became a lot of figures and what is almost a full diorama! My initial set of photos (apologies for the poor quality/ composition) and happy to take more if anyone is interested:
-
Dinner on the Front (35325) 1:35 MiniArt via Creative Models Ltd Soldiers need to eat. It’s an immutable fact, and during an advance such as those pioneered in Blitzkrieg, they need to have their feeding facilities either with them or close at hand behind the lines. During the advance into Germany by Soviet Russia toward the end of WWII, the space between battles were filled with soldiers either sleeping or eating. We’ll ignore the other stuff they may have gotten up to for decency’s sake. This new set from MiniArt depicts one such incident that could have taken place within a building or shack, where the squad takes the time to rest and enjoy a meal together before their next task. Arriving in a figure-sized shrink-wrapped top-opening box, the set includes some elements that you may have seen before, plus a set of five figures to use with these parts. There are eleven sprues in the box, one in white and the rest in grey, plus a small Photo-Etch (PE) fret of brass that supplies parts for the Samovar, handles for the pots and a few pieces of cutlery. Build up is simple as you’d expect and careful painting will be key to adding realism to the ingredients for this snapshot of life in WWII Soviet military. The scene is exactly as you see it on the box art. Five men, three sitting with food or drink, while one tends the fire, and a Commissar or Officer in a greatcoat stands and eats from a billy-can with a spoon. The soldiers all have typical leather boots and quilted uniforms, and that Soviet staple the Ushanka ear-flap hat in fur to keep their heads warm. Also included in the set is a table, pots, crockery and cutlery to fill it, a Samovar self-heating urn and a barrel-shaped wood-burning stove (how fashionable!) with large chimney. Four chairs complete the scene, but there are other Easter eggs hidden away on the sprues such as a makeshift stick rotisserie using a pair of y-shaped sticks and cross-brace, lots of odd-looking helmets, tools and sundry items from the typical soldier’s inventory, which includes plenty of rifles, PPSh machine guns, grenades and pistols. My example had a few parts rattling round inside the heat-sealed bag, but it also had a missing torso, which is a shame but won’t affect my review other than to say that this is a first for me with MiniArt, and advise you to always check your new acquisitions for possible missing parts. As always with MiniArt, the sculpting, figure breakdown and naturalistic poses is excellent, with detail incorporated everywhere and seams placed at convenient locations to minimise clean-up time. There is a page of the instructions devoted to the making and painting of the soldiers, and at the bottom of that is a list of accessories with names and painting suggestions laid out for you to copy. In addition, on the rear page of the instructions above a copy of the salient parts of the box art, you will find a selection of four posters printed for you to add to the walls of whatever dwelling you intend to place the set within. The paints called out during the build are referred to by a table on the back page that converts them to Vallejo, Mr.Color, Lifecolor, Tamiya, AK, Mission Models, Hataka, AMMO and plain English, which is always helpful. Floor not included Conclusion As is pretty standard from MiniArt, this is a great set with details that add realism everywhere you look. Good news if your Soviet soldiers are getting hungry. Highly recommended Review sample courtesy of
-
I see these as a 3D picture rather than a model, and I find it an extension of the paintings I usually make. I like the Miniart stuff, but the self propelled gun was a bit challenging to finish to a decent standard, but as part of a diorama some corners were cut. Close inspection via photographs show up some things that could be improved, but hey ho, overall I am pleased with the outcome, and most important I enjoyed making it. Didn't spend too much time on the figures, as the building is the main topic. Photos now: Hosted by Billybookcase on FLICKR Hosted by Billybookcase on FLICKR Hosted by Billybookcase on FLICKR Hosted by Billybookcase on FLICKR Hosted by Billybookcase on FLICKR Hosted by Billybookcase on FLICKR Hosted by Billybookcase on FLICKR Thank you for looking. Cheers BB
-
I am new to modelling, but not new to being creative. My background, as a young lad, was diesel mechanic, welder, and avionics (RAAF). Past 20 years has been in counselling (no hand skills required). Then, out of the blue, I got roped into, by the local maritime museum, to convert an antiquated lift-span bridge console to operate a model bridge. Then I discovered that they had no model bridge and nobody to build one. Then I found out that the museum is totally run by volunteers. So I end up volunteering to build a model bridge which can be operated by the real bridge's original console (1964-1995), and have the bridge set in a diorama display of 2400 x 1200 mm (8 x 4 feet). Yes, I have to build the diorama too. I have been doing this for several months now. I am still a long way from completion. My plan here is to post photos of progress by piecemeal. Both the console and bridge lack available schematic diagrams and drawn plans. So the whole modelling aspect will have to be scratch-built. As a result, I had to extrapolate the bridge measurements from numerous photographs, reverse engineer the console, and figure out how to operate the bridge. The current bridge operator was not allowed to tell how to operate the bridge, but was able to tell me what each switch did. From this information it took me a while to figure out the operating sequence. It is not a simply matter of raising and lowering the lift-span. There is much to consider in terms of safety, and in controlling the foot, road, and vessel traffic even before raising the bridge. Anyway, the first few months was spent in compiling the information needed. Then draw up plans (bridge) and schematic diagrams (electronics) for myself to follow. Actually I still have some unfinished problems to solve. The whole bridge fits nicely within the 8 foot width using a 1/72 scale. Here is a photo of the actual bridge: The console as it arrived at the museum: Proposed display layout: Yes, there will be a model boat traversing under the raised bridge-span. It is hoped that the museum display will be interactive by the visitors (mature or not). Meaning, that the display operations need to be, as far as possible, child-proof. The last thing the museum wants is someone purposefully lowering the bridge on the traversing boat . Or any other possible out-of-sequence operations. This has become a major headache for me. Finally, as an introduction, the museum is a non-profit organisation, so it has limited funding. My task then is to build this display as cheap, yet in good quality, as possible. So please excuse my choices of materials to do the task. Both the museum curator and president as given my free rein to do this project, which is great, because I work best without a boss. Though this project seemed daunting to me, I had also found it very satisfying to see it progress along. Hope you will also enjoy watching this work in progress.
- 454 replies
-
- 14
-
-