
Search the Community
Showing results for tags '1/24'.
-
 Research AP-101C-0601-3A Wasp HAS 1 Illustrated parts manual T. L. Ciastula: The Development of the P.531, The Aeronautical Journal / Volume 68 / Issue 642 / June 1964 D. B. Bathurst: Maritime VSTOL — The Development of Small Ship Helicopter Operations in the Royal Navy, SAE Transactions Vol. 83, Section 3: 740525–740863 (1974) L. B. Bryson, F. E. Heenan, C. A. Johnson: Helicopters in the Royal Navy, The Aeronautical Journal / Volume 76 / Issue 740 / August 1972 J. H. Stevens: Scout and Wasp - Westland's All-British Helicopters, Flight International June 1964 Adrian Balch: Westland Scout & Wasp, Warpaint Series No.110, Guideline Publications. 2017 Larry Jeram-Croft, Terry Martin: The Royal Navy Wasp: An Operational & Retirement History, Pen & Sword Aviation 2018 A placeholder so I can't bottle out of doing this at such a large and (to me) unfamiliar scale once the Sea Vixen builds are completed.... 😁
 -
HI,everyone!!😄 this is my 1/24 takara scope dog "votoms scope dog" is a 80's Japanese sci-fi animation..remind me my childhood memories.. this kit first release at 1983..then re-release at 1997..I got a one at that time.. build this kit almost 20 years ago..never paint it until now...😅 I am glad I finally finished it.. hope you like it..
-
This is the 1/24-scale RealSpace Mariner 9. It includes resin, styrene, and PE parts, and wire. Rather than use the full solar panel decals provided, I cut out the individual blue solar cells and affixed them to gold-painted panels. I also "upholstered" the main probe body in LDPE plastic wrapping to better simulate the sheet material covering the actual probe. Painted with Alclad, Tamiya, and Mr. Color. Light black enamel wash on vents on the octagonal bus. Not complicated but still a challenging, but fun, build. Thanks for looking!
-
Time to unveil the next car which will be getting some paint on it this summer. But this one is going to be a bit more of a challenge than the others... If we go way back in time to Christmas 1988, 12 year old me received this kit as a present. At that time I didn't have such useful stuff as paint, and I think this may have been the first time I used cement rather than UHU (I thought it was UHU, but judging by the strip down performance it seemed as though some parts had been cemented - damned if I can remember after all this time though). Anyway, as is usual at that age I leapt straight into it whenever I was allowed space on the kitchen table, and set about gluing bits together. No paint meant the whole thing was yellow, but never mind, I could make up for that by using all the decals for both the #7 and #8 cars - that'll make up for the lack of paint right? 🤣 Anyay, after 10+ years sitting on a shelf, and another 20+ sitting in a box it was looking a bit sorry for itself. First job was stripping it down which I always find quite a depressing part of the job - it almost feels like you're destroying it rather than rebuilding it. And this one didn't all want to come apart easily; there are some parts where the plastic preferred to break rather than the glue come unstuck so I'm just hoping I can get those repaired something like ok. And then there are a few pieces gone missing over the years, but as far as I can tell there's no more than 5 missing parts, none are clear and all should be capable of being replaced. So time to go ahead. And, after attacking it with vinegar, IPA, the freezer, hot water (accidentlly too hot for half of the engine block but I'm hoping I can salvage that) and the ultrasonic bath I ended up with a load of pieces: Not that really does look depressing doesn't it, seeing a model housed in some margarine containers. It gets worse if you look close-up and see the broken bits too. But no point dwelling on that, it won't fix itself so better get started. First bit to try and get ready for paint is the chassis. I've brushed some acetone over the bits of glue on the surface which oftened it to aid removal - I avoided using that during the strip down as I was worried about melting the plastic rather than the glue, but it looks as though I would have been better using that than all the other things I did. So with the glue softened, careful scraping with a #17 blade and som esanding has left it almost in a position to spray the primer and see how bad it looks. Just two problems - firstly I'm still spraying the Micra and Pontiac... And the second problem goes all the way back to 1988 when I didn't have sprue snippers and instead used the kitchen scissors. And when I removed the chassis from the sprue it looks as though my aim was off and I took a chunk out of the side of the chassis. I decided it would be better to try and fix than now rather than leave it, so first step was to put some plastic card in there to give a base: Once that was set I applied some spare sprue dissolved in acetone (well I say dissolved, it has actually turned into a gloop) as I wanted something a bit stronger in there than thinner. But I got it applied and sanded back, only to discover that I hadn't quite got it built up enough. But as I had got enough strength into the repair I was able to add filler today... at which point I realised I hadn't got a pic of the repair. But hopefully you don't need a photo to imagine it all straighted out. So that's the start of my scary Porsche restoration challenge, expect it to be slow and painful but hopefully you get the picture. Thanks to all who drop in to look at it.
- 68 replies
-
- 12
-

-
- 1/24
- Restoration
- (and 1 more)
-
 I am very bad at keeping work in progress threads up to date so I do not normally create them; and to be honest, this is not a good wip thread either. I actually started this model in 2018 and am only now getting close to completion. Given I started this before I joined Britmodeller I thought some here may be interested in more details. So here goes…. I am using the Aoshima ‘Garage Vary’ version of their Mazda MX-5 NB (Mk II) kit (kit #040904) as a starting point. This kit has a somewhat race-inspired body kit, big rear wing and comes with the Mazdaspeed roll hoop. This seemed like the ideal starting point for an homage to the 1991 Le Mans winning Mazda 787B; yes, that one. Of course, I am hardly original with this idea – Mazda UK even produced a limited run of NA MX-5s (Mk I) with the orange and green livery and BBR turbo fitted. Here is the box. Aoshima do a number of NB kits and they are not badly detailed. Unfortunately they do not have the later NB (Mk 2.5) with the spotlights, though the soon to be released Auto-Exe version is closest. The ride height out of the box is a touch too high, so I will attempt to rectify that in this build. Shell with all body kit added and in primer. Here you can see the included Mazdaspeed roll hoop dry fitted. The included roll hoop is good for a street car but I want to add more. I decided to 3-D print a rear cross brace and top section. The cross brace was just passable but I could not get top section to print nicely. The printing was done with an old style thermal polymer 3-D printer as I do not yet have a UV-curing resin based setup.
- 11 replies
-
- 2
-
-
- 1/24
- Mazda MX-5
- (and 1 more)
-
Saw this car in my LMS a few months back, and picked it up in the hope that it'd be a quick build, Heller's Bugatti T50. The T50 was produced in small numbers between 1930 and 1934, racing in the 24 hour Le Mans event between 1931 and 1935. (Sources: Wikipedia and Supercars.net) OT: interesting that Heller are advertising their ships in this box - I'm currently finishing off a wooden boat (Shallop), and eagerly awaiting a ship kit (HM Armed Cutter Sherbourne) that releases at midnight tonight ... both too early for this GB. Heller have kindly chrome (aluminium?) plated one sprue. Why do car kits have this? The box was sealed, and makes no mention of the chrome, so there is no marketing value to the feature. That metal plating will need stripping.
- 18 replies
-
- 18
-
-
I thought that I would open my account for 2024 with something different and a subject that I am unfamiliar with, so I will get to learn something along the way. The moment I saw the Record I thought that curves typified the rounded shapes of many American and European car manufacturers of the 1950's, add to that the chrome enhancements and I was sold on the idea of building this. I am not sure how far I will get, it depends how I cope with my chemotherapy treatment, but I am hoping that it will keep driving me forwards and give me another target to aim for. Here are photos of the box and contents and I don't intend adding too many bells and whistles so it will be built more or less as it comes. The Box, by John L, on Flickr Body, interior and chassis parts, by John L, on Flickr the shiny bits and tyres, by John L, on Flickr and finally, a set of destructions. by John L, on Flickr Off to check the ol' tinterweb to see what I can find. Cheers for now. John
- 30 replies
-
- 18
-
-

-
Here is my Hasegawa Mitsubishi Lancer EVO I Group A. This is the result of a refurbishment of a model built many years ago. If I recall correctly this was one of the first Hasegawa kits (#25066) I ever build and I was certainly in the period when I did not paint bodies. After it spent some time in the freezer to make the glue brittle I was able to dismantle the model with minimal damage and, given their age, the decals were relatively easy to remove. I painted the body and repainted other parts as necessary. New decals are from Shunko (SHK-D212) and went on with minimal fuss. Grant. Original model after many years After refurbishment With an EVO III from 1996 Rally Sweden
- 12 replies
-
- 18
-
-
This is my build of Tamiya’s very nice Mazda MX-5 ND RF kit (#24353). This kit has the larger option wheels and has been painted Tamiya TS-49 Bright Red to match my NA to ND series. The model was enjoyable to build and nicely completes my collection. Grant. With its “standard” convertible sibling The collection of MX-5s
-
A few years ago Pegasus Models came out with some vinyl dinosaur models in 1/24 scale. They released a Tyrannosaurus Rex, Triceratops and a Spinosaurus. Having picked up all three, I gave the T-Rex and Triceratops a try. The Spinosaurus has disappeared into the void known as my son's room. Overall, the detail was great, fit wasn't perfect but not bad. The models were cast solid so they have a fair bit of weight to them. I recently noticed the T-Rex kit languishing in the basement and decided to see what I could with it. First thing I did was I managed to get both hind legs off and work on improving the fit. This mostly involved removing some vinyl from the joint area. I then glued them back in place. I then primed the entire figure. All the paints I'm using are acrylic as anything else won't dry on the vinyl.
-
Well, I think the title is self explanatory on this one. The model comes pre-painted (excluding the cowling) and has a dummy rotary engine that spins with the propeller. I cannot fly it, since I do not have the right batteries, but enjoy these pictures. Also, please excuse the messy office desk. A special thanks to Jon Porter at MicroAces for creating these nice, well-engineered kits that are made in the U.K. Cheers!
-
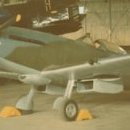
.... and we're off. My wife ( blessed be her name) bought me this for my (hrrmph) birthday. It's taken me nearly two months to get started. (I blame the distractions involved in moving from Brazil to Canada). But now here we go. I've completed page 1 of the 44 page instruction booklet in a day and a half - that means I should be finished sometime around christmas....😮 It'll be the RCAF Ian Keltie City of Winnipeg version. I've previously built the 1/24 Typhoon, which judging from other posts, seems to be a pre-requisite for doing this.!🤣
-
This model of Fujimi’s Subaru Legacy GT Touring Wagon (#03553 / ID-106) has been built for my proposed diorama of the 2001 Rally Australia. The idea is that this fictional car acted as a support vehicle for Subaru Rally Team Australia; a period photo confirms a Subaru Outback with this number plate was used. Built out of the box with the addition of spare decals. Grant. With a real car from the event it may have supported With a fictional recce car from the event
-
This is my model of Tamiya’s Mazda MX-5 ND / Mk IV (kit #24342). The model is an homage to a real car formerly owned by a former member of our local MX-5 club. Wheels are Aoshima 19” AVS Model T6 (#045527), exhaust tips are Hobby Design (actual car had two dual-tip outlets, though perhaps not this big!) and paint is Tamiya TS-95 Pure Metallic Red over grey primer. Grant. With “stock” sibling
- 10 replies
-
- 26
-
-
- Mazda MX-5
- Tamiya
- (and 1 more)
-
HI everyone!🙂 this is my TAMIYA 1/24 FIAT 500 A very cute little car... the kit is aged,however,I think it's a good kit I did some modification and detail up hope you guys like it!
- 16 replies
-
- 34
-
-
Dear all, Another 2nd hand Ebay-find: This weekend I've finished my latest project and first DTM hero, the AMG Mercedes C-Class DTM in D2 livery. And what a livery it was to get right... Obviously I kind of knew what I was getting myself into, but this car is almost entirely wrapped in decal sheets. As an almost 30 year old kit, the decals were cracked and fragile so got a replacement set from Decalpool. At first sight good decals, but it appeared later that the two sheets of decals had different shades of blue, where this should be the same. So I ended up using the original fragile Tamiya decals for most dark blue sponsor decals as this was closer to the massive Decalpool D2 decals that were part of the white D2 pattern... Also two decals were not printed correctly and the level of detail was less than the Tamiya ones so it was good to have some alternative, but I'm not overly enthusiastic about the quality of Decalpool. Next project is the Calibra DTM for which I also have a set of Decalpool replacement decals, they seem to have a better quality. Fingers crossed. The kit went together well, except for the body on the chassis. Al seemed ok, until I stuck the glass in and suddenly it didn't really fit nicely anymore. There were large gaps between the body and the glass and the body didn't fit anymore on the chassis as intended. Ended up with cutting as much glass away where possible to make it kind of fit. Still a bit of a gap between pillars and glass, but at least the body fits nicely on the chassis. As the interior is quite empty and large, I added some wiring which is not visible on the pictures anymore. And I trimmed the exhaust tip 3-4mm, it would stuck way too much out of the bumper compared to the real car. Car is painted in TS-17 Gloss alu with TS-13 clear coat. Wheels in TS-29 and TS-79 Semi gloss clear coat. I had the same experience with TS-17 and TS-13 as with the CLK-GTR, they really don't seem to go well together. As was suggested earlier, I'm considering another clear coat when using TS17. Anyhow, quite happy with the end result. Great DTM era this was, so this car will be accompanied with its competitors in the future; a Team Joest Opel Calibra is next in line and then the Jägermeister Alfa Romeo 155. Thanks for watching and any comments/suggestions! The CLK-GTR can be found here
- 13 replies
-
- 15
-
-
I built this from the Revell F&F boxing 'Dom's Charger'. I must admit to only having seen the first film in the F&F series..... It's really not my thing 🙂 although, I do love some of the cars! The kit parts do not include a rear seat, luckily one was donated by a fellow modeller through FB. I did some detailing in the engine bay, spent quite a bit of time thinning the supercharger drive belt down to a more appropriate thickness. Wheels were swapped out for Pegasus T's in the big 'n' little style. If you look carefully, you can just make out the ignition key in the steering column! Paint is Mr Hobby GX Deep Clear Red over their gold base, followed by several coats of GX112 UV cut gloss clear. The front grille part had damaged chrome so I elected to strip the kit chrome and use Molotow through my airbrush.
- 22 replies
-
- 27
-
-
I had originally started this build in the 109 group build, but was sabotaged by Photobucket and some personal things that didn't allow me to complete it in time. Here is the link to the first part of the build. Gunther Rall 109 group build I hope to have all the photos replaced shortly and will update what's been done since the Phorobucket fiasco.
- 13 replies
-
- 1
-
-
- Trumpeter
- Bf 109 G-2
- (and 1 more)
-
So my shelf of shame is getting a bit busy, a change of job and various other factors seem to have reduced my ability to get things fixed together. This is my entry (there are more to come for the GB, if I can get the time). I originally started it in the classic Japanese GB, thread here: Alpine Renault A442B Turbo - Big In Japan - Classic Japanese Kits GB - Britmodeller.com The kit is a pretty simple affair but seems to have been fighting me all through the build. The kit supplied decals have seriously yellowed over the years, though are actually usable (if a bit brittle), the aftermarket ones however had their own issues - firstly they didn't supply the larger area ones (for some of the white areas and black ones) and the white decals are somewhat less than opaque - especially on the bright yellow background. I used the kit decals for the black areas, decided to overpaint the logos (badly) and will attach the decals on top. The actual areas I masked seemed to come out relatively well (the large white areas at the front and rear) - though it was a bit of a struggle initially getting enough white primer and gloss white on to cover the kit plastic yellow, only to overcoat most of it with yellow! I should have masked up and airbrushed the black too, and done the smaller areas in white in hindsight. Here's a shot of the side, showing just how badly my brush painted black bits are on the sills, also the difference in colour between the white areas - the lower left one is just the kit decal (and appears to have a bit of a weird yellow/orange tint) - the other two however, I'd come up with a cunning plan.. As you may have noticed in the previous image there is a small piece of paper at the front. I used my scanner/printer to effectively photocopy the decal sheet - this can then be transferred (using masking tape, which takes up the print) to the backing of some white decal sheet, cut to size (slightly smaller to fit inside the black border) and applied as a second layer of white! The decal film sheet itself isn't completely opaque but together they do a good enough job. You can use the inkjet to print directly onto the other side of the decal film (I did try this) however I guess because the film is plastic and non-absorbent the ink never seems to dry and easily smudges - not a problem in my case as I was cutting off the exterior print and not needing an actual pattern. The reverse image method (on the back side) seems better as I don't need to worry about the masking tape ripping the film and it gets discarded when you water slide the backing off - for my needs it's fine as the decals are pretty much mirrored left/right on the car. Other than the white translucency the aftermarket Shunko decals have given me other issues - they supply the black stripes to go around the white areas painted which have been somewhat of a PITA as they are thin and prone to snapping but on the bright side they do distract the eye/cover any minor mistakes on the masking. In hindsight I should have probably just placed all the original Tamiya decals on and then over applied the aftermarket ones for most of the white areas (I did that for the decals on the air scoop and I think it looks fine). There is a reason some kits end up never getting finished but I'm hopeful I can at least get to the point of calling this one done, even if it has tested me along the way!
-
This is Fujimi’s model of the Koenig Specials Porsche 911 Biturbo (kit #12004 / RS-04). I built this completely out-of-the-box, using Tamiya’s TS-95 Pure Metallic Red over Tamiya Pink primer and adding home-made number plates. Though simple, or maybe due to this, the build was easy and pleasurable. Something a little different on the shelf and soon to be joined by the Koenig Specials Porsche 928 S4. For some reason a certain song by Sir Mix-a-Lot keeps coming to mind…. Grant.
-
HI everyone!🙂 this is my fujimi1/24 250gto 250 gto, probably my favorite ferrari car of all time.. the kit is aged,however,I think it's a good kit I did some modification and detail up try to build this beauty as good as I could.. hope you guys like it!
- 23 replies
-
- 48
-
-
Hi everyone I just wanted to share my thoughts and progress using the Cricut Explorer Air 2. I received my Cricut last Wednesday, my wife brought it for me for my 50th birthday (thank you Leanne). Now I'm a bit of a luddite when it comes to technology and I'm incredibly lazy I just want things to work with out any messing around but to my surprise the Cricut is very easy to use and I think the masks that you can make are as good as any commercially produced items. I started by looking for any additional software that you might need to use for designing and producing masks, the Cricut software is ok but almost every user I could find recommended using Adobe illustrator so I duly subscribed to Adobe (£19 pcm) down loaded the software and had a play. I started by producing a series of RAF roundels circa 1939 - 45, I found several references online that gave the size of each roundel type in inches so I found an online conversion tool and converted these measurement's to cm and drew them in illustrator to 1/48 scale. I then sent the image to the Cricut software and cut my first mask a Type A.1 roundel in 1/48 scale. I used some white vinyl which has proved to be very hard to remove because its too tacky and it lifted the paint. I had another go, this time creating a mask for a 56 in, 28 in, 21 in upper wing roundel again in 1/48 and sprayed that (see both roundels below) Not too bad I think I could be onto something here? I then decided to create some templates for RAF fonts circa 1939 - 45 again a search of the internet threw up some examples so using these a place to start I produced my own set of fonts again in illustrator.. ..for my next test I scaled my drawings to 1/32 and created some more masks this time using Frisk film as the masking medium and this time sprayed my 1/32 Fly Hurricane paint mule again applying a Type A.1 fuselage roundel and code letters.. I think with a little more practice the Cricut will prove its worth enabling me to produce any set of codes, markings, camouflage, wheel and canopy masks. I think the Cricut is a great bit of kit, not cheap (my wife paid £260 for mine) but I'm the kind of person that will spend a small fortune on after market masks so I think that for my it will cost effective in the long run plus its quite enjoyable researching and making the masking templates. Cheers all Iain
-
Hello. When my 1/24 scale FW190 build hit a snag (should be recoverable), I didn't want to stop building - so I embarked on the classic Airfix 1/24 Scale Hawker Hurricane. One of my all time favourite aircraft. I originally built this kit as an over excited prepubescent kid during the 1970's and of course, as delighted as I was with it, it obviously looked like it had been built by an over excited prepubescent kid - with little glue control, his sisters nail sanders and over sized paint brushes. This time I hoped to do it more justice. The subject of my build is P3803 of 501 Squadron. This aircraft was lost off the coast near Ramsgate on 12th August 1940 with F/O Kazimierz Lukaszewicz (Polish) at the controls. Sadly neither he nor his aircraft were ever found. The build is mostly out of the box - except for the Yahu Instrument Panel, Barracuda Studios Resin tyres, and RB Productions Sutton Harness. The decals were to my own design and printed by https://www.custom-model-decals.com/. All paints and varnishes are Vallejo. One modification I did make was to the (in my opinion) over-sized nose. After looking at different options I eventually stuffed it with milliput and then sanded it down to reduce the base diameter by a small margin. As you can tell... I'm not a photographer! I am pleased with how it has turned out. As with all models there are a few places I think could do with more work - but in reality I think I'm going to call this one done. Maybe time to get back to the FW190 . Thanks for looking.
- 20 replies
-
- 45
-
-
 Greetings all - and all the best for coming year. Airfix 1/24th Hellcat II NF (F6F-5N), KD127, 892 NAS, Drem, Scotland, mid-1945. Here's my first completion of 2024 which nearly made 2023 but the cold, wet weather was against me for the final varnish coat! The Airfix 1/24th Hellcat is well known and documented so I'll save the background information but suffice to say it's one of the most enjoyable builds I've ever done - it's an absolute beauty of a kit and I loved building it. Whist there are some nice marking options in the box, I decided to go off-piste a little and do something different, hence buying the excellent Aerocraft set to make this into a Royal Navy night-fighter variant: The level of detail is sublime out of the box, and it went together beautifully with virtually no fit issues whatsoever. What I will say though, is tolerances are very tight indeed and the parts benefit from having their mating surfaces sanded slightly to cater for the thickness of the paint. The gun bays, for example, have a lot of the wing structure to add and thus very careful test-fitting was required to get that satisfying 'click' as it all goes together. The engine is a small model in itself - it took a total of three weeks to get it together and painted. Airfix give you a very detailed construction guide and this enables the builder to add the mass of wiring associated with the ignition harness - I used some aftermarket braided wiring and the effort was well worth it. The surface detailing is some of the best I've ever seen and gives a wonderful 3D effect - when you catch the right light it looks so realistic: Considering this was built OOB with the only additions being the seatbelts (I felt the kit examples were a little over-scaled), the ignition wiring and conversion set, it's exceptional value and quite a presence on the modelling desk. Paints were all Xtracolor enamels and I kept weathering effects to virtually none - these were, in reality, high gloss Dark Sea Blue and pretty clean. The stressed skin effect does most of the work for you to be fair, and other than some light exhaust staining I kept this in line with period photos of late-war Royal Navy Hellcats. To anyone considering building this, a few observations of the build process which may come in useful: As mentioned above, tolerances are very tight - gentle sanding of gluing surfaces and test-fits are a must and it will be very easy for things to become misaligned, especially in the gun bays; If you can, build the engine and main airframe as separate parts and bring them together after painting. I installed the engine as a completed unit prior to the main airframe being painted and this resulted in some very complex masking around the exhausts! The main canopy was quite a bit wider/flared at the base than the runners it is supposed to sit on. I had to coat the inside of the canopy with some Future (to avoid 'fogging') and then attach it with CA glue; The wing tip light lenses are slightly too large for the apertures they sit in - in hindsight I should have test-fitted these earlier in the build and not after painting! Be really careful when following the instructions as to whether you are doing wings folded or extended - the build sequence is very different between the two! Anyway, that's enough waffle from me! All the best, Tom
- 19 replies
-
- 67
-
-

-
Time for a break from all the sporty and classic stuff, this is Fujimi's K12 model Nissan March, or as we call it in the UK, the Micra. I've always had a soft spot for the Micra as it was my first car, so when I saw that kits were available I was always going to be tempted. So here's the inspiration: As for the kit itself, this is one of the simpler kits I've made with only about 60 parts, 12 of which make up the wheels, It's a kerbside kit so no engine apart from the underside which is moulded into the chassis. In fact, lots is moulded into the chassis including the engine, gearbox and most of the exhaust apart from the rear silenced and tailpipe which, oddly, are two separate pieces. On the bright side, the kit does go together very well with most pieces fitting so closely you could almost build half of it without glue. There are a couple of bits I'm not so keen on such as the glass all being one piece and the fact that there was a massive mould line across the bonnet only just above the badge, but overall I'd give this a thumbs up and recommend it as a good (and cheap) kit for anyone wanting to build a more day-to-day car. Just don't use Gunze paints if you're brush painting the seats - I must have spent half the build time on the interior just waiting for it to dry and adding soooo many layers As for the build, despite a couple of things which I think could have gone better overall I'm reasonably pleased with how it turned out. As usual, any comments and constructive criticism are welcome - for example I already know I will be reverting to proper panel washes next time! The full WIP thread is here: And with all that blather done, on with the photos. Quite a few as usual I'm afraid, but I enjoy playing around with the camera as much as building the model so I hope you'll forgive me. First of all, a trip around the car as usual: Next up, a few details. I didn't take one of the underside of the completed car as I was concerned I'd stap the aerial if I turned it over, so this one is from during the build. There are better shots of the interior in the build thread, but this does have the virtue of showing it in place. A close-up of the back of the car. The tail-lights have small indentations for you to paint the colouring, but I think it would have been easier to have had separate red, white and orange clear pieces like some other manufacturers do. And finally, a close-up of the front. One of the bits I'm most pleased with is how the grille has turned out - the photo doesn't do it justice but the drybrushing has really helpd to give the impression of indicators and space behind the grill when you see the model in real life. And finally, time for me to get all self-indulgent as I began playing around with the camera. There should have been one of it in the sun too, but just as I got the shot lined up the sun disappeared behind a cloud, it started raining and the sun wasn't seen for the rest of the day! Not convinced by the first one - I think I might need to get hold of some sort of base with a more realistic image than just plain black card. Meanwhile, this was an attempt to replicate those shots you see of a full moon where the moon is taken behind an object using a really long lens to it appears massive. (Obviously, for this shot there must be a street lamp just out of shot shining on the Micra) And the usual angled shots. Thanks again for looking, and hope you like it.
- 11 replies
-
- 15
-


.thumb.JPG.10b411b8c3e1481eb3f7765bfeb3c723.JPG)


