Search the Community
Showing results for tags '1/144'.
-
For the currently ongoing Bomber/Strike/Ground Attack Group Build my entry was a Mikromir Handley Page Victor. Mikromir is a Ukrainian short run kit manufacturer, their kits don't fall together like more mainstream brands' kits might. They need some care to get right, but you can get some fantastic results from them, especially the more recent releases. This kit was released in 2019, and I previously bought and built one shortly after the initial release. Since then my modelling skills have moved on and developed a lot so I wanted to give the kit another go, and also of course just wanted to add another Victor to my collection of V Bombers. I decided that this would be built as an early Victor B1 in the original white scheme featuring full shade markings, before the pale versions were introduced. I chose XA935 because there are a good number of available reference images and it lacked squadron markings at one point in 1959, which is what I was after. I think it is rather fitting that my first completion of 2022 is a Ukrainian kit. The build thread is quite disjointed due to long gaps when I was at uni, so I have summarised the build here instead. The original thread is here if you want to read it: The Build The box art of this kit is a painting of Victor B.1a(K.2P) in its 1970s scheme, the real XH648 is currently in its final phase of restoration at the Imperial War Museum, Duxford; it is the only surviving Mk1 Victor. Included are decals for three aircraft: XA940, XH592 and XH648. There are a few mistakes here; XA940 was just a B1, in fact it was the only camouflaged B1, it never had any tanking mods; XH592 was a B1a, it too had no tanking mods; XH648 is a B.1a(K.2p) referred to here as a K.2P (not incorrectly, this designation was sometimes used before the K2 was introduced), however the instructions would have you build her as a K1a. XH592 and XH648 can be built fully correctly with only kit parts by just choosing the right ones, XA940 needs a small modification which I will get to later. Construction of the model went fairly smoothly, interrupted by university though. Due to its short run nature, careful assembly was required throughout the build. Every part needed adjustment to fit correctly, but once these adjustments were made most of it fits well. There are no alignment pins in the kit, so plastic card tabs are essential to get parts lined up properly. Small amounts of filler are needed with most joints, but few joints required a significant amount. The intake inserts are some of the most filler hungry components, the internal seams aren't too bad but they don't quite sit right in the wing. Speaking of the wings, this is where this build becomes a bit more me. If you know anything about what I like to build, you will know that I like to modify kits with all sorts of conversions and corrections. The wings in the kit represent the later version with an extended, drooped leading edge. Originally Victors were built with leading edge flaps, but following the findings from the tragic loss of XH668, the first B.Mk.2, they were refitted with the fixed extensions depicted in the kit. To build mine in the configuration I wanted, I needed to convert the wings back to the original design. All this required was sanding back the leading edge, reprofiling it and rescribing the panel lines. Here the wings were marked with tape along where I needed to take the leading edge back to. Replacing the kit's photoetch airbrake fins is a must. The upper fins are larger and the lower ones are more of a ridge. The kit supplies two sets of upper fins. Plastic card was used to make new ones, the upper ones using the etch parts as a template and the lower ones just being thin strips. After fixing some damaged parts, assembly was completed. My standard process for painting V Bombers in white is white primer, in this case Tamiya, followed by a medium grey pre-shade a couple of coats of Halford's Gloss Appliance White. From there the details were painted in, decals were applied using tape as guidelines to align them properly. The landing gear was added, which I think is overengineered with 17 parts on each main gear, or 9 if you don't include the wheels. In 1:144 scale that is simply too complex, and not particularly durable. It's one of only a few points I will criticise on this otherwise good kit. The penultimate step was adding a gloss varnish to protect the decals and make them as shiny as the Halford's white. And finally to finish the build, a panel line wash was added. My taste is for darker lines, I know this isn't to everyone's taste, but it's how I like my models to look. The Finished Model Finally, with the model finished after four months of on and off work, here is the final result: A few with the stand I made for my first Mikromir Victor. I think I'm going to have to make another of those, it's a modified ICM stand and I think I have a spare around somewhere. And of course, the full set of V Bombers in the early version of the anti flash white scheme: Replacing the Vulcan B2 with a Vulcan B1, albeit a bit smaller in 1/200 scale. The three Vs in their original production variants With pale markings I have a Vulcan B1a in the right scale And finally with a more recent, better quality build of a Vulcan B2
-
 My first Zvezda 757 build ,and I have to say it is a wonderful kit that goes together perfectly. Almost no filling required,all parts fit neatly. I had actually plans for the 757 with the Phoenix Suns livery but the seller sent me the wrong sheet although the correct instructions. While I checked photos of the Diamond Backs livery I found it also very attractive,so I decided to keep the decals and build it in this livery. The greenish fuselage colour had to be mixed. As these paints were Humbrol flat paints,I clear coated it with Future,as my usual Gunze varnish wasnt enough to get a smooth surface for the decals. The decals are Brasil Decals,they offer a great variety of liveries and the quality so far was quite good. But here the decals,esp. the red/gold stripes didnt want to stick on the model and most of the elements tended to silver after dry. Lots of careful trimming away the clear film took care of the silvering,not perfect but a lot better than without. Some elements overlay,so I clear coated them between each step to ensure that they will stay on the model. Some trimming was necessary as the decals are actually meant for the Minicraft kit. The windows are from Authentic Airliners and details are from the kit and a 757 detail set. Its in my opinion not quite up to my usual standard due to the problematic decals but it looks good in the showcase. Cheers Alex
- 19 replies
-
- 25
-

-
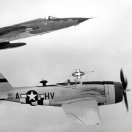 My newly completed F-14 Tomcat VX-4 'Vandy One'. The kit is Revell 1/144 scale and the model is brush painted with acrylics. It was a very nice kit, original Revell moulds that went together easily and a very detailed set of decals that really brings it to life, which you don't always get with 1/144 scale. The hardest part was painting the black plastic white for the undercarriage and missiles, I lost count of the number of coats I painted. I've also incuded a picture with the Revell 1/144 MiG-31 as a fun size comparison. Thank you for looking!
 -
Here are the photos of old Revell model of Boeing 727-100. I engraved the model. I installed a transparent part of the cockpit from the Daco model of B-737 to improve the shape of the nose
- 5 replies
-
- 23
-
-

-
- Boeing 727
- Revell
- (and 1 more)
-
Here is my finished Boeing 757-236 in 1/144 scale from the Zvezda kit in the ‘Animals & Tree’s’ World Tails livery from British Airways registration G-CPEL. The aircraft entered service in April 1989 with Air Europe. It then joined the BA fleet in August 1992 where it served passengers out of Gatwick and Heathrow. It was then transferred to FedEx in June 2010 where is was given registration N946FD and is still active with them today. This kit goes together seamlessly with very little sanding and filling required. It’s great that is has both engine options as well as having either the newer blended winglets or the classic wing tips. I’ve never built the Minicraft or EE kits but I absolutely can’t recommend this kit enough! The beautiful decals are from Ray at 26Decals. The Animals and Tree’s livery originated from Botswana and was designed by artist Cg’ose Ntcox’o who is of the Ncoakhoe People of the Kalahari Desert and the design depicts seven jackals at an oasis. It was wore by 7 other aircraft in the BA fleet around the same time. Paints used were Halfords appliance white for the upper fuselage, Halfords Fiat Capri Blue for the lower fuselage and engine nacelles and Halfords Racking Grey for the wings and stabilisers. Metals are a mix of Revells aqua range. The decals are excellent quality and I highly recommend them! I am already working on a few more BA liveries, the B767-300 in the Chelsea Rose livery and a B757 in the Landor livery. As always, all comments and feedback is greatly appreciated. Thank you for looking. Regards, Alistair
- 15 replies
-
- 34
-
-
My first entry, as I have committed to many GBs this year may be my sole entry ( although my local art and hobby do have a 1/72 Hornet and I did get a voucher for my birthday, hmm, but it’s the top gun 2 boxing, hmm)
-
 After 7 months of work, more or less without long pauses, i manged to finish this bird. I have actually no realtionship to the plane, i just liked the livery and i remember seeing it until 2013 in TLV, when we had nightflights to israel. So allthough some people say this kit is more or less flawless, i found quite some errors i had to correct. But in general this kit is inline with other zvezda products. First thing i noticed zvezda obviously was very keen on releasing the kit, probably as much as we modellers were awaiting it. My kit hat a trapped air bubble in the windshield and a short shot MLG. Both things were corrected, one easier and the other one....well - not so. So i started making a copy of the windshield by crafting a silicone mold and casting clear resin with some green/turquoise dye. The short shot MLG was simply fixed with styrene plastic. here is the link for the WIP things i corrected, added or modified: - Clear resin windshield with the typical turquoise colored glas - Full cockpit including customized pilots - Cabin windows casted into the fuselage - Added window blinds - Closed APU exhaust and added a proper exhaust pipe - Added outflow valve case and flap - Replaced all lights with clear parts and lenses - Corrected panel lines at the tail section (zvezda missed one on one side) - Scratched panel lines for the nose gear doors - Added radio altimeters with plastic styrene - Added repair patches on aft fuselage - Added 2 antennas on roof top - Masked most of the livery, except for titles and registration - Made own decals for a few stencils (trim scale) and the registration - Scratch built MLG wheel wells incl. hyd lines - replaced wheels with some resin wheels (bought somewhere in russia...don't ask the brand, can't remember) - Added hyd lines to the MLG - Added Beacon lights, scratch built - Added static dischargers made of brush hair (counted all of them...hate it) - Scratch build all antennas in 0,3mm styrene paper - Added Authentic Airliner etch part pitots and Authentic airliner wiper decals - Masked the cockpit metal frame with own designed masks i probably forgot a couple of things, but those are the main things. If you are interested check out the WIP... this time i made videos on youtube. So, here are the pictures, i hope you like it.
- 18 replies
-
- 35
-
-
My last Star Wars logo jet. I had this one finished some weeks ago but not yet photographed for the RFI. Now here it is finally. The build was straight forward without issues like the other 777s. Most fiddly parts are the landing gears with their detailed but also tiny parts. The decal sheet is from BS MODELLE. I used decals from him before,so I was a bit surprised with the problems I faced here. Some decals are wrongly designed and shaped so lots of cutting and aligning was necessary. Some elements were impossible to get in the exact location otherwise issues would occur in other places. It doesnt affect the overall appearance so I can live with it. The windows are from Authentic Airliners,details from the kits decals and spares. Paints are Gunze white primer for the fuselage,gloss coated with Gunze Premium gloss before and after decaling. Grey is Gunze grey 315 and metallics are Gunze chrome,aluminium and burnt metal. I wanted to take a group shot with all 3 Star Wars themed models but the space was not big enough...😊 May the force be with you Alex
- 12 replies
-
- 27
-
-

-
- Boeing 777
- Zvezda
- (and 1 more)
-
As mentioned in the RFI for my Eastern Airlines 757,I worked on both kits simultaneously. The mods I did are explained in the Eastern 757 thread,for the AA version I added the winglets,which come from a Eastern Express kit. They needed a fair amount of work to fit on the Minicraft wings...I always assumed the EE kits are simply copies of the Mincraft 757,but it seems not entirely. For the AA 757 I chose a more weathered look as pictures I found showed a quite worn and tired looking 757. The metallic look was created with Tamyia aluminium with a thin overspray Tamyia Mica silver from a spray can. Some silver decal stripes were added for more detail.The decals are from the kitwith the exception of the cockpit window being from Authentic Airliners. The cabin windows were printed on the stripes,so I could not use AA cabin windows. The coroguard panes are from a Flying Colors detail set,that I found in my spares box as well as some other details. The "AA.COM" logos on the winglets come from a Hasegawa 737-800 kit.They are a bit smaller than they should be but it was all I had in my stash.Most important that the logos are there at all... 😉 I sealed the fuselage with a light coat of Tamyia semi-gloss to tone down the metal and Tamyia matte varnish for the wings and engines. Weathering was done by using Humbrol graphite powder. Cheers Alex
- 9 replies
-
- 19
-
-
- Boeing 757
- Minicraft
- (and 1 more)
-
I’ll probably keep the kit scheme on the Academy, going to have to find something interesting for the LS. I’ll start chipping away but I reckon I won’t really get going properly till I’ve got my two F16s done.
-
Fokker F-27 Friendship EI-AKD Aer Lingus, 1960s 1/144 Eastern Express kit converted to F-27 Series 100 with Classic-Airlines decals I bought this little kit from 26 Decals for £16 (ironically without decals!) (I later discovered that Hannants are selling it for £49.99 with decals – that’s quite an expensive decal sheet). Classic-Airlines.com already had decals designed for the Doyusha kit for £8 – which were adapted by Nick Webb to fit the Eastern Express kit, so I bought an Aer Lingus set. The Eastern Express kit has the long nose of the later version and needed modifying back to a Series 100 which Aer Lingus operated. The markings here are the second iteration on the F-27, the first being the green fuselage top and white cheat line variety used on the original issue Airfix F-27 in 1/72 scale. I had intended a ‘quick build’ of this one, but it never turns out that way, does it? Even though this is a new, modern kit, the fit of everything everywhere needed much fettling and large amounts of Milliput – you know the story I’m sure. But as usual I got there in the end and I’m quite pleased with the result: Chris (By the way, yes, I had noticed the Irish flag colours are the wrong way round on the Starboard side!)
-
Hi everybody, just finished this Zvezda A320 neo in TAP colours. Overall a simple livery, but I personally really like it and have a special connection to Portugal where I am at least once a year and flew TAP a couple of times. It could have been my fastest build ever, as the Zvezda kit is really neat and easy to build and clearly better than the Revell, which one can make look nice as well, but it will be definitely more effort of sanding and filling, which is certainly my least favourite part. The only question I cannot answer, is why it has zero details on the outside and then antennas that come with it have an odd shape. So I built my own details for the fuselage and used some antennas from other models. So why didn’t I finish it earlier? Because of the decals. A never ending story. First I bought decals from PAS, but when I received them I immediately realized that the colours are odd, nowhere where they would need to be. I looked for alternatives and went for the Nazca ones (yeah next mistake there). They were certainly not accurate colour-wise, but looked close enough to be used, but when I applied them I found out that the titles were just too small and looked odd. Certainly the last time I bought Nazca decals, as they are just full of faults. Okay new set needed so I went for the 8adecs from Mexico (there’s also a nice 26decals set, but it is the old version without the AIR). Well the shipment made all the way from Mexico to Frankfurt Airport but got lost by German Post on the short way from the Airport to my home. Jon from 8a decs was so kind and sent me a replacement. So 4 weeks later it made it but the decal was damaged once it arrived. So I reached out to Jon, wjho really cared and sent me yet another set that arrived just 3 days a go..and finally with the 5th decal set (!!) I could finish the plane just yesterday. The 8a decals are great…and yeah with that story I will certainly order again from him. A nice guy that cares..we all know that that’s not always the case. Detail are from a Revell sheet I have as spare and the cockpit windows from Authentic Airliners, as usual. Otherwise the plane is painted with Tamiya and Mr. Hobby colours. Now enjoy the photos, I appreciate any feedback / comment. Julien
- 19 replies
-
- 33
-
-
-
 BEA Trident 2 'Ground Gripper' 1/144 Airfix with modifications The Trident earned the name 'Ground Gripper' due to its long take off run, seeming reluctant to take off! The Trident 2 was a development of the Trident 1, with an increased wingspan but utilising the same fuselage with a different internal arrangement increasing the seating, and 1 door less on the starboard side. The Airfix kit has been around for 50-ish years now, with a few accuracy issues, which I have have attempted to rectify There is a new kit from Eastern Express, but at £60+ it is way too expensive for my tastes, and anyway I get a lot of pleasure from doing a bit of real modelling and improving things. The main things are, straightening the leading edge of the fin, adding the fuselage to wing fairing, reshaping the centre intake, and a first for me, adding the leading edge 'wing kink' There is more detail at the end of this post, but for now, on with the pictures. I chose G-AVFB as it is preserved at Duxford in these colours: With something else, my recently completed Airfix Comet 4B These are the main improvements: I have never attempted putting the wing 'Kink' before. It is tricky because it is only in the leading edge. The trailing edge remains straight. I scored each wing upper & lower part on the inside, and bent & sanded it to obtain the kink, which slopes down from fuselage to about 1/3rd of the way along, where the rest of the wing takes on some dihedral. It worked well and I'll definitely do it on my next Trident build. I used the 26 Decals BEA Red Square sheet, but had problems filttng the black nose decals. I struggled to get then to lay down around the compound curves of the nose, and they started to split as I endevoured to line them up. So I removed them and decided to mask and spray all the black, including the cheat lines along the sides. It worked well and I am pleased with the result. I did the black on the fin top at the same time. This is all paintwork with no decals yet applied: It was a lot of work, but very satisfying! Thanks for looking, John
- 32 replies
-
- 77
-
-
-
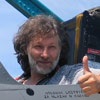
@chrism started this build and passed it over to me for completion. Having made two Airfix ones last year, I decided to do something a little different. Hope you like it.
-
Besides ANA,LATAM of Chile also added a Star Wars jet to their fleet. They chose the attractive Galaxy's Edge Storm Trooper scheme for one of their Boeing 777. When I found those decals from PAS on ebay,the decision was easy. The quality of the decals is very good,the only downside is that it comes without instructions. So a lot of research on the net and careful photo study is inevitable. Also some careful trimming in some places is necessary. I had a 3 Zvezda/Revell 777s in my stash and so the project was on. The Zvezda kit is superb with mostly good fit,so the build was troublefree. The fuselage was painted with Gunze white surface primer 1500,clear coated with Gunze premium gloss. The wings were done with Gunze grey 315 and the metallics are different Gunze and Testors paints. As the decals have window holes,I left the windows open on the kit and filled them with Krystal Klear. The silver frames come from the great Revell decal sheet as well as all stencils. This will be my final Star Wars logo jet,together with the R2D2 Dreamliner And the ,still in production, ANA 777-300 BB-8.Finishing this is a bit delayed as I had to wait for some decals for it. It will make a nice line up and a great addition to my collection of special liveries. Cheers Alex
- 19 replies
-
- 36
-
-
- Zvezda
- Boeing 777
- (and 1 more)
-
I am not the biggest fan of the 787,but somehow it grew on me to a certain degree and 3 Zvezda/Revell kits managed to enter my collection and now happened to be built all together. For the 787-8 I chose the delivery scheme ANA applied to their Dreamliners,with large "787" titling at the fron instead of the usual "ANA" titling. The kit is probably well known for its pros and cons,so I will not go into detail here . The build was pretty straight forward as everthing fits well with only a little putty and sanding required. The landing gear is the most fiddly part as it is very delicate and fragile. The decals are from BSmodelle and are very well done. Windows are from Authentic Airliners and details come from the Revell/Zvezda sheets and from the spares box. The whole model was spray painted with Gunze white surface primer 1500 ,clear coated with Gunze Premium gloss airbrushed prior and after decal application. Some photos revealed that at the time of delivery the wifi (hump) antenna had not been installed yet,so I left it off. The other antennas I left off too as they always tend to snap off during cleaning the models and then disappear on the floor. Cheers Alex
- 16 replies
-
- 34
-
-
Jet2 757-200 & 737-800 1/144 I'm currently working on a diorama for Newcastle Airport but as I've progressed with that I've neglected to add my aircraft builds as part of my work in progress. These 2 examples will be of the same Jet2 livery and will be Newcastle regulars. Although Newcastle has a heavy Jet2 presence the classic 737-300s have gone and also the aging 757-200s. However ignoring the current disruption the 757 does make an appearance for New York trips and various other charter flights normally positioned from Leeds Bradford or Manchester. I don't have a specific registration for the 737 but the 757 will be G-LSAB which has been newcastle based and includes winglets. It also has the same metallic finish as the 737 fleet as some of the 757's have an older gray paintjob. The Revell kit has error such as a mighty set of super sized winglets so for the cheap price the Zvezda kit is a no brainer. It's obviously been covered before but the kit is beautifully detailed and snaps together really well. It also has alternative winglet options such as the non-winglet tips found commonly on the classics (and some NGs) and the alternative scimitar type found on the TUI NG's. one small problem is the cockpit glass doesn't blend well with the fuselage. To overcome this I used superglue over the surface which once dried allowed me to blend the 2 surfaces smoothly. Some unnecessary mini sections to add that come part of this kit, make sure you've got a good eye and a pair of tweezers. This piece I actually dropped and lost but luckily I had a spare! The 757 options are limited. I've went with the Minicraft C-32 kit and the braz conversion. Zvezda need to hurry up and bring out the 757 tool, I'd imagine it's going to be popular You can see from the minicraft build that it's not quite right. It's not abysmal but the tail is too square, the cockpit window area is angled incorrectly and there's almost a hump (a bit like the 777 rest area) just above and behind the cockpit. Some of the bodywork detail is nicely scribed and the parts actually fit together well. the nose is fine but the cockpit window is too far forward The tail is too wide, this is made obvious if you look at the width at the top conversions always get messy remove the link inside the fuselage, the braz piece won't sit right otherwise. You have to watch out because some parts of the circumference the plastic goes from thick to wafer thin. I found it was wise to leave some excess resin on the front bottom of the tail to fit in a hole in the fuselage, this way the tail is more secure when superglued to the base a good comparison the kit includes the giant wing tabs which can be a pain. If you lucky enough for them to fit then it's wise to keep them on otherwise they are not going to be very secure. As covered before this kit as a issue with the undercarriage where one set sits higher than the other, unfortunately this means inevitably you may have to hack the tabs off one wing and try and level it with the other wing, this will create a nasty gap but is necessary to have the thing sit on it's wheels. If your doing it in flight then you'll probably get away with the wing tabs and the position of the wings I got some winglets imported from the US (at an extortionate price). They are extremely fragile and have a tab that fits on the top half of the wing. Sadly the lower portion of the wing does not fit on well as a result and a lot of sanding and thinning of the wing is required. I actually bought the zvezda 737 after this and I live with regret as it would have been easier to modify the spare scimitar winglets for the 757, they are a very similar size and shape. they include a nice little trailing strobe light as mentioned before the repositioning of the wing creates a gap. too big for filler or milliput. I admit I nicked this idea from somebody else's fine minicraft build but it is basically just spare sprue (from this kit) plus lots of polystyrene cement allows for a nice plastic pace. don't inhale this stuff! drys as plastic and makes the wing less likely to snap off fairings added under the wing and starting to look like the mighty 757 Another major problem is the plyons, as you can see it has the engines pointing nearly 45 degrees up. This is important....don't sand them to the correct shape which is what I stupidly did. just hold the plyon at both ends a bend the plastic (gently) till it straightens out and sits level on the wing. I did this with plyon no2 and it's perfect, unfortunately no1 needs completely reshaped with milliput. oops. final thing to add is a couple of VHF antennas, they are barely noticeable on the real thing but I wanted a little detail added to the top of the fuselage As mentioned this is part of my airport diorama and both planes will sit on the apron in front of the building
-
Started somwhere in 2020,I finally managed to get this off my bench. I already built a 747-400F by using a Revell -200 fuselage and the wings of a Revell -400. For this build however,I used the fuselage of an incomplete Airfix 747 kit and the wings of the Revell -400, I had in my spares. Mating these parts was a major task,as the Airfix kit has no wingbox,the wing root had to be built up with sheet styrene and putty. I also tried to correct the front end as good as possible, Many sessions of puttying and sanding were necessary to make everything look smooth. The decal for the Singapore Cargo comes from V1 decals and are very well printed and nice to work with. Painted with Gunze white surface primer 1500 for the entire fuselage,and Gunze enamels for the rest of the model. All in all,I am pleased with the result and happy to have been able to use parts from the spares entirely for this 747. Cheers Alex
- 10 replies
-
- 30
-
-
-
- Boeing 747
- 1/144
- (and 1 more)
-
Revel box build with AA and other third party decals. Seemed that everything went wrong with this kit, I must have dropped it about a thousand times and weirdly it didn't fit very well. Still, here it is, not bad. Have also just finished a much nicer Zvezda A320neo, which can be seen here: https://www.britmodeller.com/forums/index.php?/topic/235106308-sas-scandinavian-a320neo-zvezda-1144/#comment-4327834 Chris.
- 5 replies
-
- 16
-
-
- Revell
- Embraer 195
- (and 1 more)
-
Hainan Airlines operated 4-5 Dreamliners in different Kung Fu Panda liveries. I found the golden one from PAS Decals. Windows are from Authentic Airliners,details come from the Zvezda and Revell decal sheets. The PAS decals have no white backing,but they come with a set of masks for the panda head shape. For the fuselage I used Gunze copper,as the gold paint would have been much too bright compared to photos of the original. After application of the panda head decal,I realized that the masks were a bit off in shape and size,so after clear coating,I had to correct and fill the gaps carefully,so that the panda would be embedded in the copper. The rest of the build and decaling was troublefree. The only problem are the door decals,as they stand out a bit on the metallic paint even though I gloss coated the whole fuselage prior to decal application Cheers Alex
- 16 replies
-
- 34
-
-
- Boeing 787
- 1/144
- (and 1 more)
-
Another one for my collection of special liveries. This particular 777 entered service with this livery in 2013 and will be repainted back to its standard scheme this year. EVA AIR's Hello Kitty aircrafts have proven to be vety popular among travelers,so they had many different Hello kitty planes in their fleet. The decals are from 8A decs and are very nicely printed allthough on a very thin carrierfilm,so application of the large segments has to be done very carefully. The kit is the well known Zvezda 777-300. The build was straight forward with no major issues.The installation of the landing gear and doors is the most tricky part. The fuselage was spray painted with Gunze white surface primer 1500,clear coated prior and after decalling with Gunze Premium Gloss. All other parts are also painted with Gunze paints. Light weathering and highlighting the slats and flaps was done with a sharp pen. Two more of this giant airliner are on the bench currently,both with special liveries as well. Stay tuned Cheers Alex
-
Hello one and all, This is a project I have had in mind for a while, probably about 5-6 years now I think about. It was always pushed to the back of the pile as the boxes are pretty small and I had the bits all over the show due to 2 house moves. I was thinking what I could add to this GB over new years as I really want to increase my build rate from the pitiful 3 completed models last year (well I did have pneumonia last year!). Anyhow, I was wondering if I could stretch the rules to add the F/A-18F from Ace Combat (like I did in the F-14 build) but I didn't think the Ace Combat/iDOLM@STER collab would go down well, plus I couldn't make it fit into the rules, see below for what it looks likes... I think I will save this for when I have more time, and about 20 more AMRAAMS. So I was left with my supply of 1/144 F-18's, and I have a fair few (I think about 20 kits of the top of my head), then I remember the Chippy Ho! decals I had floating around - result! I know this build might please one member in particular at least due to what is going to be put into it, the main model will be the F/A-18C of the VFA-195 "Dambusters" aka "Chippy Ho!", the decals are labeled as the "Final Legacy" - I am going to assume this is the last scheme the CAG aircraft wore before they upgraded to the Super Hornet? I don't normally go for CAG birds, but there was something about this one that I really liked. I will also add an F/A-18D from VFA-125 "Rough Raiders", but that isn't the main point of this build, but if I can get it done that will be a bonus. Anyhow on to the pictures... So I will be using the Revell 1/144 F/A-18C as a base kit, I have built this kit before about ten or so years ago and really enjoyed it. I think this was when I was started using an airbrush. Anyhow, the kit builts up really nicely out of the box, but that would be too easy for me as I like to make things more difficult for myself (see below as to why). The two kits together, there isn't much difference between the C and the D models except for the canopies as you can see in the sprues, pay attention to the bottom of the tree to see the main different parts. I purchased these resin upgrades absolutely ages ago and I have used them in my previous builds. They are straight swaps for the kit parts and fit beautifully. I will not be using the tailplanes for these models as I have put them aside for an F-15 SMTD/ACTIVE (clicky-linky Wiki link) that I *will* get around to building one day this decade. I used to buy Domi's parts on an almost monthly basis, as they are really good and easy upgrades for these kits. If you can, I would recommend you check the bits out. You'll just have to trust me when I say the parts in in there, they are in the bottom right of the collection. I also have F-16/F-15 and possibly Alpha Jet bits in here. I think the other cockpit tub is for an F-104... but I really can not remember. About 80% of the parts here are from RetroWings. I will also be adding the Brengun 1/144 upgrade set for this kit. These parts will be mainly put on the Chippy Ho! aircraft, but I will use some bits on the D model as well. I don't think I will be using the mutions upgrades though. There is also a Vacform canopy and resin upgrades for various parts of the aircraft. The pack the decals came in, I haven't seen anyting from MYK in a while, then again I haven't really looked either. Hope they are still around and producing their decals as they are rather good. Hopefully the finished product will look something like the above... I gurantee nothing however. I do really love the eagle though, probably why drew me to this version. The decals themselves, I find it weird that we have the decals for the black stripe that goes on the spine and wings but not the green. I also do not see any obvious colour call outs for "midori" which means "green" in Japanese, I can't read much Japanese, but I can read that much... just. I will have to see what the other kit manufactuers say as I am sure someone else has produced this version. The D model box, I have also built this version before and it was a good model. I have only just noticed the dodgy missile on the 1st wing station. Is that meant to be a Harpoon? That is was is in the kit and what I built all those years ago... who knows? And the scheme I am going for with the D model, it is very basic and shouldn't prove to be any issues. This is a rare example of Revell providing call outs for paint other than their own brand which used to annoy the hell out of me, but not so much now. Depending on how well I get on with these kits, I do also have the Dragon 1/144 carrier deck to add, but we will see what happens. So welcome to this build thread and feel free to laugh/cry/shake your head along with me as I probably give up on this half way through. All feedback welcome and encouraged! Kind regards, Dazz
- 6 replies
-
- 3
-
-
- VFA-195
- Chippy Ho!
- (and 1 more)
-
Good day to all and Happy New Year!!!!!! Given the impressive numbers and quality of what others have shared here with us, I check in with a paltry nine models for 2021. I am unable to post the 1 / 1 scale home improvement projects that I have been doing along with the nine kits. While I matched the same number from 2020, the nine here were much more simpler in terms of complexity and colors. Airfix Spitfire Mk. I / II Special Hobby P-40K Warhawk Eduard F6F-3 Hellcat Academy P-38J Lightning Academy B-52H Stratofortess ( 1 / 144 scale ) Hasegawa F-86D Sabre Dog Revell V2 Hasegawa AH-64 Apache attack helicopter Trumpeter J-10 Chinese Delta wing fighter Here are my thoughts for the kits I worked on for the 2020 year………… 1 - 10 ( 1 being the worst, 10 being the best ) ranking of the kits……… 1. Airfix Spitfire : 6 2. Special Hobby P-40K Warhawk : 9 3. Eduard F6F-3 Hellcat : 8 4. Academy P-38J Lightning : 9 5. Academy B-52H Stratofortress : 8 6. Revell V2 : 8 7. Hasegawa F-86D Sabre Dog : 7 8. Hasegawa AH-64 Apache : 7 9. Trumpeter J-10 : 6 *Most enjoyable : Academy P-38 Lightning & Special Hobby P-40 Warhawk *Most fun : Revell V2 *Least enjoyable : Trumpeter J-10 *Feel good about : Academy P-38 Lightning *Least feel good about : AH-64 Apache *Most effort : Trumpeter J-10 *Least effort : Special Hobby P-40 Warhawk Thank you in advance!!!!!! Mike
-
The last of the batch. The decals for the Gulf Air version also come from an older Revell 767 release. Their 1992 kit with British Airways/Gulf Air decals and RR engine option. These decals were in similar condition as the Lauda ones,but at least they stayed on the model. Utmost TLC was necessary to get the decals layed down and around the nose.They were quite stiff and brittle in some places,even after the application of liquid decal film. Some touch ups with paint were unavoidable but it came out better than I expected. Same paints used on this as on my previous 767s. It was quite a task working on 6 767s simultaneously but also fun and I learned a lot about the type.The many door and window layouts in particular,which lead to careful research of the subject.A good thing that I have a very informative book about the 767,it was a massive help during those builds. Thats it for now with this type,3 more Revell 767s are in my stash,but they will be done another time. Now I am off to my 777s and 787s that are in production. Stay tuned Alex
- 12 replies
-
- 24
-
-
-
- Boeing 767
- Zvezda
- (and 1 more)
-
Finally my (for now) last batch of Boeing 767s are off the production line. It took a bit longer than planned as life got in the way. Now here we are again and I continue my Boeing 767 parade. This is the very good Zvezda 767-300 kit,which in comparison to the Revell version,is more detailed,esp. the landing gear and engines. The fit overall is very good,although for some reason the kit I used for the Qantas version suffered from a seriously warped fuselage. It took quite a while to straighten it out. The other Zvezda 767s were fine,so I assume this was an isolated incident. Qantas had often painted some of their aircraft in special liveries,so this came probably not by surprise when they promoted Disney's animation hit "Planes" The decals come from PAS decals and are of very good quality. The kangaroo logo is a white printed decal which is surprisingly opaque on the red paint. The decal sheet itself has many details but as they have no white backing,some of the details or the windows are useless as they will either disappear or become too dark on surfaces that are not white. Another note to be taken ,is to use any solvents sparringly or not at all ,while applying the decals.Much better to use only enough water to slide the decals into position. The paints are Gunze,the white for the fuselage was done with Gunze white surfacer 1500,gloss coated with Gunze Premium Gloss prior and after decalling. The windows are from Authentic Airliners. Cheers Alex
- 12 replies
-
- 29
-
-
-
- Boeing 767
- Zvezda
- (and 1 more)