Search the Community
Showing results for tags '1:72'.
-
Hello folks I've just got the Cromwell and Centaur book by Ian Carter and I'm trying to work out what the differences are between the Centaur and Cromwell Mk VI CS. The obvious differences I've found are: Centaur No hull MG; early wheels with 'drilled' tyres (but I note two preserved examples in France don't have them); sighting box on turret. Cromwell Mk VI CS Hull MG; later wheels with solid tyres; no sighting box on turret; spare wheels often mounted on turret rear. I expect they're other differences, but I can't spot them. Can anybody help? Thanks Stewart
-
Hi fellow modellers, Here's my first finish of 2024, Nakajima E8N2 Dave in 1:72 scale from RS model. I chose Royal Thai Navy markings as they are not what you normally see. Plus I'm originally from Thailand and Thai equipment from WWII is one of the topics I'm interested in among others. A brief history of Dave in the Royal Thai navy. In its bid to expand its military in the mid 1930s, Thailand heavily relied on Japan for light and heavy weaponry. One could say they became a miniaturized version of IJN/IJA, fom small submarines and gunboats to a handful of fighter aircraft here and bombers there. A brach of naval air arm was even formed separately from the air force. It was this branch of service that received 18 Daves. Although the document mentioned E8N1 model, the few available photos suggested that at least some of them had the characteristics of E8N2 model. Back to the model. I bought this RS model Nakajima E8N2 kit when it first came out in about 2019, started immediately, then it went into a black hole for nearly five years. I can say that RS model kits are generally quite nice. Details are a bit soft but there is no major error worth mentioning. The instrument panels are a combination of PE and printed clear plastic (Acetate sheet?). The biggest problem with this kit is the clear parts are also provided as a flat clear plastic sheet. These are difficult to work with and I think the outline of the shape is questionable. I ended up cutting my own clear parts from a clear grocery package. All the struts need to be reinforced with metal wire to withstand the handling. The instruction suggest overall silver paint for the aircraft, but my information says it should be light grey. It is debateable whether it was standard IJN light grey or another shade of grey specify by Thai navy. I went with AK interactive IJN amber grey but I lightened it up by mixing in some 30% white paint. Some areas received heavily faded paint to add contrast between each component and material. The transport cart is not provided in the box. So I borrow one from a Fujimi F2M Pete kit. A small supporting piece was built from plastic pieces and painted. Cheers, Nanond
-
To be edited . V-P
- 4 replies
-
- 6
-

-
- Mk.IXc
- Weekend Edition
-
(and 1 more)
Tagged with:
-
Below some images of my recently finished 1:72 Revell Panzerhaubitze 2000. I received this as a review kit from IPMS Netherlands and an article (in Dutch) was published in the last issue of MIP. The kit has great detail out of the box and is easy to build. Minor issues are the closed hatches on the turret and the moulded on tools. I thought the decal choice to be a bit bland (Bundeswehr and Ukrainian Army), so I opted for Lithuanian markings instead. I used NATO colours from Tamiya's TS spray can range, with details picked out in Vallejo colours. I hope you like it. Peter
-
A request from a Swiss friend. A Guppy kiosk conversion ( Porthmouth Sail version ) for a Gato Class submarine to represent the USS Torsk 423 with a 1:72 Gato Class Revell hull. I have to release the big sonar under the hull also. I found a lot of drawings on this excellent Gato Class website: http://www.gatosubs.com/mkptsail72draw.htm Unfortunately they are not very accurate, see picture, but they did help me a bit to start my 3D drawing. Luckily, you can find a lot of pictures of the USS Torsk in a dry dock during an interview and docked at the museum, especially on Flickr with HD pictures of individuals. This submarine kiosk looks simple in terms of shape, but it's quite the opposite. First sketchs:
- 58 replies
-
- 17
-

-
F-5E Tiger II, Brazilian Air Force, 1./1 Grupo de Caça, 4839, 1985 - Santa Cruz Hobby Boss kit as a base but also added parts from Italeri kit. Also some scratch built details such as the extended tail fin. Not the most detailed kit but it was fun project nevertheless to get as much as possible to out of two kits. Painted with Vallejo acrylics and weathered with Ammo Panel Liners and Oilbrushers. Built for the South of the Rio Grande GB. WIP here:
- 6 replies
-
- 21
-

-
- HobbyBoss/Italeri
- 1:72
-
(and 1 more)
Tagged with:
-
Hello my friends after veeery long break. This is my continuation of my teenage struggles with models If you remember my tornado 1:144 you know i love smale models. So I start new project polish TKD 1:72. I have only one month to finish model so i dont bought any photo-etched elements. How you see, I add polystyrene box and fire extinguisher. I glued a few polystyrene leaves and a small square as a box. To make a fire extinguisher, I used Tamiya plastic pipe and polystyrene as a fire extinguisher holder. It looks bad, but it's better than nothing.I also drilled the barrel from the kit. Greetings from Poland ! heh..it was so funny how 3 years of make models gone....
-
Felt like doing rather straight forward out-of-the-box build and chose this as my subject - Hobby Boss F-5E. Decent looking plastic, but maybe bit thick looking panel lines. This is the paint scheme. I'm not entirely sure whether this is supposed to be SEA camo colours or not? In some pics it looks like it could, but then again, in other pics it shows to be very different - maybe due to paint weathering? Having done quite a few SEA planes, given the choice I would be drawn more towards the gray/green Brazilian camo but this comes with the box so I think I will roll with this one. I've already narrowed down possible colours for the scheme. Cockpit work in progress. Those two instrument panels on the right are for another build. Cockpit done. Not my best work but it will do. I did add belts from masking tape but other than that, straight from the box.
- 28 replies
-
- 13
-

-
Hi All Here is my latest build - F-20 Hasegawa kit, 1/72 scale. OOB.
-
I´m doing afv not that often, but from time to time some topics come to my mind and bring a kit on my bench. This time all started on our way to Euro Model Expo in Lingen when we passes a convoy from German Army with some TPz Fuchs and Fenneks. If you see this vehicle from the lowered position of your co driver seat, it's just impressive. So the next day three of us purchased the 1/72 Trumpi kit.😂 And here we go... I´m doing the Netherlands version as mentioned in the titel. It will get it´s standard Nato camouflage and will find it´s place on an small base at the end. At the beginning the major parts for the interior were put together and some details as the seatbelts were added. The windscreen has some massive connections between the front and side windows. When dry fitting they were clearly visible from the outside and I´m not sure the outer frames will hide them at the end. So I cut the windscreen into three and sanded and polished it again to get rid of these problem. I used green for the interior but I´m not sure if it´s right at all. Most pics i found on the net shows German Fenneks and the looks overal green but on some pics from Dutch Fenneks it seems there are also a lot of white or light grey. Anyway, in that small scale you will not see that much at the end and I´m not even sure if I will open or close the doors at the end. All put together with some dirt added looks quite okay for me. So far for now, I hope your interested in the little fox.
-
I’ve had the bits and pieces to build a Wasp for a while but I’ve shied away as it’s quite small and there’s loads of fiddly resin. I know there’s one on the way in 72nd scale imminently but thought this GB is a good place to start with what I’ve got. The base kit is Airfix’s Westland Scout with a couple of Air Graphic’s resin conversion sets and an Airwaves etch set which makes a big difference to the interior. The conversion set has a new tail, tail rotor, buoyancy pods and all the small bits for the undercarriage. The engine set has a new Nimbus engine which is much more detailed and finer than the Airfix one in the kit. The parts of the Scout which aren’t too bad as the original moulds date back to 1966 Two very valuable resources. Jeram-Croft and Martin’s book is a great read as well.
- 11 replies
-
- 2
-

-
- 1:72
- Scout conversion
-
(and 1 more)
Tagged with:
-
There is still a bit of time left until Christmas and here IBG Models sent me a gift from me in the form of their new model of PZL P.24 B aircraft (72554) in Bulgarian paintings and the model came with 3D printed extras. And there are two kits dedicated to P.24 series aircraft: IBG 72U023 Radiators and Venturi Tube for PZL P.24A/B/C/E - 3d printed (1:72) and IBG 72U025 Pilot's seat with seatbelts for PZL P.24A/B/C/G - 3d printed (1:72). I would like to thank IBG Models for the supplied model and accessories. That's enough introduction now it's time to see what's inside. After opening it up, this is what it looks like inside. All the mouldings. Two plates and a film. Decal sheet and what I found very interesting is the lettering ( number 26 ) on the tyres! A revelation for me. There are three camouflage variants to choose from, I haven't chosen which one I will build yet. And as you can see there is also an invitation to "Babaryba 2024" it is the biggest and best modelling event in Poland. A complete novelty of IBG Models company, that is their 3D printed add-ons and here they are dedicated to PZL P.24 family of aircraft. All in all, we have a very interesting version of the P.24 in uncommon paintings with very interesting additions. I still have to look at the source materials to see what more can be squeezed out of this model. There is nothing left for me to do but to invite you to continue this workshop thread. I would like to thank IBG Models for the supplied model and accessories.
- 32 replies
-
- 10
-

-
- PZL P.24
- IBG Models
-
(and 1 more)
Tagged with:
-
The Airfix Blenheim has been built a few times in BM and I previously built a both a MkI and a MkIV of 771 NAS based at RNAS Twatt. So a quick look in the stash revealed this one as well. I had laid down some paint previously but that’s all. I have some aftermarket, the masks are vital for the Blenheim’s glass house and turret, while I’ve got a selection of transfers. I’ll use the markings for 787 NAS the Naval Air Fighting Development Unit. I’ll add in some etch seat belts but otherwise OOB.
-
My second contribution to the GB. It is the nice Mitsubishi bomber from ICM in Thai markings during WWII. Parts are already removed from the sprues on this one. /Nanond
- 20 replies
-
- 13
-

-
My last kit finished this year - 1:72 Hispano Aviación HA-1112-M1L Buchón. My interpretation of aircraft no. 71-5 "MAPI", serial C4K-9, 71. Escuadrón, Ejército del Aire, Gando Air Base (Gran Canaria), Ifni War (Spanish Sahara), 1958. Special Hobby kit built "out of the box" with some scratch. Thanks for watching!
- 21 replies
-
- 69
-

-

-
- Buchon HA-1112
- 1:72
-
(and 1 more)
Tagged with:
-
Hello all, I've now finished my first "proper" attempt at modelmaking with this Airfix 1:72 Spitfire Mk.Ia which I picked up at Christmas from the fabled "middle of Lidl", at half price to boot - just £3.50! I learnt a LOT from this kit, and there are a few things I'm not happy with (the paint is too thick in some places so it's filled in panel lines and stopped them from taking the wash later on, had some trouble with varnish coats pooling, might have overdone the weathering) but overall I'm pleased that I actually completed a kit even when at times I felt like it wasn't going to turn out any good. This is compounded by the fact that I am diagnosed OCD so it's quite difficult for me to be realistic about what I can achieve and to know when to put it down and walk away for a couple days. My ethos going forward is very much "done not perfect/don't let perfect be the enemy of good". And compared to my very first attempt at modelmaking (an Airfix Hurri starter set I built during the first lockdown) I'm satisfied with my progress. All painting was done using Humbrol Gen 2 acrylic dropper bottles and brushes, with Humbrol spray primer. Having used Vallejo and Citadel paints a lot in my miniature painting side-hobby I found them to be lacking for modelmaking (in particular, the Vallejo just peeled and flaked if you blinked at it, even with spraycan primer underneath) so thought I'd give the new Humbrol paints a try as I had seen a few good reviews on Youtube and they're a decent price. Some colours went on better than others but overall they were perfectly good paints. I think next time though I'll add in some Acrylic Thinner and build up the layers in many multiple thin coats. I let my impatience get the better of me a few times with this build and slapped it on in a few places. I used Eduard masks for the canopy and the camouflage - the canopy was fine but I found that the camouflage ones, when painted over with a brush, leave a little "lip" along the edge of the tape that can be quite difficult to get rid of. I tried gently scraping it away with a fresh craft knife blade, and sanding it gently with a 3000 grit sanding stick, but the result wasn't great and in a few areas it just messed the paint up and caused me to apply another too-thick layer of paint. For future builds I might give white-tack a try or just freehand it as best I can. I applied Ammo by Mig Ultra Matt "Lucky" varnish which is what I usually use for historical miniatures but I can't help but wonder if its maybe a bit TOO matt - are Spitfires more of a satin finish in real life? Let me know! Weathering was achieved with Flory clay washes - Grime for the interior and Dark Dirt for the exterior. I used Humbrol weathering powders for the exhaust and gun smoke, although I found that you have to be careful with these as they like to get everywhere and stain bits of the model you don't want weathered. I'm also not sure how to fix them in place, I've thought about adding a final coat of varnish but I'm worried that the action of brushing it on will just smear them everywhere. Again, let me know if you have any tips. I may come back to this and add a bit of chipping and wire for the radio, although I'm not so sure of the best product for the latter - any suggestions would be appreciated. Anyway, thanks for looking and any thoughts/feedback are very much welcome! - Joe
- 27 replies
-
- 49
-

-
Hello all, After receiving a great deal of very kind and supportive responses to my RFI of my first "proper" completed kit, the Spitfire Mk.Ia, I feel buoyed up and full of enthusiasm for cracking on with my next model. For Christmas I was generously gifted the 617 Sqn. Dambusters Gift Set, which includes both the modified Lancaster and the squadron's new aircraft, the F-35B. As the Lancaster is my all-time favourite aircraft I was tempted to get started on that but I've reined myself in and chosen the F-35B for my next subject instead as it looks to be a much simpler kit designed specifically with the novice modeller in mind, and should be perfect for getting another "win" in my column and building up my confidence. We'll see how things actually play out! I cracked open the box on Sunday afternoon and, after diligently washing the sprues, got started on assembly. Coming from the 2010-tooling Spitfire the difference in both part quality and construction design is stark, and I was surprised at just how large the F-35B actually is in comparison with its ancestor. Clean up of the pieces went well, and so far I have assembled the fuselage (just 3 pieces, with 3 more on the inside to provide rigidity) and the twin tails. Despite dry fitting the pieces I did find that assembling the top and bottom fuselage halves was a bit tricky, probably because I failed to properly sand down the ejector-pin marks on the inside of the wings. This (plus perhaps a bit too much glue) has meant that there is a slight lip on the underside where the top and bottom halves of the wings slot together. You can just about see this in the pictures below, and you can also see where some glue had seeped out into the join and I have scraped it back. This is now looking better than it was at first, but there's still a sort of white crustiness inside the line that seems to refuse being removed out with a craft knife. I'm hoping a coat of primer will hide this, and hopefully disguise the slight lip too. At the end of the day, though, this is the underside and therefore won't be easily seen. I've decided to build this kit in hover mode, but I'm likely to buy another (possibly in the Then and Now Gift Set to get the Spitfire Mk.V starter set too) for building in flight mode, so that's a lesson to take forward. That said, if anyone has encountered this before in their own projects and knows of a better solution than scraping then please let me know. My next task is to prime everything with Humbrol No 1 spray can primer, and also the small pieces which are still on the sprue, however good weather sadly eluded me yesterday so I'm waiting for some sunnier weather. I'll check back in when I've done that and hopefully made a start on painting up the cockpit. Thanks for looking, any advice or tips+tricks welcome. - Joe
-
F-84F Thunderstreak, Royal Netherlands Air Force, P-171, No.311 Squadron, Volker AB, 1963. Kit: Special Hobby 1/72 F-84F Thunderstreak (SH72395) Aftermarket: Dutch Decal Republic F-84F Thunderstreak / RF-84F Thunderflash / Hunter (Royal Dutch AF) (DD72105) Paints: Vallejo Weathering: Ammo & Abteilung Superb new kit by Special Hobby, painted with Vallejo Model Air acrylics and weathered with Ammo panel liners and Abteilung oil paints. Fuel tanks are from Valom F-101 kit - otherwise built straight from the box. WIP:
- 13 replies
-
- 36
-

-
- Thunderstreak
- F-84F
-
(and 1 more)
Tagged with:
-
Well folks, here she is! The first half of my Sopwith double build is now in the cabinet. The interior, all struts, beaching trolley, tail surfaces, and tail stand are scratchbuilt. The Lewis is MiniWorld, prop and engine are Aeroclub. Mods to the kit included removing the headrest and moulded front "visor", reskinning the entire top surface of the fuselage with .005" sheet to correct the cockpit shape and improve the definition of the rear turtledecking, reskinning the fuselage underside to reduce the depth, and drastically reducing the height of the main floats. The opening in the upper wing was also filled as photos show this aircraft without it. Rigging is .06mm (0.002") monofilament, with similar sized stainless wire used on the tail float. The sling on the upper wing is simply a couple of pieces of cotton tied together and CA'd in place. The model represents a Sopwith Baby with Nore Flight, Isle of Grain, in May 1916. This particular aircraft was there by 24th April 1916, and was capsised and wrecked in mid May. It was struck off charge in June of that year. She's just become one of my personal favourites, I hope you like her! Ian
- 29 replies
-
- 57
-

-

-
- 1:72
- Sopwith Baby
-
(and 1 more)
Tagged with:
-
I had the idea to make a model of the aircraft in the 1959 Tintin Belvision animation of The Star Mystery. It's an Arado Ar 196 in the comic and it certainly inspired the animation team. I first thought of a CAC Wirraway, but then came across the DL in Las Alas de Peron book. This group build is just what was needed to push me past the idea stage. Now there will be a long pause as I work on some drawings.
- 3 replies
-
- 1
-

-
- Tintin aircraft
- scratchbulid
-
(and 1 more)
Tagged with:
-
Mind you, if I try to regain my lost modelling and also my modelling related discussion mojo, by building a quick (I hope) small high-quality kit in this group build? I hope my permission will be granted, as I took a jump start on this two days ago, just to be sure my build would this time advance beyond the opening post! Monday, 13.5., afternoon by the dinner table (no paints and glues to be applied yet!) Looky here, one nice Wildcat kit to be built using one of two kit supplied decal schemes. Not from the MTO proper, but close by on the Atlantic shores of North Africa. VF-41 was one of fighter squadrons aboard USS Ranger in November 1942. The kit has options to be built legs up or down, wings folded or not, and canopy closed or open. I started by removing most of the unnecessary parts for my build, and bagged them. Later that evening, I got to my workbench, and started painting. Airfix painting instructions are eh a bit vague. I consulted Eduard instructions available via Scalemates. Cockpit is Hu149, dark grey Hu125 and the light grey Hu129. Black is Hu33. Tuesday, 14.5., evening. Painting and subassembly progressed nicely in my opinion. The landing gear is a mini kit of its own. Kit cockpit decals look like displaced but I had no zoom like this in my eyes when attaching them. Very crude masking tape seat belts added too. Very little of those decals will never be seen againg, because I buttoned up the fuselage. The horizontal tailplanes are just slid on to act as clothes pegs while cement dries. Wednesday, 15.5. Ridiculous kit in its simplicity, even when built gear down. Joined the separately painted upper and lower wing halves, and a bit later attached them to the fuselage, which was by then yet unpainted. Would it remain that way? I used the windshield part to mark the part of fuselage that would became part of cockpit cowling, and painted it matt black. I had already masked and painted the canopy framing with Hu 149. Soon I could attach the windshield and prepare myself for the next step. No, of course not it didn't remain unpainted. First Hu129 for the lower parts - remember, the wings were already painted. I don't know which is more scary, that I use the very tin of Hu129 I bought for the brand new release of the Monogram F-4J back in 1985, or that I remember the fact? The Hu125 unfortunately comes without such story. I will now let the paint set and dry thoroughly before I get to add the decals. As can be seen, I have most of the detail parts already painted, only the exhaust and the prop need more work. The rest will be touched up after attaching to the model. Thanks for looking! V-P
-
When the box cover says 'for experienced modellers', you know it's not gonna be Tamiya Baby blue plastic doesn't really make things look any better. But the (tiny) box is full of stuff so it's kinda promising. It's bit hard to see because of the plastic colour but there are details. I mean they are not the most sharpest of details but it looks a bit like diamond in the rough. So no, I don't think the box cover was a lie, if you are an experienced modeller, you can probably make this work. Anybody know any experienced modellers? You have to be really careful when taking parts of the sprue. My favourite are all the small intakes you have to cut out... This is a multimedia kit. Resin parts are included. For this build I will be using the underbelly gunpack on the left. Also metal parts! Landing gears and some other rather bent parts that I am not yet sure yet what they are. Also resin exhausts. They look rather nice. Vacuform canopy. I would not expect any less from an 'experienced modeller' -kit. I did make a start with the kit before the GB. Friend of mine built High Planes P-47 (and did rather splendid job of it!). I got him into building that by saying that if you do that - I will build the P-70. He did the P-47 in something like a week - mine's taken, let's just say, a _bit_ longer But now it is the time! Super simple kit, really. One picture for the whole build process! Makes you think why Eduard needs tens of pages for something like this 🤔 I like the parts that you just 'make up'. And remember all those small intakes (if they are intakes?) from earlier - can't see them on this pic. They're probably not needed, if I am lucky I will be doing the P-70 nightfighter, 'Dusty'. Some rather nice photos exists of this plane so it will be interesting research process. And joking aside, the 'experienced modellers' on the cover is no joke, I think this kit will challenge me from the beginning to the end but I have all intentions to give it my best 🙂 Let's go!
- 37 replies
-
- 19
-

-
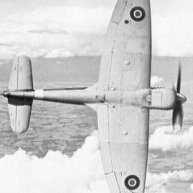
Spitfire Mk.Vc Trop - Off to the Sangro.
erniewise posted a topic in Ready for Inspection - Aircraft
Hello BritModeller folks. If Glaciers made models they would finish them faster than I do! Any way hey ho, here we go. This is my interpretation of Airfix’s Mk.Vc spitfire, built OOB, other than the addition of a CMK resin 250lb bomb and some scratched elements. I decided to build the SAAF kit option, using the set of IWM images taken of 2 Sqn on their way to the Sangro River as references. I like the camo scheme, and a spitfire with four cannon really means business. Airfix provide decals for JL115 DB-V, there is a DB-V present in the IWM images right at the back of an echelon view (https://www.iwm.org.uk/collections/item/object/205211923) whether it is actually JL115 I do not know. But it is good enough for me. Other elements of conjecture based on these images. I decided to paint the cannon bay hatches in the same red as the spinner and the flashes on the tailplane tips. I’ve seen suggestions that they could be in dark mediterranean blue but they seem tonally closer to the red to me. I’ve also presumed that the fabric patches over the gun ports are close to azure blue as I’ve seen various photos (non-colorized I think) of desert camo spits with these in place. Paint used were Vallejo model air for the airplane itself and hataka bronze green for the bomb. Finally, I have used an IWM image as a base for my display. Mods, if there is any issue with this, I can swap the base other to show a generic sea scape!


