
dad's lad
-
Posts
396 -
Joined
-
Last visited
Recent Profile Visitors
3,405 profile views


dad's lad's Achievements
")
Established Member (3/9)
118
Reputation
-
1987 Academy 1/72 P-40 w upgrades
dad's lad replied to Penickart's topic in Curtiss P-36/40 Hawk STGB
-
AEC Matador and 5.5 inch gun *** Finished***
dad's lad replied to 825's topic in Less Than A Tenner GB
Thank you, I'll have to source some of the Xtracrylic. Clive. -
AEC Matador and 5.5 inch gun *** Finished***
dad's lad replied to 825's topic in Less Than A Tenner GB
Looking great, the colours look spot on. What paint did you use? -
Thanks for clarifying, I'm easily confused!
-
My apologies, I thought that the blurb that you'd posted earlier suggested that the fuselage brakes extended first which then triggered the wing brakes. Clive
-
Oooo, hadn't realised that there was going to be one!
-
Many thanks John for the comprehensive answers. If I've understood correctly, the aircraft should either have both sets of brakes extended or neither. I know somewhere that I've seen a closeup photo of the top of the wing showing the brakes open otherwise I'd have been oblivious to their existence. I'll go with the Italeri positioning, who's to know any better (not that anyone but me will be seeing it). Clive.
-
No problem, interrupt away, it's all useful information. Clive
-
That's brilliant, thanks John. Clive
-
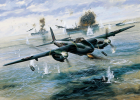
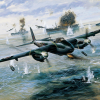
Does anyone have a definitive answer regarding the finger brakes fitted to B-57's please? I've separately read that they were a remnant from the original EE Canberra and that the USAF found them ineffective and replaced them with the rear fuselage brakes, whilst elsewhere, it is stated that they were used in conjunction with the fuselage brakes. I'm going to be making an Italeri Canberra and the finger brake positions are well marked on the wings, but I don't know whether to feature them. Also, does anyone know where I can find a picture of these things? I was certain that they were in my B-57 book, but can't find them. Thanks, and Merry Christmas. Clive
-
Greetings from a fellow modeller from Nottingham currently located in South Wales! Clive
-
Ah thanks, I missed the icon showing the removal of the nose and assumed it was showing the parts being attached. Clive
-
Brilliant work, but I'm curious, I've never seen a 1/72 Fujimi Spey Phantom with separate nose pieces before. Is this one of the modifications made when the other improvements were made I wonder? Clive.
-
Enzo's Phantom Phrenzy Part 1 - FG.1
dad's lad replied to Enzo the Magnificent's topic in UK Phantom STGB
Brilliant thank you, I'll know what to look out for when I eventually get around to building my own Fujimi F-4's. Clive -
Enzo's Phantom Phrenzy Part 1 - FG.1
dad's lad replied to Enzo the Magnificent's topic in UK Phantom STGB
Please excuse my ignorance, whilst I understand the RWR difference, are there other significant differences in the actual plastic of both kits (FG.1 v FGR.2) that necessitate the fuselage swap? Regards, Clive.


