johnny_7713 Posted March 1, 2016 Author Share Posted March 1, 2016 How about sticking pieces of masking tape across the gap, from the inside? If you don't overlap around the edges too much it should pull out OK once you've finished. Not sure if that makes sense? Cliff Yeah it does. Would have to do that before closing up the fuselage right? Link to comment Share on other sites More sharing options...
CliffB Posted March 1, 2016 Share Posted March 1, 2016 Would have to do that before closing up the fuselage right? Yes, that's correct. Here's one that's currently in my pending pile. First what's inside: And then after the tape has been installed and the fuselage closed up. In this case, each of the three windows has its own piece of tape so that they can be pulled out individually. I'll be glazing the windows with Kristal Klear in due course. As you'll appreciate, the exposed piece of masking tape is sticky, so I always seal it straightaway with some thinned varnish (or Klear), to stop it picking up hairs and sanding debris etc. Cliff 1 Link to comment Share on other sites More sharing options...
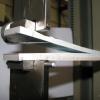
johnny_7713 Posted March 3, 2016 Author Share Posted March 3, 2016 (edited) Getting ever closer to closing her up. First order of business though was to lop off some of the attachment points for the tail antenna(?) as the naval version is slightly different. Before After Looking at the reference pics the remaining attachement points should really be oval, rather than square, but that's a bit beyond my skills for now. After that it was time to install all the various sub-assemblies, and this is where everything stands at the moment. Will close it all up this weekend and hopefully get some primer on at least. Edit; regarding the foam for protecting the interior. Would a sponge work? Edited March 3, 2016 by johnny_7713 1 Link to comment Share on other sites More sharing options...
johnny_7713 Posted March 5, 2016 Author Share Posted March 5, 2016 Starting to look like a proper rotor-driven death machine now. The naval additions continue to disappoint in terms of fit and detail compared to the regular kit parts, but nothing that filler won't overcome hopefully. Landing gear is on and drying now (not in the photo yet). Later tonight or tomorrow I'll put on the sponsons and then the filling and sanding can commence. 1 Link to comment Share on other sites More sharing options...
CliffB Posted March 5, 2016 Share Posted March 5, 2016 As you say Johnny, it's really starting to look the part now Cliff Link to comment Share on other sites More sharing options...
johnny_7713 Posted March 12, 2016 Author Share Posted March 12, 2016 Some further progress over the past week. Several rounds of primer (Citadel Skull White), sanding and filling. Then a coat of Valejo 152 (aka 70.883 Silvergrey). It's my first time airbrushing in at least 5 years so I still have some learning to do, but from 0.5 metres away it looks OK. Tip for anyone who might build this in future: the instructions say to close up the fuselage first and only then stick on the landing gear, but I would highly recommend doing it the other way round. You have to fix the upper part of the leg on a certain positioning hole inside the fuselage, which is probably a lot easier if you haven't closed up the sides yet. 3 Link to comment Share on other sites More sharing options...
dude_gan_ainm Posted March 12, 2016 Share Posted March 12, 2016 Lookin very good Johnny.Shaping up to be a stunner. Jimbob. Link to comment Share on other sites More sharing options...
johnny_7713 Posted March 13, 2016 Author Share Posted March 13, 2016 Put on a coat of Microscale gloss and removed all the masking. Quite pleased with how the colour has come out. I've started on the first round of decaling, which is helping to break up the massive slabs of grey. Still various antennae and other sensors to install before I go full out on the decalling though. Had a slight accident during removal of the masking of the tail-plane de-icing boot. Fortunately it's on the bottom side. No fancy meshes from me, at this stage of my modeling skills I'm staying with drybrushing aluminium over black. Quite a ways to go yet, but it's slowly starting to come together. 3 Link to comment Share on other sites More sharing options...
CliffB Posted March 14, 2016 Share Posted March 14, 2016 That looks really nicely put together and I'm looking forward to seeing it fully decalled Cliff 1 Link to comment Share on other sites More sharing options...
Hockeyboy76 Posted March 14, 2016 Share Posted March 14, 2016 Wot he said. 1 Link to comment Share on other sites More sharing options...
Smudge Posted March 14, 2016 Share Posted March 14, 2016 Coming along nicely. 1 Link to comment Share on other sites More sharing options...
johnny_7713 Posted March 16, 2016 Author Share Posted March 16, 2016 Spot the differences! 2 Link to comment Share on other sites More sharing options...
Dermo245 Posted March 16, 2016 Share Posted March 16, 2016 Really coming alive now - great! 1 Link to comment Share on other sites More sharing options...
johnny_7713 Posted March 25, 2016 Author Share Posted March 25, 2016 (edited) Progress continues to progress slowly, but I've got some more decals on, as well as diverse antennae and other small parts. Edited March 25, 2016 by johnny_7713 3 Link to comment Share on other sites More sharing options...
Hockeyboy76 Posted March 27, 2016 Share Posted March 27, 2016 Looking really good. 1 Link to comment Share on other sites More sharing options...
johnny_7713 Posted April 3, 2016 Author Share Posted April 3, 2016 Decals, so many decals! (You may commence laughing now if you usually make models with several sheets of stencilling, I'm sure there was only a modest amount on this model). Getting close to being done now, rotors, wheels, winch, pitots, and antennae all that's left, as well as a light wash. 4 Link to comment Share on other sites More sharing options...
Nigel Heath Posted April 3, 2016 Share Posted April 3, 2016 Fantastic decalling, looks great! 1 Link to comment Share on other sites More sharing options...
johnny_7713 Posted April 14, 2016 Author Share Posted April 14, 2016 Final painting and assembly completed, and it´s done! I´m sure the practised eye can pick out quite a few spots for improvement in the macro-photos (even I can ) I'm pretty pleased with how it looks when I look at my display shelf from behind my desk. I'm also pleased with how my very first attempts at scratch building turned out (life-vests and trackballs in the interior and the blue bracket (?) on the tail. I'll post some more pics in the gallery and then it's over to the Hunter STGB forum for me (of course I'll keep following all the amazing builds going on here as well). 4 Link to comment Share on other sites More sharing options...
dude_gan_ainm Posted April 14, 2016 Share Posted April 14, 2016 Very nice build,well done Johnny. Jimbob. ... 1 Link to comment Share on other sites More sharing options...
Nigel Heath Posted April 14, 2016 Share Posted April 14, 2016 Great to see this finished, a very charming and tidy build. A great addition to the GB. 1 Link to comment Share on other sites More sharing options...
CliffB Posted April 15, 2016 Share Posted April 15, 2016 Congratulations Johnny, that's very cool scheme! Cliff 1 Link to comment Share on other sites More sharing options...
Smudge Posted April 15, 2016 Share Posted April 15, 2016 Nice, very smart finish. 1 Link to comment Share on other sites More sharing options...
johnny_7713 Posted April 18, 2016 Author Share Posted April 18, 2016 Thanks for all the kind words, glad you liked it . After uploading I actually discovered a set of decals that the carpet monster had dragged to its lair, so I'll probably add two more stencils (one 'rescue' triangle on each sponson) some time in the coming week. Link to comment Share on other sites More sharing options...

Recommended Posts
Create an account or sign in to comment
You need to be a member in order to leave a comment
Create an account
Sign up for a new account in our community. It's easy!
Register a new accountSign in
Already have an account? Sign in here.
Sign In Now