Search the Community
Showing results for tags 'WW1'.
-
I've had this model kicking around the stash for many years and thought while I'm a bit crook with some head cold and currently high on cough medicine, it might be time to start a WW1 aircraft. I don't usually build WW1 so fitting the struts was interesting, I think I managed to get them mostly lined up. I also in my haze, decided rigging would be a good idea. I drilled small holes and threaded some stretchy line through them. It took me a day but it does look nice. A simple little base was made from a wooden thing i found at a good will shop, grout, some spares box stuff, CMK resin pilot and Mini Natur grass tufts. I left the aircraft pretty clean and glossy, I've read that WW1 paints were high gloss and then faded off, but as this aircraft was not in use long I figured a dead flat finish wouldn't be realistic. The aircraft is apparently one flown by Olivier Freiherr von Beaulieu-Marconnay in probably Jagdstaffel 18, some time in late 1917 or early 1918. He would score 25 victories flying mostly the Fokker DVII between March and October 1918. On October 18th he was hit in the leg, probably by friendly fire. He managed to get back to base but was not expected to survive his wounds. His recommendation for the Blue Max was rushed through, but he would not live to know he'd become the youngest recipient of the award at just 20, dying in hospital 10 days later, only a few hours before confirmation of the award arrived.
-
Dear Ship fans, I hope someone can help me out here. I'm currently building the Hobbyboss RMT Olympic in her first dazzle scheme but am struggling to reconcile published differences in the lifeboat arrangement. In the Shipcraft book Titanic and her sisters Olympic and Britannic, by Peter Davies-Garner, there are three different given configurations for the wartime complement and arrangement - a line drawing and accompanying description on page 60, implying stacking of two lifeboats (size, but not type mentioned, but I assume standard) and just two parallel rows aft - colour side profile on page 46 (2nd dazzle scheme) with partly deployed lifeboats, plus standard lifeboats stacked on what look to be Berthon collapsible types - colour top view showing same, but with three parallel rows aft, of different types (both standard and Berthon?) A colour print (profile) of Olympic (in 1st dazzle scheme) by Simon Glancey shows just a standard lifeboat (not deployed) stacked on a Berthon. What is going on here? Does anyone know the true pattern? Ngā mihi, GrahamB
-
Hey! um, this is my first post here and i started tu cut and join some stuff and idk, but i think it looks pretty decent...
-
 Having made the propeller out of laminated cherry veneers, I am calling my WnW FE.2b done - there are few tiny details that need adding and some touch ups to do - but I will get round to those in due course. I found this a hard kit - there were a few issues getting the nacelle to fit together (probably my fault). And the model is quite delicate and has to be handled very carefully because of the design of the aircraft. Further, as you can see there is a lot of rigging (which I find quite relaxing, thankfully). But I am calling this DONE! You can see a short build log here, if you wish.
- 12 replies
-
- 42
-

-

-

-
- Fe.2b
- Wingnut Wings
- (and 1 more)
-
Hi all, just about put the finishing touches on my latest project, Tamiya's excellent (if somewhat simplified in areas) Mark IV Male. I replaced the kit supplied simple chain for the unditching beam with some smaller brass chain, and the shackles/clevis and track fittings are 3D printed by myself. Stowage in the grouser box is a mix of Valuegear crates and plus model POW cans. Had a bit of a hiccup with the kit tracks becoming fragile from enamel thinners and falling apart, so replaced them at the last minute with the metal Friul offerings, they need some modification to fit the kit, and are a bit slack as they are impossible to connect if I remove any more links, but once sitting on a flat surface should be able to take up the slack I hope. Painted with Tamiya and a bit of AK RC and 3rd Gen acrylics, and weathered with Oils, AK's new Gouaches and enamel earth effects. Still sitting on it's painting stand while I sort out a temporary display base for the club competition at my IMPS brand meeting this week. It will eventually find its home on the diorama below, but not had time to finish that yet! Thanks, and look forward to any thoughts, or questions! Dan
- 16 replies
-
- 38
-
-
-
Halllo I am thinking about building my Luckgraph models. Now I must take in consideration that I will have to work with 3 D printed parts. I know to build WNW kits. I know to build resin kits. I never built a 3D printed, or mostly printed kit. Anyone with experience? Please refrain from answering without experience! I only need true facts no guess! Happy modelling
-
I've been on a bit of a WW1 binge this month following a very enjoyable visit to the RAF Museum at Hendon. Not really my normal subject area, but I've had fun. First up was a 1/72 Eduard Albtross D.V. This is one of Eduard's older kits, but still a very enjoyable build, although the multi layer lozenge/ribbon decals did prove a challenge. Got there in the end though! My second build was an old (1963) Revell Fokker D.VII. This is a crude kit' although TBF it cost very little. I really couldn't face hand painting the underside lozenges (as Revell expected me to do), so used some CMK decals instead. Together with my older Roland C.11 Walfisch: Perhaps something easier next month........
- 1 reply
-
- 25
-
-
- WW1
- Luftstreitkrafte
- (and 1 more)
-
 Hello Great War Hive Mind, I found a 1917 magazine about 'The use of aircraft' (ominously in the Sept. 11 issue of Vol. 13) with a picture of a 'A high-speed scout of American design'. I checked Jane's Fighting Aircraft of World War I and Casari's American Military Aircraft 1908-1919, and didn't find it. Perhaps it isn't 'American' at all? Anyone? in:
 -
 Hello my friends. I first want to say that I’ve only been a member here since December ‘23. Newbie. And I have to say; I love this site and the people on it. Top quality all around. Thank you for letting me be here to share and learn from you. So many good modelers here!! Now, onto to today’s BEAST of a model, the Tamiya 1/35 Mk. IV Male. What a great kit! Typical Tamiya, pain free. At least till I got the the weathering. Oh man, let me tell yah, there’s parts of my body on there, inside and out. I sh*te you not. Here’s a few shots to prove it... I painted in Tamiya with a glaze technique to build the color and saturation. I did lots and lots of washes. Lots! Lots of dry brushing to get those beautiful bolts to shine through. I used every trick up my sleeve to create dry mud, wet mud, angry mud, happy mud. I think I even added some drunk mud. No, I’m sure of it. I used Mr Hobby weathering pastes. I think all of’em. I used their “wet effect” along with a few here and there. I think I even spit on the thing a few times. Sorry, true story. Maybe I should package that up and sell it as it worked. At least a little. I had some fun with the photo shoot and my wife’s camera. Sorry for so many pics. This is my first WW1 model and I loved doing it. Granted it took me awhile but totally worth it. I hope you like it. Please share your thoughts or critique. Cheers, Graeme
- 31 replies
-
- 45
-
-

-
- Mark IV
- Tamiya Mk IV
- (and 1 more)
-
 Hello everyone, Here is my latest completion, the Eduard 1/48 Albatros D.III, built for the current Eduard WW1 group build over on Facebook. This kit traces its lineage back to the late 1990s, and still remains an excellent base model for further improvements. I made a few modifications, including correcting / re-scribing the nose panels, adding details to the kit engine and interior, adding a scratch built fuel tank, replacing the kit gun barrels and muzzles with MASTER metal items, adding nails to the fuselage, adding the aileron control arms to the upper wing, and replacing the undersized kit wheels, amongst other minor additions from various Eduard etched sets for the base kit. Rigging was done with elastic and utilising “Bob’s Buckles” metal turnbuckles. I painted the model in the markings of Ltn Gustav Nernst, Jasta 30, April 1917. All markings were sprayed using home made masks, and the serial number was also a home made decal. Paints were all SMS Acrylic Lacquers (my new favourite paint), with the fuselage plywood effect and propeller done with oil paints. Weathering was kept relatively light, given the somewhat short service life of these aircraft. And some progress shots: For my build log, please see here – https://forum.ww1aircraftmodels.com/index.php?topic=13996.0 Feedback, comments, and suggestions for improvements are always welcome and encouraged! Many thanks for looking! Brad
 -
Hallo This are photos some years ago, when I built this kit. This was my second WW1 kit, at this time without any experience in WW1 aircraft. In at this days in an awful physical condition after release from hospital. I cam acros this pics, when cleaning my computer from old files. Maybe it is of interest. Have a look: Happy modelling
-
Hi everybody, After recently completing my first ever scratch build I am jumping back into the deep end. The BE2c has long been a favourite of mine but has never been available as a 1/32 kit so the only option is to get stuck in and have a go at scratch building one. The version I want to model has a Royal Aircraft Factory 1a engine which is not available as an after market kit so that is where I shall start. The engine looks quite complicated so let's just see how far this goes, if nothing else the modelling Gods might take pity and give us a kit. Here is a picture from the front; Royal Aircraft Factory 1a V8 engine by Richard Williams, on Flickr Scary stuff! The crank case at least is just a box and the massive fly wheel is just a circle at the back. A few bits and bobs stuck together gives me this; RAF 1A V8 engine by Richard Williams, on Flickr The mounting beams are left long for ease of handling and will be cut down once the frame is together. RAF 1A V8 engine by Richard Williams, on Flickr Not he most impressive work for sure but it's a start! I don't know the name for the tear drop shaped housing that the prop shaft goes into, whatever it is called I made with laminated 2mm styrene sheet cut and filed into shape. Handily this gave me a centre line for adding the bolt fixing channels. The bolts (correct number of!) were added by using a similar method to my riveting method. 2mm lengths of 0.5mm brass tube were cut and using a paintbrush were applied with Future floor wax. Nice and easy because it can be rolled into position. 20210811_224652 by Richard Williams, on Flickr Once dried super thin super glue is applied to each one and zapped with Zip Kicker. Hopefully this gives the look of them being part of the casting rather than separate parts stuck on. A quick lick of paint to see how it looks reveals a few blobs of CA glue that need to go but I quite like the overall look. 20210811_231525 by Richard Williams, on Flickr Cooling fins were added to by cutting tiny pieces of styrene. Gel super glue was added to the engine part and using tweezers the fins were added. Great care needed to be taken to hole the fins so the tweezers didn't touch the glue, not 100% successful but at least nothing pinged across the room. 20210812_193956 by Richard Williams, on Flickr Again, super thin super glue was run down each fin in the hope of making them look like part of a 1 piece casting. The main parts are just tacked together with a tiny blob of glue for ease of handling but it is beginning to look like an engine! I won't have any time for a few days so here it will stay for now. Thanks for watching, all comments, criticisms and advice gratefully received. Have a great weekend. Richie
- 481 replies
-
- 20
-
-
Almost all Northern Ireland War Memorials have a British Army figure atop.. All the figures are different A number of years ago I found out that all these figures were sculpted in life by one sculptor. They were all sculpted during late 1920 to early 1922. Most of the War Memorials were completed in time for the 1921 Armistice Day Commemorations Further, I found out that the sculptor used real WW1 soldiers in their real kit as models. The soldiers chosen, and paid, were mostly unemployed Irish ex-British Army soldiers Thus, I think its reasonable to assume that the bigger than life-size bronze statues are wearing WW1 kit and can be used as some sort of reference Last Tuesday I finally had the opportunity to start on my 'project' of photographing these statues in a 'walk-around' type photo session This is the statue on the Comber, County Down, War Memorial These are just a few sample photos. I couldn't get a decent photo of his rear left because of a big tree close up and blocking the view. It might be better in winter
- 3 replies
-
- 17
-
-
-
- WW1
- British Army uniform
- (and 1 more)
-
And it’s done! After just over a year, a lot of plastic card, a Costa’s-worth of coffee stirrers and millions of tiny rivet balls I’ve finally decided that my Mk 1 Gun carrier is finished. It was a great fun project and I learned a lot. Everything is scratchbuilt apart from most of the figures. The large chap with the leather jerkin was scratchbuilt (well, his legs, arms and torso were) but the others are cheap knock-off resin figures. I tried to replicate a photo of “Darlington” cresting a small ridge while the top brass look on. I’m happy that I’ve pretty much captured the look although I shied away from covering the whole vehicle with quite as much kit as is shown in the photo. Painting was done using mainly Tamiya paints, with weathering being mostly oil paints with a little clay wash and a dab of pastel dust. I constructed it so that the upper hull can be removed to show the interior off. Things I’d like to improve next time…. Figures; there’s always room for improvement there. I’m very slowly getting better, but there still seems to be miles to go. Groundwork; this was my first attempt at painting grass and earth on a black-primed base and I’m not 100% convinced that this is better than using coloured static grass. I might try a hybrid approach next time. Foliage; my little bush is a bit sad, and the (real) cow parsley I used to represent real cow parsley isn’t particularly convincing I don’t think. Thanks to everyone who followed and provided brilliant advice, feedback and support during this extended build. The (12 page) WIP can be found here….. Mk1 gun carrier scratchbuild - Work in Progress - Armour - Britmodeller.com
-
Kick-off Hello, I have spent the last 6 months working on a scratchbuilt Mig 15 and that project is now drawing to a close. http://www.britmodeller.com/forums/index.php?/topic/235012524-mig-15-scratchbuild/& Consequently, I've been thinking a lot about my next project and after much deliberation, including considering a very, very wide range of possible subjects, I have decided to try something completely different to my usual aviation related fare. I am going to try to build His Majesty's Australian Submarine AE2. This is a project that I has been in the back of my mind for over a decade now and when a fellow modeller offered to lend the following set of plans to me, all thoughts of other projects evaporated. In my view Allied submarines in WW1 are under represented in the modelling world, so I'm going to try to do my little bit to correct this. AE2 was an early E-Class submarine operated by the Royal Australian Navy. On the evening of 25 April 1915 (while the Gallipoli landings were underway) she successfully penetrated the extremely formidable Turkish defences in the Dardenelles Straight and proceeded to 'run amok' in the sea of Marmara. During a short-lived but very intensive period of raiding she caused considerable disruption to Turkish attempts to reinforce and supply their defences on the Gallipoli peninsula. On the 30th of April AE2 was damaged by the Turkish torpedo boat Sultanhisar and, unable to dive to safety, her captain decided to scuttle her. All hands survived the scuttling and spent the rest of the war as P.O.W's in Turkey where they suffered terribly. Four of the vessel's compliment of 32 died during their incarceration. In 1998 the wreck of the AE2 was located and found to be in remarkably good condition, mostly due to it's partial immersion in anoxic mud. A thorough campaign to preserve the wreck in-situ continues to this day. The possibility of recovering the wreck has been discussed at length, and although probably technically feasible would be a very high risk and highly expensive project. So - in the meantime a model will have to do! I have not yet started any physical construction - so there's not a lot to see yet but, most unlike me, I have been conducting some additional research. And just as well too because it turns out that the drawings above are for a mid-war configuration E-class submarine which in some significant regards was different to the early war AE2. For example, the mid war submarine had a gun mounted ahead of the conning tower and had two forward torpedo tubes instead of AE2's single tube. There are other differences also. Suffice to say that this set of plans from the RAN's historical page on their website will help me nail down the correct configuration. The model itself will be: 1 / 100 scale Waterline - surface trim Scratchbuilt - although I might resort to some aftermarket details here and there. It will not be a cutaway (despite various people suggesting the idea) Predominantly made from wood, but expect to see some brass and plastic sheeting and a few other bits and pieces as well. I am hoping to have physical construction under-way this week and am aiming to have it finished by the end of 2017 but really don't have any idea how long this will take as I'm completely new to this maritime modelling lark. My plan for this job is basically to 'muddle through' so any encouragement and expert advice from the sidelines will be most appreciated! Best Regards, Reconcilor
- 471 replies
-
- 15
-
-
- WW1
- Scratchbuild
- (and 1 more)
-
Hi all – here’s my latest completion, the Eduard 1/48 Albatros D.V, boxing number 8113. This one had a couple of modifications. I scratch built a number of internal details, including internal frames, a fuel tank, a compass, and other instruments. Details were added to the engine to better replicate the Mercedes D.III engine used on early DVs. Belts and other bits and bobs were also added inside. One of the enduring criticisms of the Eduard Albatros DV is the kit’s short undercarriage legs; accordingly, I replaced these with some resin aftermarket legs (I can’t remember who they are from, as I bought them a number of years back, but they were a bit rough). I also replaced the kit spinner with a home made vacform item, as the kit spinner is also too rounded and bulbous. I also hand-riveted the nails on the fuselage. Rigging is elastic, with “bob’s buckles” turnbuckles and sleeves. The exhaust pipe is a Rex metal item. The machine is painted in the markings of an early DV, D.2164/17, flown by 27 victory ace Karl Thom when he flew with Jasta 21, around June 1917. Thom would eventually earn the Pour le Merite, or “Blue Max”, on 01 November 1918, being one of the last aviation recipients of this revered award. Paint was a combination of oil paints for the fuselage, and SMS acrylic lacquers for the other colours (most were my own mix), and the decals from Eduard’s earlier 1124 dual combo boxing. Enough talk, here’s some pics: And some pics of the interior / modifications: For a more detailed build log, see here – https://forum.ww1aircraftmodels.com/index.php?topic=13255.0 This kit has been a stalwart of Eduard's WW1 line up for 20 or so years, and she still builds up as the best 1/48 DV on the market today. The kit's relative simplicity when it comes to struts and rigging also makes it a great kit for someone cutting their teeth on 1/48 WW1 models. Thanks for looking – feedback always welcomed! BC
- 34 replies
-
- 63
-
-
-
- WW1
- Albatros DV
- (and 1 more)
-
My most recent completed build is, of course, the DFW Floh. 🙂 This one is by Elf models (appropriately enough) in 1/72 scale. The kit is a good one, but I had no end of trouble during the finishing stages which I'll spare you the details of, but the crowing glory of which was dropping a pot on a wing after rigging detaching it and completely crushing the interplane struts 😒 Luckily I make all my struts from filed brass rod so after a few days I cautiously removed them straightened them out, repainted and carefully reinserted them retightening the monofilament rigging lines (These are superglued into holes drilled right through the wings) With that done I was able to twist the wing back into place and run a bead of thin cement along the join; not perfect, but better than hurling into the bin . . . Trickiest finishing job was adding the thin black line to the edges of the flying surfaces; with the high contrast between colours there's no hiding place and close up photos are not really your friend. Final job was to add the propeller (hand carved from laminations of ply) and then step slowly away from it 😅 Paul ps Model is now based up with a 3d printed figure of the designer to give a sense of scale. I was going to use Dick Dastardly, but thought perhaps not 🙃 <a<a
- 14 replies
-
- 41
-
-
I've got two sets of 3D printed 1/72 wicker seats from Gaspatch Models, they look really nice, and the cushion is a separate piece. They come as two-pack, one with short backrest and the other with tall. So my question is, was there different purpose for the short seat, for instance for the gunner? Or was it just pilot's preference, or perhaps just what was available. I saw a photo of a Sopwith Camel cockpi - it probably was a replica- but it had a short version.
-
Lloyd C.V Lukgraph 1/32 The model has been really pleasant to build. The woodgrain is Lukgraph's decals. I've added some minor details like the binoculars or the anemometer. The propeller has been laser-cut by my friend Michał Jakś and carved by me. Overall I'm quite happy with the result. I hope to see more Austro-Hungarian subjects coming from Lukgraph.
-
Morning all. Managed to wrap up this build which has been on the bench since early December! There's a full thread of what's been going on here- For those who've not been following it started life as the 'new' KP 1/72 kit, but had a lot of changes made during construction and various bits of metalwork and etched brass details added (struts are made from soldered brass for example) Cheers Paul
-
Not realising the whole bunfight protocol our hero got stuck into a KP 1/72 DH5 as soon as he saw mention of a DH Cookup in one of Marko's threads (Sorry old fruit - promise it won't happen again) ☺️ Anyway since the current Eindekker build was sitting in the cabinet waiting for paint to dry and I'm not getting any younger I cracked open the box and made a start. Overall impressions were pretty good initially. I've got a few of these KP boxes on the shelf and unlike some it doesn't have the prominent rib ridges that some have (For those of a certain age think the old Matchbox trench digger in reverse) 😉 The softish grey plastic is easy to work with even if many of the 'details' are rather heavy handed and needed refinement. First up though was sorting out the flying surfaces which needed a slight adjustment to outlines and a lot of sanding to get somewhere near acceptable thickness . . . . After much sanding (That well known village in the Cotswolds) we ended up with some useable parts that just needed the control surfaces removing and new control horns adding. The rather horrible looking cowls opening cowl was too small so needed enlarging as well as slots refining and new stiffeners added with 5though plastic card strips after everything was sanded (anyone spotted a theme here?) After that all the rigging holes were drilled and for once I managed to avoid breaking any 0.3 mm drills 😎 After a few evenings work I've now got a kit of parts that I'm reasonably happy with (Cowl stiffeners yet to be added in the above picture) Roden supplied a much nicer engine and wheels as well as a half decent Vickers (although it would be nice to have a Miniworld or Gaspatch one there are none easily available at the moment. If anyone has a spare laying around that they'd like to sell please get in touch) I added a few wrinkles to the fabric sides and new plastic tubular intakes. The prominent fuselage stitching is absent in the main and in it's place are a few more trenches ready to be filled 🤨 Hey ho. Overall I really like the kit despite what I've said; it's an interesting prototype and would build into a sound looking DH5, but I just like to fiddle . . . . . Toodlepip Paul
- 75 replies
-
- 10
-
-
RAF BE2C 1/32 Lukgraph The journey is over and I have to admit I have enjoyed it thoroughly. The BE2 is an extremely interesting subject and the CDL , woodgrain and metal is something I simply love. I find the kit to be the best by Lukgraph so far. No issues and and an extremely enjoyable to build. Painted with AK RC, AK 3GEN, Gunze, Tamiya and other. Weathering with AK pencils and oils. The propeller is hand-carved and as always with help of Michał Jakś (laser cut outline) and the hub is by Proper Plane.
- 31 replies
-
- 83
-
-
-
Hi folks…! Well the dust has thoroughly settled on my Pierce Arrow AA truck, and so it’s time to consider the next project. I had a bit of a palate-cleanser in the form of the Vickers gun crew that I bought to provide a decent machine gun to clone for the last scratchbuild. I stuck the two chaps and their weapon together and mounted them on a little round base made from a piece of insulation foam stuffed into an olive jar lid as a figure painting practice more than anything, and rather enjoyed it, though I still seem to be struggling to improve my figure painting skills. So the stash is empty and I admit that I can’t really get myself excited about kits – it needs to be another scratchbuild. Trawling the Landships II website, I came across this vehicle…. The mighty Mk1 gun carrier. Based loosely on a Mk1 tank, it was intended to be the first self-propelled gun, carrying either a 6” howitzer (as above) or a 60 pounder. The 60 pounder was too ferocious a weapon to fire in-situ, so had to be demounted for firing, but the howitzer could stay on board while it did its damage. Strategically the opportunity never really came up for these vehicles to fulfil their intended role, so they were converted into supply tanks, recovery vehicles and ad-hoc troop carriers it seems. Panzerart do a kit (a whole series of them covering all the variants in fact) but it’s very expensive, and pretty hard to get hold of. Also, being resin, not terribly appealing to me. I seem to have developed an allergic reaction to superglue, so too much of it during a modelling session and I sneeze for days and my eyes are streaming. This doesn’t promise an enjoyable build experience! It’s a beast of a vehicle, slab-sided and covered in rivets – yeah! So ripe for scratching! The Landships II site contains a good bit of background info and more importantly, an excellent and very detailed cardboard model template and instructions produced by Clifton W McCullough. He’s provided both the vehicle itself and the howitzer, and just building the cardboard model would be a considerable challenge and should produce an excellent and highly detailed model, including interior detail and engine – really impressive stuff. Of course I’ll tweak his cardboard instructions and template to get the thing constructed from plastic. I kind of have a kit after all with these excellent templates, so time to assemble the other necessary ingredients. I ordered 5 A3 sheets of 0.75mm plasticard plus a number of A4 sheets of 0.5mm and 0.2mm. The rivets on my last couple of projects went pretty well using “nail caviar” – small decorative balls intended to be glued onto one’s digits. I’ve got these in 0.6mm, 0.8mm and 1.0mm, but the 0.6mm ones are rather irregular in both size and shape. For the Pierce Arrow I used 0.8mm which are much more consistent, but really way too big when the finished model is compared to photos. A search on ebay for “0.4mm balls” came up with solder balls – ah-ha! I ordered some 0.2mm and 0.4mm. The 0.2mm are unbelievably tiny – more like dust than visible balls, so I don’t think I’ll have much use for these, and the 0.4mm are really the smallest I’ll consider for rivets. I’ll order some 0.6mm as well. The consistency of these solder balls seems to be absolute – 0.4mm really is 0.4mm. To go along with these, I ordered a bunch of drill bits – 0.15, 0.35, 0.7 and 0.9mm – 10 of each, as they’ll snap as soon as look at them. The idea is that the balls sit in/on holes slightly smaller than the balls’ diameter. A slosh of Tamiya extra thin creates a tiny crater, and they’re held in place that way. Talking of which, I also ordered a bottle of Tamiya airbrush cleaner, which I’m led to believe is exactly the same stuff as extra thin cement, but much cheaper. I inserted the template images into CAD software and re-scaled them up to 1/35 (the originals are intended to produce a 1/48 model), tracing over most of the major detail to get nice, sharp images. The parts were re-arranged to make best use of the A3/A4 size and they were printed out – here’s a typical sheet: As usual, these will be spray-mounted onto the plastic, drilled for rivets and cut out, and so it begins!
-
Does anybody know if French decals for the CSM model exist? Would prefer to do the mfg country, as opposed to russian, serbian or other countries. Scalemates is a bust, and a general Google shows up reasonably simple schemes. So if all fails, I can mask roundels.
-
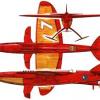
Hallo After a short while I finished this FF 33 E. The kit was fair. Not good and not bad. The etched parts were a certain thing by itself. Read my WIP, and you learn more. Well, the rigging was not so difficult. It was just two mornings. After this model I jump in deep water. With my Su-27 K from Minibase. Happy modelling

.thumb.jpg.88079287985aeb50f1ee404da4cebb1f.jpg)