Search the Community
Showing results for tags 'Apache'.
-
 Another Apache this time by Trumpeter: 1/35th Boeing AH-64A Apache Source: https://www.facebook.com/groups/400134982296666/posts/633284202315075/ V.P.
 -
 Being currently a lot into Helos, it is almost inevitable that I come across the Boeing AH-64. Also, as it followed the AH-1 in the service of various armed forces and the related tenders around the world, it's only consequent it will follow it on my workbench. So it will be the Westland build incarnation of the AH-64, and Academy has a nice kit in 1/72 available, and since quite a while, me in my stash. It's this: It includes decals for the one Capt. Harry Wales, Prince of Sussex flew at RAF Cosworth Airshow in 2013, and I am tempted to do this. You know, a little bit of glamour on the shelf, not always just blunt plastic in olive drab without any personality, but some glitz of the real world red carpet airfields we so rare get close to. And here's the chance - what a rare occasion for us in the airplane section...
 -
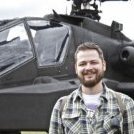
Evening, folks! Just thought I'd share my latest build with you all. Here is my depiction of AW Apache AH Mk.1 ZJ224, 656 Sqn, 4 Regt. AAC. She is depicted as she was on 15. Jan 2007 during what is perhaps her most famous escapade, during her involvement on Op. Glacier II, near Garmsir, Helmand Province. I'm sure most of us here are well aware of the now-famous Jugroom Fort rescue, so I'll spare the details The base kit is Hasegawa's fantastic 1/48 AH-64D. This was my first, but I can guarantee it won't be my last! The conversion to AH.1 spec was done by scrounging the HIDAS fit from the Revell kit. She is depicted with the older 4-point HIDAS fit, with the older TADS housing/ORT fit in the CPG's pit. The CRV-7 pods are from Heritage, and any remaining lumps and bumps specific to the British Apache were scratchbuilt. Eduard's PE & Masking kits were used, which reaffirmed my hatred for little springy bits of metal. The 2 little passengers on each of the EFABS are from the Airfix Vehicle Crew, who were convinced to go under the knife in order to get them ready for their ride. On an unrelated note, I've suddenly decided that I hate painting figures... She was finished in Revell Matt 46 (Nato Olive?) which is still the best match for the Apache that I've found in acrylics (any suggestions are very welcome...) Pictures taken during the rescue show '224 as rather clean for an Apache in the desert - they can (and do) get really grubby out there! - so I tried to weather her with restraint. Panel lines on Apaches don't show too well, so I opted not to give it a panel wash. Oil stains and leaks were attempted using Tamiya Smoke over the final coat. Tamiya Weathering Master sets were used for sand weathering. There are a couple of errors/mistakes that I am aware of - some my fault, others not so much. I accidentally placed the footholds that are strangely omitted on the Hase kit over the wrong footwell on the port EFAB. And I was a little too lazy to correct the weighted tyres that come with the kit (mounting was a last minute decision.) The only thing I can fault with the kit is the incorrect shape of the EFABs at the front, as they curve towards the TADS housing. Although not that noticeable, it does bug me a little. Overall, I'm pretty happy with the outcome of the kit. It was really meant to be a testbed for the kit before I start my other Hase Apache (as a modern spec 5-point HIDAS/M-TADS AH.1) but I guess I got a little carried away. As always, comments and criticisms are more than welcome. If I've forgotten or overlooked something, please let me know! And, as always, apologies about the quality of the photos. I will get a new camera soon, I swear! I'm hoping to bring her down to the Helo table at Cosford this Sunday if I can find a safe way to get her there, so if you're about, come and say 'hi' and talk about Apaches for a bit! Thanks for looking, and I hope you enjoy! Daryl.
- 25 replies
-
- 27
-

-
I picked this up real cheap from my local retro computer games store as he bough it in a lot of diecast models. Fortunately this is better than their 1/48 offering which I attempted to build a few years ago. Detail is ok, the same with the fit of the parts, nothing the average modeller couldn't contend with. The one fault with the kit is the decals, mine were badly out of register so I painted on the yellow ID stripe and sourced spare IAF insignia from the decal stash. AK Interactives RC229 'Army Helo Drab' (FS34031) was used for the base colour and it looks spot on. Weathering was achieved with MiG pigments and washes along with Tamiya pastel kits. i also chose to mount some inert blue Hellfires for a little colour. Thanks for looking.
-
Another one! After the TAKOM/Snowman Model AH-64D/E (link ) Meng Model is to release a 1/35th Boeing AH-64D Apache Longbow kit - ref. QS-004 Sources: https://weibo.com/ttarticle/p/show?id=2309404830678314516765 http://moxingfans.com/new/news/2022/1031/10892.html V.P.
-
I have been looking forward to making this for a little while now. I wish I could make this into an UK Apache but there doesn't seem to be any decals, I suppose I could scour my leftovers and add an union jack or something. 🤓
-
AH-64A Apache Carrera Revell 1:72 (03824) The AH-64 Apache was developed from the US Army's Advanced Attack Helicopter programme in the early 1970s. This stemmed from The US Army need to fill its anti armour role, following the cancellation of the AH-65 Cheyenne programme. This was designed to find the replacement for the AH-1 Cobra. Hughes Helicopters developed their Model 77 which became the YAH-64. The YAH-64 first flew in 1977. It features a nose mounted sensor suite containing targeting sensors and night vision equipment. A 30mm chain gun was carried under the forward fuselage and stub wing pylons provided four hard points for carrying AGM-114 Hellfire missiles and unguided rocket pods. The helicopter was introduced into US Army service in 1986. The US Army is the primary user of the AH-64., however it has been exported to many countries with the UK developing its own version with different avionics and Engines. Later version would feature a mas mounted radar. The primary anti-tank weapon is the Hellfire missile, but rocket pods and even Sidewinders can be carried. The Kit This is Revell's own tool kit from 1990 which was released under the Matchbox label in 1992 when Revell owned Matchbox. The tool seems to have held up very well and the level of detail seems good for the kit. The kit arrives on 4 sprues of grey plastic and a clear sprue. Work starts with the man rotor head. The four main rotor are assembled between the two halves of the rotor head and the completed assembly is put to one side. Next up the weapons racks and their 4 Hellfire missiles for each side are built up, along with the stub wings; these again are put to one side. Now we move to the cockpit, the tub is one piece with the side consoles as decals. The seats go in along the instrument panels and their coamings. The instruments are provided as decals. Cyclic controls are provided but there are no collective sticks or tail rotor controls present. Two pilot figures are included if the modeller wishes to use them. A rear bulkhead completes the cockpit. Once this is done the cockpit can be closed up in the fuselage. The main rotor mast and a few aerial are then added. The side engine pods are built up and added to the fuselage. At the rear the tail wheels, rotor and stabiliser are all attached. Moving back to the front on the underside the main insert goes in and then the 30mm chain gun and front undercarriage can be added. At the front the sensor turret goes on followed by the canopy. The pilots side window can be in the raised or lowered position. To finish up the rotor and stub wing assemblies from the start of the build are added to the model. Decals The decal sheet is printed in Italy so there should be no issues with it. Only one set of markings are provided for a US Army Helicopter from Operation Iraqi Freedom. Conclusion This is great kit of the early model Apache, recommended Carrera Revell model kits are available from all good toy and model retailers. For further information visit or
-
Academy is to release a new tool 1/35th Boeing AH-64E Guardian/Apache - US Army - ref. 12134 Source: https://www.britmodeller.com/forums/index.php?/topic/235117457-academy-2023-releases-newsletters-1/&do=findComment&comment=4622755 V.P.
-
VFR Models (https://vfrmodels.co.uk/shop/ & https://www.facebook.com/vfrmodels/) has released a 1/72nd Piper PA-23 Apache 3D printed kit - ref. VFR7201200 Sources: https://vfrmodels.co.uk/product/172-piper-pa-23-apache/ https://www.facebook.com/vfrmodels/posts/354826259888848 V.P.
-
MMZone from Korea, moxingfan & Model Bar from China report about a not yet officially announced 1/35th Boeing AH-64A Apache by Academy - ref.12129 Some reliable sources say it'll be just a rebox from the old Hapdong Tech/Kangnam/IMEX kit (link). Sources: http://mmzone.co.kr/mms_tool/mt_view.php?mms_db_name=mmz_forum&no=370385 http://www.moxingfans.com/new/news/2020/0327/7533.html https://tieba.baidu.com/p/6579272654 https://www.hobbyeasy.com/en/data/stkofi5ecsdmhaahtm1i.html https://www.hlj.com/1-35-scale-ah-64a-apache-south-carolina-ang-acd12129 V.P.
-
Having an interest in the AAC, I have started my first ever build (as a more dedicated hobbyist) on the attack helicopter that is currently being replaced by the Echo model.
-
 So I toyed with this GB as I have 3 helos in the stash, including an earlier version of this (only thing different is decals so not sure how/why I have both!) and the Airfix Merlin......I have a lot ready for the Battle of Britain GB and can just see myself over extending - I have only just come back to the hobby, built in the Nordic GB, also managed to finish off my 2 x F-111 builds from the STGB (have updated the threads!), pushed along a couple of stalled 617 Sqn Lanc builds etc... Then I thought - when would I ever build these things - if not in a Helo GB....so why not! Living in Colchester I regularly have them flying over me from Wattisham, its still makes the hairs on the back of my neck stand up everytime, throwback to Helmand in 2006 I expect, where part of my role included being a JTAC (Joint Terminal Attack Controller) and as callsign WIDOW 67 I often had to call up air support, including UGLY callsigns from the Army Air Corp's 9 Regt/656 AH Sqn. I always like to have some personal link to my builds if possible, this is a bit of a stretch given I will have to build the aircraft as circa 2002! This boxing is not the best, its really a US version with some Dutch decals and British decals....the Heritage add on set for the upgraded AH1 that saved my butt a few times in Helmand in 2006 seems impossible to source.... As ever no crew, again a shout out to any 1/48 Helo crew sat in a spares box that want employing! I looked back and found a picture of an Apache AH1 without all the lumps and bumps that were later added - any experts please do correct me, but I think IO can get away with a UK build based on the initial delivery...if not I am anyways! Obligatory box and sprue shots Aforementioned 'basic' UK Apache - pic dated 2002! Got started yesterday, removing and cleaning up some parts. A little research seems to blow most of the painting guide out of the water, so I have used references and started the pit in various black shades, blades also will be a NATO black. Mr Paint FS34031 US Army Helo Drab is pretty much out of stock everywhere, so I have gone for the Hataka Orange Line version and ordered....found these paints ok to use, once perfectly thinned for whatever airbrush is being used.... won't be weathered too much (new airframe and BoB build in mind!). Priming also started: eye test next week, defo need glasses for close up work now, so I will just do the basics as the IP's look old rather than the UK version and I can't focus as well as the old days!! Some great ref pics for the newer Apaches by @gary1701 available on the site as well. Thanks for looking!
 -
 Greetings everyone! This is my first post here and I must say that it is an honor to be able to participate and share experiences with the members of this forum! Amount of kits since my 13 years old and today I am 53 ... I am already calloused due to errors and correctness and I will show you the assembly of a scale kit 1/48 AH-64 Apache. The kit was chosen by the Academy because it is reasonably detailed and cheap (of course the Hasegawa kit would be better, but since I will cut the whole kit to try to improve it, you will understand why I did not choose Hasegawa). The many years already elapsed today make me want "challenges" and in this kit I intend to modify it to make the AH-64E "Apache Guardian" version, all based on the scratbuilding technique. The assembly sequence will not be very traditional as some may be accustomed, but I will try not to disappoint the most demanding. The objective is to have an empty "matrix" to improve and add equipment (as it happens in the BOEING factory in Mesa - AZ) ... The fuselage receives several cuts ...
 -
Academy is to release in 2015 a (allegedly?) new tool 1/72nd Boeing AH-64D Longbow Apache kit - ref. 12514 Source: http://mmzone.co.kr/mms_tool/mt_view.php?mms_db_name=mmz_forum&mms_cat=[정보]&no=340077&keyword&where&mode&start_page=0 V.P
-
US Apache, pics thanks to DL Munne.
-
 AH-64D British Army - Update set, & Masks 1:72 Eduard for Academy Kit These are sets for the new Academy kit. Update Set (73641) This set has one brass fret & one nickel one. The coloured parts are primarily for the cockpit in the form of new instrument panels and side panels, There is also a new MFDs, other cockpit parts, and seatbelts. There are new parts for inspection panels, and grills. There are parts for the Hellfire missiles, their launchers and the CRV-7 rocket pods. The engine exhausts get new grills. For the canopy there are new cable cutters and wipers. For the ECM / Countermeasures system there are new parts and finally there are new parts for the rotor head. Zoom Set (SS641) This is just the colour fret from the update set. Masks (CX522) Supplied on yellow kabuki tape, these pre-cut masks supply you with a full set of masks for the glazing. In addition you get a set of hub/tyre masks for the wheels, allowing you to cut the demarcation perfectly with little effort. Tface Masks (CX523) Supplied on yellow kabuki tape, these pre-cut masks supply you with a full set of masks for the glazing (inside & out). In addition you get a set of hub/tyre masks for the wheels, allowing you to cut the demarcation perfectly with little effort. Review samples courtesy of
 -
Hi all and welcome to 2018. Below, and dare I present, the last model I finished in 2017. Here we have Italerie's 1/72 Apache Longbow that was handed to me by a family member a few months go and will be built OOB. The kit was more a flat-pack than a kit; some parts painted with some parts missing. The build went well with the missing parts being fabricated and it was during the build that, AFAIK, this kit was of the prototype...and stayed at what ever variant it is. After a bit of filling and sanding, the primer went on and still everything looked. The helo was painted with Tamiya Olive Drab and coated with a couple of coats of Klear. Kit decals were applied with no problems and there stood a nice shiny Apache. Then, it went downhill. I asked the LMS, "What matt varnish would you recommend?" Humbrol's water soluble matt varnish was applied and this was the result.....aaaaahhhh As can be seen, it looks like it has been sprayed with milk! It stayed as-is and ironically the previous member thought it looked weathered and great. As to what went wrong, I can only put it down to the varnish and/or how it was applied... What an end to and otherwise good year Stuart
-
As Prince Harry goes public with the next chapter of his life, what better day to begin a build reflecting his service career. This build is the AH-1 Longbow Apache from Academy, which looks both good fun and comprehensive. and yes, @Procopius and @CedB, it's a flying thing, albeit not much in the way of wings, and yes, it marks a return to the gentleman's scale after recent larger excursions. The model also has another significance, as it was the first online order fulfilled by @Duncan B's BlackMike models. No connection other than as one very satisfied customer. So what are we building? Augusta Westland AH-1 Apache by jongwinnett, on Flickr Augusta Westland AH-1 Apache by jongwinnett, on Flickr Augusta Westland AH-1 Apache by jongwinnett, on Flickr Augusta Westland AH-1 Apache by jongwinnett, on Flickr
-
Brengun-Hauler is to release in 2017 a 1/72nd North American A-36 Apache kit - ref. BRP72025 Source: https://www.facebook.com/HaulerBrengun/photos/a.459886544169999.1073741832.440180076140646/711185289040122/?type=3&theater V.P.
-
Finally found the time to clean up my Duxford May Show shots. More here if you want to see them: https://www.hanger51.org/airshows/2017/duxford-may-airshow/ No apologies for the number of Foxy shots. Rapide at rest by tony_inkster, on Flickr P-51 Frankie by tony_inkster, on Flickr Grosvenor House by tony_inkster, on Flickr The Blades by tony_inkster, on Flickr Catalina by tony_inkster, on Flickr AAC Apache Demo by tony_inkster, on Flickr JP & Strikemaster by tony_inkster, on Flickr V-1 Doodle Bug by tony_inkster, on Flickr Winding her up by tony_inkster, on Flickr Foxy dirty pass by tony_inkster, on Flickr Foxy's first pass by tony_inkster, on Flickr Foxy G by tony_inkster, on Flickr Top side pass by tony_inkster, on Flickr
-
Hughes AH-64D Apache Block II 1:72 Academy The AH-64 Apache was developed from the US Army's Advanced Attack Helicopter programme in the early 1970s. This stemmed from The US Army need to fill its anti armour role, following the cancellation of the AH-65 Cheyenne programme. This was designed to find the replacement for the AH-1 Cobra. Hughes Helicopters developed their Model 77 which became the YAH-64. The YAH-64 first flew in 1977. It features a nose mounted sensor suite containing targeting sensors and night vision equipment. A 30mm chain gun was carried under the forward fuselage and stub wing pylons provided four hard points for carrying AGM-114 Hellfire missiles and unguided rocket pods. The helicopter was introduced into US Army service in 1986. The AH-64D or Longbow Apache identified by the Longbow radar system carried on the mast head entered service in 1996. This was produced now by Boeing as they had acquired McDonnell Douglas, who themselves had acquired Hughes. The US Army is the primary user of the AH-64. The primary identifying feature of the D model or The "longbow" Apache is the AN/APG-78 Longbow millimetre-wave fire control radar located above the main rotor head. This allows the simultaneous tracking of upto 128 targets with the ability to engage 16 of these at one time. This data can also be shared to ground units by means of a radio modem. The Block II airframes were first delivered from early 2003 and featured a digital communications upgrade. The Kit Academy have brought us Apache kits in the past, and these have been very good, in fact some would say the best in 1/72 scale. The new AH-64D kit is a new tool kit, this is not as some manufactures would be tempted to do and that is stick a AH-64D radome into an AH-64A kit. There is a choice of early or late sensors and access panels, along with the correct instrument panels and MFD's. A great touch is the one part main rotor in the kit so you wont have the often problematic job of aligning the rotor blades to a main hub and stopping them from drooping down! The kit also features fine engraved panel lines, great detail throughout and slide moulded engine pods which are basically one piece. Construction starts with the main fuselage halves. Holes must be opened up for various parts to attach later on in the build. Once this is done construction can move onto the cockpit. Control columns are added to both cockpits, along with the main display panels. There appears to be a cyclic control only and no collective. The one part moulded seats can then be added. Coamings are then added to the front and rear panels. The next step is to make up the mount for the main rotor blades. Once this is done the completed cockpit assembly and rotor mount can be added into the fuselage and the halves closed up. Next on the list of jobs is to make up the wings for mounting the weapons systems. Once made up these are attached to the main fuselage along with the top cover for the engine area. A five part assembly each side is required each side for the front landing gear. Once made up these too can be added to the main fuselage. The next major step is to attach the fairings down both sides an underneath which house a lot of the electronics carried as well as the feed system for the 30mm canon. Once the underside part is on the 30mm canon itself can be added. The tail wheel is also added at this point. Rocket pods and/or hellfire missiles can be added to the weapons pylons next (though I suspect these will be left to last by most modellers). Next up are the engine pods. The engine fronts and heat shielding exhaust parts are added and then pods can be attached to the main fuselage. Following this the main sensor package can be assembled and attached to the front of the helo. Now that the man parts of the helo have been assembled it is time to add the myriad of aerials, sensors, handles etc that seem to festoon the exterior. The last steps in construction are to add the main and tail rotors. The main rotor is one part while the tail rotor is a more complicated four part affair. The last item to be added is the mast mounted radar system, though check your references as often this was not carried to save weight in a lower threat environment. Canopy The canopy is a one part one which is a shame you cant open it up and show of the cockpit more. It is clear and distortion free. Decals Markings on these helicopters tend to be sparse so Academy have managed to get six options onto the sheet. A full suite of stencils and weapons markings is also provided. Decals are by Cartograf and should pose no problems. 07-7029 "Archangels" Camp Humpreys South Korea, 2010. 07-7031 "Slayers" Camp Humpreys South Korea, 2010. 99-5188 "Vipers" Iraq 2003 (Shark mouth). 99-5102 "Vipers" Iraq 2003 (Shark mouth). 02-5289 "Avenger" Iraq 2003. 01-5241 "Sidewinders" Iraq 2003. Conclusion This is thoroughly modern tooling of the latest US Army Apache and should make up into a great looking model. Highly recommended. Review sample courtesy of UK Distributors for
-
Hello everyone, I'm still learning how to improve my skills so this is just a regular model I managed to put together in a few days while applying some techniques and avoiding others (such as brush painting a matte coat at the end). This was my fifth Hasegawa and the first one to come with some details as you can see on the photo below, for example the canopy fit. However, Hasegawa is still much better than Italeri. And also, I will have to fit in the canopy before painting from now on to make any corrections necessary. I am also disappointed that the rocket launchers come empty while the missiles are loaded on Hasegawa helicopters... As for the paint job, the olive green (I know, it had to be FS 34031) was Tamiya Enamel and the flat black, Tamiya acrylic. Completely by brush. And, BTW, am I the only one who notices that the Tamiya flat enamel has this sheen while the Tamiya acrylic flats have like a dusty texture? And finally, I avoided the disaster of brush painting the matte coat at the end to hide the glossiness of the decals. Instead, I applied the matte coat only right on top of the decals. And the flash of the camera reveals where I went beyond the decals. I'll soon be putting up an F-20. Just have to make some corrections...
-
Hey! Didn't really know where to post this topic :/ I'm currently making an AH-64D Apache Longbow (Revell's kit) in 1:48 scale. I'm gonna be bored over the summer, so I was probably gonna have a crack at making an Middle Eastern diorama focused around the Apache. It will be just before a mission, so there will be people loading ordnance, maybe a quick bit of maintenance and nothing much else really. I was looking at Hussein El Kaissy's 1/32 one on https://www.youtube.com/watch?v=iJjPWS18rTQ . It looks really nice. So, my question is; Where can I get these diorama accessories in 1/48? - A collection of modern weapons, such as a TOW Launcher (looks so cool ) etc. Much like Italeri's collection, but in 1/48! http://www.italeri.com/scheda.asp?idProdotto=2530&idCategoria=5&idSottocategoria=55 - A maintenance kit, for example a tool case, military mechanic figure, tools and a laptop thing/walkie talkie. - An rearmament set, with a winch, missile trolly etc. - A belt feeding kit for rearming the chain gun. - 90's/00's U.S.A.F figures, including a pilot and gunner. Please note that these need to be in 1/48, and apologies for any dumb mistakes, e.g. naming or describing something wrong because I am more of a WWII modeler. Thanks )
-
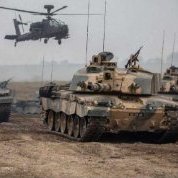
All pics in the thread from Gary Stedman unless noted otherwise. Ferry tanks fitted to one of the first AH's delivered to Wattisham, summer 2005. ferry tanks never actually used by the AAC, only flown by Westlands during trials. ZJ173 on display at Colchester military festival in June, 2007. Aircraft is in UK training fit only - no Helicopter Intergrated Defensive Avonics System (HIDAS) fitted. ZJ209 in Wattisham hangar, May 2008 showing panels removed for 300 hour checks. Quad Hellfire rails and UK spec CRV-7 19 tube rocket pod on ZJ166 at Wattisham, May 2008 Rotor head on ZJ166, same time and location as above. ZJ226 outside Wattisham hangar, May 2008. Fitted with then current theatre standard HIDAS. AH Front seat, early configuration (Fitted with TADS, prior to MTADS) AH Rear seat, all standards. cockpit detail on ZJ166 at Wattisham, May 2008. View through Wattisham hangar, October 2008. ZJ224 the very day it returned too Wattisham after Operation Herrick duty (October 2008). This aircraft was the one flown by 'Ed Macy' at Jugroom Fort in January 2007. AH ground running at Wattisham, May 2008.
- 9 replies
-
- 3
-
-
- AgustaWestland
- AH-1
- (and 1 more)
-
AH-64D Block II - For Academy Kit 1:72 Eduard This set is one colour fret and one brass fret for the new Academy Kit. The colour set contains full seat belts for cockpits. In addition there are parts for both instrument panels, the rear cockpit bulkhead, the seat sides, the instrument coamings, side consoles, tail rotor pedals, the interior cockpit sides, fuel fillers, windscreen wipers, and cable cutters. The brass fret contains mostly parts for the exhausts, as well as rotor head, various mesh intakes, rocket pod ends, missile rail ends; and rear parts for the missiles. Recommended to bring an already excellent kit up a notch. Review sample courtesy of