Search the Community
Showing results for tags 'canberra'.
-
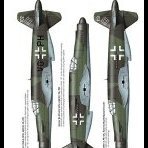
 A big project in progress... A 1/32nd Martin B-57G Canberra 3D printed kit by Flying S Models Source: https://www.facebook.com/flyingSmodels/posts/pfbid0nFxhJjHeChuuBzhEKo5qBuRvUfrgSUMoFEaRxzchn27ukp51goJjdrFLdxcRA61il First 3D renders V.P.
 -
The orange Canberras operated in Germany were a pretty common sight at British airshows in the 80s - I remember seeing them at Fairford. I'll be building an AMP 1/72 Canberra B.2 in this scheme, using a Model Alliance decal sheet I've had in the stash for ages. Here's the kit and decal sheet: I'll get started soon.
-
MikroMir AMP is to release 1/72nd E.E. Canberra kits. Among them T.11/ B.2 /Tp.52 Swedish air force etc. Source: https://www.facebook.com/mikro.mir.dnepr/posts/1768192206591841 V.P.
-
SOVA-M is to release a 1/144th Martin B-57E Canberra & CIM-10A BOMARC kit - ref. SVM-14013 Source: https://www.aviationmegastore.com/en/modelling/martin-b57e-canberra--cim-10a-bomarc-sova-models-svm-14013-200537.html V.P.
-
With so many options for different RAF versions and units, not to mention all the foreign operators and the type’s longevity, why is it that no manufacturer has produced a new tool Canberra in 1/72? I’d have thought it would be an ideal subject and well overdue! If I were to use the ancient Airfix B(I)6, I’m assuming it’s close enough for making early B.2s, etc?
-
My entry for this group build, the Martin B-57B Canberra operated by the 8th Bomb Squadron out of Bien Hoa AB and then Da Nang AB in 1964/65. It didn't take the Canberra long to become well-known on the tactical scene and they picked up the call sign 'Yellow Bird' based upon the squadron colours (the sister13th BS were 'Red Bird'). I am building the 1/72nd Italeri B-57B Canberra OOB and it will be finished in aluminium. I will be using the decals from the kit. I will also 'ghost' build a second B-57B which will be in the later SEA camouflage scheme coded as 'PQ'. I am looking for a straight forward build of these kits which I have had in the stash for many years now. Michael. Canberras2 by Ghostbase, on Flickr
-
The main issue with the newer Airfix 1:72 and 1:48th Canberra kits tailplane really needs to be understood for it to be corrected properly. The real Canberra tailplane has a 10 degree dihedral which it maintains across each half span from the fuselage joint. Airfix have made the fixed stub part molded on the fuselage level (ie no dihedral), this in effect raises the upper tailplane surface join position too high on the fuselage, even though the main mounting slots and the tailplane are pretty much in the right position. The stub also looks completely wrong when compared to an actual Canberra as it lacks the leading edge sweep back, by removing the stubs you eradicate these issues. Why Airfix did this is a mystery as no other Canberra kit, including their old classic B(I).6 kit features this. To the eye the actual tailplanes appear to simply butt up to the fuselage tail assembly, in reality, it's a bit more involved than that though. The tailplane assembly is hinged at it's forward spar and has an electrically actuated drive at the rear to allow it to travel up and down to adjust trim of the aircraft in pitch. The rear fuselage has a cutout to allow for this movement which is why you can see a clear gap under the tailplane when it is in neutral - to trim up position, usually when the aircraft is parked. The small section of fuselage above the tailplane is mounted to it, and moves with it, but has a slot in the top to avoid the fin rudder assembly. There is a tailplane leading edge root fairing fixed to the fuselage. Hopefully these pictures illustrate what I mean, you can see how a small section of the aft upper fuselage section moves with the tailplane, from the hinge point just ahead of the national markings on the fin - to the break point with a white painted aft face. The fuselage tailcone assembly adjacent to the elevators is fixed. Canberra T.4 WJ874 by James Thomas, on Flickr Canberra T.4 WJ874 by James Thomas, on Flickr Canberra PR.9 XH135 by James Thomas, on Flickr Canberra PR.9 XH135 by James Thomas, on Flickr As said, the Airfix tailplane/fuselage junction stub is molded into the fuselage, this can be completely removed as it is solid plastic, and the remaining area shaped to conform with the correct fuselage contours. At this stage, an easier fix would be to butt join the tailplane halves into the existing slots. The tailplanes themselves will then need plasticard adding at the join area to compensate for the loss of span with the removed fuselage plastic. The slightly more involved, but ultimately more satisfying and correct, route is to make the whole tailplane assembly as English Electric did. The tailplane can be made into a single assembly by making up a new box structure between the two halves (the included kit tailplane tabs will help you here), and between the tailplane front spar (the tailplane hinge point) and the elevator hinge line. Cutting out the corresponding section in the fuselage is the next step. This will allow for both a more life like appearance and to be able to mount the tailplane at a desired incidence. Back of envelope sketch, 030 (2) by James Thomas, on Flickr
-
 Managed to move this one over the finish line yesterday. My third in what will be a long line of S&M Models 1/72 RAAF Canberra's. The kit is a good one and I thoroughly enjoyed researching and putting this one together. Details of the build for those interested can be found here: This particular aircraft was inspired by an all around good guy, Australian Aviation Historian and fellow modeler Roger Lambert. Roger and his platoon were the benefactors of this Magpie's work when on patrol in SVN. Rather than attempt to tell the story it is well worth a read here: 5 RAR Articles: Blondes, Bombs and Bunkers - https://www.5rar.asn.au/soldiers/blondes-bombs-bunkers.htm Magpie 31 - https://www.5rar.asn.au/soldiers/magpie-31-page-1.htm Magpie 31 Part 2 - https://www.5rar.asn.au/soldiers/magpie-31-part-2.htm I’ve also included a photo of Roger mid tour in 1969; L to R: CPL Jackson. Lt Roger Lambert and Platoon Sergeant, Peter Knight. Image was taken during a water resupply hence the empty water bottle carriers. Details of the mission: Pilot that day on the right The finished product In good company Now to starting thinking about the next one. Cheers, AGW..
- 17 replies
-
- 55
-

-

-
 Hi all, so this is my first ready for inspection kit I have done, this Canberra will certainly not be my last Canberra. I hope everyone likes what I have done. That link above shows what happened with the build and why it started out as a pure classic airframes kit, but then changed into the classic airframes/ airfix hybrid that it now is. If anyone has any advice or tips on how I can improve my builds I am up for learning and trying those out.
- 8 replies
-
- 25
-
-
- Canberra
- 1:48 scale
- (and 1 more)
-
Hopefully I have this sorted correctly but here goes. I have started my Canberra b1 conversion using the classic airframes kit and the master caster b1 VN799 late conversion thats ment for the airfix kit. I am currently having a fight with the cockpit, it will not go together properly for some reason, so I am in the process of sanding parts back to try and get it to fit together, while I'm trying to figure that out I have started on the tail spine and so far thats going well, I am currently sanding down the side to get a smooth finish going to the spine. The next issue I have is the classic airframes canopy had a white mark in the canopy so I used 400 grit wet and dry sandpaper to remove it and the last one I use was 1500 grit but it's still cloudy, would anyone know how I can make the canopy clear again? Also a big thankyou to thecanberrakid for giving me the mk1 ejection seat, nose section and being extremely knowledgeable with the Canberra's. Also a big thankyou to britjet for doing the decals for me because I couldn't find them anywhere online. Progress on this will be slow but hopefully I can get it completed in a few months.
-
Having had a wee lull I finally managed to finish this 1/72 Micro-Mir Canberra T17. I ended up finishing as a 360 Sqn aircraft from RAF Wyton in 1985, mainly because the decals with the kit were incorrect. Built OOB using the Modeldecal 85 set and addition of the HF aerial using fishing line. Was looking forward to building this when it came out but probably used not far off as much filler as there is plastic and it fought me all the way. Got the weighting in the nose wrong but the trick with the wire in the wheels worked a treat. Apologies for the poor photographs but they hide the flaws quite well. 😀
-
 I’ve been working on this Airfix 1/48 EE Canberra kit for a few weeks now and I’d like to share progress with interested Britmodeller colleagues. I’m looking for advice from those who know more than me about Canberra B. Mk 62s in Argentine service during the war in the South Atlantic 40 years ago. My aim is to recreate as closely as possible the configuration of aircraft B-110 (ex RAF WJ619) in the immediate period prior to it’s loss to a Sidewinder 9L launched by Lt. Curtis flying 801 NAS Sea Harrier XZ451 on May 1st 1982. I plan to build the Kinetic 1/48 SHAR as XZ451 to complement the Canberra early next year. If interested, please read on after the pictures. I’ve already made some major decisions which I may yet regret, but in the main I think I’ve made a fair stab at it and so before I finish the placard decaling, weathering and final sealing coat, there may still be room to modify, add or remove some details based on any further advice I get. I made an obvious error in selecting the wrong intake parts. I should have selected the parts with the transverse slot in the top surface, but only realised my mistake when I'd attached them to the wing sections and the cement had set. I bought the re-release of the original kit and so missed out on the decal set supplied for Argentine sister aircraft B-105 in the original boxing, which looks as if it came with a plethora of placard markings, notably the wing walkway markings which are missing from the Aztec “Canberras in South American Service Part 1” decal set I tracked down on-line and bought from Blackbird Models in Sheffield. If anyone out there built the original boxing in it’s RAF scheme and still has the Argentine decals that they would be happy to part with, perhaps we could reach an arrangement? It’s entirely possible of course that the FAA overpainted many of these during maintenance prior to the aircraft’s loss and maybe even the white walkway lines themselves, but a forward starboard fuselage photo of B-110 taken from low down has evidence that it did at least carry the latter on the upper wing leading edge at the time the photo was taken. I’ve only been able to identify one other good quality image on line of B-110 which shows a full length starboard side view. All other aspects of the model are based on images of her sister aircraft and after reviewing other on-line info I’ve made the following modifications and additions to the kit. Cut out and inserted a transparency for the missing bomb aimers ventral viewing window. Scratch built the locally designed and manufactured chaff/flare dispenser scabbed-on to the lower rear fuselage which I believe was installed just prior to 1st May 1982. I didn’t have any accurate dimensions for this and it’s based on two image frames grabbed from a Spanish language video on Youtube shown here, but it looks to be roughly about the right size and in the right place. Added a circular camera port just to the rear of the bomb bay doors that's present in a photo on the IPMS Canberra SIG site here of a sister aircraft in an Argentine museum. I think this was present on B-110, because the rather crude “angle iron” re-inforced v-shaped support ahead of the camera port, also present in the photo and presumably added in the field to replace the jacking point where the camera port now is, appears to be also present in the starboard side view of B-110. Removed the two moulded on clear vision panels from the canopy transparency. Airfix were presumably planning on releasing a training version of the Canberra, but why they are elongated ellipses when the clear vision ports were circular is a bit of a mystery. Aztec provide some nice decals to replicate the circular clear vision port on the port side of the B. 62. Scribed in place the missing rudder, aileron plus elevator trim tabs and added their actuators using stretched sprue. Manual trim tabs were also made from plastic card and added to the ailerons. Added missing dorsal and ventral fuselage navigation lights. Made starter cartridge exhausts from embossed foil on the engine nacelles where I think they were originally located. These are based on a realisation that the Avon engines are non-handed articles and that the ports are diagonally opposite one another on each nacelle. I admit these do look a bit over scale, but this is due I think mainly to the red outline around them not having a ring of camouflage colour inside them. I’m still trying to figure out how to accurately recreate these features. Added the white Bendix ADF aerial to the top fuselage behind the rear cabin. Added the two blade aerials on the fuselage and the dipole aerial on the starboard wing. Corrected the angle of the tail plane leading edge root fillets. I’ve yet to affix the open cabin door, or the aerial cable from the forward fuselage to the tail fin, which I’ll do when remaining work is completed. The Aztec decals are very good, but I’ve spotted some minor discrepancies. Placard decals lettering is either black or yellow on the supplied decals, but some of the lettering on B-110 appears to be white in this photo and I need some guidance on whether some of the placards were located, or even present on B-110. Most notably: Red, black and yellow warning placards for the starter exhausts which Aztec place low down on the outer front of the nacelles. I can only see evidence of these on B-101 when it was flown in the UK prior to delivery to the FAA. This aircraft also carried full wing walkway markings, including some white lettering placards based on an in-air photo. (see here) Rectangular red and yellow cut-here signs for first aid kits located just ahead of the fin on the rear fuselage topsides The exact location and orientation of the rear cabin ejector seat warning triangle placards on the top of the fuselage behind the rear cabin windows. Pointy end forward, or rearwards would be a start. (Aztec don’t supply top or bottom views, so markings on the top, or bottom are otherwise mysterious.) Any positive advice or further information would be most welcome. Hope to finish this soon and post it up as a completed article. Cheers
- 2 replies
-
- 6
-
-
- 1/48
- Falklands 40th
- (and 1 more)
-
Hi all I am new to this community and i am trying to find the best 1:48 Canberra kit out on the market currently ( the one with the rounded canopy ). I am after something that has really good detail and is a challenge and if the kit will be fine to take the Canberra prototype vn799 late conversion set. Also if anyone would recommend any upgrades to make the kits look even better what would they be? Any and all recommendations will be greatly appreciated thanks Ryan.
-
Fresh off the production line one thats taken me a little longer then normal (I blame the humbrol red 19 paint) Airfix 1:48 Canberra B(I)6 WT309 of A&AEE Boscombe Down as she was in about 1985. Unfortunately only the nose of the aircraft survice now preserved at Farnborough FAST museum. My thanks to @canberra kid for some help and insights with his vast canberra knowledge. A few homemade additions to the kit in the form of wing tip camera pods, pylons adjusted for position, size, and markings, upper and lower fuselage whip antenna, brake lines, wing pitot tube, ejector seat handles and harness. Tips for anybody making this kit in the future: The plastic is really thick and subsequently the bomb bay doors really dont fit well plenty of material to remove! The raspberry ripple box scheme dosen't show any of the standard markings so an hour+ looking at pics matching what can be seen on pics with whats on the standard scheme is required. And the pilot is very undersized! As always any comments, questions and tips greatfully received. And now the pics.
- 15 replies
-
- 59
-
-
I have the old Airfix Canberra B.2 and their newer B(I)6 in the stash in 1/48, I would like to build one from Wyton circa 1987. Ideally the TT18 with black and yellow stripes would look good in such a large scale, but I can't find the target pods in aftermarket, nor, perhaps surprisingly any 100 sqn tailfin markings. Are there any available, or is it relatively easy to scratch build the Rushton pods? Which of the Airfix Canberra kits would be best to convert to a TT18? If the pods/conversion prove difficult perhaps I could just do a 100 Sqn B2 instead, I believe they operated some in the 80s, albeit grey underneath not yellow & black. Perhaps a question for @canberra kid?
-
 Heres the thing - I don't model many things that are unarmed - so I looked at my stash and there was the PR9 I got at a snip some years back, part of building aircraft from my nostalgic youth, living in East Anglia... so I dug it out and looked at the ongoing builds to find a few PR9's in1/48 and 1/72...what can I do different...and found the Alley Cat SC9 conversion - why not I thought. All kit reviews also hammered the decal quality - not easy to get aftermarkets anymore... Alley Cat conversion kit: Then I have seen @DaveJL's build and thought, great another project I can follow and handrail - sorry Dave my last 3 builds have kinda mirrored yours, obviously we have similar tastes, honest I am not a copycat! The next factor - I am due to jet off to Tokyo with work on 12 July to cover the Olympics (if it goes ahead!) so my initial look at the dates thinking I have til August was thrown into touch! So what option paint job should I do - looking at Dave's build and the fact a bit of the extra lumps will be omitted, I have thought I can bash it together reasonably quickly as I am off this week (though the suns out!) which would give me the time for the paint job.... Anyone have any preferences?! Depending on the option a number of early decisions will need to be made (with/without tanks, antenna holes etc) - oh and requisitioning paints etc.... Option 1 - High speed Silver would be straightforward paint wise, with the Day-Glo and blue primer - but my building skilz are not perfect so would show the likely many imperfections! Option 2 - White always a challenge I spose and similar imperfections wise as Silver .... Option 3 - never done a Raspberry Ripple, would be a challenge I guess, but with Mr Paint Lacquers the drying time is quick meaning the masking etc would not have to wait days as per other paints.... Option 4 - Hemp/LAG would be a bit easier I spose.... So - what will it be.... Next I will get the parts off the sprues, get the cockpit done quickly, believe its not correct and it will be black with a bit of artistic license on the buttons and switches...maybe get some of the other bits off and cleaned up as well.
 -
Hi everybody, after more than one year (I did work on some other models in between) I finally finished the E. E. Canberra B.15: Photo taken with a kind of digital vintage-filter. The Dark Green actually looks like it does on 1960s shots, I think. Maybe I should polish the canopy more. Scratch-built pylon and Microcell rocket pod converted from a Revell Matra pod. Towards the end of their career, B.15s were equipped with additional hardpoints to carry AS.30 missiles. Special thanks go to Britmodeller Rossm who generously provided me with the Flamingo decal from a long-sold out Model Alliance decal sheet. A rudimentary WIP-thread can be found here: https://www.britmodeller.com/forums/index.php?/topic/235067090-canberra-b1516-akrotiri-strike-wing-172/ Not an easy kit, but it has finely engraved surface detail unlike many recent kits from Airfix and even Special Hobby. It took me a lot of time mostly because there were many small things to research and to decide in order to convert it to a B.15. All comments welcome and enjoy!
- 14 replies
-
- 53
-
-
Although I had already asked about this Canberra in another thread, I was advised there to make the search for images stand out in the title as well. So here is my question for all pictures of this particular aircraft. Preferably in 1969 condition. Most preferably from 08/08/1969 after landing at RAF Luqa when the aircraft was badly beaten up in a thunderstorm. Or also gladly from other Canberras after a thunderstorm.... I am also looking for photos or plans of the internal structure of the tail fin. Thank you Canberra experts!
-
Hi everybody, this week I started my Canberra. It is the S&M B.6 kit, but it will be slightly converted into a B.15 or B.16 (not decided yet) that served with the Akrotiri Strike Wing on Cyprus during the 1960s. That's a sturdy box You know it's a short-run kit when the sprues come in a Tesco freezer bag The parts look good, but I already realised when starting with the cockpit that everything needs a lot of test fitting. The instructions are fairly vague and there are no colours indicated for the interior (it's mostly black, I guess).
-
 To begin, I would like to thank @canberra kid and @Antti_K for their help and support in answering a few basic questions about a particular Canberra: WH660 which was planned to make the first launches of the Vickers Red Dean active radar-guided air-to-air missile. It was scheduled to be the first aircraft to link the Red Dean to the AI.18 radar which, itself, was scheduled to be fitted in the 'Thin Wing Javelin' but did find service in the Sea Vixen. The Red Dean was cancelled early in 1956 and WH660 never carried the Red Dean, although Canberra WD956 did launch earlier, unguided, Red Dean development rounds. The inspiration came from this book: 'Black Box Canberras' by Dave Forster. I purchased it on a whim but it has definitely become my 2020 Book of the Year. My starting point was a first crack at a Red Dean using polystyrene sheet and rod. Seen here next to a Firestreak for comparison: it was going to be a big missile! Here is an image of WH660' nose in comparison with one of a B.6 (Mod). Alleycat make a B.6 (Mod) nose and you will see it's similar but not identical. So, taking the Alleycat resin part as s starter, I've been re-shaping it using a drill and a file! I admit it looks slightly 'dodgy'... More to follow. Kind regards, Neil
 -
After some deliberation and almost starting a Jaguar, I've decided to plunge into this rather complicated Alley Cat Canberra conversion. I'll be making a hemp one I think, as sometime in the future I'm planning to do the TT18 in green/grey camo with the black & yellow underside. The T17 was flown by England rugby legend Rory Underwood, our record Test try scorer (49 tries in 85 games between 1984-96) who was also an RAF pilot during his playing career before rugby turned professional! First question, (possibly for @canberra kid?) which of the Airfix Canberra kits is best for a T17, or despite the box are they the same? The colour in the first option is incorrect, apparently there were no grey T17s, but I'll probably do WH902/EK in hemp instead. A few of the decals missing as it was an ebay 'bargain' (ish), but I have all the ones I need, I think. I probably won't bother cutting off the kit cockpit for the replacement though, it'd be more trouble than it's worth given my 'ability'! Second question, do I need to bother with the Alley Cat tip tanks or are the Airfix ones adequate enough?
-
In Phil Keeble's excellent Book "Patrolling the Cold War Skies: Reheat Sunset" he describes a flight in a thunderstorm to Malta. He describes the aircraft with the code 175, but without the two letters in front of it. Does anyone know which Canberra that was exactly? And what it looked like at the time? Or even better: Does anyone have any photos of the plane from that time? Best of all, someone even has photos of the plane after the flight, it must have looked terrible. Where could I find pictures? Ask anyone except Mr. Keeble himself... If I can find Canberra experts anywhere, it's here, right? Thank you very much for your help!
-
Hi, can anyone help me with the colour of the u/c bay or wheel well and covers on the Canberra. The 1/72 S&M kit gives no hints (if I haven't overlooked anything). I am referring specifically to a mid-1960s B.15 with Dark Green/Dark Sea Grey/Silver paint scheme. Thanks in advance.
-
 Hi guys! Well, Cosford was a few days ago and I managed to come across a wonderful Airfix 1:48 Canberra PR.9: (amongst other things >_> ) I was inspired by Navy Bird's excellent 1:72 Canberra PR.9 "End of an era": ...and thought I should probably have a go myself. So, the plan of attack is as follows: -OOB apart from a fair bit of scratchbuilding -Scratchbuild the cockpit -Scratchbuild the Navigator's "cupboard" -Scratchbuild the flare/bomb-bay -Open up a few panels, if possible? -Gear down, flaps down, flare/bomb-bay open -Scratchbuild the cameras -*Anything else that needs editing/making (The chosen scheme) What I could do with are some good reference drawings/photos of the flare/bomb-bay. Also, could I ask what panels on the Canberra could be removed for maintenance, I would be particularly keen on modelling panels that gave access to the cameras or perhaps a reference showing the engine cowling removed (who knows, I could have a go at scratchbuilding an engine!). Thanks for dropping by! Kind regards, Sam -Oh and an update for those following my application for medicine= rejected. Nevermind, Biomed it is!
 -
This is a collection of all the small scale models myself and David (the husband) have built so far. These were all pretty hard to photograph being so small so i hope you don't mind my less than perfect photography skills (plus I should have dusted a couple first!) Lets begin with the Eduard spitfire, made by David. It was painted using alcad and tamiya acrylics. This model goes together like a dream and wing of this aircraft is phenomenally thin! Next up is the Stuka. This is the older eduard boxing with the snake (I presume the one coming out soon is the same kit just with different decals). This was also a great fit, although the photoetch and the flaps on the wings were fiddly and required a little bit of an extra file to make sure that they were staying put. The splotches on the undercarriage legs are done freehand. More to come....
- 25 replies
-
- 8
-
-
- wildcathurricane
- canberra
- (and 7 more)


