Search the Community
Showing results for tags 'revell'.
-
Airbus A380 (03808) 1:288 Carrera Revell The A380 is a wide bodied super-heavy airliner from the European consortium Airbus, and its entry into service took the crown away from the venerable Boeing 747 as the largest passenger aircraft in the world. It was announced in 2021 that they will cease production due to changes in the aviation world, and as the wings are made down the road from where I live, I wonder how that will affect them. Not too badly I'd hope. It first flew in 2005 at the Airbus HQ in Toulouse, and over 200 airframes have been delivered so far with the final total nudging 300 by the time the lines close. Unfortunately for Airbus, airlines have become more interested in smaller aircraft to reduce the losses when flying at less than capacity, demanding flexibility in arranging their routes, using smaller, more efficient airliners. Emirates have been their largest customer with almost half the buy flying with them, with British Airways the second largest customer. There have been a few non-fatal incidents during its service so far, which has probably affected sales and its reputation, and despite its advanced design and capabilities, Airbus don't expect to break even on their £25bn development costs by the time production finishes. Having seen it in flight, it is a true behemoth of the skies, the huge curving wing-root and forest of landing gear making it an impressive sight. It didn't just pip the Boeing 747 past the post in terms of size – it's 40% larger than the old Jumbo Jet, but with even the 747 under threat of cessation of production, the A380 is and will remain a much rarer sight, a relic of the days of mass-transport. The Kit This kit was initially released in 2009 as a Snap-Tite kit, reboxed in 2014, and now available as a standard kit in a new end-opening box. Inside are four sprues of white styrene, a small clear sprue with one part on it, a decal sheet and instruction booklet that is printed in colour on satin-finished paper with profiles on the rearmost pages, depicting the demonstrator scheme that was worn initially by the type. Given the scale and its origins, detail is good, with engraved panel lines, recessed windows in the fuselage sides, landing gear with separate wheels, and engine pods with fans visible from the front. Construction begins with the cockpit, which is a tiny part with moulded-in seats and consoles that are pretty good for the scale. You can paint this to your own standards, then place it inside the fuselage, slipping the canopy over it, and closing the two halves around the tab at the base of the tail fin. The wings are then started by adding doors to the gear bays in the belly section of the underwing, mounting a dog-bone insert on two pegs between the bays inside. The outer panels of the wings are single thickness, while the uppers have the inner panel moulded-in, which overlap with the centre lower wing to create a strong joint, placing the fuselage in the gap between them, trapping tabs that hold the upper wing panels in position as you install it. The A380 needs many wheels to support it whilst on the ground, making two bogeys with six wheels each for the belly bays, two with four wheels in the inner wing, and a twin-wheeled nose gear leg, all of which are inserted into the underside of the model, adding closed bays that hide most of the blank space in the respective bays. Leaving the model inverted, the four high-bypass engines are built individually, as they are handed and unique to their location on the wing. Each engine is made from a forward fan that fixes to a tubular ‘body’ that has the exhaust cone moulded into the rear. This is surrounded by the two-part cowling that also has the pylon particular to that engine moulded-in. Some detail painting will be needed during assembly of course, and once complete, they are fixed to their underwing mounts, plugging into position at the correct angle to the ground. The last parts are the elevators, which slot into the sides of the tail to complete the model. Markings There is one decal option included on the sheet, which is the demonstrator with a blue tail and flash across the rear fuselage, and a large A380 logo on tail, with another on the fuselage just forward of the wings. From the box you can build the following: Decals are by Cartograf, which is a guarantee of good registration, sharpness and colour density, with a thin gloss carrier film cut close to the printed areas. Conclusion Even at 1:288 scale, the A380 is around the same size as a large WWII fighter, but it certainly won’t take up as much room on the cabinet shelf as a 1:144 kit, which could be useful. Detail is good for the scale, and although the gear legs and some other parts are over-scale because they must support the model’s weight, they aren’t too obvious when complete. Highly recommended. Carrera Revell model kits are available from all good toy and model retailers. For further information visit or
-
Smit Houston Tug Boat (05239) 1:200 Carrera Revell The Houston was a Tugboat that was launched in the late 70s at Heusden in the Netherlands, delivered to and operated by Smit Internationale until 1990, where its innovative design and advanced technology gained a reputation for being and excellent vessel. She was powered by two six-cylinder Stork Werkspoor diesel engines each with an output of 4,600hp, giving her a top speed of 14 knots, plus a lot of torque, and berths for up to 32 passenger and crew. After serving Smit for around thirteen years, she was sold to Greenpeace and underwent a change of name to MV Solo, where she remained until 1995 by which time a helipad had been retro-fitted, ending its days under the name ETV Waker until a serious engine room fire in 2009 rendered her unfit for repair after years of solid service with the Dutch coastguard as a chartered Emergency Tow Vessel (ETV). The Kit This kit was originally tooled in 2007 and released first as the Smit Houston, then as the ETV Waker with new parts added to represent the upgrades made by Greenpeace and the then-new owners. The kit arrives in a deep end-opening box, and contains three sprues of white styrene, three more in green of various sizes, a single hull part in brick red, four strips of clear acrylic sheet that should be glued behind the portholes and windows, a length of stiff black cord, two decal sheets, and the instruction booklet that is printed in colour on satin paper. Detail is typical of a maritime kit from Revell of this era, with external detail, a well-moulded hull that could use some improvement to the bow thruster area, and a simple stand that you can use during the build if it’s not up to your usual display standards. Construction begins with the hull, fitting two ducted screws to the rear, corresponding prop-shafts, and rudders that are mounted on the rear of the shrouded section. Two additional parts are attached either side of the bow to give it a more bulbous profile, fitting anchors to the hawsers on both sides of the bow. The stand is built early to allow the modeller to keep the hull stable and off the desk, making it from four parts that join together in a butt-joint that is strengthened slightly by location tabs and recesses between the parts. The hull is shown being painted in four bands of colour at this stage, as is the rear deck that is predominantly bright green with brown sections forward, installing it in the hull and adding small parts after painting them, then surrounding the stern with a cowling that curves inward and has four cross-braces fitted across it. A diagram shows the colours for all the railings and lights, with another diagram showing the painting of the mid-deck, which is inserted next, adding the first of the railings and superstructure, then putting more deck equipment and railings in place over the following steps, building up to the bridge after adding the foredeck, which is also very green, studded with small equipment parts, and more railings. Each successive deck is painted, has holes drilled for railings, and various pieces of equipment added, including a fire-fighting deck above the bridge that is roughly T-shaped. Twin funnels are made from three parts each and are fitted behind the bridge with a ladder and mast base linking them together, making the two masts from several parts each, the more complex assembly sited between the funnels, adding radar and other antennae to the various stations. The fore mast is glued into the fore deck along with a crane, building a lifeboat from two halves for installation on the port mid-deck with its davit, aft of the superstructure. A rigging diagram shows how the anchors and other cables should be arranged on the fo’c’sle, wrapping the ends round the capstans moulded into the fore-deck, with another drawing detailing the rigging of the two masts. Markings The Smit Houston only wore one scheme during its time with them, and a full set of profiles are included spanning three complete pages. From the box you can build the following: Decals are by Cartograf, which is a guarantee of good registration, sharpness and colour density, with a thin matt carrier film cut close to the printed areas. Conclusion The Houston was a well-respected tug during its time with Smit Internationale, and there’s adequate detail for most modellers, including clear backing for the portholes, and a length of waxed cord for rigging. Highly recommended. Carrera Revell model kits are available from all good toy and model retailers. For further information visit or
-
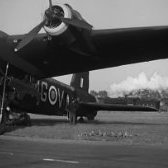 Being of the age where "Topgun" had a big impact on me as a great aviation movie, I had always wanted to create my own aircraft carrier diorama. Here it is 🙂... There is a obvious mistake, that's a 1am in the morning error! 😂
- 10 replies
-
- 22
-

-

-
 Revell first introduced this kit as KC-135 Tanker/Transport in USAF markings in 1959. It was re-released in many forms and variations over many decades.Its even due for re-release later this year again by Revell as AWACS. This kit came out in 2021 from Atlantis Models,who used Revell's older molds.Meaning that this kit features open cockpit windows and no clear part and the early small PW engines.Revell USA even released it once as a Boeing 720 !. Anyone who has researched the Boeing 707 knows of its countles variants/subvariants and changes of wing layouts and other things,even within the same model versions. Revell's 707 is more or less a 707-120 version,Atlantis cleverly states this too on the box and presents us this kit with demonstrator markings. A beautifully done decal set imho. As I have a thing for demonstrator/prototype markings,this was a must have kit. The moulds showed its age with quite a lot of excess plastic but overall nice looking parts. I built it mostly oob,with the exception of replacing the canopy with a Zvezda 737 part,as the front of the kit is more Caravelle-like. The version with the clear part is actually better. So replacing the canopy was a must here to get a more realistic look. The engines got newly created inlets,done with sheet plastic,cut and sanded to shape to get a round and seamless intake. As the left side passenger door was a separate piece,I added a wall behind the cockpit and in front of the cabin and a piece of floor,to build it with the door opened. The door is only taped to the fuselage,so I have the option to close it and mout the model on a display stand when display space is getting rare. Paints are entirely from Gunze,The cockpit window decal is from an Authentic Airliners set. Even with its faults and somewhat odd scale (1/139) ,for its age it still builds up to a nice looking kinda 707... Cheers Alex
- 16 replies
-
- 45
-
-

-
-
- Boeing 707
- Atlantis
- (and 1 more)
-
This year I built ,amongst other kits, my last 5 Revell A310. 3 of them are done,the other 2 await their engines. Revell's A310 kit is now a good 40 years old and its becoming harder to find,esp. for reasonable prices. Its very simple in detail and has only a few parts and suffers from some inaccuracies. But I like the kit ,as it goes together reasonably well and with a few corrections,builds up to a nice A310 model. The most obvious error is the front section. There are some resin replacement noses on the marked,but I chose with all my builds,to correct it myself. As there is enough material,its an easy fix.I glued in the cockpit windows,then used liquid plastic and sheet plasic cut to the shape of the front window and placed it in the correct angle. After all dried for a few days,some filler was used to cover the whole window section and then sanded carefully to shape.The rest is taken care of by individually applied window decals. The flaps on the wings are only shown through slightly raised lines.These were engraved by me and then sanded down a bit. After painting was done,the flaps were highlighted with a sharp pen. For the Lufthansa A310,I used the superb decals from 26.The kit is built oob. I actually planned to build the first LH A310 D-AICA ,but the "A" fell victim to the carpet monster,so its now D-AICB. The Balair A310 has decals from 8A decs. The quality is good but suffers a bit from size issues,although the set states its designed for the Revell kit... The winglets are scratch built as I had only 1 -300 Revell kit that provides winglets. The kits engines were replaced with the correct PW4000 from DRUZ. Absolutley delightful resin parts and worth every penny. The A310 came new to Balair in 1986 and in the 90s was transferred to Swissair,when 3 newer A310-325ET (Extra Tank) joined the fleet,then in the new "parrot" livery. This particular A310 will show up soon here on BM...stay tuned. The Interflug A310 is done with the respective kit decals and aftermarket window decals. The engines come from Authentic Airliners. In comparison with the excellent DRUZ engines,they were a bit of a disappointment in terms of material and fit. It came a bit as a surprise as my past AA builds were nice and troublefree... I also recently finished their A310 kit,which I found quite a disappointment in terms of fit and resin quality. More on that when I get around posting the finished model. Interflug received 3 A310s in 1989,shortly before the reunion. They flew until Interflug's demise in 1991 and then joined the German Airforce as transporters. 2 were scrapped recently and the 3. still awaits its transfer (in pieces) to a park where it should be on display. All models were painted with Gunze white primer 1000 for the white parts,Gunze metallixs and Revell enamels. Cheers Alex
- 20 replies
-
- 37
-
-

-
-
- Airbus A310
- Revell
- (and 1 more)
-
Airbus A330-300 (03816) Lufthansa New Livery 1:144 Carrera Revell Airbus Industries began working on a larger wide-bodied passenger jet in the 1970s, naming it the A330 that would be initially available as the A330-300, taking orders toward the end of the 80s, and flying for the first time toward the end of 1992, arriving with its first customer some two years later. It is available with three choices of engines from GE, Pratt & Witney, and Rolls-Royce, all capable of carrying over 270 passengers more than 7,000 miles without refuelling. The shorter -200 series was made available soon after, with an even longer range due to its reduction in weight and carriage ability, while the -300 received an upgrade in 2010 that allowed it compete with the Boeing Dreamliner, adding 2 tonnes to its maximum take-off weight, a small increase in range, and more than a tonne more cargo. Further improvements followed as technology advanced, and there are now over 700 airframes based on the A330-300 airframe in service with many carriers. If you expand that to the rest of the A330 series, that number increases substantially, including the new A330-743L Beluga XL, which will eventually replace the original Beluga when those airframes reach the end of their lifespan. There are also standard cargo A330s, and military variants that perform transport and air-to-air refuelling tanker duties, their number increasing over time. The Kit The original boxing of this kit was released in 1992, and has been re-released with new decals on several occasions, this being the latest, depicting Lufthansa’s new livery, with a blue diagonal band wrapping around the tail and rear fuselage, and the Lufthansa logo written in large text above the passenger windows behind the cockpit. The kit arrives in a long end-opening box with a painting of the subject travelling away from us above the clouds, and inside are seven sprues in different shades of white styrene, a small clear sprue, a large sheet of decals, and the instruction booklet that is printed in colour on matt paper. Detail is typical of a modern airliner kit, especially the more recent engines that are included with the kit, which have finely engraved details plus delicate fan blades front and rear, and the option for a wheels-down or in-flight pose. The model is further enhanced by the new decals that include window frames, doors and use metallic inks to portray the swash-plates for the tail and other features. Construction begins with the cockpit, which is single-part tub with moulded-in seats, plus a rear bulkhead that has two doors moulded-in, which is odd. Little will be seen through the windows though, and there are no paint call-outs for this area, but the interior of the fuselage is indicated as being painted a light grey. The nose gear bay must be built before the fuselage halves can be closed, building it from a C-shaped roof and two side walls that trap a five-part gear leg in place, sliding one wheel with a long axle through the lower end, and plugging it into the hole in the back of the other wheel, leaving it free to rotate if you wish. It is glued in behind the cockpit, adding 15g of nose weight to prevent a tail-sitter, then cementing the two main gear bays into the mid-fuselage, after which the fuselage halves can be closed, inserting the belly panel during closure, and deciding whether you need to open the hole under the rear for the clear anti tail-sitting rod, which is a strange time to do this as you have the opportunity to insert nose-weight. Maybe a dot of paint could be applied on the outside of the fuselage to mark the location in case it is needed later. The cut-outs in the belly are filled with three inserts, adding a pair of antennae behind them, then fixing a close-fitting part around the nose gear leg, which has an engraved line down the centre to depict the two doors. The open parts of the doors are fitted vertically to each side of the strut, adding two swept antennae to the rear of the bay. The wings are built from upper and lower parts, adding four flap actuator fairings to the underside, the innermost one on each wing made from two parts, taking care to arrange them correctly. They are slotted into the root fairings on each side of the fuselage and glued in position, ensuring to obtain the correct dihedral until the glue is cured. The engines hung under the wings are next on the list, building the inner structure from two halves with the engine rear trapped inside, adding an internal trunk around the fan section, then putting the two front fan stages into the centre. More trunking is fitted in front of the fan section, creating the intake tunnel, then the external cowling halves with moulded-in pylon are closed around it, completing the assembly. A tiny sensor is provided that attaches to the outer cowling at an angle, as shown in a scrap diagram nearby, which also shows the flat lower portion of the otherwise circular intake, which is designed to allow adequate clearance from the runway. The engines are handed, and are attached via pegs to slots under the wings, adding wingtip finlets that help improve fuel economy on long flights. To build the model in-flight, the landing gear steps are skipped, and alternative gear bay door parts are inserted in their place. The gear-down option requires making two handed gear legs from T-shaped struts, adding two brake fixtures on each side that are linked by a bar, inserting the twin wheels into two axles, one of which has a long axle while the other has a hole in the back, avoiding gluing the axles if you wish to leave them mobile. Three additional retraction jacks are added to each gear leg before they are installed in their respective bays, gluing two bay doors to the outer face of the struts. The elevators are each made from two parts, and it might be worth considering leaving them loose until after decaling to make applying the swash-plate decals easier, as the elevator pegs pass through them. The model is completed by inserting the windscreen at the front, adding a pair of antennae to the spine, and gluing a cap on the tip of the tail. The last step shows the use of the clear rod that is a prop in the event of a tail-sitter due to insufficient nose weight, or the forgetting of same. Markings There is one decal option provided on the large sheet, and the paint code for the Lufthansa blue tail is a mixture of two Revell codes, which could prove tricky and inconsistent if you’re not used to mixing paint, or don’t use Revell acrylic paints. A little research turned up a Revell Lufthansa Blue with a code of #36350 in their Aqua range that seems to be widely available in the UK at least, which begs the question “why suggest a mix?”. Revell’s enamel range also has a suitable shade in their range, #32350 Lufthansa Blue, but not everyone will use enamels due to their comparative toxicity and long drying time. Someone is bound to pop up with some alternative suggestions from other acrylic brands however, so worry not. From the box you can build the following: Decals are designed by DACO Products and printed by Cartograf, which is a guarantee of good registration, sharpness and colour density, with a thin gloss carrier film cut close to the printed areas. There is a note on the profiles that advise that a decal (#22) matches the outline of the door moulded into the kit, while a more accurately sized door decal has been included (#23) for those wishing to use it after sanding away the incorrectly sized door. The same note is applicable to the opposite side, using decals #16 and #17. Another note states that an EU flag was applied to aircraft from early 2020 onward, which is typical of the high level of research carried out by DACO. Conclusion The A330-300 is a large aircraft even at 1:144, and this model depicts it well, ably assisted by the decals and more recent parts. Highly recommended. Carrera Revell model kits are available from all good toy and model retailers. For further information visit or
-
Its been a while since my last post here on BM. But work ,weather and in the end some health issues kept me from taking pictures of my many models that have been completed since end of 2023-summer 2024. This project was actually planned to post in my 2019 747 anniversary post. But kit issues and thus lack of energy to continue,kept it unfinished on the shelf. The 747 was ok,even though the 2012 issue as set with the Shuttle showed its age. The biggest problem was the Space Shuttle,which must rank among the worst kits Revell ever produced.The flaws showed even more through the worn out moulds. The sets Shuttle went into the bin after trying to make anything pallatable and replacement kits were ordered.This time some older issues. They were slightly better but still crap... The highlight are the decals,which bring this kit to life.After more than 6 years in production, its finally done and finds its way into the collection. I had planned another SCA (in American Airlines livery),the 747 has been completed but its unlikely that I will finish the 2. shuttle . It will show up sometime here too but I still need to glue the shuttle mounts on... Cheers Alex
- 14 replies
-
- 48
-
-
-
-
- Boeing 747
- Revell
- (and 1 more)
-
My long term project of building every version of the Boeing 737 in 1/144 has come one step further with the -600. The conversion itself is quite easy,I used templates found on the Boeing website and shortened the fuselage accordingly. The wrong shaped Revell engines were replaced by a resin set from Authentic Airliners.The superb decals come from 26. Paints are from Gunze ( white primer 1000) ,grey and metallics. The blue is Tamyia Royal blue. The 737-600 has a similar length as the 737-500 but new ,bigger wings and tailplanes as all NG versions up to the -900. The short fuselage combined with those wings gives the -600 quite a special appearance. And as the Airbus A318,the 737-600 was not in great demand from the airlines,due to its high operation costs compared with its weight/payload. Cheers, Alex
- 2 replies
-
- 15
-
-
-
- Boeing 737
- Revell
- (and 1 more)
-
 Here is the good old Revell Boeing 767 finished as ANA Cargo's JA8356 circa 2010. JA8356 was delivered new to ANA in 1991 and flew in passenger configuration until 2009 when she underwent freighter conversion by Boeing making her a 767-381/ER(BCF) i.e. Boeing Converted Freighter. She stayed with ANA Cargo until 2019 and then joined UPS as N394UP. A Japanese freighter is a bit off the beaten track for me since I normally model European airliners but I hadn't done a Group Build for a while and took the notion to join the Asia GB hence the Japanese prototype. The build thread is here for anyone who wants to read it. I had a false start with the Zvezda kit (explained in detail in the build thread) and switched to Revell half way through. Thanks for looking and constructive criticism is always welcome Dave G
 -
I present you with a dog-fight in 1/144 Using the old Revell kits of a Messerschmitt Me.262 and a Hawker Tempest V I adapted an old Frog stand to have tubes and the aeroplanes have copper wire that plugs in to the tubes Years ago I made some basic 1/144 pilots in seats. They can be adapted to any aeroplane. These Revell kits have no pilots so they got one each The pilots; my stock photo of them The Tempest; I fitted a pitot, a VHF aerial, drilled out divots and filled them with silver paint for the landing lights Top side, I put a wire aerial aft of the cockpit The victim, Me.262 And on the stand I'm still having problems with my eyes and working on these involved strong magnifiers and plenty of tea breaks Thanks for looking in BTW, this is my 7,000 posting !
-
 Hi all, Here we are. After months of reading your articles, taking your precious advice and admiring your beautiful achievements, I am going for it and offering you my first post on this website. After Etiennedup's splendid SAAF Transall, here is a civilian one, with the magnificent Air France Aeropostale colors by 26Decals. I hope you like it, all criticism is welcome. A bientôt, Olivier
- 12 replies
-
- 26
-
-

-
-
Last time I posted a NASCAR build was (I think) 2017... I started this one around the same time, then lost interest in all NASCAR modelling until about two months ago when I found this and all my others during a stash clear-out. There isn't very much to say about the build, I'm sure most builders of American Stock Cars will agree the construction is entirely predictable and formulaic, the only differences being the body shells and paint/decals. That said the early 2000's cars that Revell released are even more so as they're all related to their 'snap together' pre-painted range that were mainly sold through official NASCAR merchandise outlets across the US. Right, enough backstory, this is the less well known of the 2003 Chevy Monte Carlos driven by Kevin Harvick for that season featuring the Californian Funk Metal band 'Sugar Ray' (no I hadn't heard of them either), there aren't too many photos but I found a few, even better is to watch the end of that seasons' Richmond night race and how Ricky Rudd clipped Harvick, putting him in the wall with just eight laps to go, Harvick was running second at the time, Rudd was in third. The post-race 'altercation' was great TV. Paint here is Tamiya TS-14 Gloss Black straight from the rattle-can, when dry the larger areas were very carefully masked and then sprayed TS-21 Gold. Decals are by JWTBM, and date from 2004 - not sure if anyone reading this is connected with JWTBM, but if there is... you 'quality control' was fantastic, after twenty years the decals behaved perfectly. Four coats of Tamiya LP-09 lacquer clear sealed the decals and were left to fully cure for two weeks. Sanding and polishing-out took three days, and I'm VERY pleased with the final finish. So that's it, a toe back in the water of NASCAR modelling and I really enjoyed it. Already looking at a few of my old donor kits & decal options but got a couple of other projects I need to get finished first. Cheers from NZ, please feel free to comment, criticise or ask a question. Ian.
-
 Star Wars: Mandalorian – Speeder Bike (06786) 1:12 Carrera Revell We’ve probably all heard of Star Wars, the three trilogies, the spin-off films and now under the auspices of the massive Disney corporation, we are being treated to some television series on their streaming service Disney+ that are bringing back some of the magic that perhaps had been lost, or at least dulled over the years under the helmsmanship of J J Abrams. The Mandalorian series reached our screens in 2019, right around the time the Covid-19 pandemic first hit, and it has helped keep us Star Wars fans entertained for three seasons now, with a fourth in the offing for 2024, hopefully. It has brought us new characters into the much-loved Star Wars universe such as the Mandalorian, Din Djarin himself, Grogu the baby Yoda, and it has reintroduced the previously reviled but nevertheless popular Boba Fett, who seems to have mellowed and become more well-rounded during his short time being digested in the Sarlacc Pit, and had his own series on the strength of his cameo performance in season 2, as has Anakin Skywalker’s former Padawan (pre-lava bath), Ahsoka, who now has her own spin-off. Even Luke Skywalker has made a brief appearance at the end of season 2, heavily de-aged using CGI and an actor with a similar physique to his younger self to fit in with the show’s timeline of being set just after Return of the Jedi. Speeder Bikes of various designs have made several appearances in the new show, some more familiar than others, but all taking a similar form that was established by the original Speeder Bikes that Han and Leia encountered in the forests of Endor toward the climax of Return of the Jedi. Imperials like to standardise their gear, and have a specialised force called Scout Troopers, who have lighter armour than their Stormtrooper colleagues, riding 74-Z speeder bike that don’t need wheels thanks to Repulsorlift technology. Two Scout Troopers on slightly revised post-Empire white bikes snatched little Grogu after he was dropped by Kuiil (Nick Nolte) when he was ambushed and killed on the planet Nevarro. The Kit This is a new tooling from Revell, who hold the Star Wars licensing rights in Europe and the US, creating new kits and reboxing kits from Bandai, who have the rights for other territories in the Far East. The kit arrives in an end-opening box that has a group of Mandalorians peering over the top right corner of the art work, including Din Djarin as we now know him. Inside are three sprues and a base plate in white styrene, one sprue in black, another larger sprue in grey, and a small clear sprue that contains two supports for the model when complete. The instruction booklet is printed in colour, and has profiles for painting and decaling on the rear pages, with a decal sheet and safety leaflet tucked inside. Detail is good, but this is definitely a Revell tooling, as the rider figure isn’t an articulated action-figure, and the bike is built in a very different way to the Bandai kit, which I have on a shelf above my desk. Construction begins with the Scout Trooper figure, who has an articulated head, the mechanism for which is built from two halves that are then trapped within the two-part helmet sides with separate top dome, plus an insert for the ‘mask’ and a separate lens part that sits inside the helmet’s cowl, so that it can be painted separately if you wish to achieve a neat demarcation. Each of his arms is made from two halves, as is the torso, which has the upper legs moulded-in. The arms are trapped between the torso halves during closure, and the head is pushed onto the ball-joint at the top, fitting rear cuirass armour and waist cummerbund at the rear, adding the prominent hump with control panel to the cuirass, and a two-part belt with ribbed tubing below. Front armour and two-part cummerbund are added to the front, fixing pouches and belts around his waist, linking the front and rear belt sections with a pair of two-part assemblies. Additional armour is added to pegs on the upper arms, elbows, and knees, with a few decals applied after painting, then the legs are extended by adding two-part boot-tops to each one, putting a holster for the two-part pistol on the outer face of the right boot. The feet are separate parts, and are first fitted to the foot pegs before they’re installed at the end of the trooper’s legs. Supports for the foot pegs are built from two C-shaped parts that are spaced apart by short bars, painting and setting this assembly aside until later. The forward empennage is moulded as a single detailed part, and is shown for painting purposes initially. Before adding another assembly to the front that holds the diagonal steering(?) vanes, building it from three parts, and locking it in place with a plate from below, then fixing the vanes to the rods, and applying some small decals to all the vanes, after painting of course. A cylindrical intake assembly is next, built from four parts and installed under the left half of the main chassis member, linking it with pipes and corrugated tubing, adding more hoses to the opposite chassis half, and bringing them together with a ribbed plate inserted into a gap in the underside. Twin semi-circular exhausts are found on the rear bulkhead, adding detailing parts to each one, and a quartet of nozzles into the centre, again setting it aside for later installation. A rectangular plate has a probe and link wire fitted to it that is used to cover the workings at the base of the forward empennage painted earlier once it has been mated with the chassis, adding another part underneath. The bodyshell of the bike is almost fully moulded as one part, shown again for overall painting, plus detail painting and decaling of the control panel in front of the rider, which has a small panel inserted to the left side. Although it’s not immediately clear from the drawing, the chassis is inverted to add cowlings to the sides of the engine bulges, slotting the bulkhead made earlier into the rear, and adding a pair of vanes that clip into place without glue at the bottom to remain mobile, and while the model is still inverted, the bodywork is mated with the chassis, telling you to drill out two holes in the rear for ‘Version B’, which is doesn’t mention again until over the page. Version B has the Scout’s bag attached behind him on the aft deck, while Version A has baby Grogu in a different bag slung round the rider’s shoulders. The bike is flipped right-side up, and the rider is attached on a slot in the moulded-in seat, and his foot pegs are attached to the supports that were made earlier, which click into position on two friction-fit clips beneath the chassis. The rider’s hands have the grips moulded-in, which need to be attached to the model, first using a pair of flimsy styrene wires that slip into holes in the cowling and at the outer ends of the grips, and firming up the assembly with sturdy two-part arms on each side. If you are modelling Version A, a nicely moulded Grogu is made from two halves, and once painted is trapped between the two haves of the bag, locating him on a pair of pegs in the rear, which has two closure tabs glued onto the top flap, and is held in place by the shoulder strap that is wrapped around the trooper, and attaches to the bag on two pegs, locating it on the rider’s hip. Version B has the single-part bag fitted on the back of the bike on the holes drilled earlier, and no Grogu. There’s no excuse not to use him, unless you’re going retro and building a Jedi variant. To display the model hovering on its repulsors as it does in the show, a rectangular stand is included, which has rocks and sand textures moulded in, and two clear supports that are inserted into the holes near the front and back. The bike and rider rest on the two flat topped supports, which have small raised edges to reduce the likelihood of it falling off for any reason. Markings Unlike the Return of the Jedi speeder bikes, these post-Empire examples have white bodywork, but the riders are ostensibly the same as before, although everything is a little more careworn and beaten up now that the endless resources the Empire once commanded have evaporated. The decal designers have borne this in mind, and most of the decal sheet consists of decals of scratches and scuffs in grey that you can apply if you wish. From the box you can build the following: Decals are by Cartograf, which is a guarantee of good registration, sharpness and colour density, with a thin gloss carrier film cut close to the printed areas. Conclusion This is a good representation of the Imperial Speeder Bike, with the option of painting and depicting it as it appeared in RotJ, or in its more recent appearance in The Mandalorian. Use Grogu at your whim, but make sure you paint his cute little face well. Highly recommended. Carrera Revell model kits are available from all good toy and model retailers. For further information visit or
 -
Ford Mustang 60 Years (05647) 1:24 Carrera Revell Ford’s Pony Car was first introduced in 1964, and immediately struck a chord with the American car-buying public, claiming a place in motoring history as it did so. The lineage became known as ‘Pony Cars’, which extends all the way to today with the seventh generation, as at time of writing. The progenitor was a much simpler car from a simpler time when the upper working and expanding middle-classes were relieved of their excess money by their innate desire to drive something sleek and fast. There were two variants at launch, including hardtop and a drop-top cabriolet, and they were joined by the Fastback later in ‘64. Ford’s chief engineer Donald N. Frey was responsible for the project, which began in ’62 and was chivvied along at board-level to ensure that the plug wasn’t pulled by the penny-pinchers with no imagination. The result was a relatively light, powerful four-seater with a price limit to keep the more ambitious designers in check, using the Ford Falcon chassis as a base to keep costs down, and after a competition between the various Ford in-house design departments, the Ford design was chosen, as it appealed to men and women, adding a little European flair to the bodyshell, whilst keeping it palatable for home audiences. It also got a new badge, dropping the Cougar project name, taking on the Mustang name, and adopting the prancing horse that’s now legendary. The first Mustangs were given 1965 VIN numbers, and this led their fans to call them the 64 ½ Mustang, running with various engine sizes from 2.8L to 4.7L, three-speed manual and automatic gearboxes, plus a four-speed manual box. From outset its appeal was obvious, receiving 22,000 pre-orders, and selling almost 1.3 million cars in the first two years. The original Pony Car and its descendants have changed the way Americans view their cars immensely over the years, and I wouldn’t mind one of the new ones myself, if I had a few shekels to spare, as they’re now officially available in the UK. The Kit This is a reboxing with new decals of the 1985 tooling by Revell, which is backed up by the raised lettering on the underside of the interior tub of the model. The kit arrives in an end-opening box, and inside are five sprues and the bodyshell in white styrene, another sprue that has been chrome-plated over white styrene, a small clear sprue, decal sheet, and instruction booklet that is printed in colour with profiles for the decal option to the rear. This is a special boxing that depicts a single car for its 60th anniversary, which is an amazing length of time for a car and its name to continue in production. It is an old kit, but has good detail, and time has been kind to the moulds, including a full engine, underside details and the interior, plus of course the revised bodyshell and other parts that make this a convertible. As it’s a special edition, there are six thumb-pots of acrylic paint in various colours, a 12.5g bottle of Revell Contacta Professional cement, and a #2 Revell paintbrush with a thick coating of starch keeping the bristles safe from harm, which worked well in this instance. Construction begins with the engine, two parts for the block and integrated transmission, adding multi-part detail inserts top and bottom, fitting two cylinder-heads and their rocker-covers, then accessorising it with alternator/generator, serpentine belt, fan and manifolds, exhausting four cylinders per bank. The under-tray of the vehicle is then outfitted with the front axle with suspension moulded-in, twin exhausts that exit at the rear, and the rear axle, which has extremely ‘hi-tech’ leaf-springs and the drive-shaft moulded-in, then has a pair of dampers fixed between them and the chassis to reduce rebound, installing the engine between the chassis rails at the front, joining the down-pipes from the manifolds to the exhausts, and the drive-shaft to the transmission. The interior is begun by applying six dial decals to the instrument binnacle, and another decal for the boss in the centre of the wheel. The two binnacle components are glued into position, fitting the steering column with moulded-in stalks, and the steering wheel, adding a cranked shifter to the centre console, and creating two front seats from two parts each. The dash and console are installed first, adding the seats on their twin pegs next, before installing the interior and the windscreen with rear-view mirror into the bodyshell, which most modellers will have painted by now. While the bodyshell is inverted, a pair of coil-over shocks are fitted into the front suspension towers, trapping them in position with the floorpan, after painting the struts red and the coils black, taking care to get the lines nice and straight. The instructions turn to the road wheels, inserting the two hubs from each side of the flexible black tyres, applying white rings around the outer faces of the tyres, and gluing the knock-on/knock-off retainers to the outer centre of the four hubs, which are all chromed. The vehicle’s front panel has the radiator core glued to it, adding a window to the soft-top, and a pair of chromed rear-light clusters and boot button to the rear, painting the lights with translucent red and orange as appropriate. The lower valance and bumper with moulded-in over-riders are attached under the boot lid, adding side-lights in chrome outboard of the over-riders. The radiator panel is slotted into the engine bay, adding a strut-brace between the strut towers, and fixing two ancillaries to the left bay wall, applying a decal to one of them. The face of the car has a pair of chrome light reflectors and clear lenses with mesh moulded-in, fitting the chromed radiator grille, and those go-faster stripes on the panel under the radiator, then doing the same to the front skirt, and mounting the bumper and side-lights beneath it. The bonnet has some detail moulded into the underside, but you’ll need to remove the ejector-pin marks in between them, applying the two go-faster stripes after painting, and fitting the air-box and radiator feeder-pipe into the engine bay, and painting the battery filler plugs orange, as batteries weren’t sealed back then, and needed a regular top-up with deionised water. The bonnet can be slipped into position without glue to leave it mobile, but you’ll need to scratch-build your own stay if you want to prop it open, or you can close it over the bay, dropping the pivots into two recesses in the bonnet sides. A two-part wing mirror is added to the driver’s door, but you have the luxury of a door handle on each door, and chromed intake trims are applied to the scalloped area on the rear panel. You have a choice of fitting a stowed roof that is a single C-shaped part, or the deployed roof made earlier, slotting the four wheels into the arches with or without glue, depending on your likelihood of driving it around when no-one’s looking. Markings There is just one decal option included on the sheet, which contains many double white stripes that are applied over the front and rear of the car. The other decals include logos, number plates, and the white rings around each of the tyres, as previously mentioned. You can of course paint the car any colour you like, but the instructions show it in a handsome blue with a white roof, which is covered by the pots of paint included in the box. Decals are by Cartograf, which is a guarantee of good registration, sharpness and colour density, with a thin gloss carrier film cut close to the printed areas. Conclusion Whilst this isn’t the newest kit on the block, the detail is good, as are the decals, and it’s the original Mustang, which is appealing in itself. Highly recommended. Carrera Revell model kits are available from all good toy and model retailers. For further information visit or
-
Rejoining with this Revell kit of the unsuccessful JSF candidate. Kit cost me £3.85 on Ebay in 2004. A build that compliments my X-35 Lightning build, in the F-35 Lightning STGB.
-
 Joining with this kit, bought 2004 from an IPMS colleague for £4.99. The only one allowed a splash of colour I've just looked at the instructions. How has such an uninspiring aircraft become so successful? And as a compliment to this, I'm building a Revell X-32 JSF in the Project Cancelled GB.
 -
 Hi Folk's my contribution marking this momentous anniversary is Revell's newish tool Mustang,I will check references to see if the box art schemed aircraft flew on the operation if not suitable marking's will be sourced.
 -
The Avro RJ85 was a regional airliner that was manufactured in the UK by Avro International Aerospace. The jet was an improved version of its twin airliner, the British BAe 146. The Avro RJ / BAe 146 was a high-wing cantilever monoplane with a T-tail. It had four turbofan engines mounted on pylons underneath the wings. The aircraft was very quiet and was widely used at small, city-based airports. It served as a regional jet and short-haul airliner. In the early 1980’s I once flew from the London City Airport to Brussels onboard one of them. The different Avro RJ versions were produced from 1992 till 2001. They were designated RJ70, RJ85, and RJ100 and the corresponding BAe 146 versions were -100, -200 and -300. With 387 aircraft produced, the Avro RJ/BAe 146 were at the time the most successful British civil jet airliner program. Blue1 was a Finnish airline that formed a part of the SAS group. The company started operations in 1998. They offered flights to domestic and European destinations and had a total of 11 Avro RJ jets in their fleet. Since I had previously bought Draw decal’s Blue1 markings I tried to find an Avro RJ85 kit for them. Well, what happened is that I won the kit in an Ebay’s auction but it was Revell’s Bae 146-200. I consulted my modeller colleagues and I was informed that there were only some minor outer differences between those two jets. The kit IMHO was excellent considering its age, 27 years or so. The fit of the parts was perfect and the details almost of tamigawa level. The model was first primed with grey Mr. Surfacer 1000. Then I sprayed it with Tamiya’s white Fine surface primer and finally, I sprayed the whole model with Tamiya’s gloss clear varnish. The blue tail and engines were air brushed with Revell's blue enamel number 52. The metal areas were airbrushed with A-Stand’s white aluminium.
-
Tiger I Vs T-34/85 (05655) Conflict of Nations Series I 1:72 Carrera Revell The Tiger tank was part of Hitler's obsession for bigger, heavier and stronger, which drove him to extraordinary and dizzying heights of impracticality at times, but in this case served him reasonably well. The goal was to mount the extremely powerful and accurate 88mm cannon used in the Flak 36 in a tank with sufficient armour to withstand any artillery round then-fielded by the enemy. This series of objectives were achieved, but at the cost of reliability and a prodigious thirst for fuel. It also made for some nervous bridge-crossings, as the finished article weighed in at almost 60 tonnes, which was too much for many smaller bridges of the day. A deep-water fording kit was created to get around that issue, allowing the tanks to ford streams and smaller rivers where the bridges or culverts wouldn’t take their weight. When it first reached the front it caused panic and heavy losses for the Allies, being capable of almost everything it was designed to do, including knocking out tanks long before the enemy's guns were able to get within range. Even when the Allies could get their own guns into range, it wasn't until they got much closer, almost to point-blank range, that they had any measurable chance of crippling or destroying the mighty Tiger, especially during frontal engagements, where a shot might just ricochet off harmlessly. The Tiger underwent constant changes throughout production to improve performance, fix problems, simplify and cheapen construction, but these are generally lumped together into early, middle or late productions for the sake of the remaining sanity of us modellers. The T-34 was Stalin's mainstay medium tank that was produced in huge numbers by sometimes crude and expedient methods, to be thrown into the fray against the numerically inferior German tanks on the Eastern Front, sometimes even before the paint was fully dry. The designers combined several important advances in design such as sloped frontal armour, wide tracks to spread the ground load, and the ability to cope with the harsh Russian winters without freezing to a halt, which was a problem that affected the Germans badly after the initial successes in the summer of Operation Barbarossa. The part count and cost of the tank was continuously reduced during production, with plants turning out up to 1,300 per month at the height of WWII. The initial cramped welded turret was replaced by a cast turret with more room, and later the 76mm gun was replaced by a more powerful 85mm main gun in the T-34/85 with an enlarged three-man turret, giving even the Tiger pause for thought. The Kit This is a new boxing of two Revell kits in a special edition that includes a diorama backdrop printed on some of the surfaces, two kits, six thumb-pots of acrylic paint, a bottle of Contacta cement with a precision applicator tube, and a #2 paint brush. The book that gives the box serious weight is perfect-bound with a predominantly black cover, and the usual colour instruction booklet is provided, with the decals for both models on one sheet slipped inside. These aren’t the simplified easy-click kits we’ve seen from Revell under the World of Tanks banner, but is the 1997 tooling of the Tiger, and their T-34/85 from 2002, and while they are relatively long-in-the-tooth, the detail still holds up to scrutiny for the scale. The book is written by Alexander Lüdeke, and extends to 80 pages of dual-language text, German in black, and English in blue, with plenty of photographs that include dual-language captions, several charts, diagrams and drawings that should prove entertaining. Many of the photos are black & white due to their age, but there are some modern and contemporary photos in colour scattered throughout the book, which covers both the tanks and how they were used in battle against each other during WWII. The package is of high quality, utilising thick card for the exterior, and the kits are both hidden under pull-up areas of the interior, which holds the paints, glue and brush in situ centrally during shipping and storage, with the book resting on the interior card and the instructions between them. Tiger I This kit consists of four sprues of grey styrene of varying sizes, and includes link-and-length tracks, individual wheels, and detailed exterior. Construction begins with the lower hull, which is made from the floor and two sides initially, adding the interleaved wheels to the moulded-in axles after painting the rubber tyres and hubs the main colour, building the drive sprockets and idler wheels from two parts each, fitting them on the ends of the wheel runs. The tracks are link-and-length as mentioned, consisting of long flat sections and shorter sections for the diagonals under the front and rear, and two sections across the top run to create the contour of the sag behind the drive sprocket. Individual links are used around the ends of the track runs, using six at the front and five at the rear. The rear of the hull is a broad T-shaped part that has chunky exhaust stacks and Feifel air-filters applied, covering the exhausts with a faceted shroud with louvres at the top that this reviewer hasn’t seen before. A jack is sited under the right double-filter box, installing the bulkhead in the rear of the hull and inserting two towing shackles on the torch-cut ends of the hull sides. The upper hull with engine deck insert are added next, fixing two more towing shackles to the ends of the sides, then linking up the filters with two pairs of snaking hoses, adding mudguards to both ends of the fenders. Skirts are glued to the sides of the hull, and the top deck has two towing cables (A must for the unreliable Tiger), and a choice of two styles of headlamps, one on each side of the hull. Some detail painting is undertaken on the moulded-in tools at the front, although this can be left until later if you’re not ready to apply paint yet. The turret sides are two parts that are joined together around the mantlet, removing a flashed-over hole for the shell-ejection port at the rear right, then sliding the barrel into the shroud that’s moulded into the mantlet. If you’re going for more accuracy, you can drill out the tip of the barrel, carefully opening the flash-hider with a drill that will allow the imaginary shells to leave the barrel. If you leave the mantlet unglued, the barrel can be left to elevate, unless you’d prefer to fix it in position for posterity. The turret roof needs three holes drilling in the top, fitting it over the sides and adding a mushroom vent near the rear, plus a one-part stowage box on the back. The commander’s cupola fills the hole in the roof, with an option of opening or closing the hatch, then fitting triple-barrel smoke dischargers to slots near the front of the turret, then filling the holes on the sides with spare track links, or filling them with putty if you prefer. A small tapering part is installed on the two holes in front of the moulded-in gunner’s hatch, fitting it to the body using the bayonet lugs moulded into the ring. The final parts are an additional towing cable on the left side of the hull, and six spare links in sets of three on each side of the vertical glacis plate. Markings There are two decal options on the sheet, both with a dark yellow (dunkelgelb) base coat that has either brown and green camouflage or a brown splinter pattern. From the box you can build one of the following: Battle of Berlin – April/May 1945 Panzer-Division Müncheberg Battle on Ostfront – 1944 Panzergrenadier-Division Großdeutschland Decals are by Cartograf, which is a guarantee of good registration, sharpness and colour density, with a thin matt carrier film cut close to the printed areas. T-34/85 This kit is moulded on three sprues of grey styrene, and includes similar detail levels to the Tiger kit, and has link-and-length tracks with good detail moulded into the parts. Construction begins with the road wheels, which are paired, as are the idlers and drive sprockets, installing them on the hull sides that are separate at this stage. The link-and-length tracks are fitted around the road wheels, using longer lengths on the underside, a three-part assembly on the top, and short diagonal lengths under the ends. Seven individual links are used around the front, with another five at the rear to complete the track runs. The completed hull sides are applied to the blank sides of the hull, fitting towing shackles to the rear bulkhead before fitting it, and closing the hull by gluing the upper to the lower, before adding details such as the bow-mounted machine gun, additional towing shackles, spare track links on the glacis, exhausts and armoured protectors at the rear, towing cables on the left side, followed by four curved supports on the right hull, and another two on the left, accepting three four-part fuel tanks that were often seen on Soviet tanks of the era. Grab-rails are mounted on the engine deck and hull sides, three stacks of grousers, a couple of stowage boxes, headlight and two-man saw are also festooned around the hull. The turret upper is moulded as an almost complete part, adding a pair of inserts to the lower cheeks, then trapping the mantlet between it and the lower turret without using glue to leave it mobile. A cylindrical cupola has a choice of open or closed hatches, with another flush hatch for the gunner, and three grab-rails are inserted into holes around the three sides of the turret, finishing off by rotating it to lock in place on the bayonet lugs moulded into the ring. Markings Two decal options are included, both in Russian green, one with substantial white edging and a cross on the turret, the other with a lower-profile marking set that consists of one white decal on each side of the turret. From the box you can build one of the following: Battle of Berlin April/May 1945 – 95th Tank Brigade, 9th Tank Corps Battle of Ostfront 1944 – Unknown Unit, 3rd Belorussian Front Conclusion Two good kits of important players in WWII, especially on the Eastern Front, and the book should prove interesting to anyone with a grasp of English or German and tanks. The price might hold it back from selling well initially however, but that should reduce as time goes by when reality sets in. Recommended. Carrera Revell model kits are available from all good toy and model retailers. For further information visit or
-
Right folks, this has been a long time in the making. I started this back in summer last year, before my life took a few turns for the worst. Building this kit was only ONE of the tribulations... It's the Revell 1/144 kit, originally meant to be the Lufthansa version, but I wanted a British Airways Landor version. That meant buying an Airfix version for the correct decals and the engines, which turned out to be a waste of time as the decals were scuffed and the engines were pretty useless lumps. I ended up getting the Draw Decal set and some resin engines, and still had to rob the wheels from the Airfix kit as the Revell ones were mis-moulded. As General Melchett observed, it'd have been easier and cheaper to get the Dragon kit and replace the decals! Anyway, after much kitbashing, scratchbuilding, filling and sanding, the finished article is finally here. I was hoping for some decent weather to photograph it in outside, but as I'm off work this week that's a forlorn hope...so, kitchen table it is. Hope you like it: Now, what's next? Cheers, Dean
- 45 replies
-
- 26
-
-
-
I had to have this kit, even if it does not go exactly with my 1/72 Bundesmarine aircraft theme.. Unfortunately, the kit was kind of a pain in the you know what. A lot off the bigger parts (fuselage halves, wing section) went no together well and required an astonishing amount of filling and sanding - not doing a favor to the engraved panel lines. I had a whole lot of ideas about detailing the model. Most of them for the cargo bay. After realizing that you practically see nothing when the plane is completed, I only corrected the front wall (now BOTH toilets can be accessed ) added the urinals on the starbord side back (ok, reading this, it seems I am somewhat obsesses with powder rooms) and a few smaller things. Visible on the outside is one air-to-air refueling pod on the port wing. But only one, I skipped the other wing as I modified a D-704 buddy tank to look vaguely like the one Airbus is using and only had 1 - call it a test flight? Altogether, viewed from a bit of a distance the kit looks pretty realistic. Part of that is the amount of decals Revell included. I lost count, but I think close to 300? Each engince nacelle & propeller alone has over 40! So without further ado, here it is: Oh, and in case you were wondering: 1) No, the German Navy does NOT fly Eurofighters/Typhoons. But that doesn't mean I can build one, does it now? 2) Yes, the different position of the propeller blades is on purpose to show off the variations possible. 3) Yes, I corrected the broken front wheels later (the whole landing gear is somewhat skinny for the weight of the model). Now, as always, thanks for looking and all comments welcome. Cheers
- 26 replies
-
- 70
-
-
-
-
-
Here is the Revell A330-300 converted to a -200 and finished as OY-GRN “Norsaq” of Air Greenland. Norsaq was built in 1998 and delivered to Sabena as OO-SFP. She joined Air Greenland in 2002 serving as their flagship until retirement in February 2023 and replacement by A330-800 OY-GKN. Norsaq was subsequent sold for parting out. On her final flight from Copenhagen to Tucson she made a low pass over Greenland’s capital Nuuk and most of the population turned out to wave her off. Converting the Revell A330-300 to a -200 is theoretically straightforward. The -200 is ten frames shorter than the -300 and it’s easy enough to remove six windows ahead of the wing and four aft. I used the BraZ replacement nose (more of that in a moment) so at the front I just cut off the necessary length for it plus six windows. I had previously borrowed the kit’s fin for use on an A310 and I replaced it with a tall post-modification fin from BraZ which was warped and needed softening in boiling water to straighten it. Also the fairings at the base needed to be reduced in width by about 50%. I found this photo helpful for getting the fairings correct. The BraZ replacement nose was a saga in itself. The main issue was that it didn’t match the cross section of the Revell fuselage and if it had been assembled as intended there would have been significant steps at the top and bottom. I believe BraZ worked from the actual Airbus drawings so the chances are they are right and Revell are wrong but that doesn’t solve the problem. Again I used boiling water to soften the resin after which I bent the rear of the nose halves closer to the Revell cross section. I then superglued them together at the bottom after adding the Revell wheel well and a decent amount of weight. Once the bottom joint was set I wedged the top joint apart and glued the assembly to the fuselage using 5 minute epoxy while trying (not very successfully) to align the top and sides with the Revell parts. The result was not pretty as the photo shows but after gap filling (scrap plastic, superglue and baking powder), copious quantities of Milliput and numerous rounds of sanding it more or less passed the T.L.A.R. test. A further annoyance is that the BraZ panel lines bear no relationship to the Revell ones. I took the line of least resistance and just filled everything. Unfortunately using the BraZ nose also means you lose the kit’s nicely detailed forward baggage door but there isn’t much you can do about that. The original Revell A330 was issued with GE and PW engines but both are poor. Norsaq had PWs and I replaced the kit engines with LACI’s 3D printed ones (LAC144134). Small fairings and other details came from plastic strip and sheet. The satcom bump is by BraZ. Red paint is Halfords Hyundai Electric Red. Sources disagree about the colour of the wings. Drawdecal say grey with coroguard which is definitely wrong while Lima November say plain Airbus grey. However photos suggest strongly that they were actually white. After much staring at Airliners.net and JetPhotos (especially this image) I decided that white was indeed correct, a conclusion supported by the fact that Norsaq would have had white wings in her original Sabena livery. I therefore finished the wings, stabs and engine pylons with the usual Appliance Gloss White. Metallics are by Tamiya and Revell. Decals are a mixture of Drawdecal and Lima November, mainly the former. I added Authentic Airliners windows and a few bits and pieces from the spares box. Because of the design of the Drawdecal decals I had to overlay the AA cabin windows which inevitably were differently spaced so all 112 of them had to be applied individually, the sort of modelling job which makes me question my sanity. Never mind, we got there in the end and the conversion, which was spread over about eighteen months, was actually quite an enjoyable project despite the problems. The finished result isn’t perfect by any means but I’m reasonably happy with it. If nothing else the large red model is a bit different and shows the “all airliners are white and boring” nonsense for what it is. Since I began this model the Zvezda A330-300 has arrived on the market. In theory it should be a big improvement on the Revell kit although discussion on Airliner Cafe has flagged up an issue with the sit of the Trent engines. I have one on order and I’ll form my own conclusions before deciding whether to dispose of the remaining Revell kits in my stash or hang on to them. Although the Zvezda kit isn’t cheap it should produce an accurate A330-300 without the additional cost and hassle of a (very) badly fitting resin nose and expensive 3D printed engines. Thanks for looking and constructive criticism is always welcome. Dave G
- 12 replies
-
- 55
-
-
-
-
-
While waiting for bigger rockets (e.g. Mach 2 Vostok) to become available, I decided to increase my rocket arsenal by building a second Revell V2 in US service, this one depicting the test launch "round 3" from 1946. To make it a bit different from my Bumper 5 version, I added a Meillerwagen. As always: thanks for looking and all comments welcome! Here are my other space related builds: https://photos.app.goo.gl/DLrnifbiBdBnwxfF7 Cheers
-
I don't know anything about ships. I just built one
- 10 replies
-
- 24
-
-
-
-


.thumb.jpg.d3635a7ef6507d35f372dd09671fe96f.jpg)

.thumb.jpg.ad2b820bfdebfdb8541e9255a05f38c7.jpg)