Search the Community
Showing results for tags 'Brewster Buffalo'.
Found 22 results
-
 Hi comrades! This is my build of Tamiya Buffalo. Old kit, relatively simple. I will made my life more interesting by scratch detailing of the "empty" areas (wheels-motor compartment, cockpit, main u/c legs) and riveting. I'll use some aftermarket details and decals. The painting guide is for general idea only - my project is of different prototype (but the same unit/section). Also, to make the things even more interesting - in parallel I'll build the Classic Airframes counterpart - Brewster Type 239 of Finnish Air Force (will be in different thread) Thanks for looking!
- 14 replies
-
- 4
-

-
- Brewster Buffalo
- F2a-2
- (and 1 more)
-
I am building a 1/72 Brewster F2A-1 from Hobby 2000 #72064 (ex -Hasegawa), and my chosen scheme is aircraft BuAer 1396. Now after painting I'm uncertain if the wing commanders red fuselage band and the upper wing chevron had black stripes on the edges or not. I haven't found a photo of 1396, but 1389 has the black stripes on the chevron. But it seems that the chevron is lemon yellow, so I don't know if I can draw conclusions based on that. Were there any hard and fast rules concerning the painting of those black / white stripes? Also, about the propeller, should the front be in natural metal /painted aluminium with three coloured tips? There seems to be two versions when it comes to the backside colour, some have it entirely black, some 2/3 black. And what about the red yellow and navy tips, were they also on the black backside. I think I have seen a photo (not F2A) of a pre-war USN aircraft, and it had a black front side, the tips were not yellow, but red, yellow and navy. And to complicate things, the same 1389 photo shows the backside of the propeller which seems to be black, with single colour (yellow) tips, so the presumably the front side should have yellow tips too. And there's one thing too, Special Hobby's instructions for their 1/32 F2A-1 BuAer 1396 has 2/3 of the prop backside in maroon, not black. Couldn't find any information if maroon was used for that, but apparently it was used for something in the USN, as later it was incorporated into ANA colours as ANA 510.
-
Hello Dear Friends, An outstanding classic from Tamiya. In despite of its rise panels, the kit shine by its own lights. What an iconic and infamous aircraft is the Buffalo! The Finns loved it, but it took a heavy toll during the early days of the war on the South Pacific. I read that the first tool of this kit dated from 1974... it's even older than me! (1977) Completely built OOB, only "add" were the rivets (a video from the Finland Air Museum helped me to look the fuselage and wings rivets). The Colours. Oh, to make short a long story about the colors of the RAF’s Brewster Buffalos 339E: originally painted in the US with colors close to the official ones used by the RAF. Some agreement about the upper cammo colours, with slight variations from the official ones. But things get hairy on the undersurfaces (no pun intended!), and I preferred to follow Nick Millman’s @Nick Millman opinion regarding a more “Duck Egg Blue” starboard color rather than the usual “Sky”. The latter was used for the tip of the propeller hub and the band located aft of the cockpit. Sky and Black were the only colors added by the RAF. This particular aircraft (W8138) was flown by pilot Noel C. Sharp, 488 Sq. RNZAF 🇳🇿 Kallang, Singapore, during early 1942. Sharp scored three kills flying this Buffalo (Ki-27, A6M, Ki-48). The aircraft was fitted with an automotive style rear view mirror. It also carried a four foot long Yellow and Green leaping dragon painted on the port fuselage ahead of the cockpit. All the best from Santiago, Chile. Cris.
- 21 replies
-
- 83
-
-

-

-

-

-
- Brewster Buffalo
- Buffalo
- (and 1 more)
-
Hello everyone! My first post on the site is the little Brewster Buffalo from Aoshima in the RAF temperate land scheme. I believe this kit is from sometime in the '70s, and I purchased it for around $5 from an antiques store. I built this the summer before last, so it's neither my earliest nor most recent build but as good a build as any to start with. The plastic felt very thin and flimsy from what I remember in building this, but I think the end result came out decently. I like to build models out of the box without any aftermarket details. This can lead to additional challenges in fitting pieces (or in worst case scenarios, low quality decals that disintegrate on contact), but I don't recall any major problems with this one. This was also before I started adding any weathering details to my models--it's only quite recently that I've begun to attempt this. This was painted with AK Real Colors' line of paints for the camo and Tamiya acrylics for the smaller details. Anyways, here are a few pictures. Again, this was from some time ago now so I wasn't taking as much care in getting multiple angles or setting up the shot as I have been recently (notice the rear wheel falling into the crack between planks on the table in the last photo...). More to come soon (and I may dig out some very early builds to show where I started). Any suggestions for improvement or feedback is welcome.
-
After losing a bit of mojo in the early part of the year, I was cajoled encouraged into an informal group build with @Dunny and @AliGauld with the humble Brewster Buffalo as its subject. It served its purpose and I ended up thoroughly enjoying it, despite being quite rusty and making some very basic errors. Nonetheless, I was quite happy with the result. I actually finished it several weeks ago but just now got around to taking some glamour shots. The WIP is linked below. The short version is that this is the 1/48 Tamiya kit and I built it right out of the box with zero additional enhancement. I wanted to build a Singapore defender and settled on RAAF 453 Squadron's AN204 as my subject. P/O Robert William Drury scrambled in AN204 on 22 December along with 11 other Buffaloes to intercept a force of 15 Zeros escorting an attacking force of Japanese bombers flying towards Kuala Lumpur from the north. During the widespread dogfight Drury's aircraft was badly damaged and he crash landed back at Kuala Lumpur sustaining serious injuries. He died later that evening. I was unable to find the airframe code letter for Drury's aircraft so I went for D as its his initial. I mixed the colours; my versions represent the equivalent US colours to the RAF standard (this US-built airframe was donated by the RAF to the RAAF for the defence of Singapore) and they look reasonable to my eye. We can never really know, can we? I painted all of the markings except for the roundels and one fin flash (the other was lost to a masking tape mishap). Anyway, the who story in all its detail is here.. ...and the photos here. Cheers.
- 15 replies
-
- 57
-
-
-
- 1/48 Tamiya
- Brewster Buffalo
- (and 1 more)
-
 I have seen online photos of the #9132 that have two canopy sets, and others that have only one set. Both have the same number 9132. On Hannant's, it says x 1, has somebody ordered one of those in recent times, and if so, does it contain only one canopy? It's a bit strange that the sets with only one canopy cost as much as those that have two. Concerning those online photos, the one with two sets seem to be newer, as the paper is still yellow, another photo with just one has a really faded label paper.
 -
 Coincidence is a thing, is it not? After months of absent modelling mojo two things happened within the space of a few hours; I put away the Vought A-7 Corsair that had been sitting on my bench untouched for months, and I received a message from @Dunny wondering if all was well. Aside from the inherent kindness in the query, his message included an implied if not explicit gentle nudge towards the bench. Coincidently, we were both looking at the fugly Brewster Buffalo as a potential subject and an informal two-man group build was born. Dunny's thread has the kit pics and requisite preliminary info so I'll plow directly into my version lest my mojo wane. My topic for this two-man GB is a Buffalo belonging to 453 Squadron, RAAF based in Singapore during late December 1941 or early January 1942. I have not yet decided which one. I am using the Tamiya 1/48 scale kit, same as Dunny. As a mojo rebuilding project I did not intend to spend much time on anything really, just get on with it and make a decent, if not good model. The cockpit was first and after an hour or so I had this. The cockpit glass won't be open - the kit does not offer that option - so this will be more than adequate for my purposes. Next I glued the major parts together; some seam cleanup required... The key is momentum so I didn't care too much and just let the glue cure, clean up will come later. There was a faux pas that did require some extra work on the engine cowling. Overzealous sanding in an attempt to make the cowling join better made it much worse... A bit more work to do there but nothing serious. That's it for now. Next I will clean up the seams, complete the major assembly and prep for paint. Cheers.
- 82 replies
-
- 22
-
-
- Tamiya 1/48
- Brewster Buffalo
- (and 1 more)
-
Hello everyone … I started this build 11+ months ago for the Classic Matchbox group build. Sadly life stepped in the way more than once this year so Im just finishing it up now. It is of course the classic Matchbox kit built to represent a Dutch Buffalo flying in the Netherlands East Indie’s early in WW2. Please feel free to comment or ask questions. I have added a link to the build thread in case you may be interested. https://www.britmodeller.com/forums/index.php?/topic/235108245-well-hello-its-a-buffalo/ Dennis
- 3 replies
-
- 22
-
-
- 1/72 Matchbox kit
- Brewster Buffalo
- (and 1 more)
-
A companion for my Dutch Martin bomber. Build thread here:
-
I have decided to end the year with this kit. I had started it at the same time as the B-10, but the bomber took so much work that I set the fighter aside. I have begun to modify a Pavla interior kit to fit this model. I have got some detail parts to go with it, wheels, the correct tail cone and a Quick Boost engine. It will be done in the same Dutch camo as the B-10. The Glen Martin will have a little friend! Maybe this will keep me busy until the group builds begin.
-
 This is part of a group build. I wanted to build my 1/48 Tamiya but I was short on time and had to choose between the Aoshima or Matchbox kits in my stash and chose Matchbox. Many years back I saw Jagan Pillarisetti's research where he traced flight logs to discover that Indian pilots flew a couple of Buffalos that at one time belonged to 67 sqdn and were flown to India as Singapore and Burma fell. These were acquired and flown by No.22 AACU (RAF/IAF composite unit that was later IAF). This is one of the 2 aircraft that the Indian pilots of No.22 AACU flew based on Jagan's research - W8245. The build is entirely OOB except for the decals. For 1/72 scale I use my hair for antenna wire as I have done here as well. Paints, wash, gloss and dull coats are all Tamiya.
 -
The old Matchbox model, which like most of their models, represents relaxation for work. Although my box is from 1979, the decals were top notch. I am satisfied with what has been achieved, the colors are Model Master and Humbrol. I also plan on a Buffalo with Finnish markings, just a Hasegawa model. Here's the picture.
- 11 replies
-
- 42
-
-
- Brewster Buffalo
- Buffalo
- (and 1 more)
-
Hi comrades! Here my take on Classic Airframes kit. The kit was great, I liked it more than Tamiya (built simultaneously - see "family photos" and built/RFI thread somewhere here. The only thing I regret-is the leading edge lights - they are to close to/part of wheel wells, not to my recent skills to insert the clear plastic here 😰. Otherwise-I'm happy with the result. The build is here: Thanks for looking!
- 12 replies
-
- 30
-
-
-
- Brewster Model 239
- Brewster Buffalo
- (and 1 more)
-
Hi comrades! My next build is two Brewster Buffalos. In this thread it will be Finnish one. Famous "white seven" of the commander of 1/LeLV 24 in winter camouflage. Classic Airframe's kit is much more detailed than the old Tamiya's kit. I'll anyway add some scratch details to the cockpit and wheels-engine compartment. Model will be riveted. Only aftermarket is Montex Masks. Thanks for looking
- 24 replies
-
- 7
-
-
- Brewster Buffalo
- Buffalo
- (and 1 more)
-
Hi comrades! Here is my yellow wing Buffalo. The build is here Main improvements: Scratch built half of cockpit floor, main undercarriage and aft-engine structure and wiring. Rivets. Some wiring on undercarriage legs and cockpit. Used aftermarket: Eduard's brass and canopy masks. Yellow-wings and Starfighter decals. Thanks to all the help I received for my questions! Hope, You enjoy Thanks for looking
- 7 replies
-
- 23
-
-
- F2a-2
- Brewster Buffalo
- (and 1 more)
-
Hi comrades! My build of Classic Airframes kit is approaching the painting stage And now, my question is: how the prop was painted? In different references (mainly profiles, so I'm not really sure about them) the prop is painted different: solid black, black with thin white line, red and white, blue with white line... Which one is true for start of 1943 when BW-393 had temporary winter camouflage? Thanks a lot for help!
-
Hi comrades! I am build now late variant (winter of 1943) and Classic Airframes instruction tells that on the overhauled Buffaloes cockpits were painted in "light grey" color instead of original natural aluminum and black. Is it true, and which "light grey" is proper? Thanks in advance
-
Or at least his plane. Bought this a while ago: It contains Hasegawa plastic, canopy masks and decals for Finland’s two leading aces: I will be doing the plane of Hans Wind, partly because it has a neat wintry paintjob and partly because I will not need a cheater’s note every time I try to spell his name and partly because I already have a unopened box containing Juutilainen’s Bf109. Here are some sprue shots. Two of these - notice the strategically placed sink mark on the tyre (not the only example): Hopefully I’m painting the right prop blades. I had some yellow left in the airbrush so I tried out how it will look: Vallejo yellow has the coverage and staying power of Midsummer snow. I have started to prepare mentally for the three or four dozen layers to come. Straight out of the box and, except for the yellow and the sink marks, a fun and easy build to compensate for the rivet counting (or rib counting rather) in the other build. Started with the office. I read that they were initially aluminium and some or all were later overpainted grey. No idea how Wind’s machine looked in the winter of ’43 so I made it an indeterminate alu-grey colour. It is much lighter than it appears here. Wonder if that armour plate should really be so shiny? And finnaly, decals by Cartograf, looking fine to me. I already used the IP:
-

Airfix Brewster Buffalo, 453 Sq.
John Masters posted a topic in Royal Air Force Centenary Groupbuild
Now that the thoroughly enjoyable Hawker GB is in the rear view mirror, I can clean off the bench and introduce you all to this barrel of fun. An OOB Airfix Buffalo, 453 Sq., RAAF Sembawang Singapore, December 1941...I will be using the kit decals for this one. It's too windy to prime tonight so I will have a breather and start her up tomorrow. Happy Easter folks! --John -
Here's the latest from the bench...Yes...it's like a little factory here on Paros! I present one of the Hasagawa Double Kit Brewster Buffalos B-239 flown by Sgt. Nils Katajainen, LeLv 24, March 1942, aka, 'Orange 1'. This was nice kit and all the parts fit together very well, including the cockpit floor! I had fun with this one (as usual) and it served as a good learning platform for not only my airbrushing but also chipping fluid. A quick rundown on that--after priming and building of the fuselage/wings, I masked off the sides with sticky tac and gave it a spray of Vallejo USAAF Grey for the undersides. Then the top was then spread with Vallejo White. I let that dry and then applied the chipping media to the port side of the aircraft for the distinctive 'mottled' look using a toothpick. After that was dried, I masked more and prayed some black spots. Dry, then masked again and sprayed the green. I used Vallejo Olive Green. These are all 'Vallejo Air', btw. When everything had dried, I gently, gently used a stiff hairy brush to remove the chipping media. I was very happy with the results! I masked the 3 canopy pieces, sprayed with grey primer and then dry-brushed a bit of aluminum to give it some sheen. Then I masked off the whole the craft except what would be yellow and sprayed another light white layer...dried, then sprayed the Vallejo Air Yellow. Ok...what I have learned -- it is best to get the yellow bits sprayed first before anything else. Just less problematic and less masking in the end. Airbrushing can be a steep learning curve and I found I had to do fair amount of touching up when I was finished. The decals went on well, but they took a long time to disengage from the paper. I mean, enough time to go make a cup of coffee and feed the cats. I found the Finnish roundels a bit translucent but after weathering, it isn't noticeable. The decals dried and after a quick spray with Humbrol Clear Matte I weathered with some Flory mixed with white and grime for a light dust tone. I didn't like that so much so I washed as much off as I could and then applied some oil pin-wash which I liked much better. I think thats it. I will see you all in the Britmodeller 10th GB! --John
- 9 replies
-
- 26
-
-
Hi A pair of two (also) very old models (1/72): Matchbox Lysander Mk I and Airfix Brewster 239 Buffalo, both in Finish markings from 1942-3. Lysander of TLeLv16 LeR1 (whatever it means), Buffalo of Finish WWII ace - E.Luukkanen (54 victories), HLeLv 24. Both from very archive shelf - I made Lysander in 1977 (I know it almost exactly since from 1978 to 1992 I made all together only six models) and Buffalo was done even earlier (1975?) originaly in RAF Airfix in-box markings from Singapore, than it was reconstructed into Finish about 1993-4. In 1977 I was considering this Lysender together with posted recently Dinah as my best models so far .... In this time I belived that Finish green should be a fresh light green colour. It has changed some years ago when I visited Helsinki museum of aviation and since then I know that it should be light olive green, sorry for this mistake. Regards Jerzy-Wojtek https://www.flickr.com/photos/152188754@N05/35701904890/in/dateposted-public/
- 18 replies
-
- 17
-
-
- Westland Lysander
- Finland
- (and 1 more)
-
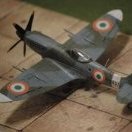
Hello, I'm presenting my Brewster Buffalo in Dutch markings (Netherlands East Indies Army Air Corps, Batavia, Java Island, February 1942). I used old Tamiya kit, rescribing all the raised panel lines. I also used Eduard Zoom PE set and Montex canopy masks. The kit was painted using MrColor and Tamiya acrylics. This was my fastest model build ever - it took only two weeks, with majority of work done during weekends Hope you enjoy!