

Tiger331
-
Posts
2,118 -
Joined
-
Last visited
-
Days Won
1
3 Followers


About Tiger331

- Birthday 11/01/1960
Recent Profile Visitors
12,107 profile views


Tiger331's Achievements
")
Very Obsessed Member (5/9)
3.1k
Reputation
-

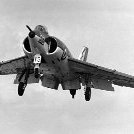
1/48 - Hawker Siddeley Buccaneer by Trumpeter - S.2D released
Tiger331 replied to Homebee's topic in The Rumourmonger
Not a bad attempt from what I can see. Some nice design features including the folding nose and what looks like a slightly more detailed cockpit out of the box, but I am not sure about the shape of those intakes and the cockpit canopy. Its going for a good price at my LMS but given that I managed to get several od the Airfix kits at less than 30 Euros each I will give it a miss (though I may be interested in they bring out a SAAF variant).- 60 replies
-
- 1
-

-
- Buccaneer
- Hawker Siddeley
- (and 1 more)
-
Getting closer to the 'ready to paint' stage. I have now completed the retracted undercarriage, which was not too difficult if taken slowly. Fitting the main undercarriage doors is helped considerably by the Airfix approach to the kit design. The Jaguar at rest often had the main undercarriage doors closed to help with the control of Foreign Object Damage (FOD) etc so Airfix provide both options with one-piece main undercarriage doors (Parts D17/18) in lieu of the open doors (Parts D34/35 & D39/40). The former parts fit like a glove. The smaller, rear, sections (Part Nos.D19/20) are designed to be open so they will need to be modified with the removal of the locating arms and some careful trimming. The rear section of the forward undercarriage (Part D42) is also a trouble-free fit although I would recommend filling the nose undercarriage bay with a small amount of packing foam to ensure a flush fit. The forward section (Parts D1 & D36) both need some trimming since they are also designed to fitted in the deployed position. A small section of the top part of D1 and part of the 'T' section on Part D36 need to be trimmed back to fit in the respective apertures. Once again, the use of some foam packing will ensure these also fit flush. I will now turn my attention to finishing off the ejection seat and seated pilot before fitting the canopy in preparation for the main painting stage.
-
Rob, Thanks for the comments and reference photos......................though I am always saddened to see aircraft from 'my' old Wing at Coltishall in this condition. I have filled in the apertures on the undersides to reflect the presence of those slat actuator covers. One trick I used on one of my previous builds was to create a template to help with the alignment of the ventral strakes. Airfix provide a useful drawing in the kit instructions, which I reduced to the right size to fit between the exhaust nozzle openings. This certainly helps to align these fuselage parts.
-
While doing some research last evening, I discovered that the slats on the Jaguar actually sit flush with the upper wing surfaces and do not have a lip. This makes sense as it would induce some significant drag along the leading edge. So, as a result, some corrective work has had to be done today. I taped off the area immediately around the slats to avoid damage to the finely detailed surfaces. Fortunately the slats on the real thing are one-piece so there were no panels etc to worry about sanding off during these corrective measures. Some gentle sanding, with regular checks on progress, have produced the desired result.
-
A bit more progress over the last couple of days. I have managed to complete the rest of the flying control surfaces, including the leading edge slats. The work on all of these parts was easier than I imagined and as long as one works slowly and steadily, with lots of test fitting along the way, should make for a very presentable finish. I've also dealt with another of the rare shortcomings with this kit; the prominent lens that sits behind the LRMTS windows, using a spare piece of sprue and a 3mm clear lens from little-cars.com.
-
Someone who works at the Army Museum of Aviation has already mentioned this venue (and appears to have very kindly offered local transport too !). It is not particularly big but it holds some very interesting exhibits, most of which are presented in a very novel way and are also very accessible, for photography etc. I would definitely pencil this one in on your list. I also wholeheartedly agree with the comments about Cosford. I visited the museum last November after a 10-year absence and could not believe how much it had grown. Well worth a visit, even if it is 3+ hours from your accommodation. HTH
-
Started working on the flying control surfaces this weekend. I had a spare set of Kittyhawk flying control surfaces that I was originally looking to use as I had anticipated that the Airfix examples may be difficult to adapt. As it happened, adjusting the Airfix examples proved to be much easier than I originally thought, and as long as one applies the 'test fit regularly' ethos, the parts can end up fitting very well. The guide vanes on the inner surfaces of the flap housings obviously need to be removed, taking care not to sand too heavily since the plastic is already quite thin. The guide vanes can then be removed very easily from the inner and outer flaps with a sharp knife. I then taped the flaps immediately behind what was left of the flap actuator vanes to help protect the exposed surfaces of the parts and provide a guide for subsequent sanding. I regularly presented the flaps up to the main wing to make sure that not too much of the plastic had been sanded away. I have also remodeled the NACA intake on the upper fuselage spine, hollowing it out and using a piece of plasticard to replicate the deeper intake surfaces.
-
Greetings from Estonia !. Great model................looking forward to getting one of these. Slava Ukrainia !
-
A bit more progress on the Jaguar. I've managed to fit the air brakes, after a fair degree of fettling. Since these parts are designed to be fitted in the open position, they are a little smaller than the apertures so I have had to use some filler to close up the gap and will need to re-scribe accordingly. I have also taken some inspiration from Spencer Pollard's excellent book on building the Airfix Jaguar and drilled out the NACA fairing on the upper fuselage spine; one of the very few shortcomings with this kit is the very shallow representation of this intake on the original kit part (Part E37). By the way, if you dry fit this part, take care not to drop it through the aperture; It will be difficult to extract since this section of the fuselage is closed up at either end with the bulkheads created when fitting the internal undercarriage/air brake sections. I have also used elements of the excellent Quickboost Air Scoops and Fuel Dumpers correction set (QB49-170), which includes the prominent fairings that feature on the lower fuselage surfaces adjacent to the air brakes.
-
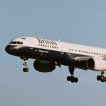
Another great set of photos. I don't ever recall travelling as far as Singapore in either the Britannia or Comet but your photos did bring back memories of trips from Cyprus, Gibraltar and Libya in these classic aircraft. Our initial trip to Singapore was on a charted BCal Boeing 707 from Gatwick. We ended up being delayed for almost 18 hours at the start of the journey as we observed, from the terminal, the maintenance team removing the engine panels to three of the four engines in succession as they sought to find out what the issue was. As you can imagine there were not too many passengers entirely happy with the subsequent 18-hour trip to Paya Lebar but we eventually made it in one piece. I was much happier taking the VC-10 from Changi via Gan and Muharraq back to Brize after that. Thanks for sharing
-
Great photos, most of which appear to pre-date my family's arrival in Singapore by about 9 years. That evocative sky in the background of the DH Comet shot brought back memories of the sudden arrival of a monsoon 'shower', which could often disappear almost as soon as it arrived, leaving more sunny spells. Happy Days between 1969-76
-
OK Folks, My second Arma Hobby 1:48 scale Hawker Hurricane is now complete. Thanks to all those that followed the build over on my WIP thread. As I mentioned, BM969 is finished in the colours and markings of No.3 Photographic Reconnaissance Unit while based at Dum Dum, Bengal, India in the second half of 1942. The aircraft sported a very dark overall Blue colour scheme, sometimes referred to as 'Bosun's Blue' which, I believe, is not quite correct. The PRU evidently developed their own version following trials at the medium to high levels at which this unarmed aircraft was likely to operate. I used very little aftermarket with this project since the original plastic parts are so good - especially the cockpit. The exhausts and seat are 3-D printed resin items supplied by Arma Hobby with the wheels coming from the Eduard BRASSIN range. The majority of paints used were from AMMO MiGs ATOM Colour and Citadel colour range. The diorama base is an old True Details/Squadron product, which has been modified and was finished with Tamiya Diorama texture paint and weathering master palettes, AK Interactive paints, VMS Spot-on pigments and Flory washes. This has been another very enjoyable build from Arma Hobby; I cannot praise this kit highly enough. It took me just over three months, in between business trips and holidays, which is a record for me. Thanks for looking
-
- 16
-
-

-
So, I have now started this project over the long weekend. First job was to assemble the main wheel wells; despite the fact they will not now be seen, they provide the blanking plates for the intakes and provide rigidity. One of the other early projects is to cut out the backing plates in the main fuselage parts for the air brakes and replace them with plasticard and to thin down the inside of the air brakes so they sit flush with the fuselage when closed up.
-
Now that the Arma Hobby Hawker Hurricane PR.Mk.II project is complete, its time to start my 'Quarter 2' project. Another recce subject from more recent times - Airfix 1:48 scale SEPECAT Jaguar GR.1A in winter camouflage from 41 Sqn at RAF Coltishall for our SIG display at SMW'26. I have decided to do it in 'flying mode' ,since this will ease my transport issues come November, which introduces some new challenges. I imagine almost everyone will now know that the excellent Airfix kit is designed to be built with 'everything out/down' including the flying control surfaces and air brakes, so some fairly complex modifications will be required. I will readily admit to being quite nervous cutting up such a beautiful kit. I also have a bit of an aftermarket fetish for certain aircraft types so this will incorporate quite a few of the sets that have recently been released to accompany the newer Airfix kit. So, here are the obligatory photos to kick off this project. Some notes on the aftermarket. I have yet to determine if I will use the excellent Inside the Armour exhaust nozzles; much will depend on where the support pole for the model ends up going. If it is going to protrude through the exhaust nozzles, I may well revert to using the kit items. The Art Scale Mk.9B/3 seat is the version without straps since I will be using a resin pilot figure (cast by one of our SIG Members) for this build. The Little Cars clear lens is to replicate the one that sits within the nose (a marked omission from the kit).
-
Almost done................!. I'm three days late (I had aimed to get this done by 31 March) but hopefully my next set of photos will be in the RFI Section.
