Rampage55 Posted January 5, 2009 Posted January 5, 2009 (edited) This is the project I settled upon for this GB. 1/48 Hobby Boss FJ-4 Fury of VMF-451 while they were stationed at Astugi, Japan in 1955. Given how slowly I build I needed to select a fairly simple project that I'll be able to finish before the deadline....hopefully, if not I have a 1/48 Hasegawa A-4M waiting in the wings if need be. This is the scheme from the EagleStrike sheet I'm planning to do. I will also be adding the AMS detail set to this build. A little dry fitting. To begin with there is some plastic that needs to be removed in order to fit the resin replacement parts. A little more plastic needs to be trimmed but not a bad fit The intake halves have been glued together along with the main landing gear bay. Thanks for looking, Mark Edited January 5, 2009 by Rampage55
darson Posted January 5, 2009 Posted January 5, 2009 Looks just great so far Mark, I'll certainly be watching this one with interest By the way what resin set(s) are you using with your Fury, they look awesome.
Rampage55 Posted January 6, 2009 Author Posted January 6, 2009 The resin set is made by Harold Offield. Here is a link to his site AMS Resin. Harold does some wonderful work and is a pleasure to deal with. Everything you see in the photo is included in the set. I just finished painting the cockpit and bang seat, I'll post some pics when I get a chance. The moment of truth will come once I try to fit the nose gear bay, get the intake and trunking lined up, fit the cockpit, all sandwiched in the nose section and get the fuselage halves together. If I can get past that stage without too much difficulty I should be good to go. Thanks, Mark
kstater94 Posted January 6, 2009 Posted January 6, 2009 Looking good Mark! Man, I just may have to pick up one of these Furys after seeing yours! Cheers! John
Stebos Posted January 6, 2009 Posted January 6, 2009 Never come across these before... that's a really good looking resin set there. Attractive scheme too.
mikeew Posted January 7, 2009 Posted January 7, 2009 Looking good so far Mark . Just a heads up for you,the scheme you have chosen on the decal sheet is for an FJ-4B not the FJ-4 you are building. I built the same kit last year, Build thread: http://www.britmodeller.com/forums/index.p...=15099&st=0 A couple of areas that need attention on differences between the FJ-4 and FJ-4B are the lower rear fuselage airbrake needs removing for a FJ-4, these were only on FJ-4B and also the inner most pylons weren't fitted to the FJ-4 so the holes will need filling. Also the FJ-4 wasn't able to carry Bullpup missiles despite them being included in the kit. This is all because HobbyBoss have issued the FJ-4 and the later FJ-4B and have used common moulds. More info is in my build thread. Hope this helsp and I look forward to seeing it finished.
bexwh773 Posted January 7, 2009 Posted January 7, 2009 Another nice choice of aircraft that Im looking forwards to Bex
darson Posted January 8, 2009 Posted January 8, 2009 Mark thanks for the heads up on that resin it really looks nice. Given I have one of those Hobbyboss FJ-4s in the stash I might have to invest in one. Cheers
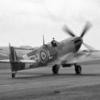
Rampage55 Posted January 8, 2009 Author Posted January 8, 2009 Thanks Mikeew Your Fury build was big inspiration to me. I will be following your lead on this build particularly the landing gear, You did a great job getting that sorted out. Looking good so far Mark Just a heads up for you,the scheme you have chosen on the decal sheet is for an FJ-4B not the FJ-4 you are building. I was wondering if anyone would pick up on that. I thought the same thing until I did a little research and I now think that the Eagle Strike sheet has missed labeled this profile as a 4B when I think it should be a FJ-4. Here's why: This is an image of a VMF-451 bird scanned from the Detail and Scale "FJ Fury" by Bert Kinzey and he identifies this as a FJ-4. He also writes that production FJ-4's began delivery in Feb 1955, with most going to the Marines. VMF-451 deployed to Astugi later that same year along with VMF-235. The FJ-4B were not delivered until early 1957. That means there is no way that VMF-451 had 4B's in 1955 as the EagleStrike profile seems to indicate. There is another image in the Squadron "Fury In Action" book that shows this same aircraft from VMF-451 and it is also identified as an FJ-4 It also goes on to say that 9 Navy and 3 Marine squadrons received the FJ-4B by the spring of 1958. The Marines of VMA-223 were the first followed by VMA-212 and 214, all attack squadrons. Which makes sense considering the FJ-4B was optimized for the ground attack roll and makes it even more unlikely that VMF-451 flew the B. Thanks for your input, Mark
Rampage55 Posted January 12, 2009 Author Posted January 12, 2009 Thanks Mish! Here's the painted cockpit. There is a bit of detail painting still to do yet. I decided to attach the intake trunking to the mouth so I could make sure I get a nice clean seam in there. I'm hoping that I will be able to slide the intake assembly into the front between the front wheel bay and the cockpit tub after the fuselage has been joined together. Dry fitting the intake to the fuselage is encouraging, the fit here seems to be fairly decent. My goal for this coming week is get the fuselage all buttoned up and attach the wing assembly. Thanks for looking, Mark
bexwh773 Posted January 12, 2009 Posted January 12, 2009 The dry fit looks promising Mark, but that office looks bloody awesome Bex
Col. Posted January 12, 2009 Posted January 12, 2009 Always liked the Fury and you're doing this one proud Mark. Keep this up and you'll have a cracking replica
Stebos Posted January 12, 2009 Posted January 12, 2009 Really does look quite spiffy. That spindly looking front gear must be taking a fair amount of weight!
Rampage55 Posted March 1, 2009 Author Posted March 1, 2009 Alright gang, I finally have made some progress on my Fury worth posting, not much, but some. I just wanted to make sure you don't think I've gone over board. Imanaged to shoe horn everything into the nose section. all I need to do is add some weight to keep it from being a tail sitter. Dry fitting the fuselage halves once again to make sure everything fits properly and dry fit the completed wing assembly. There is a gap along the wing root that will need some attention. I did struggle a bit with the cockpit fit. When I lined up the rear deck in place the IP and shroud was too low, and when I lined up the IP and shroud in the correct position, the rear deck was too low. So I separated the to pieces and glued them in separately. The rear deck still has a small gap at the rear but this will be covered by the canopy. I lengthened the front gear oleo strut. I also plan on lengthening the mains as well. I intend to use the Grand Phoenix photoetch set I pinched from my GP FJ-4 kit to replace the scissor link on the nose gear I cut off. I hope to get everything buttoned up over the course of this next week. Thanks for looking. Mark
Rampage55 Posted March 3, 2009 Author Posted March 3, 2009 A little progress has been made over the weekend; The fuselage is buttoned up and the wings have been attached. The fit is not too bad, not quite Tamyia, but not bad. I've sanded off the speed brake under the tail that was intended for the FJ-4B. I've also attached the speed brakes on the side. most of the photos I've seen of Furys parked show the speed brakes closed, that saved me having to blank off the fictitious detail HobbyBoss molded inside the brake well in order to pose them open. Well, It's starting to look like a Fury. Mark
Rampage55 Posted March 22, 2009 Author Posted March 22, 2009 Progress on the Fury continues, slowly, but it's getting there. Most of the main construction is complete. I still need to attach the tail cone and burner can. I'm still debating whether to attach the horiz stabs before or after painting and before I can start painting I need to mask and attach the windscreen and canopy. I have most of the gear doors in the closed position as most of my reference photos seem to indicate thats how they were more often than not. I took a little work, but it was not to bad. I have some rescribing to do in that area though. I'm going for the clean look on this one, so no pylons or ordnance. I am going to attach the IFR prob though. There is a small, but prominent vent on the spine just behind the cockpit on the full size FJ-4 that is not depicted on this kit, so I dillled a hole at an angle and inserted some plastic rod cut off at an angle and sanded flush. You can also see the beautiful AMS resin piece for the rear canopy decking dry fit to check alignment of this part. For some reason Hobby boss provides nothing for this area which makes it difficult to get the canopy to sit right in the open position OOB. I also decided to add the approach attitude indicator lights on the lower lip of the intake. I filed out a slot and glued in a clear light from the spare bin and sanded to shape. Before I glued the light on though I drilled three small holes and painted them to represent the indicator lights. I don't think I photographed the IP before I installed it so I thought I would include one now. I used a some Promodeller instrument decals. Some wire for the brake lines. Nose gear assembly complete. I swiped the scissors link from a Grand Phoenix kit and added some small rod for attaching points. I hope to have this one done by the deadline. A few more details and it should be ready for the paint barn. Thanks for looking, Mark
Rampage55 Posted April 19, 2009 Author Posted April 19, 2009 Well gang, I'm on final approach with this project, and It looks as if I just might make it by the deadline. I got on a bit of a roll with this project over Easter weekend and didn't bother to take any photos, sorry. Here is where I'm at with my Fury at the moment. I was very pleased with how the Eagle Strike decals worked with the HobbyBoss kit. They fit well and snuggled down nicely with a bit of MicroSol. I was a bit concerned with how the decals would work around the intake but found they worked great. I hand painted the blue around the lip and into the intake. I debated about whether to paint the intake lip blue like the decal, or red as the Eagle Strike sheet indicates. The black and white photos I have are inconclusive on this detail. Obviously the decision was made to go with the blue. The star and bar decals were a bit tricky to lay down over the cooling scoops on the empanage and the wing fence on top of the wing, but again a couple of applications of MicroSol and they settled down nicely. I have a few more touch ups to do on the wash before I can seal it. Then I can peal off the canopy masks and get that bit sorted. After that, all that is left is a few landing gear doors and it'll be done... Thanks for looking, Mark
marine4 ever Posted April 23, 2009 Posted April 23, 2009 that is a mess! how can you show this swill on here? That look fantastic Mark! great work. I love the weathering and the detail is fabulous! Semper Fi Dan
Rampage55 Posted April 26, 2009 Author Posted April 26, 2009 She's finished!!! ... Snicked this one in just before the deadline. I'll post the rest of the completed images in the completed build thread. Thanks for a fun GB! Mark
Seamus Posted April 26, 2009 Posted April 26, 2009 Lovely job mark, she's a beauty Glad you squeezed her in on time
Rampage55 Posted April 26, 2009 Author Posted April 26, 2009 Thank you sir... And thank you for a fun GB, well done. Mark
Recommended Posts