Search the Community
Showing results for tags 'Star wars'.
-
Here's another spares box build. I knocked this one up on the quiet without an in progress thread, The idea is it's Star Wars ship from the Aratti system (It's a big galaxy they have) used to escort commerce ships. I had a 1/48th Cobra and a Mil Hind in 1/72nd. Other parts came from the bits boxes as and when required. It's an odd looking thing I must admit. The Pilot gets a full on frontal view at least. Guns are under the chin. The tail came from a WW2 German whiff. I wanted a slightly alien design look. I think I got there. The underside, obviously. Engines are two 1/48 Mosquito nacelles. And there he is. I sprayed gloss white on it and did lots of weathering and big paint chips. The round object at the front top is the Nav droid. Slotted in behind the cockpit, like on an X wing. One of the in progress pics that I took. And a pre-primer shot. Pre-primer again. The droid was a large yellow light. The round bits at the engine rears were clothes hanger size rings. There are bits of masking tape on the droid here. And the basic airframe so you can see the main parts. Thanks for looking. Your comments are always welcome. Cheers, Pete
- 6 replies
-
- 14
-

-
- Star wars
- Scratchbuild
- (and 1 more)
-
Trying something a little different, I've had these for at least a year and were one of the main reason I wanted to start having a go at figure painting using decent brushes and acrylic paint to try and do them justice, but I've had so much fun with all the cool 3D print stuff thats available these have kept getting pushed further and further to the back of the list! They are the smallest thing I've done so far, the legion scale seems to be a little weird and hard to nail down from hunting about, but apparently its around 32mm. There are two in the box, one is running with a guy shooting his blaster, and the other is stood still with the rider looking around with blaster drawn. Started by getting them off the sprue (man haven't had to cut sprue in a while! Nice to be back to it!) and then there was just a little seam line clean up mostly on the tauntauns underbelly and arms. IMG_20240602_162540664 by Nick Frost, on Flickr I got the legs and arms on the tauntauns, but left off the top half of the heads and the rolled blankets for ease of painting. With the riders I got the arms on the shooting guy as he's fairly wide open with his pose so no problem for paint, but the other guy holds his blaster across his chest so I left off that arm and both their heads. IMG_20240602_164009889 by Nick Frost, on Flickr Once parts breakdown was sorted I snipped some bits of paper clip then using my pin vice and super glue got them attached to some corks so I can hold them easily while painting. IMG_20240602_173629511 by Nick Frost, on Flickr Then I gave them all a blast of chaos black primer, and used some white lacquer paint through the air brush to bring out the detail and give a slight zenithal start point. IMG_20240606_200337245 by Nick Frost, on Flickr IMG_20240606_201820755 by Nick Frost, on Flickr Thats as far as I've got so far, next up I'll get the brushes out and make a start on the fur, I've got another 3D print coming up at some point that involves a large wolf, so one of these is going to have an arctic wolf fur colouring as practice (so a dark ochre for shadow moving through pale yellow to a pure white highlight in only small areas the most in the light) Thanks for looking, more soon
- 31 replies
-
- 10
-
-
Hi, This is a present for a friend of mine, fan of Star Wars. The AT-ST kit from Bandai was a real pleasure to build. Engineering and fit are perfect. First time experimenting with colour modulation. I kept the weathering to a minimum.
- 10 replies
-
- 21
-
-
Here we go again. Are you sitting comfortably? back in October at the Lincoln model show, I was taking a slow march around the tables in the company of @general melchett. Under one of the tables I spied a Revell Rotodyne box, the reissue one, up for a tenner. I'd wanted one for some time, so... Of course this won't be built as intended. But then you knew that didn't you? In one of the Star Wars films a sort of flying bus lands and out steps Ewan Mc Gregor. Hmmm A couple of years ago at the car boot I picked up a display type pod racer for a quid. Hmmm The disassembled pod racer. I've wanted to use the engines on something since I bought it. But, I thought they may not be space going engines, hence the pod racer use. All I needed was a suitable fuselage... How to disguise the fuselage source? Well, I had this 1/32nd P-38 nose piece.. So I sawed off the Rotodyne nose. A bit. The nose cone was slightly too narrow, so I sanded down the fuselage halves at the front to fit. But it was then under strain. So it also got sawn behind the door and card inserted . Much better. You can see here the start of trial fitting fairings, The main rotor fairing had to go, of course. These two black bits are ex SR-71. This will not be a bus, but a fast planet bound freighter. Sort of a much much faster DAF 7 1/2 tonner. Here I'm starting to fill in the windows. There's a 1mm card backing plate glued inside them. Filler has since been used. The card inserts seen here save filler and mean that when sanded I should get a fairly smooth finish. The rivets are going too! The fuselage half locating pins were hopeless. I've added card tabs like on a vacform for strength. And, just to prove that I do like the Aircraft. This hangs in the manshed. Rescued from a Calendar almost 40 years ago! The original is signed Hardy and dated 1984. A lovely picture IMHO. Obviously more is to come. I hope you were able to follow my ramblings and will return sometime soon. If only to try and make more sense of what I'm trying to do here. Given the weather, there could be an outdoor bar by then. Who ordered the cheeseburgers from the barbie? Comments and a more exotic cheese in the burgers are always welcome. Cheers, Pete
- 33 replies
-
- 23
-
-
- Star wars
- Scratchbuild
- (and 1 more)
-
 Imperial Service Ramp (20023-1/72) 1:72 GreenStrawberry Given that in Star Wars, the Empire’s ships are always getting the worst end of the battle whenever they come up against the Rebels or the Resistance, the ones that return must need regular maintenance, and what better way to reach those high-up locations than to bring in a maintenance gantry or ramp. So much more high-tech than ladders. This set is one such ramp that would sit next to any TIE fighter or other 1:72 Imperial ship, or just in the background of a hangar diorama or vignette. It arrives in a small black-styled box with the usual GS theme in green, red and grey, and inside are two Ziploc bags containing twenty-seven resin parts, and a fret of thick-gauge Photo-Etch (PE) brass that is bagged together with the instructions and a sheet of black paper to separate them. Detail and sharpness of the set is everything we expect from GS, although with typical Star Wars logic there are no stairs to get on and off the gantry, but when has practicality ever been a thing in Star Wars? The PE fret contains just two parts, by far the largest part being the walkway and railings, which are folded into a C-profile, and has the small PE panel and ten ancillary boxes applied to the forward railings, but they could be arranged however you like. The two large double-pillar base stanchions are mated to a pair of angular supports via some recesses in their undersides, adding a stabilising bar between the tops and the outer pillars. The walkway assembly is then placed onto the two supports, lining up the holes and locking them in place with a single pillar at each end that is topped with additional tapering “feet” to complete the model. Conclusion Detail is excellent, construction simple, and the added height and detail it will bring to any diorama will pay dividends in terms of visual interest. Include some suitable 1:72 Star Wars figures on or around it, and you’ll have a winner. Chicken dinner optional. Very highly recommended. Review sample courtesy of
 -
 Hi all. I've been stuck with Wing B. I know what I want to achieve with the exterior paint but I'm not quite sure how to do it or the result. So since the Bandai kits yard is not enough to take things lightly and push forward to see what comes out I have decided to leave it until my ideas are clarified and in the meantime undertake a much simpler kit, in all aspects. And it was this little one's turn. Very good kit from the Fine Molds brand, with good details and equally fine and negative panel lines representing this small combat ship that appeared in the film “The Phantom Menace”, or Episode I of Star Wars, being piloted in it by young Anakin Skywalker. Ignoring the staple with the pieces of the exhibition platform, the kit consists of three small staples: two grey and one yellow. The cabin is quite well reproduced, as well as the figures that correspond to an adult pilot and the little Anakin, who is a due to his age and height is represented somewhat smaller, which will make it even more difficult to paint a figure that is to scale. 1/72. I don't know about you, but what has always caught my attention about the ships of the planet Naboo has always been the stylized shape and the pointed shapes that they have. Both this ship and Queen Amidala's cruiser as some other I've seen. So before undertaking the construction, starting with the cabin, I have decided to prepare this aspect of the ship. Both the fuselage and the engines have a very pointed finish, however the corresponding parts are not sufficiently represented. With 600 grit sandpaper and later 1200 grit I have refined the corresponding pieces. The cones on the front of the motors have also received the same job with sandpaper. And the area where the previous cones fit I have also worked. And this is all for now. Andrés S.
- 33 replies
-
- 8
-
-
- STAR WARS
- The Fhantom Menace
- (and 1 more)
-
For once I didn't do a WIP this time as I wasn't too sure that it would work. But it did in the end and here's the result. I was inspired by a Star wars transporter called a LAAT that I saw when I visited @shortCummins earlier this month. It's from a Star Wars computer game I think. So this is similar but, as usual, was made from the bits boxes in the manshed. To begin, take three scrap 1/48th Hueys and dismantle. Attack with a razor saw, join two together and turn upside down. Add parts and half a tube of Humbrol filler, lots of plastic card and various bits box parts. prime in grey and... Chunks of foam obscure the cabin here, but this shows the general idea I think. The roof with lots of technical stuff. The ex tank hatch at the front is for the flight crew to enter. Unmasked, painted, weathered and decaled, I ended up with this. Not well focused, but the dirt shows I hope. BTW, the cabin footsteps were Ju88 Dive brakes. I case you wondered. Decals are from the spares box. The roundel is one over another. I think the underslung tank is ex Kamov. The side pods were Bf 110 Fuselages. One Matchbox and one Airfix. Slightly different but close enough. That's an ex 1/72nd JU 188 cockpit in the middle there. Now with a 1/48th rear gunner in it. He fits nicely too. The guns can just be seen poking out from underneath. Because this is upside down to the original, cockpit entry is now via ladder and through the hatch on top. The landing gear? Ex FROG Mk1 Blenheim. Kindly donated by @keith in the uk The rear gunner gets a ladder too.It folds in half in case of tail down landings! The grubby top, in focus. That's an ex 1/32nd Puma Hydraulic reservoir in the foreground. Because the cockpit section is now upside down, These were the Huey chin windows. will hold around ten seated figures Slightly insectoid nose view, to my eye anyway. The greeblies extend to the underside too. The feet could really have done with being on outriggers for better stability. The rear gunners turret can be seen here. Nice and comfy in there. No doors but other Star Wars transports don't have them either. Force fields perhaps? It seats about ten figures. The anti slip flooring is worn Micro mesh! The solar panels are ex TIE Fighter. If they can shift one into light speed then they should easily power this beastie. And there you are. I hope it meets with approval. I may have overdone the weathering. But I was enjoying myself! I'm starting to run out of wrecks to use on these things. Despite combing the bay for scrap items. If you have anything suitable & unwanted on the shelf of doom I'd be grateful for donations. Helicopters especially. As always, Comments, complaints and adoration are always welcome. Thanks for looking, Pete
- 10 replies
-
- 15
-
-
The Mandalorian N-1 Starfighter (06787) 1:24 Carrera Revell We’ve all heard of Star Wars, the three trilogies, the spin-off films and now under the auspices of the massive Disney corporation, we are being treated to some television series on their streaming service Disney+ that are bringing back some of the magic that perhaps had been lost, or at least dulled over the years under the helmsmanship of J J Abrams. The Mandalorian series reached our screens in 2019, right around the time the Covid-19 pandemic first hit, and it has helped keep us Star Wars fans entertained for three seasons now, with a fourth in the offing for 2024, hopefully. It has brought us new characters into the much-loved Star Wars universe such as the Mandalorian, Din Djarin himself, Grogu the baby Yoda, and it has reintroduced the previously reviled but nevertheless popular Boba Fett, who seems to have mellowed and become more well-rounded during his short time being digested in the Sarlacc Pit, and has now got his own series on the strength of his cameo performance in season 2, as has former Padawan of pre-lava bath Anakin Skywalker, Ahsoka. Even Luke Skywalker has made a brief appearance at the end of season 2, heavily de-aged using CGI and an actor with a similar physique to his younger self to fit in with the show’s timeline of being set just after Return of the Jedi. At the end of Season 2, the original ship that carried Din Djarin around the universe, the Razor Crest, was obliterated by Mof Gideon’s cruiser, in a scene that had my jaw genuinely dropping, mostly with sadness. Mando made it off the planet and back to Tatooine with some help from Boba Fett where he met up again with Peli Motto, who with some help from her fold-up droids and those light-fingered Jawas, fixed them up with a heavily modified Naboo N-1 starfighter that had a special feature that gives it a remarkable turn of speed when activated. As Din isn’t all that fond of droids, the Astromech socket was removed to make space for little Grogu to sit while they travel, with a clear dome keeping the cold of space at bay, whilst giving him a bird’s eye view of the space outside the canopy. The Kit This is a new tooling from Carrera Revell, who hold the license to produce kits of the Star Wars franchise outside the Far East, although the manufacturer in the Far East seems to have become rather quite of late. The kit arrives in a large end-opening box with a painting of the N-1 in combat over some Star Wars landscape, and inside the box are eight sprues of grey styrene, a sprue of clear parts, decal sheet, and the instructions, which are printed in colour on matt finished paper. Detail is good, as this is a large kit, and much of it is moulded into the seventy-seven parts inside the box, including crew figures of the Mandolorian and Grogu (baby Yoda). A stand is also provided in crystal clear styrene, although you may wish to decorate the base with some kind of landscaping material. Construction begins by making up two engine structures from halves, adding a compressor face to the front, and a toroidal bulkhead to the rear, plus inserting L-shaped hoses joining the engine to the bulkhead, with plenty of detail painting to be done in between stages. Two detail inserts are fabricated from panels with half of two cylindrical shapes moulded-in, thickened with additional halves and more detail painting to be done. The engines are installed in the tip fairings of the wings after painting the interior, and the detail inserts are applied to the undersides, putting the finished assemblies to one side for a time. Din Djarin is supplied as a seated figure, his body and legs made from front and back halves, adding a two-part head and detail decals to his torso, and deciding whether you wish to pose Grogu in the cockpit on Mando’s knee, or in his observation blister behind. To place him in the cockpit, leave the tab on Mando’s right thigh, mounting the single-part Grogu onto it and applying decals for his eyes and the upper folds of his ears. If you wish to pose Grogu in the blister, cut off the tab and make good the knee before painting and decaling Mando. Din’s arms are separate, and have flight control handgrips moulded-in, with more detail painting and decals applied in various areas on his forearm and shoulder pauldrons, plus two tiny extra decals on his helmet’s ear fairings. The ship’s cabin is moulded into a large insert that also includes detail that will be seen around it, so detail painting is a must before you proceed. The sidewalls are separate, and these too are detailed with decals after painting, as is the rear bulkhead, adding them all to their tabs within the cockpit area once completed. The instrument panel and coaming are moulded as one, applying five decals to the panel and coaming before it and Mando are inserted, gluing some lozenge-shaped cut decals to the soles of his feet, possibly to represent foot pedals – I’m not entirely sure, as it’s not a place I’ve thought to look while watching the show. Mando and the panel are then dropped into position in the cockpit, each with their own location sockets and tabs. The fuselage upper is a large part, and must be partly painted inside before it is utilised, especially around the lips where greeblies and details will be seen. The two upper wings and the engine nacelles are placed into the lower wings by use of several turrets and pins, adding a curved fairing around the roots, which locates on tabs with pins and holes on the underside. The N-1’s skeletal tail fairing is clipped into the upper fuselage on a similar tab and pin, with detail painting shown, and a scrap diagram showing the relationship between the parts. If you plan on inserting Grogu into the viewing blister, he is supplied again and a two-part head and body assembly, using the same decals for the other figure, but as there are two sets, you could simply build both for giggles, or use one in a different situation. He attaches to the floor of his area on two pins, then is inserted with Grogu or a deeper turret without him from the inside of the upper hull, as is the main canopy, which is crystal clear, and locates on a pair of tabs from inside without glue so that it can slide back and forth into position. The cockpit assembly is fitted over it from within, locking the canopy into position, so make sure everything is properly finished before you mate these two assemblies. The N-1 is a cut-down ‘roadster’ of a ship, and has areas without panels covering the equipment within, either for weight-saving or aesthetic purposes, and two of these can be found in the nose just in front of the cockpit, inserting two bays on tabs into the upper hull once detail painting is complete. The two engine nacelles are covered with framework where some panels were removed, allowing the viewer to see the engines within, while some moulded-in details are also painted to give further impression of layered detail. If you have fitted Grogu, his clear blister snaps into position over him and the floor, but if you have decided to put him in the cockpit with Mando, there is a tapered head of an Astromech droid with a couple of decals applied to fill the space. A two-part set of greeblies with a circular ‘air-box’ on top is fitted to a depression in front of the main canopy, wrapping a grille decal around the air-box in two parts, with a little more detail painting pointed out between it and the canopy. The engine nacelles have tapered tips with a long tail, which is made from two halves and is fitted to a tapering cylindrical part, then is in-turn fitted behind the engines, with a short tapering intake with stator blades moulded-into the front. Two auxiliary intakes mounted above and below the main intake are painting black to imply greater depth. Over the nose, a pair of blaster cannons are inserted into troughs in the skin, with a proton torpedo launcher barrel moulded under the nose. Under the tapering tail, a hyperdrive capable engine fairing is built from a two-part tube with fairing, and a set of exhaust petals are detail painted in various shades, painting the skeletal tail fairing at the same time. This ‘stinger’ is further extended by the addition of a beam and framework underneath, plus some silver/black stripe decals. All that is left to build is the stand, which is made from four clear parts, comprising three supports and a raised plate into which they plug, with shaped tips to provide additional stability to the model. Markings The N-1 is a unique creation, and although it was based upon the Naboo Starfighters of the prequel era there is only one decal option suitable, unless you’re doing your own paint scheme. From the box you can build the following: Decals are by Cartograf, which is a guarantee of good registration, sharpness and colour density, with a thin gloss carrier film cut close to the printed areas. Conclusion This builds into a large well-detailed model, and while it won’t match scale with most other Star Wars kits you have, it is easy to build, and should build into a creditable replica of this new ship. Highly recommended. Carrera Revell model kits are available from all good toy and model retailers. For further information visit or
-
I got hold of a Revell Rotodyne for a tenner at the last Lincoln model show. I also had a small display Pod racer with great engines ready and waiting for it. Better start up the Kenwood mixer and see what comes out then,,, The box. I have unused spare parts, Blades, interior, clear bits etc if anyone needs them The result. Remember Tatooine and the moisture farms? Well they will all need supplies, lengths of pipe etc. And they will probably be a long way apart. So you'd want a bit of speed. If you have an old freighter and find some ex Military engines, Wotcha gonna do? Here we are, parked up. Airstairs are down thanks to the ex Sea King sliding door. The hump on the spine is two parts SR-71 and some Milliput worms. Plus lots of rubbing down. There was a big hole there when I cut off the rotor pylon. The bubble on the front is ex 1/32nd P-38 The landing gear is just spares box bits. The gear leg support struts spread the load of those big engines. I've kept the rear clamshell doors for loading and yes, the dome is ex Apache. It's use in this case is unknown, but I like it there. The underside centre seam would not go away, so this ex in flight refueling probe covers it up. Again, useage unknown. Underside of an engine. The latice of thin strips on the wings covers up all those rivets. A sort of exoskeleton. Under the nose. Sensors and a searchlight. BTW, Desert planet/Moon? equals awful paintwork. Hopefully it all makes sense now? It's been a fun and fairly fast build. Your comments etc are always appreciated. The next one is already in progress. Another Star wars scratchbuild! I've got a whole Galaxy to equip you know! Here's a link to the WIP https://www.britmodeller.com/forums/index.php?/topic/235137087-star-wars-fairey/
-
Scaled(83).thumb.jpg.a203e1f9b6a63e284ae39279b774d3f0.jpg) The backstory is Jawas found a crashed post-Order 66 ETA-2 Actis in the sand dunes of Tatooine and sold it to everyone's favourite mechanic in Mos Eisley's Hangar 3-5, to be butchered and upgraded to hyperspace-capable by Peli Motto's pit droids. After stumbling across a beaten up secondhand Jedi Starfighter toy for £3, a basic design was made in Blender with the help of a low resolution 3D scan of the toy from Thingiverse. The blue box poking out at the bottom will be a simple battery box to power a lighting setup, disguised to look 'guts on the outside'. Cut plans were then made from the 3D meshes' UV maps. Here's an example of the UV maps. These are the parts that were cut off from the model using cutting discs, craft knives, saws and grinding bits. The plastic's a strange one; not as hard as Tamiya, but not as soft as some Hasbro products. It turned out it can be cut relatively easily just using a hobby blade (although blood was still drawn). Here's a reference image of what it originally looked like. I decided I didn't want a droid sticking out of the wing, so the panelling was removed to be replaced by styrene sheet, reinforced with a CA/body powder mixture just to give the styrene some sort of backing. The solar panels were deemed to be redundant, so the bottom pair were glued in permanently after holes were cut to match the main wing holes, for visual interest. The battery powered sander with removable velcro discs is a cheap Boots electric toothbrush. I then decided I wanted a hole with a gadget sticking out 🤭. Styrene panels (1mm base panel with 0.5mm detail panels) were made to fill the top wing solar panel cavities, with basic spacers inside to level them up to the wing surfaces and give them a bit of rigidity. A next step was to make some detail parts out of Plastruct, styrene, wire and old electronic device parts. This is how they look when fitted. The tail will have some sort of internal structure to keep it rigid, as it will be supporting a AA battery box for tiny cockpit LEDs (and possibly the main engines if the promising tests stand up). Here's a test fit of the 1mm thick inner tail; a 0.5mm thick outer panelling layer will be added to give better scale to the edges. The styrene was cut to shape and curved by immersing it into a glass of freshly boiled water that was roughly the right diameter, then quickly immersed into cold water to fix the shape. Dave's Model Workshop on YT has a video showing the process. And that's it for now. Thanks for reading so far.
The backstory is Jawas found a crashed post-Order 66 ETA-2 Actis in the sand dunes of Tatooine and sold it to everyone's favourite mechanic in Mos Eisley's Hangar 3-5, to be butchered and upgraded to hyperspace-capable by Peli Motto's pit droids. After stumbling across a beaten up secondhand Jedi Starfighter toy for £3, a basic design was made in Blender with the help of a low resolution 3D scan of the toy from Thingiverse. The blue box poking out at the bottom will be a simple battery box to power a lighting setup, disguised to look 'guts on the outside'. Cut plans were then made from the 3D meshes' UV maps. Here's an example of the UV maps. These are the parts that were cut off from the model using cutting discs, craft knives, saws and grinding bits. The plastic's a strange one; not as hard as Tamiya, but not as soft as some Hasbro products. It turned out it can be cut relatively easily just using a hobby blade (although blood was still drawn). Here's a reference image of what it originally looked like. I decided I didn't want a droid sticking out of the wing, so the panelling was removed to be replaced by styrene sheet, reinforced with a CA/body powder mixture just to give the styrene some sort of backing. The solar panels were deemed to be redundant, so the bottom pair were glued in permanently after holes were cut to match the main wing holes, for visual interest. The battery powered sander with removable velcro discs is a cheap Boots electric toothbrush. I then decided I wanted a hole with a gadget sticking out 🤭. Styrene panels (1mm base panel with 0.5mm detail panels) were made to fill the top wing solar panel cavities, with basic spacers inside to level them up to the wing surfaces and give them a bit of rigidity. A next step was to make some detail parts out of Plastruct, styrene, wire and old electronic device parts. This is how they look when fitted. The tail will have some sort of internal structure to keep it rigid, as it will be supporting a AA battery box for tiny cockpit LEDs (and possibly the main engines if the promising tests stand up). Here's a test fit of the 1mm thick inner tail; a 0.5mm thick outer panelling layer will be added to give better scale to the edges. The styrene was cut to shape and curved by immersing it into a glass of freshly boiled water that was roughly the right diameter, then quickly immersed into cold water to fix the shape. Dave's Model Workshop on YT has a video showing the process. And that's it for now. Thanks for reading so far. -
Gillman Productions of the US 1:4 scale bust of the Star Wars villain Grand Moff Wilhuff Tarkin sculpted by the talented Jeff Yagher. Tarkin, portrayed by Peter Cushing, first appears in Star Wars episode IV: A New Hope (1977) as the high ranking Grand Moff of the Empire in charge of the imperial battle station the Death Star and along with Darth Vader is attempting to recover the stolen plans of the mighty battle station and crush the rebellion against imperial rule. Tarkin perishes at the end of the film when the Death Star is destroyed by Luke Skywalker. Tarkins character makes a number of subsequent appearances in both live action prequels and animated series. A young Tarkin makes a cameo appearance in Revenge of the sith (2005) and a CGI version is portrayed in Rogue One (2016) where the ending of the film is the event that leads into the beginning of the first 1977 Star Wars movie. More of his back story is revealed in the animated series The Clone Wars, Rebels and The Bad Batch. Tarkin is modelled here as he appears in the original 1977 film and is finished mainly in oil paints over acrylics.
-
 This one didn't seem to take very long. The Build thread is here, https://www.britmodeller.com/forums/index.php?/topic/235136055-droid-speeder-bike/ This is a meld of a large Droid from the Stap set, some scrap model bits and bits box lurkers. Start with an idea. In '50's Britain Motor bikes were a big thing. There emerged clubs and gangs of riders. One thing to do was to race against the clock between 'tea stops' on modified bikes. These became known as Cafe' Racers. The Cafe Racer thing is just the basis of the idea for the pose. I see this as a fast scout bike. I added a larger Comms pack to his back. I took a 1/48th Skyraider Fuselage. Turned it upside down and back to front and joined it to a 1/32nd Puma tail Boom. Lots of filler and rubbing down until smooth followed. Please assume that this has the usual Star Wars Anti Gravity drive. Comin' right at ya! The hadlebars are from the Stap. The 'headlights were a bike instrument cluster. Guns, Front forks The prone position apes the '50's riders who would shorten and lower the handlebars to aid slipstreaming. The base is the Stap base with some old model railway scatter material glued on. The pale blue is a mix. The droid is lying on mostly plastic card supports. The feet are on ex Stap footplates. I wanted to weather the boring overall brown of the Droid. The blue bit shows his section, or maybe rank? Here we are sans Droid so you can seen his supports. The guns are clear here and the bit on the side is ex Stap too. Underneath I sprayed with semi matt clear and sprinkled some ground stuff on. This Guy flies low! Witness the bit of bush on the footplate too. I couldn't resist also putting some Bike engine bits on. The tailfin has spoilers which actually swivel in and out, Again, a blue patch for the section. At the base this side of the footplate are ex Jet Provost intakes. Now thrusters. Just to prove that the two sides are the same! I enjoyed the weathering. This thing has seen some action. Here's a pre-paint side view. Just to make it clear how it all looks. It's close to 12 inches long. I hope you like what you've seen. Either way please feel free to leave a comment and don't forget your party bag from the bar. Thanks for dropping by. I'm in the middle of having a clearout and general tidy up of the manshed at the moment. So when the next build will appear I'm not too sure. The subject is also unknown at this moment in time! Cheers, Pete
- 13 replies
-
- 22
-
-
TIE Fighter (20423-1/32 for AMT Studio Scale) 1:32 GreenStrawberry The TIE fighter was one of Star Wars’ outstanding and iconic space craft designs that stemmed from the original film that was released in 1976, but has since become Episode IV of the saga, which still rankles a little bit to this reviewer. Flown by the evil Empire, they were first encountered after the Millennium Falcon came out of hyperspace where Alderaan should have been, and was later encountered in their escape from the Death Star, then again when the Rebel Fighters attacked the gigantic battle station in an attempt to destroy it before it destroyed their base, which they clearly managed. The design carried on through the rest of the original trilogy, and has been seen in different forms at the end of the original trilogy and as updated variants in the sequel trilogy, plus the new TV shows such as the Mandalorian and The Book of Boba Fett. We’ll ignore Kenobi. AMT released their new tooling of the TIE Fighter last year as part of their Studio Series brand, and our friends at GreenStrawberry have wasted no time in creating a new set for the kit to bring up the detail to what you would expect from a Studio Scale kit, as the model has been criticised for being a bit soft and low on detail. The set arrives in a flat package, with a substantial card protector hidden inside the dark grey themed outer layer of cardboard, and inside is a large fret of Photo-Etch (PE) brass, plus a clear sheet of acetate with various triangular shapes printed on it, and a clear red sheet of foil to assist with lighting your project. The instruction sheet covers both sides of a piece of A4 that is printed in colour, and consists of six steps, although the last two are both marked as No.5. Small portions of the two faceted inner cockpit walls are removed, then several facets of the interior are replaced with PE parts, applying the decals to the clear printed foil to show through the PE part with the same number. This extends to twelve panels, one in the corner receiving an additional PE layer over the top. The coaming that covers some of the faceted windscreen in front of the control columns has the instrument box cut from the top to be replaced by a new folded part, with the two control yokes detailed by adding small levers to the outer sides, removing the top surfaces of the grips, replacing them with small PE parts, with addition levers on the inner side where the pilot’s thumbs would rest. The clear kit floor is laminated together with a PE part that has the same decking pattern etched into it, sandwiching a section of clear red foil between them to assist with lighting the floor, and giving it a red hue. The pilot’s seat is detailed with a new PE head box that is folded up from three parts and applied to the back of the headrest, which will be seen through the hatch on top of the hull once complete. A small instrument box is folded from two parts, and applied to the inner face of the coaming, where it too will be visible through the hatch. Speaking of the hatch, this area is improved by folding up a new hinge from three PE parts, and adding a highly detailed etched rim around the rear lip that is curved to fit the contours of the entryway, gluing the hinge to a flat patch in the centre of the strip, and supporting the hatch itself in the open position. The interior of the windscreen is provided with a new PE inner frame that creates more realistic detail when looking out from the hatch, and another two-part equipment detail assembly is fitted to the bottom rail of the inner octagonal frame. There are eight “clamps” spaced around the external edges of the windscreen, which have their moulded-in texture removed and replaced by small PE rectangles with a crisp pattern etched into their surface, with two spares in case you lose some. The instructions note them as parts 29, but that is the kit part number, and they are in fact part 28. The final part is a honeycomb textured PE insert that fits within the hexagonal exhaust at the rear of the fighter. Conclusion This is not a huge set, but neither is it expensive, and it improves the detail on the kit to a level where it will draw the viewer into the cockpit. The addition of the extra interior details that lend their use to lighting the model will be useful to the modeller with a hankering for some LEDs in their TIE Fighter kit. You can see the set applied to the unpainted kit by following the link below, which gives a feeling for the usefulness of it in improving the kit. Highly recommended. Review sample courtesy of
-
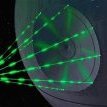
 Hi all! After my Space 1999 Eagle, I wanted to do something smaller and quicker. This is my 1/72 Scale Tie Fighter from Bandai. Sorry there aren't a lot more photos, I thought this was going to be a very quick build between projects and it turned out a lot nicer and a lot more fun than I expected! I've included the in-progress photos here as well as there's only a couple, and even then they show it in almost a completed state. The paint-job is closer to the tie fighter in The Empire Strikes Back, which was always a favour of mine. Album: https://hobbyphotohost.com/album?i=59 A close-up of the finished model, showing the lovely details on the wing. I had hoped to take some better photos with some photographic background sheets (black or white) behind to really show it off, but I've run out of cash for now I actually broke the stand right after taking these photos. I though it had a bearing at the top allowing you to pivot the tie-fighter. I tried to move it just a little too much and it snapped. Still, with a little glue it's almost as good as new. I enjoyed painting this detail in the bottom, though you never see it unless you detach the model from the stand and remove the round bottom plate. The main body is fully painted, though the cockpit masking is still in place. Everything (but the stand) painted and ready to put together. The model is very well engineered, and fits together perfectly, unlike some of the Trek models I've worked with from AMT... I'm looking at you Mr Reliant! I would definitely recommend it. I did really enjoy this build, and it gave me an opportunity to be more adventurous with the painting than I have been on my Star Trek ships and the Eagle. I learned a lot that should be useful going forward Next project, I promise to take a lot more photos for an 'in-progress' thread! Cheers
 -
A while ago I got a gluebomb Stap & Battle Droid for not too much from the bay. I've used up most of the Stap in a previous build on here. Now to use up the Droid. The recipe goes like this, Take one old 1/48th Skyraider and a 1/32nd Puma tail boom. Both first built in the '80's. Strip down the Skyraider to the fuselage and sand both until fairly free of old Humbrol. Add imagination (1ltr). Here's the Droid. I unglued the arms but the knees won't move yet. This is a chunk of the Stap. It's Star Wars architecture so that's a good thing. But it needed a little something... Where the Tank Idler wheel sits was just a boring bump. This makes it more mechanical. (a touch of kreiger?) And now you can see where it goes. And the basic concept of this thing. That's a length of 20mm conduit that adds strength & holds the two pieces together. And now what it's all about. Think Cafe' racer motorbike. This is just a basic mock up obviously. The Droids hands will go onto the Skyraider taiplanes. It's going to be posed in flight so he'll need a saddle. Feet will go into stirrups. There will be landing gear too. No obvious control panel. He'll be wirelessly connected. I hope this raises a smidgen of interest here. Please let me know what you think. Cheers, Pete
- 19 replies
-
- 18
-
-
Download from Thingiverse and printed on my Creality Ender 3 the parts sub assemblies o had a bit of trouble with the print following which the printer died so the tops of the legs are scratched from bass wood and the white thighs is styrene sheet. ( next job after the blitzbuild is to fix my printer) Almost fully assembled
-
Hi all and taking the plunge with this one. Corellian YT-1300 Freighter Will be a non-standard paint & decal scheme with some scratchbuilding along the way for the freight! Cheers, Dermot
-
 Hi all Tossed the coin over whether this belongs in the SF or diorama section but as I haven't posted in here before SF won. I made a very small Helms Deep and really enjoyed it, so continuing on the small scale I picked up the 1/350 Bandai Millennium Falcon at Telford and have set about making a suitable base for it! It kind of had to be Docking Bay 94. Apologies but no progress shots on the kit, it doesn't come with either the ramp of landing gear. I decided to leave the ramp but scratched some simple legs. Onto the docking bay. The base was made from foam with two layers of cork walls with spacers to allow for the storage bays. Next step was covering the whole thing in wood filler and give it a good sand. Then i've started to add the details before the roof goes on. My plan is to have a cut away section to look in the hanger but have the full circle of the 'roof'. I started adding bits of greebles and plasticard, lead wires old PE etc. and its starting to look like a docking bay! I haven't looked too closely at the film pics for the wall details, I'm more just going with the flow and having some fun. That's it for now! Just going to be working my way around the walls and storage bays.
- 30 replies
-
- 34
-
-
Well that didn't take long. Less than a month! To sum up, I had a gluebomb Stap & Droid bought cheap from the bay, and a box of 1/48th Italeri A-10 Warthog bits. I dismantled the Stap with TET and used the biggest part for the rear of this beastie. Obviously, the front end of the A-10 too. A previously unseen space going fighter from the Star wars universe. I've still not thought of a name for it or it's home Planet. Paints are Tamiya extra dark sea grey underneath & Model Master Braun Violet on top. There is lots of card and filler here. Panels had been cut out on the fuselage & I had to alter the Stap part. The pilot is ex spares box. Orange flight suit like the X wings. So probably a rebel. Laser cannons are repurposed machine cannons. I wanted some sort of insignia and came up with a white 20mm square and two blue stripes from a Matchbox Puma. Intakes, The slim one is ex F-16 tail. The round ones are a 1/32nd Airfix wheel and a jet exhaust from I know not where. Engines were cobbled together from various bits. Ships guns, Ju88 bomb clamps, copper wire etc. At the back we have this huge sensor fairing as on many modern Earth fighters. Playing 'dead ants!' Halves of drop tanks are obvious. As are the landing pads, Space 1999 Eagle. They'd retract straight in and seal the hole. I should have made the struts longer. It sits rather close to the ground. The paint finish came out a bit weird. I used Tamiya rattlecans underneath. The top was brush painted. The grey was okay but I think the cold got to the matt coat in the garage. It looks kind of worn now. Re-entry damge? Nose gear. (Obviously). The canards were in the spares box, but I don't know their origin. I've left most of the A-10 access panels in place and penciled in others. And the six inch ruler gives a clue to the size of this thing. Oh yes, there's another sensor fairing under the nose. The mottle was an experiment. Take a white primer rattlecan and a tumble drier scent sheet as a mask. Et Voila! Similar method to what they used to do on U.S. Custom cars with lace. Some sheets give a more random effect. It's probably rubbish as camouflage, but I think it gives an 'other worldly' effect. And another view. Most of the panel lines and scallops were already on the Stap part. A lot have been filled in. And that is your lot for another mad build. Thanks for looking and I look forward to your comments. The WIP is here https://www.britmodeller.com/forums/index.php?/topic/235131889-a-10-with-a-stap-garnish/
- 13 replies
-
- 22
-
-
Long long ago, in a Universe far far away (Actually 12 miles North of Lincoln) another Star Wars ship is being created. Some time ago I gathered together unused parts from scrap Italeri and a Revell 1/48th A-10 Thunderbolts. Then recently I got hold of a gluebomb Star Wars Stap and Droid from the bay. I used witchcraft and TET to dismantle the Stap (The Droid is for another time) sat down and had a good long ponder. You probably know what an A-10 looks like. So here are the Stap bits that I'm mostly not going to use here. https://www.scalemates.com/products/img/4/0/1/135401-11104-pristine.jpg This is a link to a Scalemates picture of the Stap boxtop. The main part I'm using holds the guns. The part of the Stap that matters and part of the pre-butchered Aircraft. The previous owner had cut out various panels. It really is a patchwork job and card and filler will be used Profusely to make something decent (Hah!) from the wreckage. And here's a rough idea of where I'm heading. The ex Airfix 1/32nd scale car wheel in the foreground is next up. The wheel on the right has been chopped about and is snuggled up to a P-38 Lightning bit. And should sit something like this. An intake will be mated to the front of this assembly. And we should get something like this. There are various other bits to be added, obviously. But this is your basic interceptor. Next I need to get the cockpit sorted and the fuselage paneled up before joining the two main parts together. Thanks for looking, There may be another post at the weekend. Until then, stay safe & party on, Dudes!
- 17 replies
-
- 21
-
-

-
 As reported elsewhere Round 2 has acquired the license to issue new and revised Star Wars kits including many of the MPC classic kits dating back to "a long time ago, in a galaxy far, far away...." Now it's been reported that one of the forthcoming updates will be the iconic Han Solo's Millennium Falcon with corrected sidewall parts based on the aftermarket upgrades available via Shapeways by "308 Bits" Instagram Link While no doubt this kit will never match, much less surpass, the FineMolds or Bandai Perfect Grade kits, this should be a welcome improvement to a classic kit at a much more affordable price point.
 -
This one was from the bay. Missing a foot, so less than eight quid. Just in my price range! I made two new feet using parts of pencil sharpeners and added different sensors to them. The kit (snap fit) got modded into a proper Desert Walker with extra cooling gear at the back and more stowage. There are other mods too, I'll leave spotting them to the Star wars rivet counters. It wasn't until I started the weathering that I spotted moulded in circlips on the top inner sides of the legs! The desert sand colour doesn't show up so well in this picture. The garden looks nice though. Spot the extra greeblies. I've added lots of little bits that should be on one of these but weren't there on the snap fit kit. Here it is with another snap fit that I went bonkers on some years ago. You can see how the feet differ. 3 - 2 - 1 - Go! Back inside and the colour comes through. I've weathered it fairly heavily. Them Deserts is rough, you know! See, filthy! The Tatooine jetwash is coned off for maintenance. Left foot forward. See the holes on the spring on that front sensor? Fuse wire and PVA. The holes developed on their own. But shows wear and tear on the spring cover so I left them as is. A 1/35th bottle crate became smoke grenades. The colour seems to have changed again, but, here we see a unit marking, the concussion weapon and streaks of muck. The handrail around the top is small splitpins and wire. I still don't know how the crew is supposed to get in and out of this thing! And there we are. There is a WIP if you would like to see more. https://www.britmodeller.com/forums/index.php?/topic/235128275-chicken-walker-altered-state/ Thanks for looking in and your comments are always welcome. A special thanks to those who sent me boxes of bits to use as greeblies. Can't do this stuff without you Guys! Cheers, Pete
-
My latest Sci Fi Scratchbuild involved the remains of two gluebomb Airfix Bristol Superfreighters, Plastic card and lots of greeblies. There is a work in progress thread in the appropriate place if you're interested to see how it was done. These would be Corellian freighters being used by the Empire to supply their ships in deep space. On the right is the top view. Left side inverted. Scale would be around 1/720 I think. A ship scale? From the bow on the right, The bit with three stripes was a Helicopter intake, I think. Gotta have a probe up front! At left are legoalike bricks to create the Bridge and quarters etc. Paint is simple grey primer. Midships. Various greeblies including (I think) an F-15 RADAR set up and a couple of tank barrels. Oh, and a googly eye. The yellow stripe? Well Red denotes a Diplomatic ship. So maybe yellow is for cargo vessels? It just seemed right. This is a repurposed Tank section plus various other small pieces including track and Aircraft parts. The aft structure, Another Tank bit with add ons. Probably the engine rooms. Solar sail at the bottom here. A better view of a solar panel. A Tank bit with added thin strips. Why do they have to be black? This is Alien tech after all. The green of the upper hull shows up nicely here too. It was brushpainted in streaks of thinned Tamiya acrylic. Engines. Small Tank wheels and a 1/72nd Airfix JU88 engine intake. Makes as much sense as the engines on the Falcon! Upper hull. Colours blasted by Solar rays and debris but mostly green. (or blue) I wanted to get a sort of insectoid feel. There was a (90's) Sci fi TV series (can't remember the name) that had that sort of craft. German/Canadian, the male actor was Brian someone. He had a companion robot head? Here they are mounted on my Star Destroyer section* in the mancave. See the red Diplomatic ship, top right. *There is a build and RFI for it somewhere on here. Just another view with a different freighter in the background. I don't really need two of these on display. So if anyone is really desperate, I could be persuaded to part with one. Very many thanks to those who followed the build and to you for looking in at this RFI. Comments are always welcome. Next build coming soon! Cheers, Pete
-
Well, the bench was empty and looked rather sad. So I thought I'd better do something... I'd acquired two gluebomb Airfix superfreighters. I had a vague idea that I could use one to build a Mandalorian style ship. But then I changed my mind. So a Corellian freighter was born. Well, actually two of them, why ever not? I'd dismantled the models ages ago, so they'll feel no pain during the next bit. I assembled my Dremilalike minidrill jobby and a circular cutter and then sliced the fuselage halves lengthwise. Then again to reduce the height before joining them together again. Their tails got lopped off too. Here, the glue is drying. There is black plastic card bridging the joint to add strength. This may look like I'm making small Aircraft Carriers, but please bear with me. I've added card spacers across the gap. And, two pieces of wood to aid in the eventual mounting (steady!) of the models. Here the one in the background has the white card fitted. Still waiting in the foreground. I was off making tea. I should explain that these things don't yet exist in the Star Wars universe so I'm making it up as I go along. As usual. The one in the foreground is the correct way up. The front to the right here. This is just a basic shell. It will need more card to shape it further, and lots of filler to lose the windows and any gaps. Then I can start to add lots of greeblies to make them look the part. Basically what ILM did all those years ago. Meantime, these are resting under the weight of my Star Wars reference book so the glue joints dry properly. As always, Your comments and questions are welcome`at the usual address. The next box down ⬇️
- 13 replies
-
- 13
-
-
- Star Wars
- Scratchbuild
- (and 1 more)
-
Carrera Revell Millennium Falcon Gift Set (05659) 1:72
Mike posted a topic in Sci-Fi & RealSpace Kits
Millennium Falcon Gift Set (05659) 1:72 Carrera Revell The YT-1300 Millennium Falcon was one of the key ships of the beginning of the Star Wars legend, and gained a special place in a lot of hearts then and since, becoming a true icon of science fiction in the process. As well as being the main mode of transport for Luke, Old Ben and the droids for much of the first film, its gritty, poorly maintained style, and asymmetric design appealed to filmgoers and modellers alike. She was the fastest hunk of junk in the galaxy, although we’ve since seen her in better condition before Han wrecked her during Solo: A Star Wars Story, which covered Han Solo’s early career as a smuggler, and how he came to own the ship after a game of Sabacc with his friend and rival Lando Calrissian, where in a brief moment of overconfidence, Lando bet his ship on a hand that later proved not to be as good as he thought. When Han took over ownership of the Falcon, she was pristine Star Wars white, with blue accent stripes, plus an escape pod that nestled between the halves of the cargo mandibles. Of course, he almost destroyed her during the Kessel run, and it arrived at its destination in a sorry state of disrepair. The Falcon we know and love is a result of this and continued attempts by Han and his co-pilot Chewbacca’s attempts to put her back to her previous gleaming white appearance and functionality. She’s fast at sub-light speeds, and Han’s piloting skills, which mostly consist of lazily banking to one side or another to avoid destruction, means that she’s a surprisingly safe ship to fly on, if seat-of-your-pants travel is your thing. She can defend herself too, having a pair of crewed self-defence cannons in the top and bottom centres of the hamburger-like hull, plus a couple of pop-out weapons under the hull for defence from ground-based threats such as the Snowtroopers that were setting up an E-web cannon at the beginning of The Empire Strikes Back (TESB) as the Rebel Base falls to the Imperial invaders. The Kit This is a reboxing of Revell’s 2006 kit that originally hit the shelves as a snap-together Easy Kit, and can still be built that way, although it arrives unpainted for this edition and includes a decal sheet to create the accent panels and other details. The kit arrives in a large top-opening box with a painting of the Falcon cruising past a planet, and with a 40th Anniversary of Return of the Jedi (ROTJ) badge in the top right corner. Inside the box are four sprues in a pale chewing-gum coloured styrene, a small vinyl sprue with two figures, clear sprue, decal sheet and instruction booklet printed in colour that has three pages of painting instructions in the rear for your guidance. This is not a complex kit, and the sprue count is an indicator, as is the original form that the model came to market, but detail is still pretty good for the style of kit. The two hull halves have the loading mandibles and most of the detail moulded-in, so a little simplification is bound to have happened, but the detail is still appealing. As this is a gift set, it comes with a selection of acrylic paints in small “thumb pots”, a Revell No.2 paint brush, and a 12.5g bottle of Revell Contacta Professional glue, which is well-liked by many, partially due to the precision metal applicator needle that makes it easy and accurate to use, avoiding wasting glue in the process. There is also a poster of Return of the Jedi, which is very tightly rolled and secured with an elastic band, so we’ve not even tried to photograph it, and would refer you to the box art, which has a photo of the poster on the front left side. I’m not sure, but it doesn’t seem like one of the original posters that were around at the time, but if you like it, it doesn’t matter when it was created! Construction begins with the cockpit, installing the moulded interior and separate bulkhead into the lower half of the cockpit cowling, with a decal to add detail to the bulkhead, which is highly visible in most of the interior shots of the films. The (optional) landing gear is next, making up three sets of legs, which consist of the vertical struts, a circular cuff, and the landing pad itself, and there we have an issue that the purists may spot. The Millennium Falcon kits that I have, all have five gear legs, one in each corner, and one toward the “nose”, if you can call it that. There was a change from three to five at some point, and although I am quite the Star Wars fan, I can’t remember the details. Most people won’t care though, providing it doesn’t topple over, and it won’t. The struts that actuate the boarding ramp are fitted to a carrier plate for later installation, as is the original circular dish that sits on the upper deck of the Falcon, and was knocked off during their escape from the exploding Death Star II at the end of ‘Jedi. The lower hull is prepared with paint, plus the cannons for the central defence station, and the boarding ramp, which is a single part. The coloured accent panels are shown being painted at this stage, but that’s optional thanks to the decals already mentioned. Another two drawings show the other colours that are used on different panels in order to keep the process straight forward, after which you have the choice of installing the landing gear assemblies, or plating over the shallow bays with alternative parts to depict your model in flight. If you have opted for that route, you don’t need to build the gear at all. The next step shows the interior of the model being painted black all over to hide the lack of detail, as well as adding the inner horizontal face of the centre of the mandibles, a small flat part near the boarding ramp, and inserting the pegs at the ends of the ramp supports into turrets moulded into the hull. The inner surfaces of the mandibles are completed by adding the sides, the small front panels, and a bulkhead between them, then continuing down the tapering sides of the mandibles adding the “greeblie” strips to the vertical space between the hull halves. The docking adapters at the mid-point of the hull sides are fitted along with their returns, with a short curved section behind them, and the clear curved exhaust aperture completes the sides. You are advised to paint the exhaust part light blue, and apply the comb decal that was another later addition to the Falcon’s design to depict the engine glow, but there are always LEDs for that sort of thing. The upper hull is painted and accented next, with just the guns added to the centre, and the same three drawings break down the different colours and location of the panels. The interior is painted black again, inserting the cannon glazing into the hole in the centre of both hull halves, plus another mandible interior cover panel, and the cockpit that was made at the beginning. Han and Chewie are both painted and fixed to their seats, then the canopy is fixed over the cockpit, and on the opposite side of the hull the dish is push-fitted into its socket moulded into the surface without the need for glue. The model is completed by bringing the two halves of the model together, and pushing the pins into the turrets within. Markings This kit represents the Millennium Falcon at her prime from a filmic point of view, as she appeared through the exploits of our heroes during ROTJ, the culmination of the original trilogy of movies. There is just one scheme included in the box because she’s unique. There were variations from shot-to-shot and between films however, as cinema model makers and directors are human and change things, or make mistakes. From the box you can build the Millennium Falcon: Decals are by Cartograf, which is a guarantee of good registration, sharpness and colour density, with a thin satin carrier film cut close to the printed areas. Conclusion The Millennium Falcon is an awesome ship, and we are quite fortunate to have many models in various scales and for various skill levels. This kit will suit the beginner or novice modeller perfectly, and if you want a kit of the Falcon without putting together hundreds of parts, this is the one for you. Highly recommended. Carrera Revell model kits are available from all good toy and model retailers. For further information visit or