

Jonners
-
Posts
1,465 -
Joined
-
Last visited
Content Type
Events
Profiles
Forums
Media Demo
Everything posted by Jonners
-

1/72nd danish Gloster Gauntlet MkI
Jonners replied to VincentM's topic in Ready for Inspection - Aircraft
Very nice indeed, Vincent, that looks great. A tidy finish and neat rigging - I like it. Jon -
Italeri (ex-Supermodel) Aermacchi MB.326 1/72nd
Jonners replied to Wez's topic in Training Types Group Build
I've been sorely tempted since I first saw a b&w photo of an Alitalia 326 in an old issue of Air Enthusiast, but sanity prevails every time I consider all those parallel narrow lines! -
Italeri (ex-Supermodel) Aermacchi MB.326 1/72nd
Jonners replied to Wez's topic in Training Types Group Build
Nice one, Wez, like it - I've not tried that kit in either of its boxings so I'll be interested to see how you get on with it. Handy photo for the underside flap detail, btw - thanks! You're right, those Italian Macchis weren't just orange, they were ORANGE! Jon -
ESCI 1/48 Atlas Impala Mk1, SAAF - Finished!
Jonners replied to Jonners's topic in Training Types Group Build
Okay, I've been getting on with painting the scratchbuilt cockpit. The wiring bundles on the rear bulkhead are just that: fuse wire and strands of copper wire painted white, with 'cable ties' made from fishing line tied in a reef knot and trimmed. The yellow oxygen bottles are stretched sprue with Tamiya tape retaining bands, and everything else has been fettled from plastic card and scrap sprue. The rivets on the rear bulkhead, which are a bit rough but they'll do, are from white glue applied with a cocktail stick. The white flap controls are in place, but throtlles and control column haven't been added yet and the non-slip panels for the pilots' feet have yet to be painted. Still plenty to do, like the cockpit sidewalls and actually getting the tub to fit into the fuselage halves - I know there's going to be a gap around the starboard side of the rear bulkhead which will have to be filled, and the rear instrument panel and associated bulkhead will have to be trimmed to fit under the small sill I'm adding to the cockpit sides, for example. I'll be leaving the seats until later in the build, mainly because I want to get the basic elements together and filled / sanded ASAP. I've also cut the flaps from the Mk 2 kit wings, made a start on filling their front ends to reproduce the rounded profile and thinned the inside of the wing parts to give something that will look closer to scale in front of the dropped flaps. Jon -
ESCI 1/48 Atlas Impala Mk1, SAAF - Finished!
Jonners replied to Jonners's topic in Training Types Group Build
You mean the Gannet / Malgas single-seater Imp 2? That one's on the 'to-do' list! (It doesn't fit the 'trainer' theme...) -
ESCI 1/48 Atlas Impala Mk1, SAAF - Finished!
Jonners replied to Jonners's topic in Training Types Group Build
Ah, that's interesting - I didn't realise that NeOmega produced a 1/48 cockpit. Mind you, you could probably buy a complete 326K kit for the cost of resin tanks and cockpit! (I'm a Yorkshireman, obviously ) -
Nice. I don't know if they are included on the kit decals, but as you're doing the red, white and grey scheme don't forget to add the two dayglo orange dots above the serial number on each side, just for an added bit of authenticity - they are (were) formation reference markers for lining up the corner of the tailplane. There were 2 as the reference points for each seat are obviously slightly different. You've given me a bit of inspiration there, Steve. I'm very tempted to do one of these myself as a later entry into the GB, depending on how my Impala goes. I've got a specific aircraft in mind with a bit of a story attached (not this one: http://www.britmodeller.com/forums/index.php?/topic/234951336-shorts-tucano-pencil-drawing/ but a very different scheme instead) so I'll see how I get on with my other build vs time commitments. Is the kit scheme for a Church Fenton aircraft? I'm sure I remember seeing the toucan still on a tail at Linton in the mid-90's. Jon
-
ESCI 1/48 Atlas Impala Mk1, SAAF - Finished!
Jonners replied to Jonners's topic in Training Types Group Build
Baaie lekker? Ek hoop dit sal wees... (Blimey, that took me back a few years!) Okay, so I started with a box that I've had for years containing a whole mish-mash of parts: The grey parts are from the Imp 2 kit, as per the box, while the white parts are from my previously-bodged MB326C kit. The Impalas had the large tip tanks, so I'll be using those from the single-seater kit as the 326C kit has the small tanks. I'll have to use the grey fuselage as I managed to badly damage the white parts when trying to separate them some time ago (!). The horizontal tailplanes differ between the two versions, with those for the single-seater (grey kit parts) being larger than those for the two-seater, so I'll be using the smaller white plastic tailplanes. The Imp 1 could carry the gun pods that are included in the kit, but I intend to build a classic 'clean-wing' trainer. The old film cannisters, by the way, contain the flap parts that I previously cut from the white wings - I'll be dropping the flaps, but using the grey wings so will have to that little chore again. Okay, so my first task will be, as usual, the cockpit. I forgot to take a 'before' photo, but imagine flat plastic with so-so decal intrument panels and consoles. The canopy is pretty large and I intend to model it open, so the from-the-box solution simply won't do for me. I know that Ozmods produced a resin cockpit for the Australian MB326, but I decided not to go down that route for a number of reasons: i) it's a representation of the Australian cockpit, not a SAAF Impala, ii) I wasn't desperately impressed by online photos of the product (soz, Ozmods!), iii) I prefer not to spend a fortune on resin parts if I can produce something reasonable myself and iv) I fancied having a crack at scratchbuilding the cockpit. There are lots of superb online 'walkaround' webpages full of MB326 and Impala detail photos, so accurate references were/are readily available. A lot of tinkering with stretched sprue, plastic card and wire produced this (apologies for the poor photo): Throttles and control columns have yet to be fitted, and there's also a bit of work completed on the fuselage sidewalls. I also re-boxed and tweaked the tailpipe area to close off the hollow area that goes up into the fin on the basic kit. Painting is in progress; more to follow soon. Jon -
ESCI 1/48 Atlas Impala Mk1, SAAF - Finished!
Jonners replied to Jonners's topic in Training Types Group Build
I didn't see the article, but I imagine it would have been one of the Italeri boxings - I visited Newark air museum the other day (excellent, by the way; first visit for 18 years and was very impressed...and my son thought the Vulcan was awesome! ) where the shop stocked both the MB326K/Impala 2 and MB326C versions. I haven't seen inside an Italeri kit so I can't comment on the decals, but the old ESCI decals are pretty good and the kit does go together ptetty well. The cockpit is very basic, though, and the ejection seats are a poor representation of the MB Mk 6 used by the Impala. I've got some old Aeroclub Mk3 seats which I considered modifying but the detail is too vague for my liking, and I have a pair of resin Mk6 seats (can't remember the manufacturer) for the Buccaneer which could be modified. I used a similar seat in my Imp 2 but the ESCI cockpit tub is so narrow that the sides of the seat had to be sanded quite heavily for it to fit. I haven't decided whether to do the same with this kit or to scratch-build new seats at a width that will fit; scratching ejection seats would be a first for me but would be good practice and would allow me to model the harnesses in a genuine 'prepped for flight' manner rather than the way in which the straps on resin seats are usually cast. It would probably have been easier to scratchbuild a new cockpit part from plastic card with slightly narrower side consoles and a wider tub for the seats, then simply use the resin seats, but it's a bit late for that now as I'm committed. I'll post a couple of WiP pics once I've fired up the PC instead of tapping on my smartphone. Jon -
My annual egg-fest - a Xmas project
Jonners replied to AndyC's topic in Ready for Inspection - Aircraft
I thought Blackbird eggs were pale blue? -
Airfix 1/72nd Fokker Friendship
Jonners replied to bigbadbadge's topic in Ready for Inspection - Aircraft
Very neat, Chris, and a really tidy paint job. How did you get such a smooth handpainted finish, and what type of paints did you use? Jon -
Skybirds 86 Percival Prentice in 1/72nd Scale.Finished.
Jonners replied to Alex Gordon's topic in Training Types Group Build
Could your random white metal part be a central throttle arrangement, photographed upside down? -
Slingsby Firefly (1/50 Heller Fournier RF6 kit).
Jonners replied to carlstavros's topic in Training Types Group Build
That's interesting Carl - even in the four with the 'bigger' cockpits I couldn't wear a helmet due to the lack of headroom, so had to wear a headset instead. Those of us who were of non-standard height looked quite comical during Instrument Flying training, as we had to wear a back-to-front baseball cap with the IF visor velcroed in place. Imagine lanky gangsta Darth Vader in a green gro-bag and deep pink parachute.... -
Seversky, that is simply exceptional, incredibly realistic modelling. Quite superb. That is one of the best, in fact quite possibly the best, aircraft model that I've seen on BM. An aircraft with an all-white paint scheme sounds quite simple, but you have shown just how very complex it really is - and how very effective it can be when done properly. Brilliant. Thanks for showing it. Any more to show? Jon
-
1/72 Lockheed DP-2E Neptune Drone controller
Jonners replied to hgbn's topic in Training Types Group Build
Wow, that's going to look fantastic! What a great idea. Good luck! Jon -
Slingsby Firefly (1/50 Heller Fournier RF6 kit).
Jonners replied to carlstavros's topic in Training Types Group Build
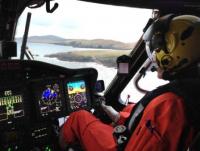
This will be interesting to see. I didn't fly 'UA or 'UI, but flew 4 others (G-BLVI, BONT, BUUC and BNSP) when I went through the JEFTS course at Topcliffe in 1994. Those four had slightly more room in the cockpit than the others (slimmer stick tops and throttles, perhaps; can't really remember) so, being 6'3", I didn't fit too well into the rest of the fleet! Abiding memory: being upside down at the top of a loop as the sun was going down during my Final Handling Test, when the examiner looked up at the nose-to-tail traffic jam and said, "Look at all the poor people!" Not the most politically correct comment, especially as I was only there thanks to good luck and the taxpayer, but in the circumstances I thought it better to stay quiet... Happy days! Jon -
ESCI 1/48 Atlas Impala Mk1, SAAF - Finished!
Jonners replied to Jonners's topic in Training Types Group Build
Ha! I'd love to - the old orange, white and blue scheme, as I remember seeing them - though I'm more than likely to make a complete horlicks of the masking so it will probably be a standard silver trainer scheme. I'll see how it goes. Vlamgat - now there's a term I haven't heard in a while! Mirage F1, wasn't it? -
OK folks, I've decided that I really ought to go for it and enter my first GB. The subject that I'll be building is the Atlas Impala Mk1 which, for those who might understandably be scratching their heads, was the license-built South African version of the Macchi MB326 jet trainer. As a child in South Africa in the early 1980's I used to see Impalas flying overhead on a regular basis, and they are still, to my eye, one of the most attractive aeroplanes ever built. Here's what the original looked like in South African service: http://www.airliners.net/photo/South-Africa--/Atlas-MB-326M-Impala/0308745/L/&sid=295d7b2ad9573cb1ceefad0b789930aa The 1/48 Impala / MB326 was boxed in a number of variants by ESCI, and IMHO it was one of the company's best kits with and accurate outline and very nicely engraved detail, but let down (as was common with ESCI aircraft kits) by very sparse cockpit 'detail'. ESCI also produced the single-seat ground attack Impala Mk2 / MB326K version which has recently been re-boxed by Italeri. About 16 years ago I built the Impala Mk2 version (I thought it was great at the time, but it looks a bit shoddy now and the 'shadow' underspray on the camouflage gives away my poor airbrush masking skills) and it really needs its less warlike sibling to go with it: A long time ago - many years, but I can't remember how many - I bought kits of both the single- and two-seat variants with the intention of building an Impala Mk 1 out of them (The Imp 2 kit had the larger tip tanks). I made a start, rather clumsily, then tried to 'reverse-engineer' my clumsiness, even more clumsily, and the project went into the cupboard of shame. Then, as I was wondering whether or not to commit to my first GB, what should I see but a 'Trainers' new GB about to start - what better excuse? It can always become a genuine KUTA GB item if work and life conspire against me! So, here's the starting point - a complete ESCI Imp 2 in the box, plus the MB326 parts in various states of disrepair: Oh well, in for a penny... Jon
-
Thanks Steve, I'm impressed that you went to the trouble of checking a pic of the real thing! It's good to get an objective assessment of the lettering/numerals - appreciated. Jon
-
Wow, that's different. What a fantastic tool for setting up a composition...once you've done all the work to create the computer models! Very impressive. I like the GR4 drawing too. Very atmospheric, and your use of the white page really conveys the power of the reheat. As for 'slow progress', that's the story of my artistic life! Jon
-
Do you know, Rick, I think I sense a kindred spirit! Once upon a time I used to collect SAM religiously. I simply enjoyed its content, but was especially inspired and fascinated by its 'Aircraft in Detail' sections as well as the articles produced in a similar way eg squadron histories - in other words those which had a written historic overview with lots of accompanying profiles for interest and inspiration. No other publication seemed to provide the same regular format. All the other publications seemed to concentrate on showcasing how a particular kit was put together (usually to a far higher standard than I can achieve) or converted using horribly expensive resin sets that I choose not to afford. There was / is also a strong emphasis on shiny reviews of new kits. Now, I can put kits together, so why pay good £££ to see someone else do the same thing? At a certain point SAM's editorial policy seemed to change fundamentally and, in my view, it lost its unique 'feel' and became almost identical to all of its rivals in content and 'feel'. At this point I stopped collecting them. I love browsing, for the umpteenth time, through the back issues that I have, and have found them to be superb references, but I don't have any urge to go out and buy any of the current batch of modelling mags. Just my view. Jon
-
Here's a drawing that I completed a few months ago as a way of passing the time in a reasonably constructive fashion during a run of quiet night shifts. It's not my best, though it was never intended to be, and I'd challenge anyone to be at the top of their game at 3.00am! Lettering and numerals in perspective are definitely one of my weak points, so there's a bit of self-criticism for you. I specifically chose to represent ZF376, though, as I flew my Final Handling Test at the end of the Basic Flying Training course at Linton-on-Ouse in this machine back in 1996 (I passed!). The Tucano is illustrated on short finals to land, at which point in the FHT I would have been telling myself "Don't mess up, don't mess up!". This drawing was also a bit of a trial piece to see what a red-and-white-scheme Tucano would look like in pencil, as I have a vague idea for a more complex Tucano-based drawing bouncing round in my head. Perhaps one day I'll actually do something about it! All constructive criticism welcomed, as ever. Jon
-
Very nice models, Tony. Are they hand painted or airbrushed? (Before the matt varnish faff, that is...) Harriers wouldn't normally be my plastic subject matter, but these have tempted me.
-
Thanks Daniel; don't worry about being late - for a start it's fashionable (just as well, considering how long my wife usually takes to get ready) and I appreciate that you've made the effort to comment. Tony, your comment made me smile: "I wish I could draw like that". I've lost count of the number of times that someone has said that to me! My reply is usually "How do you know that you can't? Have you ever really tried?" A few years ago a colleague, senior in years and experience, was soon to retire after 27 years of continuous military flying. I thought that a pencil-drawn personal 'type history' would dothe trick nicely but an artist's commission was out of the question (£££), so I decided to give it a try myself on the principle that it was worth a try. Looking back, my early results weren't too great but, just as with modelling, you learn as you go along. (Also, just like modelling, there is the occasional disaster....) After a few months' absence from any drawing I sat down the other evening to start on a new picture of a Harrier GR3 'at rest', really as a kind of practice piece/study to see if I could get it to look right - lots of complex curves and very few straight lines. I'm toying with the idea of, once it's finished, creating a new topic to illustrate, stage-by-stage, how I create a drawing; perhaps that might even inspire someone else to give it a try. Jon
-
Thanks gents, your comments are very generous. I recently received some excellent and much-appreciated advice about getting decent prints made from a well-known aviation artist; ultimately it will come down to £££, as with everything else in life! As it happens, the current OC 202 Sqn (a former colleague) is very interested... We'll see. BZN20 - You serviced it, and I flew it! For your part, where and when? Don't forget, the aircrew never broke them, they merely found that they were broken! Jonners
