gbondoni Posted December 28, 2015 Share Posted December 28, 2015 Anyone who's ever accidentally glued their fingers to a large piece of styrene knows that there are quite a few different philosophies when building models. Most of my kits are 1/24 race car kits with detours for 1/20 F1 kits, about 90% plastic and 10% resin / scratchbuilds / kitbashes. Most are built straight out of the box because I enjoy staring at groups of cars. I like observing the look of lots of vehicles as opposed to taking a long time to really appreciate a single car. I also never superdetail or build for contests. This approach makes me happy, gives me one or a couple of decent new shelf models a month, and could keep me going forever. However, I also feel that I'm missing out on a bunch of modeling worlds, I love reading about and looking at everything from 1/35 Armor to wooden ships. So, in order to expand my horizons, learn some more skills and do something different, I have decided to take an old kit which was a) started but never completed, destroyed in a couple of house moves and c)never much good to begin with... and apply some long-forgotten (by me) methods to turn it into something I can be proud of. The kit I selected for my first BM WIP is a 1/72 scale Modelex molding of the Heinkel He 112. Modelex is an Argentine manufacturer who has inherited a bunch of old Heller molds (at least I hope so), so anyone with the old Heller Heinkel in their stash will find this one familiar. I think the instructions will also look eerily familiar, as they look photocopied from somewhere else... As I said, the kit had been pre-started and abandoned, and this is how it looked when I selected it from among a group of dead 1/72nd builds I'd accumulated over time (not all mine, but this one was). Sad... yes, but the reality was even worse - I'd done some "rebuilding" for the previous pic: The plan here is to disassemble, strip the paint, detail the cockpit, open that canopy, scratch build the missing bits (one of the reasons I selected this one is precisely so I would have to scratch stuff and not escape that particular task), reposition flaps, open the small hinged door beside the cockpit and build it as a Romanian fighter (although it might be Spanish or Hungarian by the time I get to selecting liveries). I also want to create a base, something I've never even considered doing before. I'm going to have to learn a lot of things and also take my time. As I know from other 1/72nd kits, building cars and planes require different skill sets. Cars (at least the way I like to produce them), are mainly about getting a good gloss coat on the bodywork, and most kits are detailed enough out of the box. For this plane, I want to use a realistic matt finish, plus do some real modeling in tiny sizes on the rest of the kit. I predict some false starts and a steep learning curve, but even if I end up ruining this one, I hope to lear a lot. If I don't, it should certainly look different sitting beside the rest of the plastic I have lying around - my most recent effort, the white Sauber, is pictured here with a couple of friends. From this pic, I now see some touching up needed on both Sauber and Porsche!! Wish me luck! Tomorrow, hopefully will have some disassembly and hopefully some documentation with regards to what happens when old paint meets paint stripper! 1 Link to comment Share on other sites More sharing options...
gbondoni Posted December 29, 2015 Author Share Posted December 29, 2015 If the Nobel committee ever creates a prize for world's most pleasant liquid, I seriously doubt that DoT-3 brake fluid will ever win the prize. However, it is perfect for removing old paint from styrene (anyone who's ever tried to use oven cleaner for removing paint will be delighted with this - anyone who is good enough that they've never had to remove paint should know that I hate them). So, taking extreme precautions, I dumped the larger Heinkel bits into this stuff. First, a pic of what the kit looked like after tearing it back down. The matt green paint looked like it could take anything short of a flamethrower, but it didn't put up much of a fight. After an overnight dip, this is what the bigger pieces looked like: Basically got rid of all the paint - now we can start working on this one. Link to comment Share on other sites More sharing options...
gbondoni Posted December 30, 2015 Author Share Posted December 30, 2015 I was going to write that photo etch is for wimps, but that simply isn't true - in fact, I myself harbor a pathological fear of PE. The real truth is that I won't be using PE for this build for two reasons: 1. Haven't been able to find PE for this plane, except for some included in a kit of one of the prototypes, which is sold out, and is also in 1/48 scale. 2. More importantly, Argentina's postal service has a limit of 2 deliveries per year for anything other than books (I assume our new government will soon repeal this, but for now, my two deliveries for 2016 will be large boxes with multiple models inside). So, any additional cockpit detail (plus the instrument panel which is MIA, quite possibly KIA) is going to need to be scratchbuilt. There are a few things that will need dealing with, but to my surprise, the right side of the cockpit is reasonably accurately molded and is nearly invisible anyway, so I need to think about what to do on that one, other than remove that huge ejector pin mark in order to be able to fit the necessary panel and bracing. The left side will need more work, but, again might not be overly visible. The most visible area is the seat, and this definitely needs some improvement. The overall shape looks ok, but the kit original (Heller / Modelex) was attached to the rear bulkhead with a locator pin. Looking at a cutaway of the plane, the seat is actually connected to that rear wall with two horizontal struts. I also had to remove a pretty big ejector pin mark from the center of the backrest. I created the attachment pieces and glued them on - forgive the pic, I'm still trying to figure out how to photograph stuff this small! The piece will need some light-colored primer so I can see where I need to sand and fill - right now everything is too dark to see because I elected not to strip the old paint here (I hate fishing for tiny parts in fluid!). Photo shoes some roughness though, so I will start there. We're also going to need harnesses for that seat. My cutaway shows lap belts only, which I'm building, and also waiting for a better reference to arrive, as I have my doubts about the accuracy of that claim (sadly, this isn't the most popular WW2 subject, so some angles just aren't online). This is one side of the belt: And here we can see the other: I made the strap extra long in case I had issues attaching the buckles, but since those went on OK, I may have enough material for shoulder harnesses if better references prove them necessary. I have a spare strap anyhow (my confidence in being able to fit these things together wasn't high). I created the straps from black duct tape painted with two coats Humbrol enamel. The self-adhesive back is great for keeping them flat while painting, but I'll likely use CA or white glue to attach. When I tested them on the seat, the scale looked all right, although calculations say they're a tad wide. For those attempting to calculate scale by eye, that donut-shaped thing it's stuck to is the package for a roll of the tape they use to tape broken fingers with - no idea what it's called. It's maybe a couple of centimeters wide. The triangular clasp and adjustment pieces are created from bits of copper wire (from a spare speaker wire) sprayed silver, and the rectangular piece on the second pic is a thin piece of polystyrene from a sushi tray (only packaging material I've ever seen made of PS, but excellent thin material). All of this is held together with white glue (wanted something easy to clean if I messed it up). The shiny bits should be toned down with the final matte finish, I hope. Next I want to tackle the correct shape of that rear bulkhead as well as building the in-cockpit fuel tank on which the seat rests. And I should probably make an instrument panel at some point... Link to comment Share on other sites More sharing options...
Beard Posted December 30, 2015 Share Posted December 30, 2015 Nice work on the belts. 1 Link to comment Share on other sites More sharing options...
gbondoni Posted December 30, 2015 Author Share Posted December 30, 2015 Thanks Beard! Link to comment Share on other sites More sharing options...
gbondoni Posted January 1, 2016 Author Share Posted January 1, 2016 The next step on this one was to look at the cockpit layout. The kit has the back bulkhead modeled as a piece with a step in the center. You can see it here in this test fit. I actually thought it was fitted backward as that seems a very uncomfortable head rest, but after reviewing the instructions, it was as intended. According to my reference, however, this whole area should be straight. So I went ahead and cut it in into pieces, wherein i discovered that the plastic is both soft and brittle, perhaps not an ideal combo, but it's what I have to work with. I glued it back together, grafted some new plastic in where parts had crumbled (you can see the white bits) and did some preliminary sanding. Much more sanding is going to be needed, and then I'll spray on some light colored primer which should make it easier to see what I've actually got here.And From the side - well and truly straightened... I'll leave you with a mystery bit of plastic - this may not look the part, but it will eventually become the underseat tank. I used a wire - it had the perfect curvature, and was easy to bend into shape. If that doesn't work, I'll try something else. Next up... I will chop the one-piece canopy to bits and see just how hard it's going to be to open it... 1 Link to comment Share on other sites More sharing options...
Jake Moon Posted January 1, 2016 Share Posted January 1, 2016 Very interesting project - I love these restore/save builds and will watching with complete fascination. Also, incredible job ion that Sauber! 2 Link to comment Share on other sites More sharing options...
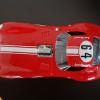
gbondoni Posted January 1, 2016 Author Share Posted January 1, 2016 Thanks! The Sauber was actually a pretty involved kit - I opened the box and an unexpectedly large number of sprues appeared. Having said that, other than the usual little niggles, it wasn't terribly difficult to build. Not quite a Tamiya kit, but very enjoyable. The plan is going to go slowly indeed. I've found that planes need a lot more planning than cars, and the smaller scale means stuff you can get away with at 1/24 becomes VERY visible. Plus this one is old, broken and missing pieces - a lot of fun in this tiny thing! Link to comment Share on other sites More sharing options...
lunarhighway Posted January 2, 2016 Share Posted January 2, 2016 Thanks! The Sauber was actually a pretty involved kit - I opened the box and an unexpectedly large number of sprues appeared. Having said that, other than the usual little niggles, it wasn't terribly difficult to build. Not quite a Tamiya kit, but very enjoyable. The plan is going to go slowly indeed. I've found that planes need a lot more planning than cars, and the smaller scale means stuff you can get away with at 1/24 becomes VERY visible. Plus this one is old, broken and missing pieces - a lot of fun in this tiny thing! great work, it's nice to see you take on a kit others would have given up on. as for details, not much of the cockpit will be seen once it's all together even with it opened, wich means that overall, it won't influence the general impression of the model as much as it's extrenal finish. 1 Link to comment Share on other sites More sharing options...
gbondoni Posted January 2, 2016 Author Share Posted January 2, 2016 ...means that overall, it won't influence the general impression of the model as much as it's extrenal finish. You are correct, and I know it isn't the most visible piece of the model. The reasons I'm doing it are because I admire the detailed cockpits I'm seeing here and elsewhere and wanted to give some of the techniques a shot - it should add a bit to the finished model, and I'll also learn and have some fun in the meantime! Link to comment Share on other sites More sharing options...
lunarhighway Posted January 2, 2016 Share Posted January 2, 2016 You are correct, and I know it isn't the most visible piece of the model. The reasons I'm doing it are because I admire the detailed cockpits I'm seeing here and elsewhere and wanted to give some of the techniques a shot - it should add a bit to the finished model, and I'll also learn and have some fun in the meantime! of course, it's better to add to much detail than not enough, and since any mistakes won't stand out one might and as you say, have some fun:) 1 Link to comment Share on other sites More sharing options...
gbondoni Posted January 4, 2016 Author Share Posted January 4, 2016 So, got some more work done. In the first place, I scratched a tiny instrument panel out of a very thin bit of styrene, which can be seen here: I was going to punch some holes in it and make the instrument panel a three layer sandwich with acetate in the middle and the dials on the back panel, but as it's deep in the cockpit I decided to forego it this time (though I might change my mind later). I also decided that this build is the perfect excuse to get myself a set of these. I've seen them used and recommended on other builds and have bought myself a set... now just need for them to arrive. In other news, I've been working on the control stick. The shaft on the kit part was a bit too thick, and also it wasn't mounted on a tube as per the original, so that has been addressed with, respectively, a piece of fishing line (the flexibility keeps thin non-load bearing shafts from snapping when handled) and a length of solder. In the pic, you can also see the trisected canopy in the background. Here's what the controls should look like. The kit part can be used for the top of the control stick with a few small mods and detail painting - all of this will be visible through the open cockpit, so well worth the effort. Also, I will have to do something about those footrests. The kit parts are just molded-on triangles. I've also been doing some shaping on the underseat gas tank: Still a ways to go to get that shape done, but al least the seat and the back panel have been fully sanded and are now ready for some primer. I got myself a can of primer today. Will be using white for a pair of reasons: 1) it will help with the yellow from the Romanian markings and 2) it was the only primer they had (getting stuff in Argentina can sometimes be a challenge). As a final aside, just wanted to share yet another reason to go for 1/72nd aircraft kits: decals are almost never a huge, time consuming project in themselves. This plane currently shares the modeling desk with a 1/24 Honda Accord, and the base decals (there are many more to come), represent a full day's modeling to get them right. If I dedicated myself to avoiding 1/24 race cars altogether I could probably save enough on Micro Sol to buy myself something... the Queen Mary 2, perhaps. Or Buckingham Palace. Have a look: Link to comment Share on other sites More sharing options...
gbondoni Posted January 5, 2016 Author Share Posted January 5, 2016 More progress has occurred. Yesterday was rainy, so no real chance to spray anything, but I did something completely unexpected and glued the top wing halves to the bottom wing half (the bottom of the wings was molded in one piece). This is way out of the order I had planned, but it was something I wanted to do for a number of reasons: 1. I will be sanding off raised panel lines for re-scribing, so while I'm at it, I can do the rough improvements of the wings shape. And close up the big gaps between the upper and lower halves. 2. I wanted to box in the wheel wells. I have since viewed another build here on BM and realized that it would have been easier to do with the wings separate, but it's way too late for that now. 3. I want to cut off the flaps (one is broken, so an ideal candidate to be repositioned), and what that operation will gain in difficulty by doing it all at once, it should also gain in accuracy - everything will be lined up where it should stay. So, after some initial boxing off, and application of filler, it looks like this (not pretty at all, yet): As you can see, flaps still there, marked for removal. They will be positioned slightly downward on the finished build. I also painted some more wire - this time black to simulate some of the copious cockpit wire. It should be enough to do the more visible areas, but I'm thinking I'll probably need to do more if I get carried away. Link to comment Share on other sites More sharing options...
gbondoni Posted January 6, 2016 Author Share Posted January 6, 2016 Looking around the amazing builds here on BM, I am thinking that a cushion for that seat might help fill out the cockpit detail, but I have no idea if He-112s were flown this way (my newbie status in the world of aircraft is showing). So I apply to the collective wisdom of Britmodeller: does anyone know whether a cushion is a valid addition? If you guys don't know, I'm not sure where I can get that - have been unable to find pics of an in-use seat on the net, and this is an obscure little bird. Thank you! Link to comment Share on other sites More sharing options...
gbondoni Posted January 8, 2016 Author Share Posted January 8, 2016 While still attempting to clear up the cushion conundrum, I continued to make the exterior uglier by removing the parts I will be repositioning: the flaps and the door on the side. In the case of the flaps, this provided another great uglification opportunity - I slathered on a bunch of Tamiya filler. Not sure if you can see it in this photo, but I did trim down the plastic I inserted around the wheel wells, so once the new filler hardens, I will be able to sand the wings. I will give everything shape and all those nasty raised panel lines will go "poof". I will be opening the little hatch on one side only, the left. This cut worked much better than the wings, but I doubt I'll be able to re-use the piece as it seems a bit thick. I've thinned the cockpit wall around the opening, but it's not visible in this view. Anyhow, this one will start getting much more aesthetically pleasing from here on out. Sanding and primer, and then smaller filling and more sanding should make it much less ugly and - hopefully - eventually pretty. But first, I'm going to take a week off to go lie on a beach - I'll be following everyone's builds, but not taking my models with me. 1 Link to comment Share on other sites More sharing options...
lunarhighway Posted January 8, 2016 Share Posted January 8, 2016 (edited) some real modelling going on here! I recently found tamiya filler can be thinned with aceton, even untill it is the consistency of thick paint. using an old brush you can than paint it on the model where it needs to go. this way it can be applied much more evenly and the aceton also makes it dry much faster. and build it up quickly in layers. before sanding it still is best to give it some time to propperly set, although if you've carefull sanding might not always be needed. carefull with aceton as it will attack plastic (although tamiya filler and model glue are more agressive,). i keep a small jar especially for thinning filler and cleaning the brush, any filler that stay in there is used next time...no need to use fresh aceton each time but should you ever wish to dispose of it, just leave the container open in a ventilated area, and it will evaporate leaving just the stuff that was desolved in it. thought i'd mention it as i suspect this isn't the last bit of filling you'll be doing on this kit Edited January 9, 2016 by lunarhighway 1 Link to comment Share on other sites More sharing options...
gbondoni Posted January 8, 2016 Author Share Posted January 8, 2016 Thanks! That is a great tip, and you're correct, I will be doing a LOT more filling here, so will try it on some scrap, and if I can get it to work for me, I'll be giving this a shot - and I'll let everyone know how it went, once I get back from my vacation! Thanks for that! Link to comment Share on other sites More sharing options...
Jake Moon Posted January 9, 2016 Share Posted January 9, 2016 Very interesting build, am looking forward to future progress. Enjoy your vacation! 1 Link to comment Share on other sites More sharing options...
CliffB Posted January 9, 2016 Share Posted January 9, 2016 Great to see this model being brought back to life Cliff 1 Link to comment Share on other sites More sharing options...
gbondoni Posted January 9, 2016 Author Share Posted January 9, 2016 Thanks guys! Hope to do it justice... Link to comment Share on other sites More sharing options...
gbondoni Posted January 11, 2016 Author Share Posted January 11, 2016 I'm on holiday with no access to modeling materials or tools, but that hasn't stopped me from thinking about this one. As this is the first "real" build at 1/72, I prefer not to go down the camouflage route on this one, so liveries are something to think about. This plane was not a very numerous type in WW2. About 100 were built, all told, and save for some emergency use by Germany and Japan early in the war, they were mainly flown in combat by Romania, Spain and Hungary. I'm still waiting for my reference book to arrive which should make this a little easier to define, but the Spanish and Romanians flew liveries that meet my criteria, as well as having the few confirmed aircraft downings with the type, so here are the options. I heavily favor the Romanian look: I especially like the yellow over gray overall scheme on this one. The Spanish version, could work as well: But it does seem a little less interesting, and I'd have to define which version to model, as I'm pretty certain the Swasticas were gone by the time these versions of the plane saw action in North Africa (the Condor legion flew some, but the victories were gained with a different model, actually one of the prototypes). There is an Aeromaster decal set that exists, but seems to be as rare as hen's teeth: https://www.scalemates.com/kits/134348-aeromaster-72-135-he-112-collection. That would be my first option as Modelex brand decals are worse than unusable. I could also adapt Romanian Messerschmitt markings, but that might be less than ideal - will have to look into it further. Finally, I have been in contact with RS Models, who produce a kit of the aircraft, and they have informed me that I can purchase the decals separately (important, as purchasing a kit means that it will get caught in customs and affect my yearly allowance of two deliveries, something that is unacceptable to me). Their customer service was very prompt, so I want to avoid keeping them hanging - I will have to decide ASAP! Decisions, decisions! 2 Link to comment Share on other sites More sharing options...
gbondoni Posted January 16, 2016 Author Share Posted January 16, 2016 Well, have confirmed my order from MS Hobbies for a very reasonably priced decal sheet - will inform everyone of how they look and what I can build with them once I receive them. In the meantime, I should be back home tomorrow, so regular modeling will resume. Link to comment Share on other sites More sharing options...
Blitz23 Posted January 16, 2016 Share Posted January 16, 2016 This is an interesting re build, doing a great job so far. 1 Link to comment Share on other sites More sharing options...
gbondoni Posted January 16, 2016 Author Share Posted January 16, 2016 Thanks! I'm eager to get back to work on it once I get home. Link to comment Share on other sites More sharing options...
gbondoni Posted January 18, 2016 Author Share Posted January 18, 2016 So, got back from my vacation to find that the Squadron Publications book on the He 112 in Action has arrived. This little publication has a wealth of detail photos and some liveries. I have already gotten some great detail ideas. I did manage to get a little modeling done, but not too much progress to show for it yet, as I spent most of the time filing stuff into a semblance of shape and sanding the wheel wells. I also did some work on the cockpit, which I'll report in the next installment, once I figure out how to take pics of REALLY tiny things. 1 Link to comment Share on other sites More sharing options...

Recommended Posts
Create an account or sign in to comment
You need to be a member in order to leave a comment
Create an account
Sign up for a new account in our community. It's easy!
Register a new accountSign in
Already have an account? Sign in here.
Sign In Now