Search the Community
Showing results for tags 'bristol'.
-
 ICM is to release a 1/48th Bristol Beaufort Mk.1 kit - ref. 48310 Source: https://www.hannants.co.uk/product/ICM48310 V.P.
- 282 replies
-
- 11
-

-
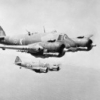
With it being ANZAC day tomorrow my contribution will be a Beaufort lost in 1942 with an ANZAC crew. Sources: Storr, Alan: RAAF FATALITIES WW2, v. 19. RAAF WW2 fatalities on attachment with RAF and other Air Forces : missing with no known grave : Officers Storr, Alan: RAAF FATALITIES WW2,v. 21. RAAF WW2 fatalities in RAF Beaufort squadrons and training units RAFCOMMANDS https://www.rafcommands.com Commonwealth Wargraves. www.CWGC.org “On 26 October 1942, Beaufort DE 110 piloted by PO Garriock, was in a formation of 8 Beauforts of 47 Sqn RAF, which left Gianaclis to strike against an enemy convoy of 2 motor vessels, a tanker and four destroyers nearing Tobruk.… The Beauforts carried out a torpedo attack and the Bisleys (Blenheim V) a low level bombing attack on the convoy. Ten miles on the return journey, DE 110 (PO Garriock), collided with a Bisley and crashed into the sea. No survivors were observed, and all crew members were lost at sea. Crew: RAAF 403733 PO Garriock, Walter (Pilot) Son of Arthur and Elizabeth Garriock, of Mascot, New South Wales, Australia. RNZAF NZ411228 FO Simpson, R W (Observer) Son of George Stephen Simpson and of Jane Irvine Simpson (nee Muirhead), of Feilding, Wellington, New Zealand. RAAF 407166 Sgt Davis, L G (Wireless Operator/Air Gunner) Son of George William and Elizabeth Stella Davis; husband of Ellen Jane Davis, of Clarence Park, South Australia. RAAF 404689 Sgt Hamilton, R J (Wireless Operator/Air Gunner) Son of James Henry and Amy Hamilton, of Toowong, Queensland, Australia. A.F.I.A. The crew of four have no known grave, and their names are commemorated on the Alamein Memorial, Egypt.” Some photos of the plastic (extra detailing bits (etch and resin on order and in the mail)) :
-
Hi, I think this is my most ambitious project so far. I saw this Bristol M.1C from Special hobby, but since I only build in 1:48, I had a terrible idea. Last year I was really into 3D printing, with my Floh project in PLA. With my Sopwith Triplane project not getting much time (but still ongoing and in the final act), I kind of compensated with a lot of Blender learning. So, the first victim was this Bristol, so I could get into the 3D modelling scene. The model is from PanzerOwl which has it for free in thingiverse. This was a good platform to learn how to thicken the pieces, join them, make holes, plan ahead, etc. Not without mistakes, of course, all part of a learning experience. I exported the pieces to a Form 3 resin printer. This is the PreForm print. With printing comes some lessons, as in, what is the minimal thickness for some pieces, how to orient them to get the best / strongest print, etc. I also used a vinyl cutter for masks. Some pieces I can reuse from unused kits, namely the Eduard Sopwith Camel which lends a 110 hp Le Rhône 9 cylinder and a seat, and a prop from a SE5. Wheels from a Fokker, and I also have an undercarriage taken from a Bristol Fighter. This is going to be really interesting, as not only I am assembling it, I also made the pieces, so really uncharted territory. Let's see how this goes, and hopefully, helps me get into finishing my other projects this year.
-
In 2020 Airfix is to release a new tool 1/72nd Bristol Beaufort Mk.1 kit - ref. A04021 https://uk.airfix.com/products/bristol-beaufort-mk1-a04021 3D render V.P.
- 433 replies
-
- 20
-
-
Release expected in Spring 2024 - ref. A05141 - Bristol Bulldog Mk.II https://uk.airfix.com/products/bristol-bulldog-mkii-a05141 V.P.
- 228 replies
-
- 29
-

-
-
 Beaufort Mk.I Engines (648983 for ICM) 1:48 Eduard Brassin ICM made the British modelling public, particularly those with a thing for WWII and 1:48 scale, very happy when they released their brand-new tooling of the oft neglected Bristol Beaufort. We’ve had several boxings now with various markings and weapons loads, and now we have a set of hyper-accurate engines to add an immense level of detail to your model. As is usual with Eduard's larger resin sets, they arrive in a Brassin-themed black-and-yellow cardboard box, with the resin parts safely cocooned in bags between two layers of grey foam, and the instructions folded around acting as additional padding. The sixteen resin parts in the box are all 3D printed, and are attached to their print bases via thin finger-like supports that are easily but carefully cut away, sanding away any remnants before proceeding. The detail is phenomenal, particularly the engine blocks, which are almost complete, just needing careful painting to bring them to life. Construction begins with the engines, making two, installing the bell-housings and prop-shafts to the front, following the painting instructions that give Gunze Sangyo codes throughout. The two exhausts and collector rings are made from two parts each, the collector rings inserting into the back of the cowling lip, while the outer surface should be painted in your chosen camouflage colour, as should the other cowling panels. The cowling lip is fitted to the front of the painted engine, the stubs of the collector ring mating snugly* with the feeder pipes that exit each cylinder of the radial engine, and these are joined at the rear by the highly-detailed ring of cooling gills and their mechanisms, after which it can be glued to the model when you are ready to do so. The two curved cowling panels per engine are separate parts that can be left nearby, on trestles, or on the wings once painted, and these are similarly well-detailed, having a near scale thickness to add even more realism to your model. * I tested the fit whilst handling the resin, and they stay together without glue, such is the level of fit. Conclusion It’s difficult to keep using all these superlatives about these 3D printed resin sets, but they really are that good. The part count is low, the detail is off the charts, and preparation should be pretty simple if you have some fine sanding tools, while the result will be well worth the effort you put into it. Extremely highly recommended. Review sample courtesy of
 -
 Joining with this recently released kit, of subject designed during the 1950s, and serving the RAF from 1958-1991. Tasked with protection of V-bomber bases, 783 Bloodhounds were built. Parts
 -
1/144 - Bristol Buckingham B.1/C.Mk.I by Valom - released
Homebee posted a topic in The Rumourmonger
Valom is to release in 2024 a 1/144th Bristol Buckingham B.1/C.Mk.I kit - ref. 14434 Sources: https://www.valom.net/?page_id=1137 https://www.hannants.co.uk/product/VAL14434 V.P.- 1 reply
-
- 1
-
-
- Buckingham
- Bristol
- (and 1 more)
-
Read in Modelforum.cz. There's a add in the CZ magazine REVI n°135 (http://www.revi.cz/cz/revi/135.html) about a future 1/48th Bristol Bulldog Mk.II/IIa kit by RS Models. Source: https://www.modelforum.cz/viewtopic.php?f=1&t=68170&start=15975#p2570827 Nothing yet in the RS Models homepage or Facebook. Wait and see. V.P.
-
Valom is to release a 1/144th Bristol Brigand B.Mk.1 - RAF Overseas - kit - ref. 14433 Sources: https://www.aviationmegastore.com/en/modelling/bristol-brigand-b-mki-raf--overseas-valom-vaclav-lomitzk-val14433-199681.html https://www.hannants.co.uk/product/VAL14433 V.P.
-
I’m looking for information on Bolingbroke turrets, specifically information for the twin Browning turrets. Does anyone have drawings, diagrams etc for the turret, guns, installation etc. Photos clearly showing the guns and internal turret configuration would also be great (I have most of the easily accessible IWM etc photos already). Thanks in advance!
-
Beaufighter Mk.I/VI Main Wheels Early (7481 for Airfix) 1:72 CMK by Special Hobby Kit wheels are generally in two halves, which means you have the resultant joins to deal with, possible mould-slip issues on single part wheels, and sometimes less than stellar detail due to the moulding limitations of styrene injection technology, especially in the tread department. That's where replacement resin wheels come in, with their lack of seamline and superior detail making a compelling argument. They are also usually available at a reasonable price, and can be an easy introduction to aftermarket and resin handling, as they are usually a drop-in replacement. This set is just that, containing two main wheels that are drop-in replacements once removed from their casting block, which is conveniently placed on the slightly flattened contact patch that just needs flattening off once removed. The tyres have the early block tread pattern, and the hubs are similarly early versions with five-spoked fronts and solid rears. Highly recommended. Review sample courtesy of
-
Beaufort Mk.I Undercarriage (481096 for ICM) 1:48 Eduard ICM’s new 1:48 scale Beaufort has made a lot of modellers very happy, myself included. Eduard’s new detail upgrade sets have started to come on-stream now, and this set is intended to detail-up the landing gear bays. As usual with Eduard's Photo-Etch (PE) and Mask sets, it arrives in a flat resealable package, with a white backing card protecting the contents and the instructions that are sandwiched between. The bay roofs are skinned with a new layer, which has a trio of raised stiffening crosses applied over certain panels. The front bulkhead is folded up perpendicular to the roof, while the rear bulkhead is a separate part that stands up above the surface of the wing. Additional detail parts are applied to the lower section of the rear bulkhead before it is inserted into the bay. The bay sides are also skinned with a two-layer detail surface, with an extra section fitted to the wing surface on each side that will be inside the bay once the cowlings are added. The upper part of the twin retraction jacks on the main gear are removed and replaced with a new folded portion, and a bay door bumper frame is fixed around the front of the main legs, plus another at the edge of the bay doors themselves. Small strengthening plates are then glued to the top of the diagonal section of the leg base, with two per leg. Highly recommended. Review sample courtesy of
-
Beaufort Mk.I Bomb Bay (7509 for Airfix) 1:72 CMK by Special Hobby Airfix’s new small-scale Beaufort kit has been around for over a year now, and here comes a new bomb bay set from CMK by Special Hobby to increase the detail in there, and add a set of bombs to populate it too. As usual with CMK's resin sets, they arrive in the familiar clear vacformed box, with the resin parts safely inside, and the instructions sandwiched between the header card at the rear. Inside the package are twenty-three resin parts on nine casting blocks, some of which are very fine, so care must be taken when removing them from their blocks. Before you can start work, you need to sand back the details from inside the kit fuselage sides and roof, plus remove the central section of the bomb bay door part, C17. With that out of the way, the bay can be skinned with new roof and side surfaces, adding a pair of C-shaped bulkheads with inserts, plus fine resin actuators front and rear. The roof is prepared by installing two bomb carriers with shackles front and rear, which accommodate one of the resin bombs each. The bombs have separate noses and cylindrical fin surrounds added beforehand, and are inserted between the V-shaped parts of the anti-sway shackles. The bi-folded bay doors are then glued to the sides of the bay to complete the job, with plenty of painting in between. Highly recommended. Review sample courtesy of
-
Beaufort Mk.I Tface Masks (EX909 for ICM) 1:48 Eduard ICM’s new Beaufort is a great kit, but it’s got a lot of glazing that might make some of our fellow modellers wince at the prospect of having to mask off the many clear parts, especially as is common with a lot of early WWII aircraft, it was quite a greenhouse, with frames everywhere the order of the day. Well, worry not because Eduard are riding to the rescue with this comprehensive set of masks. Unlike the usual Tface sets, this is supplied in an A5 flat-pack, on two sheets of yellow kabuki tape with extensive diagrams guiding you. These pre-cut masks supply you with a full set of masks for the canopy and all the other glazing both inside and out, with compound curved handled by using frame hugging masks, while the highly curved gaps are in-filled with either liquid mask or offcuts from the background tape. In addition, you get landing light masks, masks for the forward-facing gondola under the nose, and a set of hub/tyre masks for the wheels, allowing you to cut the demarcation perfectly with little effort. Having used a Tface set of masks for my recent Wildcat build, I’m a huge fan of the concept, as I believe it gives your model’s glazing extra realism and depth, so will be using these sets at every opportunity. They’re highly accurate too, and once you have installed masks on the exterior panes, locating the inner sections is much easier, as you don’t have any doubt as to where they should fit. Very highly recommended. Review sample courtesy of
-
Beaufort Mk.I Mainwheels & Tail-Wheel w/leg (4456) 1:48 CMK by Special Hobby Kit wheels are generally in two halves, which means you have the resultant joins to deal with, possible mould-slip issues on single part wheels, and sometimes less than stellar detail due to the moulding limitations of styrene injection technology, especially in the tread department. That's where replacement resin wheels come in, with their lack of seamline and superior detail making a compelling argument. They are also usually available at a reasonable price, and can be an easy introduction to aftermarket and resin handling, as they are usually a drop-in replacement. As usual with CMK's resin sets, they arrive in the familiar clear vacformed box, with the resin parts safely inside, and the instructions sandwiched between the header card at the rear. Inside are two main wheels with separate hubs for each side, and a tail-wheel with separate strut in a harder black resin. Our strut had taken a hit before it was packaged, and had a tiny piece missing, so check yours when you get it, just in case. Each main wheel is cast on its own block, and is joined to it at the bottom where the tyre is slightly weighted, so clean-up won’t be too onerous or risk damaging any detail. The hubs are cast in pairs, and are cut off at the rear at the base of a tapered “socket” so that fit is good once you remove any roughness. Highly recommended. Review sample courtesy of
-
Beaufort Mk.I Cockpit & Dinghy Upgrade Sets (7506 & 7508 for Airfix) 1:72 CMK by Special Hobby Airfix’s recent Beaufighter has been around for a year now, and it has been well-received and many have doubtless been built already. Special Hobby’s designers have now completed a number of resin upgrade sets to improve on the detail that the kit provides, on the basis that resin can perform some casting tasks that would be difficult or impossible in injection moulded styrene. As usual with CMK's resin sets, they arrive in the familiar clear vacformed box, with the resin parts safely inside, and the instructions sandwiched between the header card at the rear. Decals and Photo-Etch (PE) when included is separated from the resin parts by a clear piece of acetate to prevent scratching and damage during transit. Interior Set (7506) This set includes twenty-seven resin parts on nine casting blocks, a small fret of PE parts, and a small slip of clear acetate with printed dials for the instrument panel. The first act is to add the wafer-thin inserts into the forward fuselage after sanding off the moulded-in details, using three to cover the area. The cockpit is based upon the kit floor and the bulkhead/wing spar, although heavily augmented with new parts. The bulkhead first has a closed section removed, then has a new resin replacement placed over it along with three angled add-ons, and an additional box and cylinder applied to the new bulkhead skin. The cockpit floor has thin resin panels added at the front, the leftmost of which has the well-detailed pilot’s seat placed on top after building it from four resin parts and with four PE seatbelt sections, plus a two-part resin/PE control column in front of it. To the pilot’s side, a console, twin throttle quadrant with a total of eight PE levers, and the instrument panel, which is laminated up from two pieces of film, three of PE, and a resin backing layer, to which PE rudder pedals are glued. At the front of the floor a pair of seat parts are glued to the semi-circular front bulkhead, and on the port fuselage, a side console with two additional resin parts hanging from it are fixed to the sill. Dinghy & Bay (7508) This set holds just three parts, and requires a panel to be removed from the port wing, into which the bay is glued, with the packed dinghy placed within after painting. The bay cover is supplied as a separate part to replace the section of the skin previously removed from the upper wing, so you don’t have to be unduly careful with the removal process until you get toward the panel lines and begin testing for fit. Conclusion A pair of excellent new sets to add more detail and interest to your model, setting it apart from the others out there. Highly recommended. Review sample courtesy of
-
Bristol Blenheim Mk.I 1:48 Airfix (A09190) At the time of its first flight in April 1935, the Bristol Blenheim was one of the most advanced aircraft of its type. It's fully metal, stressed skin construction, powered flaps, retractable landing gear and variable pitch propellers all helped it stand out from the biplanes then in service with the RAF. Powered by two Bristol Mercury radial engines, the Type 142 as it was originally know, was a very fast aircraft for its time. Such was the pace of aeronautical development in the 1930s though, that by the time war broke out in 1939, the Blenheim was dangerously outclassed by the modern fighters of the Luftwaffe. During the early stages of the War, Blenheims were used for some of the first raids on Germany and they continued to be deployed in raids on German occupied airfields during the Battle of Britain. Some notable successes were achieved, although arguably more a result of the heroism of the pilots than the capabilities of the aircraft; losses were unacceptably high. The Blenheim was outmatched as a fighter too, but as with many similar aircraft, it enjoyed more success when adapted for night fighting, at least until the more heavily armed Beaufighter entered service. The Blenheim saw action in the Far East as well, and a number of aircraft were exported to Finland before the outbreak of war. The Kit This is a new tool from Airfix which follows their 2018 Mk,1F. The kit arrives on six main sprues along with a clear sprue. The quality of the parts is excellent throughout. For a kit with large clear parts these are very well done and perfectly clear. Disappointingly for fans of modelling clichés, construction begins not with the cockpit but with the bomb bay behind it, this also incorporates the spars for the wings. The doors can be open or closed for this, but if you want them closed you will have to cut the door off to reposition them. Once this is made up then we can get to work on the cockpit starting with the pilots seat and its supporting framework. These parts are highly detailed and replicate the real thing, the control column goes in front of the seat. The seat attaches to the front of the bomb bay and the whole structure is slid into the left fuselage half. Details for the bomb aimers position then go in the nose with hs fold away seat going next to the pilots seat; to finish off here the main instrument panel is fitted. Continuing on in the left fuselage half at the rear the support for the tail wheel is added, then continuing forward the boards under the upper turret are added. Holes must be drilled for the rear mounted bomb racks. To the right fuselage half the the rear mounted radios are added and at the front another fold down seat in the nose. The fuselage halves can then be joined and the top insert added along with the upper escape hatch. With the fuselage buttoned up, attention turns to the wings. The inserts for the landing lights are added into the wing leading edge. Next up on the lower wings the lower engine nacelles go on. Into these fits the landing gear. Here like all of their models Airfix provide different parts for the gear up or down. More simplified parts being provided for the raised option. If doing the gear down then internal bulkheads need to be added in followed by construction of the complicated landing gear. This seems to accurately depict the complex gear in both its looks and multipart construction. The gear fits between the rear part which represent s the main spar and the front engine firewall. Once the gear is securely in each lower wing the rear part for the flap bay is added. Now the upper and lower wings can be assembled, and the wings added to the fuselage. Small inserts between the trailing edge and the fuselage finish this part of the build. Next up its time to look at the flying control surfaces. The tailplanes are built up. The fixed parts are split upper & lower and these trap in the single part control surface when they go together. Once built they can be added to the fuselage followed by the rudder. We can now move to the construction of the engines. Again these are quite detailed. While not a full engine it will appear so when viewed from the front. The front cylinder bank goes onto the main backing plate with additional engine parts and the hub going on the front. The exhausts then go onto the engine. Collector stubs are attached to the front single part of the collector ring which then mounts to the front of the engine. The structure behind this is then built up with one main lower part and left/right upper parts. A choice of open or closed cowl flaps is then provided for the rear. once the intakes are added the completed engines can be mounted to the wings. Now the flaps can be added to the main wings. These can be open or closed, however if the modeller wants to close them up they will have to remove some of the moulded in structure to enable them to close. Outboard of the flaps the single part ailerons are added, this finishes off the wings. The next major part to be constructed is the upper turret. Again this is quite a complicated structure like the real thing. To aid construction Airfix have proved a jig to get everything aligned correctly. The vertical assembly is at this point constructed horizontally, care will be needed with the instructions here to understand how it all fits. Once the structure is together and solid it can be removed from the jig and the glazing added. The complete assembly then slides down into the fuselage. We are now on the home straight. The wheels and front doors to the landing gear are added, followed by the tail wheel. A single part cover is provided if the bomb bay is to be closed up. If not then the outer doors are added followed by the bomb load. Additional smaller bombs and their racks are added to the rear fuselage (hopefully you opened up those holes at the beginning!) . Before fitting the cockpit glazing a pilot figure is provided if you want to use him. There are four parts of the large glazed area; left & right main parts, with two top parts. The last one can be placed in the closed position, or slid back into the open position. To finally finish off the landing lights area added along with the propellers, aerial mast and pitot tube. Decals The sheet is by Cartograf which guarantees quality with no issues. Two marking options are provided. No. 211 Sqn RAF, Menidi, Greece 1941 (As seen on the box art) No. 90 Sqn RAF, RAF Bicester, Autumn 1938. Conclusion This kit continues Airfix's rich vein of form. It is a beautifully made, high quality kit which is packed with detail and options. The accurate shape and fine surface detail makes this kit a real winner, with the slightly complex breakdown of parts the only real challenge. Highly recommended for fans of pre/early-war British aircraft. Review sample courtesy of
-
Beaufort Mk.I Löök (674001 for Airfix) 1:72 Eduard This set contains a combination of pre-printed resin and PE parts to quickly and efficiently detail up your cockpit. There is a single resin part that replicates the instrument panel in front of the pilot, with glossy faced dials already painted for you on detailed black resin. The fidelity of the printing at this size and scale has to be seen to be appreciated, and stands up well even under 2.5x magnification. Additionally, the PE set of four-point belts for the pilot, plus a Y-shaped part that you fold in half to replicate a lever found on the right of the instrument panel. Review sample courtesy of
-
AviS is to release 1/72nd Bristol Bullfinch kits - ref. BX72052 - Bristol Bullfinch I Source: https://hobbyterra.com/product/plastic-model-1-72-bristol-bullfinch-i-avis-72052.html - ref. BX72053 - Bristol Bullfinch II Source: https://hobbyterra.com/product/plastic-model-1-72-bristol-bullfinch-ii-avis-72053.html V.P.
-
Beaufighter Mk.II Late Conversion Set (7490 for Airfix Mk.X) 1:72 CMK by Special Hobby When Bristol were developing the Beaufighter from their own Beaufort light bomber, there were concerns that the proposed Hercules power plants could be in short supply, as at the time the new Stirling heavy bomber took priority. As a stop-gap measure in case those concerns materialised, the Mk.II Beaufighter was developed to mount a pair of Merlin XX engines in streamlined nacelles that were designed by Rolls-Royce, and bear a family resemblance to the later Lancaster bomber with good reason. Of the 330 airframes built with Merlins on the wings, around a third were lost in accidents due to the aggressive torque steer of the twin Merlins on take-off and landing. Unbelievably, the type was also considered to be underpowered when compared to the Hercules equipped airframes, which is especially confusing when comparing the performance of the Stirling with the Lancaster. The Conversion This is a resin conversion set that is designed to be applied to the Airfix Beaufighter Mk.X kit, and arrives in a large cardboard box that has thirty-six resin parts inside, plus a small Photo-Etch (PE) fret and a decal sheet, all packed into two Ziploc bags and protected by the folded instruction booklet. Some of the resin parts are large, the biggest being the inner wing panels and engine nacelle fairings, which also incorporates the gear bays, both of which are filled with detail, and have panel lines in a style matching those of the kit. Construction begins with removal of the kit’s inner wing panels and the intakes for the oil coolers, which should be sanded back to the profile of the leading edge, filling any depressions where needed. The remaining outer wings are then joined with the resin inners, with a deep plug projecting into the outer panel to give a strong join. The nacelles, their exhaust stubs and PE flash hiders are mated to the bulkheads, with small intakes on the cheeks, and a small upstand at the rear of the nacelle fairing. The props consist of a back-plate, three keyed blades, and hollow spinner that are made up as a pair to be glued to the front of the nacelles after painting. The kit landing gear is made up and inserted into the new bays, taking your cues from the Airfix instructions, then the bays are bracketed by new resin doors, plus an exhaust flap under the engines, set in the open or closed position at your choice, using two PE struts to support them at each side. On my example, the flaps had detached from their casting block, but were otherwise undamaged. The wings have PE radar aerials drilled into the leading edges, with distances from the nacelles given to assist you. Another arrow-shaped antenna is fixed into the centre of the nose cone, and a towel-rail antenna attached to the underside of the fuselage, offset to one side slightly. The last aerial is just behind the astrodome on the fuselage spine, and the last resin parts are the elevators, which are fixed to the fuselage at right-angles to the unfilleted tail fin. Markings There are a generous five markings options on the decal sheet, including day and night schemes. From the box you can build one of the following: Mk.II EW-U/T3048, No.307 (Polish) Sqn. RAF, Exeter, 1942 Mk.II ZJ-M/T3415, No.96 Sqn. RAF, S/L Dickie Haine, Wrexham Base, England, May 1942 Mk.II RX-B/T3017, No.456 Sqn. RAF, S/L Charles G C Olive, CBE DFC, Valley Base, Anglesey, Wales, 1942* Mk.II KP-K/T3145, No.409 (Canadian) Sqn. RAF, Coleby Grange, late 1941 Mk.II, LI-P/T3223 No.798 Sqn. FAA, Lee-on-Solent, 1944 * Note that the instructions have spelt Valley and Anglesey incorrectly. The decals are well-printed, sharp and with good register to allow you to build one of the options above. Conclusion If I was a 1:72 builder I’d be building this right now, as it’s a pretty cool conversion. The resin is well-cast, the build should be relatively easy, and the instructions are comprehensive. Highly recommended. Review sample courtesy of
-
Beaufighter Mk.VI Wheels (648754 for Tamiya) 1:48 Eduard Brassin Kit wheels are generally in two halves, which means you have the resultant joins to deal with, possible mould-slip issues on single part wheels, and sometimes less than stellar detail due to the moulding limitations of styrene injection technology, especially in the tread department. That's where replacement resin wheels come in, with their lack of seamline and superior detail making a compelling argument. They are also usually available at a reasonable price, and can be an easy introduction to aftermarket and resin handling, as they are usually a drop-in replacement. This set contains three resin wheels, four outer hubs to give you a choice of two styles, a replacement tail-wheel strut in tougher white resin, and a sheet of kabuki-tape masks. The smooth-tread main wheels are cut from their casting blocks at the bottom, where the slight weighting can be seen, with the balloon tail-wheel similarly prepared and slotted between the two legs of the new resin yoke. Each wheel is a drop-in replacement for the kit parts, and as mentioned are supplied with pre-cut masks from the Kabuki-tape sheet (not pictured) inside the package to make the job even easier. The detail is exceptional as we’ve come to expect from Eduard’s wheels, especially around the maker’s details, and it has to be seen to be believed. Highly recommended. Review sample courtesy of
-
So recently i got hold of one of my favourite world war 2 aircraft. The bristol blenheim was an aircraft which was both a bomber and a fighter but lacked improving technology along with other aircraft. By the 1940s it was considered the blenheim to be too outdated and was too slow against enemy fighters. Pilots and crew were awarded medals just for flying in the aircraft. So onto the kit and to begin with there is a very nice box art. And also a choice of day or night fighter included. And also some very well produced details, which is common in airfix new tooled models. As expected the parts are very well made... To begin with the undercarriage bulkheads where fitted into place and the main frames were fitted into place also. A small bit of detail will be required but already a good start. Next the main fuselage was joined together. Work then began on the cockpit sections. Including pilots seat bombardiers position and interior components. With a basecoat of green down weathering will be done with a wash and details picked out. To finish off the evening i fitted all the parts together with a dry fit to see how well the fitments are. Details and wash will be done next before fitting everything into place. And i am also looking for referances if for addimg details and other parts. Thanks for looking.
-
Fly is to release a new tool 1/72nd Bristol 170 Freighter kit - ref.72030 Source: http://www.fly814.cz/pripravujeme-preparing/ V.P.
-
Airfix is to release in 2015 a new tool 1/72nd Bristol Beaufighter Mk.X kit - ref.A04019 Expected July 2015. Source: http://www.airfix.com/catalog/product/view/id/8398/category/15/ V.P.