Search the Community
Showing results for tags '1/76'.
-
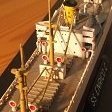
On a fairly cool saturday morning in Spring 1963, it's about quarter past 5 when I get up. I get over to the paper shop (conveniently just along the street) for about 6 am in order to help the owner put my last paper round of the week up. Off out at about 6.30, and back around 8 am. I got paid my 15/-, (not bad for 6 morning paper rounds) from which my mother will have 5/- and I keep the 10 bob left. I'll spend maybe 5 or 10 minutes looking through the comics to see if there was a Superman, or Batman, or another that I wanted to buy, which if I did, would set me back I think around a shilling, or maybe 1/6. And then it was over to the display of Airfix kits - only airfix, I never saw a frog or any other manufacturer's kit there - and browse along the kits - in bags then - for something I hadn't already made. That wasn't so difficult. actually as airfix seemed to release new kits almost every week, but in case I didn't find something there I'd go home, and wait until Woolies was open - at least, If I wasn't playing rugby or cricket for school - and see what they had. Between the newsagent and Woolies I'd find something, mostly in the 2/6 kits, but occasionally in the next price level - 3/6? More expensive kits were for birthdays or Christmas. Then it was home, take it out of the bag, start making it, go and have lunch (except we called it dinner then) and if I'd completed making it, paint it. Then after watching the teleprinter for the football results to see how City had got on, I'd go and - "play" with my new model. Mostly, for a plane, this involved flying it in one hand against an opposition aircraft in the other, with plenty of dakka dakka dakkas and the falling out of the sky of whichever plane was the loser.............. Now I wonder for how many Britmodellers this was mostly there own saturday routine? I think it was mine up until I was 16 or 17, when the pressure of A levels took over leaving little time for modelling. Why am I reminiscing? Well, wondering what to make after finishing my U boat, while browsing the stash I chanced upon the airfix gift set of its 1/76 Cromwell (purchased with some other airfix kits on impulse from Aldi or Lidl a few years ago). Suddenly, as in all good stories (I'm trying to make this a good story so I'm using good story tricks) I was seized with nostalgia for those bygone saturdays, when if I didn't build a plane, it would be a sherman, or Churchill, or Panther, or 17 pdr and quad tractor, or the bren carrier, or another one of those 1/76 airfix military vehicles. Or even a ship! And as I was doing this on a saturday morning, it was with boyish enthusiasm that I decided to make the kit on a saturday, just like my teenage years! Boy, hadn't I forgotten that 1/76 scale is amazingly small! Early teenage hands were probably smaller than my late adult, but my goodness, some of the parts were almost literally too small to handle. But no, suddenly enthused to do a complete build on a saturday I gamely ploughed on. On Sunday night I wondered why I hadn't got a lick of paint on the kit, but had a bit of filler instead. You know, I was applying modern day modelling techniques ( in my own uniquely ham fisted way) to a 60 year old kit. Well one that I think might have first come out some 60 years or so ago. The kit itself was very well made. Only the tiniest bit of flash on a few places, most parts fitted perfectly and despite the size of so many, I didn't lose one to the carpet monster! An achievement in itself! But -- and isn't the case that that there'll be a but - removing the pieces from the sprues (or runners) was a nightmare. The sprues attached to the parts with blobs often bigger than the parts, and so placed on the sprue that I had a job to cut them off, no matter if I used a razor saw, a swann morton no.10a, or snippers, sometimes leaving a disproportionate amount of sprue on the part. Which wasn't easy to remove. On Monday I painted; the tank body in overall Tamiya rattle can nato green, which looked to me to be ok, but now, comparing it to the box art, I'm not so sure. It's probably a bit dark, if I'm honest. The tracks - not the rubber tracks of the '60's that alarmingly were so tight they pulled the idler and drive wheel parts in toward the middle of the kit, but plastic tracks that fitted nicely. A few touch ups here and there and the kit was finished. A couple of days later than I had hoped, but I don't regret the extra time. In fact, I wonder now just how badly I made and painted models on a saturday afternoon ! Now where's that Scammell tank transporter I bought recently from a model rail way shop? So here are some pics, thanks for looking.
-
First time posting a build for inspection, so apologies for lack of good pictures of this 1/76 Crusader by Airfix I've built as a Crusader III. Built up well enough, with the side skirts being the only parts that needed some help to fit, then applied the original kit decals which went on without issue, much to my surprise considering the age of the kit. Then hand brushed with Vallejo Black and Gunship Green to make as close an approximation to the intended colours the kit instructions wanted as possible. The tracks I just stuffed into the skirts and superglued into place. Honestly, came out better than I expected for my first conventional armour model kit. Got me to consider getting at least one or two of the kits in the range, like the Chi-Ha or Chieftain.
-
I'll be along with one of these... Was expecting one (or more) to turn up in the Airfix Classics GB, is I'll be putting that to rights. Happy memories of popping these out on a Saturday afternoon back in the day, so that should make it ideal material of a BlitzBuild. The timing of a Saturday afternoon was pretty much the same as The Longest Day which was 3 hours long; so that's how long I'm allowing myself for this build, especially as the decals are designated as Operation Overlord No research or rabbit holes, this is straight OOB (sure my first one was in a plastic bag and later a blister pack- times change) Staying with how times change; with fast drying acrylics it should be easier than it used to be. In the interests of 'Build 'em All', I'll be doing the trailer as well: A lot more instruction steps nowadays but the same number of parts🤔
-
 A couple of old Matilda tanks from Airfix and ESCI came my way so I though I'd have a go at a tiny diorama - something I haven't done since the early 70s. The 1/72 ESCI kit, although undamaged, was probably the better model but so badly built and painted it would have been beyond my skills to renovate it. The Airfix version wasn't quite the correct shape and had some bits missing, but with a bit of barrel drilling and weathering buffed up quite well. I'm not sure if any Matildas with this colour scheme/markings survived as late as El Alamein but I wanted to have a go at placing Slater's plastic lettering in the scene instead of using a brass plaque. The sand base is Javis fine cork chippings, cork boulders and Army Painter Battlefield Snow (stuck to the base with AK Water Gel) airbrushed with MiG Ammo primer and sand acrylic. The figures are from the old Airfix 8th Army set; probably the same vintage as the tank. All in all an easy little build that kept me occupied for two or three hours.
- 3 replies
-
- 21
-

-
- Matilda Mk III
- 1/76
- (and 1 more)
-
Two sets of Bandsmen (S1) with more than two sets of Guardsmen (S2)
-
A part set of Airfix HO/00 S2 Many of these had broken rifles, so I chose to depict those with modern weapons. This is a full set of 01702 supplemented with a few S2 figures. Finally the recently re-issued A00702V Vintage Classic box set.
-
 Resistance is futile! I've got the classic symptoms of the build 'em all virus! Seeing how many locomotives are in build, I was thinking we needed to add some wagons. Was thinking of a box van but the lure of a childhood favourite was too much, so here comes the Cattle Wagon. Apparently a first issue from 1961, and if I can trust Scalemates not a Rosebud Kitmaster acquirement but an Airfix original. This though is the Dapol repop with some modern enhancements. So let's open the bag... From the KingKit website, here's the original box Instructions, in a modern style (as are the decals) The parts, as per the original. Wonderfully overscale, but the boyhood joy of opening doors (analyse that Dr Freud). The original Airfix couplings are top right though not the quaint elastic band that used to be included to act was a tensioner (tough it is shown in the instruction). Now, to the modern parts... Real wheels! I seem to think the original Airfix ones were plastic join in the middle split axle. Also included are useful couplings Alas no ballast, some thought on how to make a flat one for the floor (which is visible when the doors are open. Completely the wrong scale for me, but an unsuspecting friend will be getting a present. Expect I'll starting far sooner than I should!
- 55 replies
-
- 16
-
-
- Dapol repop of Airfix classic
- 1/76
- (and 1 more)
-
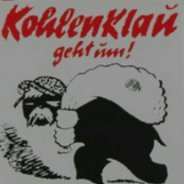 I'll put this here as a place holder as I probably won't start it for a week or so. Late 70s boxing I guess, with RC's finest on the front. The mouldings look pretty nice and crisp through the bag, I'll inhale some genuine 1970s air when I crack it open 😁
 -
What to do with a spare braille scale T34? ... It didn't end up being used as envisaged in a small diorama, on the basis its 1/76 and wouldn't go with anything else much, plus it's a bit of a rubbish kit anyway in all honesty, Fujimi of, I guess, 70s origin .. I could've just binned it or given it to a neighbours grandson (do kids still make "airfix kits" these days?) but not liking to waste stuff thought I'd at least do something with it. One requirement.. I'm not using the tracks, at all, they are the worst kind of shonky elastic band rubbish and I can't see any way you could decently use 'em!.. The obvious scenario would be an ancient rusty battlefield wreck or similar... then I thought of using it for a small diorama in a Soviet tank factory, a part built tank, might be interesting...
-
This was last weekend’s build. A nice bit of kit considering it’s a much older Mathbox rehash. Sufficient detail to make it fun to add some weathering and wear to it. Think I need to try armour in a bigger scale though to add a bit more detail.
-
Airfix 1/76 Zoo Animals Set 1 (01724) Airfix 1/76 Zoo Animals Set 2 (01725)
-
 The Long Range Desert Group was formed in Egypt in June 1940 by Major Ralph Alger Bagnold, specifically to carry out deep penetration, covert reconnaissance patrols and intelligence missions behind Italian lines. During the Desert Campaign, between December 1940 and April 1943, the vehicles of the LRDG operated constantly behind enemy lines for all but 15 days. Nicknamed the "Libyan Desert Taxi Service", they were often used to help guide other units, such as the SAS, across the sandy terrain, due to their expertise at desert navigation. Their most vital role however was the "Road Watch", where they clandestinely monitored traffic on the road between Tripoli and Benghazi. With the end of the Desert Campaign, they continued operating in the Greek Islands, Italy and the Balkans. A request to transfer to the Far East after VE Day was declined and the unit was disbanded in August 1945. The unit used a variety of vehicles, modified for their use, but the two most well known are the Willys Jeep and the Chevrolet 30cwt truck, both stripped of all non essential parts, such as doors, windscreens and roofs, and festooned with machine guns, sand channels and other equipment vital for operating for long periods in a harsh environment way behind enemy lines. So, here is the kit. I would have preferred the original Matchbox boxing, if only for the box art, but prices have generally been more than I have been prepared to pay. Found out after it had been delivered that the kit had been started, though its thankfully well under 25%. Plenty of parts still to go, including the all important diorama base! Instructions (I have downloaded the original Matchbox ones too off Scalemates, mainly for the Humbrol paint numbers). One benefit of the Revell boxing is the much newer decals. None for the Jeep, but thinking of the T Patrol markings for the Chevy. Looking forward to getting started, but not sure when this will be, as I currently have a build underway in the Classic Italian GB, plus I really ought to have a bit of a tidy up of the creation station before embarking on another build!
- 56 replies
-
- 14
-
-
In a way, I'm glad I discounted this kit in my youth, though it goes together well patience is needed to get all the hull parts to meet neatly. I'm really pleased with the base I used Citadel texture paint to create cracked mud at the bottom of the crator. As always the figure is a delight to paint. OOB apart from the wing mirror arms which were replaced with finer wire. Shading and weathering were done with enamels, oils and acrylics as required (and probably the same brush!). I've done this as a Middle East vehicle that has a fresh Light Mud (Stamer mix) scheme applied for the Italian invasion so I've kept the wear light. I've used a mix of the kit markings for want of anything better as contemporary photos seem hard to come by on the internet - those who know can roll their eyes and grumble to themselves
- 9 replies
-
- 36
-
-
- matchbox
- Humber Armoured Car
- (and 1 more)
-
3-D printed, painted in Vallejo, Revell, and Humbrol acrylics. Decals from the Airfix Refuelling Set.
- 7 replies
-
- 15
-
-
- Ray Rimes Designs
- 1/76
- (and 1 more)
-
 Whilst going through my stash for another GB I came across another few that are eligible for this one, though I will only be building one. Back in I think 1961 Airfix released their first Tank kit - the Sherman. I remember being on holiday visiting relatives in Scotland, and walking into Woolworths in Alloa and seeing it, so that was the first of a string of Airfix military vehicles I built. Generally they went for the better known ones - Sherman, Tiger, Panther, Panzer IV, Stug III, T34 and so on, so there were plenty of gaps, and I was therefore pleased when one day in the early 1970's I saw a batch of Fujimi tanks in my LMS which filled some of them. Over a few years they built up quite a range, together with diorama sets, 88mm AT gun and so on and with the smaller kits they included extras such as motor bikes, Kubelwagen/Schwimmwagen/Jeep etc. Below is a copy of the relevant pages in there 1976 catalogue. By that stage they had released everything shown up to the Panzer Jager I and seemed about to release a Japanese Ha Go, and on another page they had another half dozen " future releases" shown in silhouette which comprised a Befehlswagen I, Gigant, Panzer II, Marder II, SiG 33 and Wespe, but for some reason none of those 7 were ever released and they went into a sort of hiatus. Then, about 10 years later more kits began to appear though mostly the more "commercial" ones such as Panzer II, II, IV, V(Panther) and Panzer VI(Tiger). and subsequently they have released a few more including some post war Japanese Defence Force ones and an IS-2. According to Scalemates, most if not all of the second batch were formerly Nitto kits if I am reading it correctly. I have built all of the first batch, some more than once, and also a few of the second batch. In my stash I still have a few of the first batch, mostly Valentines, which I bought many years ago with a view to converting them into early British A9 and A10 Cruiser tanks, but then I discovered the Millicast range of resin models which already had those, so the Fujimi ones never got built. If anybody fancies building one please send me a PM. The original Fujimi King Tiger (WA1) was of the late production version with the so called " Porsche" turret, but the one I intend to build now is an early one with the so called "Henschel turret" - in fact both turrets were designed by Krupp but more on that another time. It was first released sometime in the 1980's so I guess it qualifies. This is my build of the original Fujimi "King Tiger" with the "Porsche" Turret. It will be interesting to see what differences there are between that original Fujimi moulding and this later presumably ex Nitto one. Pete
 -
When I first became aware of this proposed GB I was I believe getting ready to start the Armoured Cars one and for some reason decided I would just enter the 4 APC/ICV in my stash. Whilst looking for something else today, I stumbled across something a bit more basic in the form of "transports"- I bought this when it first came out in around 2010 and got as far as painting the tilts in a sandy brown colour, then put it away and completely forgot about it. The two are I assume eligible for this GB, but perhaps Robert @Robert Stuart can let me know whether he is ok with a joint build or would prefer them separate? Pete
-
The road to Tobruk One new build and one restoration of a previously built model.
-
Here's my latest completion of this Vintage Classic. I chose to make some small alterations/additions like opening the side door, glazing the windows and having the front windows open, scratching wing mirrors, plus a few small additions to the 25pdr. I was pleasantly surprised with how it went together - I was rather expecting a struggle, but it all went smoothly. Anyway, some pictures.
-
I though I would start off with what should hopefully be a fairly simple build. Back in the 1990's a company called JB Models released a range of small kits of British Army vehicles - Light Tank Mk VI, Bedford lorries, Land Rovers etc. They also included the Alvis FV 601 Saladin 6x6 armoured car and the Saracen APC which shared the same chassis etc. Airfix seem to have taken over the moulds and this was reboxed and released in I think 2005. I built their Saladin last year. During WWII the Brits mainly used relatively small 4 wheeled armoured cars such as the Humber and Daimler though the AEC one was rather bigger as was the T17 Staghound from the US and they also looked at the very big T18 8 wheeled Boarhound though decided not to use it. The US made a lot of use of the 6 wheeled M-8 Greyhound and the Germans quickly went from 6 wheel to 8 wheel "heavy" armoured cars which must have made an impression because after the war ended the War Office decided that they needed something bigger than the Daimler and with 6 wheels to improve the cross country performance of what would inevitably be a heavier vehicle. This led to the Alvis FV 601 Saladin, and it was decided to use the same basic running gear for a family of vehicles which eventually included the FV 604/610 Armoured Command Post, FV 603 Armoured Personnel Carrier, the FV651/652 Salamander Fire Engine, the FV 620 Stalwart amphibious load carrier, together with various other versions including an ambulance and a REME fitter's transport. Initially it had been thought that the Saladin would take priority but the outbreak of Guerrilla warfare in Malaya and other places at the end of the 1940's caused an urgent demand for the Saracen, and so the Mk 1 entered service in February 1953, around 5 years before the Saladin as Alvis could not cope with production of both in parallel and their attempt at subcontracting to Crossley failed when that company was taken over and the factory closed, or so it seems. More later. Pete
-
Three of the Airfix resin buildings - European Ruined Workshop, European Ruined Cafe and Polish Bank. Built as a scenic backdrop against which I can photograph vehicles and figures. It's sort of finished, there may be additions to the buildings as I rediscover bits and bobs, but the concept is laid out. Expect to see this behind many AFVs and men.
-
Hi all. While I'm flitting about with builds in another GB, I thought I'd start this as a 'slow burn' until the others are complete. I have a number of subjects that could fit into this GB, so I thought I'd start off with this Guy Armoured Car Mk. 1/1A by Milicast in their 1/76 scale. The obligatory stuff: The box. The resin parts...with breakages . The instructions. According to the above, the only difference between the Mk. 1 and the 1A is the weapons. Clean up time I guess. Stuart
- 36 replies
-
- 14
-
-
Here is my rendition of my recently completed Guy Mk.1 Armoured Car as part of the Armoured Car & Halftrack GB here: The kit used was the Milicast 1/76 resin kit and although it had some nice detail, it also had a little damage, particularly the smaller parts. Thanks for looking.
-
So, after a couple of easy builds I will start on a few more complicated ones. About 10 years ago I got as far as priming it and joining up the hull and axles, but to comply with the 25% rule I have dismantled the latter so it is now back to as in the box other than the primer. I started building small scale kits after I bought the Airfix Sherman in Woolworths in Alloa just after it came out - I thought it was 1960 but Scalemates say 1961. I worked through their following issues - Panther, Tiger, Crusader etc but in the early 1970's Fujimi started releasing their 1/76 range which filled a lot of gaps. I bought 2 Sd Kfz 222 kits. As you can see I did one in the old and rather orange Humbrol Authentic Afrika Korps sand and one in late war colours. They are very nice kits to my mind, the only weakness being the "solid" wire mesh grenade screen on the top of the turret. I suppose it would be possible to replace it with some etched mesh but I can't be bothered. I did the same with a couple of Sd Kfz 251 kits and so a while back I picked up a third of each with a view to a Panzer Grey finish, and that is what I will be doing here. Cheers Pete