
Columbia20713
-
Posts
84 -
Joined
-
Last visited
2 Followers


Recent Profile Visitors
2,389 profile views


Columbia20713's Achievements
")
New Member (2/9)
671
Reputation
-
 Thanks very much everyone! Appreciate the comments a lot. Thanks! The more I read and learn about him the more he seems like not just an exceptional pilot but an exceptional human being. Most of the stains are based on a real-life photo I've seen on an SBD somewhere exhibiting that kind of weathering, most especially with the colored photographs. I wish I could link them here as there's a treasure trove of pictures online but I believe a lot of them are copyrighted as well, but I pretty much just looked up SBD photos on Google and ran into more weathering references, there are quite a lot of photos both B/W and in color. Thanks for that, that's useful to know. I remember reading somewhere that the Midway-era guns were different as the twin guns on SBD-3s were either field mods or extremely new (could be wrong on this?). In the end as it was a commission I resigned to just removing the armor plate as that was one difference I heard about at the time of the build.
 -
For anyone familiar with the Battle of Midway, there's almost no need for introduction on this one. For those that aren't: The SBD Dauntless was the US Navy's primary carrier dive bomber at the beginning of US involvement in the Second World War and its most successful despite being considered nearly obsolete at the beginning. Nicknamed the "Slow But Deadly", it sank more enemy tonnage than any other dive bomber in the world. During the Battle of Midway, as the Japanese Navy's carriers sought battle at Midway Atoll, it was the SBD-3 Dauntless that delivered the killing blows to Japan's most powerful carrier force only six months after that same carrier force attacked Pearl Harbor. In a split-second decision, without which the US victory wouldn't have been as complete, this one aircraft, piloted by Lt. Richard Halsey "Dick" Best of VB-6 of the USS Enterprise, delivered the lone bomb that, in a single hit, sunk the Akagi, the flagship of Admiral Nagumo, and later in the day also attacking the Hiryu, the last remaining carrier of the battle. His actions that day rewarded him a Navy Cross and a Distinguished Flying Cross. - This build was a commission for a friend whose son had picked up an interest in the battle after watching the 2019 movie. Though meant to be more of a toy, I decided to build it to the degree of any of my other builds, and certainly didn't complain about the excuse to build an SBD myself. I finished it in the morning of the Battle of Midway's 83rd anniversary last June 4, only getting around to posting it here now. This was the boxing featuring the USS Lexington in the box art, meant to model SBD's participating in the Battle of Coral Sea, with the pre-Midway single machine gun at the rear gun position. As such, my only modification was 3D printing a pair of double-barrel machine guns. Other than that, and the decals for the SBD itself featuring Best's aircraft, which I designed myself and had printed by Siamdecal in Thailand, everything else is OOB. For the kit itself: This and the Hasegawa are pretty much the only choices for the SBD Dauntless (I believe the Academy is just a reboxing). For its age, the AM kit is pretty good though there are a few frustrations here and there. The cockpit assembly was somewhat tedious for what it was (At the end of the day it just looks like any other 1/48th OOB cockpit. Areas I had an issue with were the dive flaps, which were attached on the sprue in such a way that even if you were careful they came out warped and had to be kind of wrestled in place. I also had that issue for the three-piece canopy, which, if you wanted it open, would have to stack into each other, which naturally resulted in a lot of sanding and fitting. Finally, the decals - Pretty sure my boxing is just old, but almost all of mine shattered, and whichever ones didn't, silvered quite a bit. Overall decent kit, still good for its age, though not perfect. A couple other notes - - I'm aware that Dick Best himself described his aircraft as clean as they were relatively new, and photos of other SBDs near the time of Midway confirm a relatively clean although used aircraft. In the end I decided to go with more weathering anyway for my own practice of weathering techniques, something which led me to learn a lot from this build. - Alongside the OOB decals that silvered there are also a few that I had printed that silvered - some of these I'm not sure why, because they went down fine but a flat coat changed the color underneath. Still trying to figure out why this is. Thanks for reading!
- 18 replies
-
- 64
-

-

-

-
Thank you guys for the comments! At 9 minutes and being so text-heavy I didn't expect people to sit through it let alone learn from it hahaha, appreciate it! I'm glad it can help somehow Yep, I did mention in the review segment that it might be worth getting the CRM windshield instead especially with the Zvezda crazing issue. Unfortunately shipping to the PH was expensive so I had to stick to OOB for this build, but I might buy it or other CRM stuff next time I build a 787.
- 7 replies
-
- 1
-
-
- zvezda
- boeing 787
- (and 1 more)
-
Beautiful build and a striking livery! I don't usually expect the words "fun and quick build" to go together with vacform and 1/72 airliner but you've done it justice. Even in larger scales the windows from Authentic Airliners look nice as well.
-
Warning: Bandwidth-heavy thread! I documented this build with video again from start to finish. If you want to see it, here's the video: I actually completed this kit back in November 2024, but I only got the time to edit and upload the video now and then post it here. Background The Boeing 787-10 is the largest variant in the Dreamliner family, extended by 5.5 meters compared to the 787-9. It’s designed for high-capacity routes and can carry approximately 318 passengers in a standard two-class configuration. While it has slightly less range than its smaller siblings, the -10 is optimized for regional and medium-haul international routes for seat count. Like the rest of the 787 series, it features a new generation of composite construction and shares a common type rating across the family. The aircraft is finished in the livery of All Nippon Airways (ANA), Japan’s largest airline by fleet size and one of the most prominent carriers in Asia. ANA was the global launch customer of the 787 program and operates a significant number of Dreamliners across both domestic and international routes. A trip I had at the end of 2023 wherein I was on JA901A for a flight to Tokyo gave me the impetus to build this particular aircraft in the iconic ANA "Triton Blue" scheme. This is one of I believe three 787-10s in ANA's fleet that are lower-density in seating and equipped with the RR Trent 1000 engines, as opposed to ANA's more densely configured 78Xs for domestic routes with GEnx engines. The Trent-powered 78Xs are often used for routes within Asia and configured for international flights. On to the build photos: Review My main challenge with this build was the extremely sparse decals, which will be an issue for anyone needing stencils. Some people go the route of buying aftermarket decals that include all the stencils and details. I tried to save money by designing them myself to print, but this turned out to be a much bigger challenge than I anticipated—the decal design process took almost as much time as the build itself. They were then printed through SetupDecal164 in Thailand. In the research I did for the build, and designers uploading airline decal assets for fellow modelers (https://shikichandao.wixsite.com/jetstream), which was hugely helpful. It was great to see how many resources they had for modeling these aircraft accurately, though it does make me wish I spoke Japanese, if only to thank them and learn from their incredible techniques and work. The build itself I was expecting to be a slog, turned out to be relatively breezy. A few hiccups here and there but it was thankfully relatively stress-free. It's definitely not perfect, but I'm quite satisfied with it. Thanks for reading!
- 7 replies
-
- 20
-
-
-
-
- zvezda
- boeing 787
- (and 1 more)
-
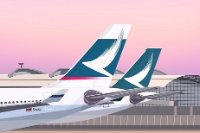
Revell 1/144 A350-900 - Cathay Pacific (WIP)
Columbia20713 replied to Columbia20713's topic in Work in Progress - Aircraft
Very glad to hear that! This build was quite a long while back so it's really nice to hear that it's still a useful resource. Looking forward to seeing your A350! Your builds always turn out beautifully and I'm sure that one will be no exception. -
Hasegawa 1/72 B-24J Kentucky Belle
Columbia20713 replied to woody37's topic in Work in Progress - Aircraft
Just starting out, I can already see that this is going to be absolutely beautiful, your attention to detail with the scratchbuilding is incredible! Will be following this because I also have a Hase B-24J in my stash, and I'm sure I'll have a lot to learn from you. Merry Christmas and a happy new year! -
1/200 Airbus A330 (3D-printed)
Columbia20713 replied to Nick L's topic in Work in Progress - Aircraft
Wow, that's beautiful work! Really hope to have your level of skill one day, everything from the CAD model to printing does justice to the real thing. I wanted a 1/200 A330 myself (or, I guess just an A330 kit in general) but without a resin 3D printer at the time I settled on modifying and repainting the Hogan plastic model. I'll be watching this thread with a lot to learn from you. What CAD software are you using? The level of detail you achieved on modelling the A330 is mindblowing, I'd like to build up that skill sometime. -
Sorry for the late response, but thanks everyone for the comments! Greatly appreciate it, means a lot. It was indeed quite a moment when I put it next to the Cebu A320, made it feel like I had made a fleet instead of just a model. Given how frequently these two aircraft and airlines see each other at my home airport it's quite fitting. Strangely enough, the wings and sharklets are indeed all on the same sprue, but the wing on the older version doesn't separate the wing and wingtip, but the newer one does, so it's a sprue change. Still odd that they didn't add it in the kit from the start. Thank you! Honestly I do actually prefer not to paint in parts or mask after decalling, but when the wings fit well, I find it much easier in terms of "bench ergonomics" to paint and decal the wings and fuselage separately. Consequence is of course sometimes I have to sand through paintwork, but thankfully it went ok! Thanks, great to hear that! Agree with you on that one, I find it more proportionally beautiful than the A320 myself, an aircraft that's almost like - but not quite - a B757.
-
This is the first build I ever had that I documented fully through video to show the build process. Not gonna lie, I struggled to get the setup right wherein the process itself can be captured, but I think it turned out alright for one of my first times doing this. If you're interested in seeing the build process itself, here it is: Background The Airbus A321 is the longest stretch variant of the popular A320 family of narrow-body airliners produced by Airbus. It is based on the popular A320, but stretched to accommodate 185 to 236 passengers, and is powered by either IAE or CFM engines. It is the first derivative of the baseline A320 and entered service in 1994, about six years after the original A320. The aircraft shares a common type rating with all other Airbus A320-family variants, allowing previous A320-family pilots to fly the aircraft without the need for further training. The airline in which this model's colors are painted in is Philippine Airlines, the flag carrier of the Philippines, and the largest and oldest commercial airline in Asia. The airline services many of the country's furthest routes internationally, as well as domestically. Of course, I can't help it with the patriotism; I always wanted to do this simple but iconic scheme, and a trip to Taipei gave me the excuse to model the aircraft I was on: RP-C9907 (on the flight back). This is the Zvezda kit, the A321ceo tooling that comes with the Condor decals. Here's the photos of the model itself: As some of you might have seen, I also built the A320 from Zvezda in Cebu Pacific colors, Philippine Airlines' main competitor, so it of course felt fitting to take pictures of both together: This is the OOB kit. Paints used are Tamiya acrylics (Mix for PAL underside color is 2 parts XF-2 and 1 part XF-55) and Gunze lacquers (GX1 for the white, GX112 for the gloss, SM206 and Tamiya LP-11 for the metal parts). I designed the decals myself (honestly probably the most challenging part of the entire build, especially with the winglets), with a few of the Zvezda A321 decals that came with the kit also. These were printed by SetupDecal164 in Thailand, same shop that printed my decals for Cebu Pacific. This time around, since I designed my decals in raster instead of vector, the printing didn't come out as sharp. If I did the build again I'd want to mask the tail logo instead. I've already talked about my thoughts on this kit in my thread on the Cebu Pacific build, and the A321 went together pretty much the same way. I guess I'd want to note though on this one is that if you're buying this kit, it's important to remember that the older boxings don't include sharklets, only the wingtip fences. To my recollection, for non-NEO A321s only the Condor boxing has them. Of course, this is covered in the many reviews of this kit that exist, but it's worth mentioning just to be sure (especially as I found out the hard way; Another older Zvezda A321 box is now sitting at my bench, with me being unsure of what to do with it). (No Sharklets) (With Sharklets) The build itself went much more smoothly than my Cebu Pacific A320 build; I guess I got lucky, but I was also able to make use of a lot of the lessons I learned from the Cebu Pacific build, so that when this build rolled around I knew what to expect. I was also able to try a bunch of new things like using a Cricut for masking (cockpit windows), and overall I think this build turned out to be one of my cleanest, problem-free airliner builds yet. Any comments or feedback are appreciated. Thanks for reading!
- 9 replies
-
- 25
-
-

-
Thank you! The paint is a custom blend, unfortunately I don't know the mix anymore; I eyeballed it with blue, green and white Vallejo paints until it looked somewhat like the interior of the PW engine, then handpainted it on.
-
Thank you guys for your comments about the build! Appreciate it very much. I figure it might be worth linking here as well, I compiled footage of the timelapses and build processes I took during the build and put them into a sort-of "reel" - The editing is a bit rushed as I didn't want to spend too much time on it but here it is. Will be putting it in the main post as well. Haha, thanks! Definitely lost some of my sanity with this build and I'm pretty sure you noticed as I was doing it. Great to hear you like how it turned out in the end, especially knowing you saw it as it progressed. Thank you! It took me some time and effort to write the descriptions of the processes, so am quite happy to hear you like it. The window/cockpit join issue seems to be a common factor for Zvezda A320 builds, and it's interesting to hear you have the same experience with it as well. On my build, it was strange - the engines themselves fit well for me, albeit not well enough for the fan to freely rotate - but the engine-wing fit was where the major issue was for me. Given Skodadriver's experience with engines it seems to be a mixed bag for these Zvezda builds. Greatly appreciate your comments, an honor especially from someone with airliner builds as amazing as yours! Seems like the engines are indeed strangely inconsistent with these kits, even my engines on the Zvezda 777 were fine up until I had to fit them onto the wing. It's not a major issue for me but it makes things somewhat strange. I actually did encounter a lot of trouble with making the flaps that configuration, I chose not to mention it as I figured it was probably user error but now that you mention it it might be worth noting. Definitely took some trouble getting the wing parts to fit in the flaps area as well, don't know how I persisted with it haha. Thanks for linking Authentic Airliners, I wanted to use their decals for this build but unfortunately they don't offer shipping to here in the Philippines. A shame as a lot of their products would definitely be upgrades to my builds. Thank you! It's a beautiful scheme indeed, good to know that it gets noticed outside the country as well.
-
The Airbus A320neo family is a development of the popular A320 family of narrow-body airliners produced by Airbus. The A320neo family is based on the previous A319, A320 and A321. Re-engined with CFM LEAP-1A or Pratt & Whitney PW1000G engines and fitted with sharklets as standard, it is 15% to 20% more fuel efficient than the A320ceo family. The airline depicted is Cebu Pacific Air, founded in 1988, and the largest low-cost airline of the Philippines and the largest airline of the country based on passenger numbers. Operating out of Cebu and Manila as main hubs, the A320 family makes up the majority of its fleet, the A320neo making up 9 of its fleet of 48. It was an ambitious paint scheme for sure, but one I've always wanted to do. This airline is a big part of my and any travelling Filipino's memories, after all. The project ultimately got bogged down quite a bit, but I will elaborate on this later in the post. The aircraft depicted is RP-C3281, a Cebu Pac A320neo that I took on a domestic flight to Dumaguete and then saw again in Caticlan Airport. Thankfully, as an owner of a camera taking reference pics proved to be very useful in the build. Here's the A/C itself as I photographed it in Caticlan Airport. I also compiled some of the timelapse footage I got of the build and put it into a sort of "reel" - First time trying this and I didn't want to spend too much time on it, so the editing and cinematography might not be the greatest. I chose to spoiler tag the rest of it as they do have quite a few images and are talked about in length Review - The kit itself is pretty good for an airliner offering, and it's no secret that Zvezda makes some of the best airliner kits out there. Personally I'm content with how the build went together, I don't have any major gripes or issues with the kit and it's still very good. However, there are a few nitpicks worth talking about - Masking Process - The masking was one of the most challenging parts of the build, and the sweeping curves all around the A320 were certainly very hard to replicate. I've been asked quite a bit about this process when posting about it, so here's a thread explaining the process. Decals: Painted with a combination of Armored Komodo lacquers and Tamiya acrylics. Gloss is GX112. Now, to summarize the build experience as a whole... This build has honestly brought me to the edge of quitting modelling more than any other build in the past, partly due to mistakes as a result of my own negligence, and partly due to luck so bad it was comedic, and certainly much worse than I've encountered on any other build. Issues ranged from paint peel on the white paint that then wouldn't feather when sanded, to incorrect hues on the first rounds of paint resulting in multiple rounds of masking and painting the (very difficult!) Cebu Pacific logo on the rear fuselage. For some reason, the white paint I used then started to yellow over time, which I had to sand back while the decals were already on - look closely around the windows where I had to avoid taking a sanding stick to it and you'll see some of the yellowing still there - Afterwards, seams reopened which resulted in having to repaint over the already peeling and yellowing white paint. The painting of the engines then went awry as the coverage of the white wouldn't lay down correctly, having to strip and repaint each one around 4-6 times each. The paint I used on the wings for some reason lightened under one of the registration decals as well, which meant I had to repaint a good fourth of the starboard wing to correct it. I had to speed up the final phase of the build as I wanted to make it in time for the local Nationals, which ultimately resulted in lots of compromises of the build - it was in the IPMS hall with the engine exhaust cones missing, left at home because they were still drying! Needless to say, it didn't really win any prizes but did catch the attention of quite a lot of people, as the only airliner build put in the competition, and with the vibrant and recognizable colors of Cebu Pacific no less. It then got damaged on the drive home, with the engines and landing gear breaking off and another fuselage seam reopening. Ultimately, the cowling ring and one of the nose landing gear wheels went missing, so I had to 3D print resin substitutes, which then made it onto the build in time to be make it my last completed build for 2022. Any modeler with a good eye can spot quite a few mistakes in the build's craftsmanship, many of which I honestly no longer had the energy or time to correct. In the end, I'm just happy to have gotten this project through the finish line. Thanks for reading, especially if you've gotten this far through the wall of text!
- 11 replies
-
- 29
-
-
It's been a while since this was completed, but indeed the end result is still magnificently done, and the attention to detail is almost inspirational. Definitely one of the best builds of this kit I've seen. Well done!
-
A Group of Gals - Two Revell B-17Gs and a Hasey Friend
Columbia20713 replied to CedB's topic in Work in Progress - Aircraft
Beautiful build! Built one of these myself but for the ProModeller boxing, it was a lovely experience. Love what you did with the metal paste, might have to try that sometime so I don't have to deal with fragile NMF paints..