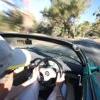
injidup Posted October 1, 2013 Posted October 1, 2013 (edited) Hello Ladies and Gents! Well I'm feeling brave and decided to post my first WiP! I have been building kits since I was about 8 years old, but since moving to Australia 15 years ago, I have only started 3 kits and completed one! I also built a 1/1 scale car in those 15 years, which is very different from even a 1/12 kit! Here's the completed full size kit car, with me competing in a sprint event: I've just finished my last build, the Tamiya Lotus 25, which has a few glaring mistakes. However, it was the first kit that I decided to add to, with brake lines, plug wires, etc. A good way to re-learn. My next build was going to be either the Tamiya 1/12 Lotus 72 (I have two!) or the new Fujimi McLaren F1. I decided to do the easy one and build the F1. It's been my favourite car since I first heard about it, and now there's a kit of it. I've seen the AutoArt 1/18 die cast but it's a bit expensive, so a plastic kit it is. My interest in the McLaren also helped with my current car choice - no driver aids, light weight, innovative construction - a Lotus Elise. Unsurprisingly I have a few Lotus models in my stash! I have the excellent book "Driving Ambition" which I bought back in the late '90s. It's out of print and is going for over $900 on Amazon! I've decided that this model will be kept fairly simple, and will be in launch model silver. I will try Tamiya Mica Silver to see how it looks. Maybe when this is finished I'll build another with a bit more detail. Here are a few snaps of the kit. I have never made a Fujimi kit before. The moulding of the body seems quite good, but there's not much detail on the engine bay or interior. I used my phone to take the photos, so they aren't exposed too well. The eagle-eyed will spot some differences between the preview car on the book cover and the final road versions. The engine bay. This will need some thought to make it look good. Doors can be either open or shut but are fixed in that position. No opening bonnet or boot. I will need some carbon fibre decals (any recommendations?) - just a simple black carbon twill, and I may get one of the photo-etch sets for a bit of detail on the vents. Edited October 1, 2013 by injidup
injidup Posted October 3, 2013 Author Posted October 3, 2013 (edited) A little progress today. I've decided on silver as the colour, and have bought a can of Tamiya Mica Silver. On the model, I've added a few small parts to the body, two small pieces on the front wing that cut into the doors and need to be seamless. There's also a small addition to a vent below the rear windows that also needs to be filled to get rid of a seam. Part "L" on the instructions, held on here with a bit of tape. Fitting it now does make fitting the doors more difficult, but it really does need to be fitted and filled before painting. image by injidup_auto_art, on Flickr Filled: image by injidup_auto_art, on Flickr And the vent below the windows: image by injidup_auto_art, on Flickr I've also ordered some carbon decals for detailing. Edited October 3, 2013 by injidup
cmatthewbacon Posted October 3, 2013 Posted October 3, 2013 I'm glad you're going first! I'm a bit worried about how strong the bodyshell is with the braces cut out... I don't like the fact that the whole front end is held on by a few square mm of plastic at the base of the winsdcreen pillars! I'm wondering whether to paint the bodyshell with them in place and remove them and touch up at the last minute... I'll be watching with interest. bestest, M.
injidup Posted October 3, 2013 Author Posted October 3, 2013 I assumed the braces were there to prevent damage to the body shell in the box, so cut them out to dry fit the doors. It doesn't feel particularly weak without them, so I'm not overly concerned. The doors have no frame on the trailing edge, so I will be careful when handling them!
injidup Posted October 4, 2013 Author Posted October 4, 2013 Off work with Man Flu ™ today so did a little work on the Mac. Primer on image by injidup_auto_art, on Flickr And a start on putting windows in the engine bay they are filled in on the model so I've cut one out and put a thin sheet of clear plastic in. image by injidup_auto_art, on Flickr Now, there are two sets of photo etch coming to market, and the Fujimi one looks good. Question for those that know, as I've never used PE before: for things like vents (beside the rear windows for example) would the PE fit onto the body or would I need to carve out the holes to fit the PE?
roymattblack Posted October 4, 2013 Posted October 4, 2013 That will depend on the PE parts. If they are Fujimi's own, they will probably go 'on top' of the kit without any hacking about needed. Other sets such as Detailmaster can often require 'surgery' to the kit. If you're confident using Cyano, it's great for fixing etched bits. You can also use clear varnish or Humbrol 'Clearfix'. Roy.
injidup Posted October 6, 2013 Author Posted October 6, 2013 (edited) Thanks, Roy. Looks like I'll have to wait as the parts aren't available yet. Some more work done on the engine bay: I've cut out the rather thin cross-member and put a scratch built piece in, and some heat shield around the cabin window. image by injidup_auto_art, on Flickr image by injidup_auto_art, on Flickr The silencers are wrong - there should be a gap in the middle, not a real problem as they won't be visible once the body is on. I've also painted the rear light lenses (if this was a Tamiya, they would be coloured plastic!) and masked and painted the sides of the engine cover windows. image by injidup_auto_art, on Flickr Edited October 6, 2013 by injidup
injidup Posted October 19, 2013 Author Posted October 19, 2013 The body has now been painted with Tamiya Mica Silver and gloss clear, then given a polish. image by injidup_auto_art, on Flickr Before polish: Polished/Not polished by injidup_auto_art, on Flickr After polishing with Meguiars car polish: Polished/Not polished by injidup_auto_art, on Flickr Head lights in progress: image by injidup_auto_art, on Flickr The Fujimi Photo Etch set is on its way from Hobby Search and will hopefully be here next week. Some assembly will have to wait until it arrives. I've been getting on with some bits and pieces... Some work done on the engine bay, just dry fitted for now: image by injidup_auto_art, on Flickr Interior & doors dry fitted: image by injidup_auto_art, on Flickr 1
triumphfan Posted October 19, 2013 Posted October 19, 2013 Looks very nice in silver. Looking forward to seeing the etch parts as I could be tempted by this kit (even though it is 'modern') Steve.
injidup Posted October 19, 2013 Author Posted October 19, 2013 (edited) Nothing wrong with modern! The F1 is now over 20 years old. I must admit I'm not all that impressed with the kit. While the body seems fairly accurate, the interior and engine bay are only close to the original car's. The windows are a bit too thick and need a fair bit of work to make them fit flush with the body. The tyres are crap, wrong tread and no lettering on the sidewalls. This is the first Fujimi kit that I've made and I don't think it's up to tamiya standards. A wet day today, so I had time to do a bit more work. Front lights done. One has foil as a reflector, the other has paint to make them look slightly different. Edited October 19, 2013 by injidup
injidup Posted October 22, 2013 Author Posted October 22, 2013 (edited) Looks very nice in silver. Looking forward to seeing the etch parts as I could be tempted by this kit (even though it is 'modern') Steve. The PE parts are here, Steve. Some interesting details, including an ignition key! Shame the pattern of the grilles is not accurate. A seat belt buckle is provided but not the belts. Photo Etch Parts by injidup_auto_art, on Flickr New exhaust tailpipes Photo Etch Parts by injidup_auto_art, on Flickr Getting the rear vents above the exhausts bent to the right angle will be a challenge. Mirrors and lights image by injidup_auto_art, on Flickr There are also some new pre-cut masks for the window frames - shame I've done most of them already with the (uncut) sheet in the kit. Instructions: Photo Etch Parts by injidup_auto_art, on Flickr Photo Etch Parts by injidup_auto_art, on Flickr Edited October 22, 2013 by injidup
Madmonk Posted October 22, 2013 Posted October 22, 2013 Great build so far and the PE set looks very comprehensive. For the belts the metal foil around the top of some wine bottles is very useful, with the added bonus of drinking the wine!! Cheers, Warren
triumphfan Posted October 23, 2013 Posted October 23, 2013 That looks like a very comprehensive set, thanks for the pics. Looking forward to seeing more developments. Cheers, Steve.
injidup Posted October 24, 2013 Author Posted October 24, 2013 Well, I started on some of the PE parts and I don't want to do that again! I built the rear grille, which is eleven tiny pieces. A real challenge for my eyes, fingers and patience! Sorry about the blurrycam. I used blutack to get the basic frame built. 4 pieces out of eleven... Freed from the Blutack... Then I could glue in the remaining 6 pieces... Next, paint! There's a grille to go behind this. See top left pic in the second photo of the instructions above. I've added the PE brake discs, pedals and fuel filler cap, no photos, though.
Recommended Posts
Create an account or sign in to comment
You need to be a member in order to leave a comment
Create an account
Sign up for a new account in our community. It's easy!
Register a new accountSign in
Already have an account? Sign in here.
Sign In Now