Search the Community
Showing results for tags 'Centurion'.
-
AFV Club IDF SHOT Centurion Mk5/1 1967 with a 105mm Gun (BUT! Guess Who? fitted the 20pdr instead) READ THE INSTRUCTIONS PROPERLY NEXT TIME - DUMMY! (Kit AF35159) The 'SPECIAL' parts comprise turned metal 20pdr & 105mm gun barrels ADDITIONAL ELEMENTS: AFV Club sets Mantlet cover 'A' AC35008 & Indy Track AF35102 I've had a load of the AFV Club Centurions for quite a while now and have wanted an excuse to get started. The Leicester Modellers Boxing Day Build Club this year has given me the opportunity to get this 2006 release started - a bit late! My choice of build for this time will be to use the upgraded 105mm gun barrel. I do have another of these and the 20pdr version will come later. The Horstmann suspension has an A & B set so watch how you fit them Also made a start on the lower hull which is extremely well molded and a great fit to the parts. Whilst not exactly on the rare list, with the advent of a host of new products being released, IDF Armour is starting to become more popular.
-
Hi, does anyone by any chance know where to find drawings of the Centurion's side skirts in 1/72 scale? I have here Cromwell model's Sho't Kal Dalet in Resin and it comes without skirts but I want to make some from thin Evergreen plastic. regards Ingo
-
 The Australian Army got involved in Vietnam from 1965 onwards but it wasn't until 1968 that they decided to make use of Centurion tanks. Once these tanks were deployed they were operated by the 1st Armoured Regiment of the Royal Australian Armoured Corps. Despite some concerns before being deployed the Centurions proved to be really good at operating in the jungles and paddy fields of Vietnam. Also, much to the surprise of some U.S. Units, the Australians found it was possible to repair even some fairly major combat damage, on the Centurion, while it was still in the field. The kit I have decided to build for this GB is AFV Club's Mk.5/1 Centurion of the RAAC. It is a rather nice kit that includes some etch, rubber tyres and a metal gun barrel. This will be my first, proper full sized 1/35 tank build, the only previous 1/35 kit I've built being Tamiya's Panzer Kampfwagen II Ausf. F/G. I won't be starting this build properly just yet as I'm trying to finish two Mk.I Spitfires for the BoB GB. Knowing me though I will probably end up starting some bits and pieces before properly getting started. The box art: The contents: ..........wow that looks like a lot of parts! I also picked up a Mantlet Cover as Centurions in Vietnam had them fitted: Over the next couple of days I'll post some closer up photos of the sprues. Kind regards, Stix
- 142 replies
-
- 10
-

-
Centurion Beach Armoured Recovery Vehicle, at the REME Museum. Pics thanks to Sleeperservice & Shermaniac.
-
Centurion Armoured Recovery Vehicle Mk2, at the REME Museum. Pics thanks to Sleeperservice & Shermaniac.
-
Now this might be an extreme shot in the dark.... But does anyone know which antenna was added to the turret of the Centurion tanks circa '59/'60, It was probably armour & tanks belonging to the Royal Scots Greys. The reason for asking is that my Dad was doing his National service with the REME at the time, Stationed at Fallingbostel, and he tells a story of a long weekend spent drilling holes in Centurion Turrets to take a new antenna for some urgent radio equipment update. Now the less qualified REME guys in the depot were on constant drill sharpening duty, were as the ones who had been around a bit got to spend hours trying not to get slung off the turret by the drill bit catching and spinning the drill and operator but not the bit. Apparently this job was so urgent that all the REME guys were allowed to go into mess in their dirty work gear, which didn't go down too well with a certain Royal Scots Greys junior officer, (yes, that one the Queen's 1st Cousin), who didn't want all these dirty/oily types in the mess, the REME's Senior officer on the job (also a dirty/oily type at the time) then told said junior officer to go forth and multiply and leave his men to get on with their break. I've got AFV club's mk5/2 Centurion kit to make, along with the Edaurd BigEd etches and Spade Ace metal tracks. I thought i might just pose the tank when its completed with a figure drilling a hole in the turret.
-
So here is the finished 1:25 scale model of the Centurion mk.III British main battle tank. It has been built out of the box with no extras, apart from the camouflage netting around the barrel which I made myself. The paints used were as follows: Primer was Vallejo grey polyurethane acrylic. This was also used for all of the interior surfaces. It gives a lovely smooth and resilient surface for the following paints. The main overall colour was Tamiya Dark Yellow Matt XF-60. This was mixed about 40% paint with 60% Tamiya X-20 thinner. Panel line preshading was done with Tamiya XF-1 Matt Black and overhead light simulation presahding was done with Tamiya XF-64 Red Brown. Some weathering effects and shadow areas were done with Tamiya XF-49 Khaki. The matt finish was thinned Vallejo matt varnish. Chipping was hand painted with MrMetalColor MC24 Dark Iron. Exhaust and metal tool parts were also airbrushed with this paint as were the tracks and tow cables. Weathering and rusting was done with a combination of Rust and Sand pigments. Various Tamiya weathering master sets for were used for streaking, rusting and staining effects. Lighter colours from these sets were used for edge highlighting. Once the track pieces were buffed where the wheels ran and also where the locating lugs rubbed between the wheels, the pieces received a dunking in first rust, then sand pigments, with a good brush scrubbing between the two. The exhaust parts were treated in the same way. Although this was an old kit that I picked up from ebay for £30ukp, it went together reasonably well. There were plenty of moulding lines that needed scraping off before painting and the instructions had a couple of anomalies. The old decals were very yellow, so the markings for my choice of variant were spayed using a template that I cut out with a laser cutter, from a CAD drawing that I made. I learnt a lot from trying various weathering methods on this build and thoroughly enjoyed myself. As usual, and observations or comments are welcome. Enjoy the images.
- 45 replies
-
- 11
-
-
This build is being posted on other forums, so please accept my apologies if you have seen it before. This will be my first attempt at an AFV since coming back to the hobby. I'll be looking for suggestions etc. from those more experienced AFV builders on here, if they are willing Anyway, I picked this kit up from ebay for £30, which i though wasn't bad. The box is a bit battered and a few pieces had come off of the sprues in thier bags. The decals are yellow but its all there. I am going to attempt an Israerli version in Dark Yellow. I Know that their current vehicles are painted Yellow-Grey, but I don't think that the early Centurions were done in that colour. I'm happy to be corrected by those more knowledgable. These first few shots are from the internal turret detail. The light grey is just Vajello grey primer sprayed liberally and dry brushed with tamiya metallic grey XF56. The chipping was applied by hand with a very fine brush, dabbing on MC214 Dark Iron from Mr.MetalColor. A Mix of Dark And Rust wash was applied. The light grey primer sprayed over the Mid Grey-Blue Plastic showing the contrast. The shell cases were sprayed with MC217 Mr.MetalColor Gold. Images showing the bits before they are all hidden:( The Ammo Boxes were Sprayed with Mr.MetalColor Stainless Steel. Turret Base with seat, the cushion was coloured dark green and gently weathered with Tamiya weathering powder/paste 'Sand'. Box edges chipped with Dark Iron. The Main Gun Breach component Turret Gearbox and commanders seat. Here is an update on the turret internals. Most of the 'innards' have been welded to the turret ring. Feel free to comment if you wish. The interior of the turret is now complete. The main issue was poorly fitting turret halves which necessitated a bit of filling with Vallejo white filler and some sanding. A couple of points of interest - The radio pack face was sprayed with buffable Dark Iron and when dry, I rubbed my finger over it to shine the protrusions. The white dials and small needles were painted and and then a drop of Krystal Clear added, which when dry gave me a nice glass face effect. The completed the turret. It was airbrushed with a base coat of Vallejo grey primer. A graded coat of dark brown was added to the shadow areas underneath with a gradual fade to the grey undercoat at the top highlight areas. A preshade of matt black was then applied around all of the edges and join lines. Heavily thinned dark yellow was then sprayed in 4 applications to build up the effect that I wanted. Once dried I brush washed the whole thing with a 'grime' clay wash and removed it in such a way to allow it to sit in the recesses and leave some dirt streaking. Chipping was then applied by hand using a teeny weeny (technical term) brush and some dark iron paint. The track pieces were airbrushed with buffable dark iron and when dry, the high spots were buffed. Rust pigment was brushed into the crevises (Ooo-err Missus):eek: The cable on the cable drum is just weathered fuse wire wrapped around. The whole lot was then dry brushed with Tamiya weathering light sand to highlight the edges. Coats of matt varnish were applied in different amounts to different areas to give a variation in 'Mattness' (I'm sure that's not a real word) I made some camo netting to scale and coloured it in desert shades. The retaining straps were made of lead wire which I rolled flat with a bottle of tamiya XF-1 and then shaped the straps around the netting and barrel. They were glued at the bottom with Gator Glue and painted in Dark Yellow. I think this adds a touch more realisms to the stark barrel. Comments welcome.....:cool:
-
I made this one a few years ago for the dad of my then girlfriend. I almost got it right, only having forgotten to add the car engine they kept on the engine deck as an auxiliary power unit.. I had very little reference.. And some idea as to how much work went into the detailing..
-
As part of our website we have loads of vehicle Walk-arounds http://leicestermodellers.weebly.com/its-for-real.html Come and take a look
-
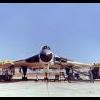
Pics from Cosford.
-
Centurion Mk5 AVRE 165 taken at Duxford.