
galaxyg
-
Posts
1,564 -
Joined
-
Last visited
Content Type
Events
Profiles
Forums
Media Demo
Everything posted by galaxyg
-

Hasegawa Celica ST185 Tour De Corse
galaxyg replied to galaxyg's topic in Work In Progress - Vehicles
I did. And you commented -
I promised myself I'd get the most tedious part of the build out of the way early, so now the seats are done. The metal P/E parts are some of the thinnest I've ever dealt with. Not great. I've also completed the wheels.
-
Fantastic. The very first photo, I had assumed at first glance was a photo of the real thing and I was waiting to read "here's what I was aiming for". That's a very nice backdrop in addition to the great build.
-
@Anteater 's comment about yellowing plastic has sold me there, I will paint it as usual now. Better to be safe than sorry; that possible outcome had not occurred to me. Thanks all!
-
I don't think I do unfortunately - given the nature of the job I did take likely hundreds but I only archived about 50% of those sort of jobs I did back in the day, and I don't think the Escort was one of them. I will have a look however. The one big bonus of building the Safari versions of the Hasegawa kits it's about the only event where the Hasegawa kit ride height matches reality. One other thing I'm considering with this build (opinions welcome) - I am looking at the perfectly white pristine and unpainted body shell and thinking "do I really need to paint this gloss white plastic gloss white?" What if I just decal right on top of the bare plastic? It's not like I need to save time on painting or save paint however the super smooth plastic seems the perfect surface for decals to adhere too, and I always do all my panel line stuff at the end anyway. Thoughts? / Experience? Will it look too plasticky once clear coated?
-
Had I known of this build 15 years ago when I had this pic taken whilst on a photography job at Ford Rally HQ in Cumbria, I'd have taken some photos of the inside to aid my build. As it was, I was there to photograph François Delecour's Escort Cosworth instead. I just happened upon this car whilst going around the facilities. Anyway, below a much younger me with no grey, and the car in question. Except this one has a snorkel and (boo) the kit does not. The kit does reflect the non-snorkel-use of the event portrayed anyway. A legendary win for Colin McRae. A great looking car. A Martini livery. Safari bits. So aside from the known "quality" of this era of Hasegawa kits and some truly massive decals, an easy choice to want to build. Here's the box. The massive decals. As often with Hasegawa kits, PE parts. Fantastic addition. And what they give with one hand, they take with another. Crappy looing spare wheel, roll cage and door cards moulded as one, and some transmission and most of the exhaust moulded into the chassis. Some 40 minutes or more of scribing whilst watching the British Grand Prix, and the front vents are open. The connecting parts between the front bumper and the body shell fill me with so little faith that that will stay together after any kind of handling, not only have I reinforced them, I've broke out the seldom used tube of poly cement to glue-bomb them into place. The smell of that glue kind reminds me of being about 14. (building kits, not sniffing glue!)
- 12 replies
-
- 12
-

-
Background: It's summer so it felt like the right time to tackle another open-top car - this time Fujimi's Fiat Barchetta, a simple kit for a simple car with a nice line in Italian flair and style. Shame it's front wheel drive. I've seen a few examples built on the internet but it's relative obscurity as both a car and a kit also appealed to me. Pros: Looks correct to the real thing. Easy to put together and little cleanup required beyond a few seam lines. Comes with both a soft-top and a hard-top roof, along with the default option of open-top. The interior has been designed to make painting the bodywork-colour parts somewhat easier. Cons: The in-box wheels are about the most boring choice from all the wheels the real car ever came with. The dashboard is a little flat compared to the real thing and the chassis is somewhat simple, with only a few parts. No engine, typical for kits from Fujimi (and others). Windscreen fit isn't perfect. Verdict: If ever a kit proved that simple is not necessarily bad, this is it. Despite a low parts count it has exactly everything it needs to easily build a very nice reproduction of a Fiat Barchetta. Build notes: Built over one week in June 2025. Painted with Halfords M3-680 paint (memorable name eh?) and clear coated with Mr Hobby Premium Top Coat Gloss. I swapped the kit wheels for those from a Fujimi Toyota Altezza which fitted perfectly with no alterations needed, added some seatbelts, retainers and interior carpets, and used Italian number plates from a Revell kit. Also included in the kit but not in my photos is another transparent part, the wind breaker behind the driver and passenger. I felt it spoiled the lines when the roof is down.
- 16 replies
-
- 27
-

-
-
@ceeb555 That's an incredibly impressive collection of built kits. And so many Ford Focii.
-
I think a 1:1 depth of shine on a 1:24 car looks somewhat unrealistic to my eyes but much like some exaggerated darkened panel and underframe lines on model aircraft, it seems to have become "the thing to do". I try to get something which is shiny but not as deep (ideally 24 times less deep), and because I'm both too lazy to clean an airbrush and too stingy to buy one, I do everything from rattle cans - perhaps this helps as I can't really get into investigating things like 1K, 2K 4K or whatever. Mr Hobby Premium Topcoat has always served me well once I discovered it. Examples below:-
-
The colour for anyone in the UK that wants the same paint Halfords M3-680 over Halfords primer. Two coats of M3-680 as it deepens the colour on the second coat. Subsequent coats do nothing else, fortunately for the point of matching things.
-
Polished body: The soft top and the hard top both have convenient ridge lines around the rear window, so it's easy to make window masks. The soft top is painted in Nato black, which is a kind of very slightly greeny-black that looks like it's eaten a Saag Aloo the day before. The hard top I've not polished yet so it retains its mask. Test fitting. The number plate is from a Revell kit. I will add the front number plate later. The interior I've livened up with some mats (blue) some carpet (black) and that blue bit at the back which isn't on the real car but looks good in place. All sandpaper, painted so it looks like texture/carpet. Completed interior. I found some Nissan GT-R P/E air vents that fitted exactly so I thought they'd help liven things up too. Also added seat belt retainers and seat belts. Current state of progress on the windowsill.
- 20 replies
-
- 13
-
-
-
1/24th scale Belkits Ford Fiesta WRC 2017
galaxyg replied to ceeb555's topic in Ready For Inspection - Vehicles
That's a very nice build and very impressive decalling. -
Some quite ugly ejector pin marks on the back of the seats that'd be easily visible if not dealt with. A large number of the parts are now painted or half painted. Many of them - as usual - semi gloss black. The seats will be two-tone grey-blue (shown) and black (not yet done). Assembling the front suspension, such that it is. Simple but does the job. And confirming that the Altezza wheels do fit perfectly. Later I tried the rears after this photo, they also work perfectly. Beginnings of the interior.
- 20 replies
-
- 15
-
-
Excellent idea, i will do that. Yes, very fine so very much looks in-scale. I've taken the first photo below to show this - the two Fiat decals front and rear. Imagining how small those decals are gives good context for the metallic effect in the paint. It is very nice paint, it's gone down so smoothly. I don't often photo in mid clear coat but I thought I'd show my method - this is the side of the car being cleared. Having learned the hard way with occasional wet-coat drips down the sides, I now do each side of the car separately to the top. The interior of the car has, like some other Fiats, elements of the exterior colour in it and I can only be glad that as simple as this kit is, Fujimi made the door interiors as a separate piece and therefore easier to mask.
- 20 replies
-
- 12
-
-
Thanks. I'm going to credit Tamiya with a lot of that It has certainly turned out very well, might be a 2025 top 3 contender.
-
It's summer, so time for something open-top and fun, the Fiat Barchetta. Aside from the seats which I forgot to include in the photo, this is everything in the kit - pretty simple, especially the underbody and suspension. There is both a hard-top roof and a soft-top roof included, although the instructions and even the sprue diagrams make no reference to the hard-top roof. The kit's wheels (shown right, in the bag) are pretty uninspiring. Whilst researching the kit I found a completed build out there which was clearly using the wheels from the Fujimi Toyota Altezza. The same wheels that are far too small for the Altezza (which is also why I have them spare) look just right on the Barchetta, so I will attempt to do the same and hope there's no wheel/hub adjustment involved - which is hopeful as it's all Fujimi fit. I've sanded off the fiat emblem on the front as I think putting the decal over the top of it will just make it a target for polishing burn-though, and I've sanded off all the seam lines of which there were many running right down the middle of panels. To be fair they were quite feint, but they were there. The intended colour is shown on the spoon. Since Halford have now stopped selling car paint for specific makes and models and changed to paint that is just designated by number, this silvery-teal colour remains nameless. And here it is in the "spray booth" (a cardboard box in the garage). It looks more silvery and less tealy in this photo than it really is. Kudos to this Halfrods paint for going down really smoothly on top of Halfords Grey Primer. Bodes well for polishing it up. Fiat have thoughtfully put a raised waist line down the full length of the car so that's something to try to avoid polishing through back to the red plastic.
- 20 replies
-
- 18
-
-
Picking up the hobby again: Car Modelling, where to start?
galaxyg replied to nv92's topic in Vehicle Discussion
In this kit there are no window masks included and since it was such an awkward shape to try and devise a curved mask for I did then what has now become my standard method of dealing with no-mask windows: A black Magic Marker and a steady hand. 3 or 4 "coats" of the marker usually do the job - when it goes on it stays wet/active for a while, I think because it's marker pen and plastic reacting with each toher, so you can't immediately recoat but a 5 mins between each go over is enough. -
Picking up the hobby again: Car Modelling, where to start?
galaxyg replied to nv92's topic in Vehicle Discussion
Here's my own 2pth worth on the same topics: 1) Here the technique I follow. a) Prime the surface. b) Micromesh the primer to make it nice and smooth to the touch c) Paint the surface d) If it's solid paint (which for a race car it usually is as they're seldom metallic) I often micromesh the paint (being careful not to burn through it). The reasons I micromesh it here is to make as smooth and a glossy a surface as possible for the decals to stick to. If there's one thing decals hate, it's matt surfaces. Sometimes the surface is glossy enough right out of the can. Sometimes - especially if it's metallic paint the decals are going onto, I'll give it a light coat of clearcoat / polish before the decals go on. e) Then apply the decals f) then clearcoat it g) then carefully and lightly polish it with 4000, 6000 and 8000 micromesh, then h) tamiya polishing compound. 2/3) Generally Tamiya kits are the best all round, however their F1 cars are 1/20 whereas their endurance cars are 1/24. Hasegawa make 1/24 F1 cars but they're of lower quality than Tamiyas - more cleanup to be done, parts may not fit perfectly together as well. Nonetheless for a constant-scale collection, I have bought only the 1/24 Hasegawa kits of open-wheel racing cars to match everything else I build. Hasegawa also make endurance cars and they fall into two categories - the older, simpler ones and the newer very very good ones. The easiest way to tell the difference - the older ones front wheels do not steer. The simplicity / age of the older Hasegawa kits often makes them cheaper to buy and easier to build and if I were recommending, I'd start there. Not least because endurance cars are a *lot* less fiddly than open-wheel cars, so you're less likely to get discouraged. The Hasegawa Porsche 962 "FromA racing" has a decent simple livery to begin with. The Tamiya endurance kits are good all round *except* the Porsche 962 as the glass and the body are moulded into on joined piece (it's roots lie in a Tamtech radio controlled car) so masking the windows to paint the body is an extra bit of work there. Why Tamiya have not engineered out this annoyance I don't know - their recent release of the Jagermeister 962C has the same joined glass-body. If you want to build a 962C, go Hasegawa. And how do I find out which are the older Hasegawa Endurance cars compared to the new ones? you might hask. Looks at the instructions, often found on scalemates.com and nearly always found on 1999.co.jp. If the wheels steer, it's a new tooling and of great quality. If the car has stub axles, it's a simpler and older kit of fair quality. The Hasegawa Nissan R92 and the Hasegawa Toyota R90V are both new toolings with steering wheels. -
Background: A brand new tooling of a great looking 911 - from Tamiya. Buying and building this was an easy choice. The only difficult choice was what colour to make it and whether or not to use the carbon roof and bonnet decals (I didn't). Pros: Correct shape and proportions with clean sharp mouldings and only a few seam lines to remove. The kit is clearly engineered for ease of assembly (without being simplistic) and goes together like a dream, as you'd expect from a 2024 tooling from Tamiya. Nicely detailed suspension and the brake discs rotate with the wheels. Perfect shiny clear transparent parts with window masks. Great quality decals with several choices of colour for the GT3RS down the side of the car. Solid mountings for the door mirrors. Separate door handles. Cons: No engine, and it would have been great to have a second colour choice for the seat pattern decals aside from red, which I didn't use. Other than that, nothing else. Verdict: Pretty much perfect. Build notes: Built over 4 weeks in May/June 2025. Painted with Toyota Precious Galena car paint - a slightly bluey silver, with Mr Hobby gold wheels and Vauxhall (GM) Breeze Blue brake callipers. Clearcoated with Mr Hobby Premium Top Coat gloss. I've added some seatbelts and changed the solid mesh of the bonnet intakes to actual mesh. Aside from that - built as it came from the box. It's pretty much as perfect a build as I've created so far.
- 22 replies
-
- 36
-
-
-
Nissan R91CP (Hasegawa, 1/24 scale)
galaxyg replied to TommyOneTwoFour's topic in Ready For Inspection - Vehicles
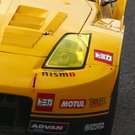
This is a much more modern tooling of an endurance car than Hasegawa's past "stub axle" endurance cars, and this kit does include steering wheels. The recent Toyota 91C-V (and variants) is also the same. I do wonder/hope that Hasegawa will tool some other lesser-spotted endurance cars at some point. . @TommyOneTwoFour Really nice build. Excellent job on the masking in particular, and the decalling of that "23" over the vents. -
Looking at reference photos of the real car, one of the few concessions Porsche make to not-all-black is the seatbelts and door handle pulls. To make some visual interest, I've chosen blue to go with the blue-ish body. The door handle pulls are actually part of the kit. The seatbelts, as usual made from card and PE. There are some seat decals that fade the centre fabric from dark red to black but they didn't really fit with my overall colour scheme. Nice substantial mounting for the rear view mirror, hurrah. Like the rear window, the side windows fix into place without glue however I've put some electrical tape over the generous mounting tab just in case. Aside from a few more parts left to add after assembly onto the chassis, the body is now done. And here are some of those parts, the 4 piece per mirror (!) door mirrors and the rear wing (underside shown). Not shown are the other parts that are around the wheel arches. And then we're done!
- 12 replies
-
- 11
-
-
Fantastic build of a legendary vehicle. Love it, Love it, Love it.
-
I bought this in a convenience store on holiday recently. Can't find the photo of the original packaging now but it's standard Hotwheels stuff. Copyright date on the underside is 2025.
-
Pricey! It's the threading I hate the most though. Pricey! It's the threading I hate the most though.
-
What CAR/BIKE kits have you recently bought, Mk.3?
galaxyg replied to Black Knight's topic in Vehicle Discussion
Thanks. It was a tiny bit incomplete but at only £17- no metal transfers. But I have some I can repurpose for the emblem on the front. And the ones on the back not important. I've been so close to getting the Barchetta in the past (it's a reasonably easy find in Japan second hand), but I've always ended up prioritising other kits. Now, at last!


