Search the Community
Showing results for tags 'JGSDF'.
Found 13 results
-
 Bored with the standard Japanese solid green or two-town green-brown colour schemes on your JGSDF tanks? Well, here's a Type 61 with a difference! I don't know if it's a Japanese attempt at Dual-Tex camouflage, or if it's just coincidental. Still, it's an interesting scheme that will draw the eye (and test the patience)! Arii used it on the box art of their Type 61 (I know, I know, at 1/50 it's not the one true scale...😉). A potted history of the camouflage trial is here: https://news.line.me/detail/oa-trafficnews/67d99db86568. Enjoy, and happy painting!
-
- 2
-

-
- camouflage
- Japan
- (and 1 more)
-
This is the Hasegawa AH-1S in one of its JGSDF boxings. This is a very nice kit with some lovely surface detail and a good shape, moulded in a hard olive plastic that reminds me of some of Hasegawa’s older kits. The cockpit is a little bare so the interior was dressed up with a little plastic card and rod, and some seat belts from Tamiya tape. The exterior doesn’t need much attention but I used a set of Master barrels for the M-197 cannon, which are a nice addition. Camo is Gunze H320 green, Model Master FS30219 for the tan, and Tamiya NATO black. Decals are from the kit (I do like a sharkmouth!) and went on nicely, needing just a few nicks with a sharp knife to conform around the nose. After a bit of search around for a new photo hosting site when Village Photos stopped working, I followed a tip from @Markh-75 and went for Postimages. Let's hope this works for a while! Chris
-
Hello. Something new. Cheers Mike
- 13 replies
-
- 25
-
-

-
Hey guys, I hope you're all well and enjoying your summer despite the heatwaves. Welcome to the very start of my first project during this year 2019, which I have called "Fuji Firepower". The main subject you ask? The brand new 1/35 scale Type 16 Maneuver Combat Vehicle (MCV) released earlier this year by Tamiya. Background Information : As Tamiya themselves say, "Japan Ground Self-Defense Force units began receiving the eight-wheel Type 16 Maneuver Combat Vehicle in 2017; it is expected to form a central part of the Rapid Deployment Regiments called for in a mobile Japanese defense policy. It certainly fits the bill, with a top speed of 100km/h thanks to a 570hp engine, and can utilize public highways as well as being airlifted. The distinctively modern turret is equipped with spaced armor and a domestically designed L/52 105mm rifled gun, working in conjunction with an advanced fire control system." What this really means, going beyond this rather synthetic description from the people at Tamiya, is that the Type 16 is a highly mobile vehicle designed in response to a changing world. In 2014, Japan outlined their new National Defense Program Guidelines. This document made explicit the Japanese government's transition to a more mobile defence policy. In a nutshell, this meant that focus was switched from main battle tanks to more agile wheeled vehicles which could be airlifted to the combat area. Obviously, Japan's rather unique geographical situation had its part to play in this decision. Being a conglomerate of 4 major islands and over six thousand other smaller ones, it's fair to say that mobility between all of these masses of land is a key thing to keep in mind for the JGSDF. And so it was ; away with the big heavy MBT's and hello MCV's. The problem? They didn't have one. So it was that Mitsubishi were handed the job of designing a vehicle to fit this new role in the Japanese army. Enter the Type 16 MCV in 2017. Strong firepower, High mobility, Low weight and second to none maneuverability. With nearly a hundred of these in the ranks of the JGSDF as of 2018, this MCV has become a cornerstone of the Japanese forces. So there you have it, the Type 16 in a very small nutshell. For those interested in learning more about this surprisingly interesting vehicle , I suggest you check out its Tank Encyclopedia page here : http://www.tanks-encyclopedia.com/modern-japan-type-16-mcv/ The Plan : Project name : Fuji Firepower Kit : Tamiya Japan Ground Self Defense Force Type 16 Maneuver Combat Vehicle Aftermarket : Tamiya JGSDF Type 16 Metal Gun barrel (Nr.12686) Vehicle : Nr. 26-6878, 4th Company, Tank School Unit, Fuji School Brigade Location/Time : Fuji Firepower Exercise 2018 Rehearsal, East Fuji Maneuver Area, Shizuoka Prefecture, Japan, 19 August 2018 Markings : Decals in box Finish : Produced in 2016. Two years old, never seen real combat. Red flag mounted on the vehicle for exercises. Weather conditions not bad (overcast but no rain), relatively dry ground. No damage. As I have already started on this project, I'm going to pick it up where I left off and will log my progress for you on this topic. I would love to hear from you regarding this project, be it compliment or criticism. Cheers! Jack **heads off to the workbench**
-
As I'm running this GB I suppose I ought to mark my spot with my first kit, yes there might be another one! First off will be a scheme I have wanted to do for a long time, that being the scheme worn by KV-107's of the Japanese Ground Self Defence Force based on the island of Okinawa and used for search and rescue duties. The main reason I want to do this is the fact that these aircraft carried a unique colour scheme for JGSDF KV-107's (it has also been used by UH-1's and MU-2's used for the same purpose on Okinawa) of white, orange and dark olive green split horizontally along the fuselage length. The kit I will be using for my build is the classic 1/72 Fujimi kit of the KV-107 and the decals will come from a recent sheet by Print Scale. First off here is the box art of the kit I will be using; Next up is a shot of the contents of the box showing that the kit has not been started yet; A fair amount of parts in there but a few are for different options and not relevant to the scheme I want to build. And finally a shot of the decal sheet I will be using and the scheme that she will be finished in; Now as you can just about see from the pictures on the instruction sheet she flew both with and without the large sponsons and I'm thinking of building her without them as I can then use them in cross kitting with a CH-46 kit so that I can build a Swedish HKP-4, as these have the same rear pylon as the US versions but have the large sponsons of the Japanese KV-107. And yes the Swedish one is a possibility for a second build but not in the splinter scheme as Steve is doing that scheme already and I wouldn't want to step on his toes . That's it for now, just have to wait until Saturday before I can make a start! Craig.
-
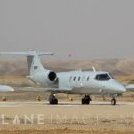 Hello everyone, Here's a playlist link to youtube of some videos of planes and helis. Andy will provide much better photos in a separate post but I'm contributing with some videos. The Helicopter landing vid is particularly good. Enjoy! Part of a three week spotting tour in Japan. Totally worthwhile since they practice daily. Today was coincidentally graduation day at the Akeno training base.
 -
Hello everybody. These are high definition pictures and close-ups of JGSDF helicopters and some ground vehicles. Unfortunately because of the rain, I was unable to operate my camera to the best of results so most pictures are overexposed and some are way underexposed. I also didn't have enough time to take walk-around pics of the Blackhawk and the Longbow because I won the lottery among another 300 people to take a short ride on the CH-47, which by the way is painfully loud!!!! I will return to the event next year and hope that it won't be raining so as to take even more and better pics. https://www.flickr.com/gp/156050727@N08/qpDo2T Note: Pics 1310 and 1311 (close close-ups of armoured vehicles) reflect the true colors according to my camera's LCD display at the moment. Enjoy!!!!
-
My entry for this GB is going to be based on the venerable old 1/48 Monogram AH-1S Cobra, which despite it's age and raised panel lines is an accurate representation of this classic gunship. Here's a picure of the box top followed by one showing the contents still sealed in the original plastic bag. And here is the decal sheet I will be using from Two Bobs. And a close up of the option I will be using for the decals for my build. Not that I intend to be finishing it like this, I've found something much more unusual, this one! Gotta love that temporary winter camo! I hope to make a start on her this evening and I am really looking forward to the build, there are already some really good models being built for this GB I hope mine grabs your interest as well. Thanks for looking in. Craig.
-
 Hi all, Here are some pictures of my latest build, Monogram's venerable 1/48 scale AH-1S Cobra which I have finished in the markings of the 1st Anti Tank Helicopter Unit of the Japanese Ground Self Defence Force which is based at Obihiro on the island of Hokkaido which is Japans most Northern island, hence the temporary winter camo scheme. I have built this as part of the Huey GB which has some great models in it and is well worth checking out, here is a link to the wip; Anyway enough waffle here are the pictures! Thanks for looking in guys. All comments and criticisms are gratefully received. Craig.
 -
So some may be aware that I've embarked on a large, multi-diorama project (gulp) revolving around a fictional conflict in Japan. The planned dioramas include a M1151 Humvee, M2A3 BUSK Bradley, M1A2 TUSK Abrams and a Type 90. The Type 90 is the oldest kit of the group; the others were all bought within the last six months, while the Type 90 is several years old. It was sitting on a shelf in about a 90% completed state, with some parts unpainted or not attached. This particular set also came with the ammo loading crew and accessories, which I never used. So given the overarching theme it seemed like a good opportunity to use all the components together. After mapping out my plan, I embarked on the risky task of masking off the decals already on the kit (they were the most interesting and I didn't want to lose them if I could help it). The only ones lost to the paint were the serial numbers front and back, since they would've been next to impossible to mask effectively (happy accident with masking tape on the stripes; it pulled some of the decals off, but gave them a weather look). I then resprayed the model in black, and for the first time added some white for shade modulation. I then applied the camo (Dark Green (JGSDF) is hard to find ) and clear coated it. From this point on I was in an experimental, uncharted stage. I hadn't done extensive weathering before, nor had I panel lined, not on a tank at least. Using an AK Interactive dark wash I picked up for NATO camo, I gave it a go with this scheme. The result was better than expected. I then applied some AK rain marks, which again turned out better than expected, although the matt coat dulled them a little more than desired (probably because I had them quite faded anyway) and some were lost, but I think it still works. After that it was some mixed up Mig Pigments on the treads, wheels and skirts and lower hull. The diorama base itself posed more issues. The air clay I used to create the terrain had the unfortunate effect of pulling up the centre of my plywood board as it dried, bowing it. The clay then fractured and separated. Not a good start. Luckily, I had some old balsa pieces which I superglued to the bottom to brace it. I then wetted the wood and set about 20kg of weights on top. Success! It worked I then reattached the clay with glue (surprisingly, the clay was completely flat despite having been sitting on the bow). With my base set up I slapped on some Tamiya diorama texture paint and lost some of the imprint detail in the clay because of its thickness. I have something of a plan to rectify this. The texture paint, as it dries, enters a stage where its more or less touch dry but has a bit of malleability in it still. So I may apply some to the area around the tracks and the ammo boxes and then lightly press them into it. Hopefully this will do the trick. I've toyed with adding the paste directly to the treads, but I'm not confident enough in my ability to make it look right, and worry that I could cock it up. I gave the base a spray with some different brown tones and then put down some PVA and scatter grass. The field grass I got doesn't work well with PVA, not for posing at least. The glue doesn't have enough tackiness to hold it upright properly, so I've got some scenic glue on order to do the job. Overall I'm pleased with how the tank came out. The diorama base is starting to look a bit better, but I'll wait and see the final result. I think it needs a surround of some kind, especially if I keep the balsa pieces on. I also bought some 'Green Stuff' to try and make some extra stowage with. Fiddly stuff, and while I made up some tarps, I'm not sure I'll be able to make much more with it (they're currently curing, and I'm waiting to see if they'll end up sticking to the plastic I set them on, or come away nicely to be used. Fingers crossed). So yeah, another text wall from me On to the pics, with some befores and afters (loading crew is done, I just didn't put them on the after test because the PVA was still damp). Gaz
-
Finally finished it! This is my first real effort making a diorama and I'm really pleased with how it turned out. Idea for this diorama is a JGSDF Type-90 being rearmed outside of Tokyo in a fictitious future conflict, with a small liaison taking place between an American soldier and his Japanese counterparts. This is one of several diorama's planned for this theme. Enjoy Products used include: Tamiya 1/35 Type-90 w/ Ammo Loading Crew Tamiya 1/35 JGSDF Iraq Humanitarian Assistance Team (2 figures) Masterbox 1/35 Cordon and Search Team (1 figure) Bronco 1/35 PLA Fuel Drums (3) Tamiya Diorama Texture Paint: Dark Earth Soil Woodland Scenics: Field Grass Woodland Scenics: Fine Turf Garden Rock 'Green Stuff' Tarps Gaz
- 8 replies
-
- 4
-
-
- Tokyo 2019
- Tamiya
- (and 3 more)
-
This will be my first armour build after only doing aircraft before, so I'll hopefully learn a lot along the way. Thanks for looking, Jason
-
A rework of an old kit that's been on my shelf for years. Completed the build, repainted and fully weathered for a diorama. Has the ammo crew to go with it, but they'll show up later Gaz